Title: 20x32 A frame cabin Central KY
Post by: EaglesSJ on July 23, 2010, 10:39:15 PM
Post by: EaglesSJ on July 23, 2010, 10:39:15 PM
Just got medically separated from the Airforce as a SSgt. (weapons specialist) after 6 years for Malignant Melanoma. I was gonna buy a house from my aunt. Well the house was in good shape internally but the windows and siding were in bad shape. So bad I couldnt get a loan for it. So I spent $4k putting on new siding and new windows to get the loan to go through and then my aunt decided she didnt want to sell it anymore. AND SHE REFUSES TO REIMBURSE ME FOR THE WINDOWS AND SIDING!!! So needless to say I was pissed and said some things that didnt set so well with her and now Im being kicked out of that house. (I was renting it from her when all of this started about me buying it)
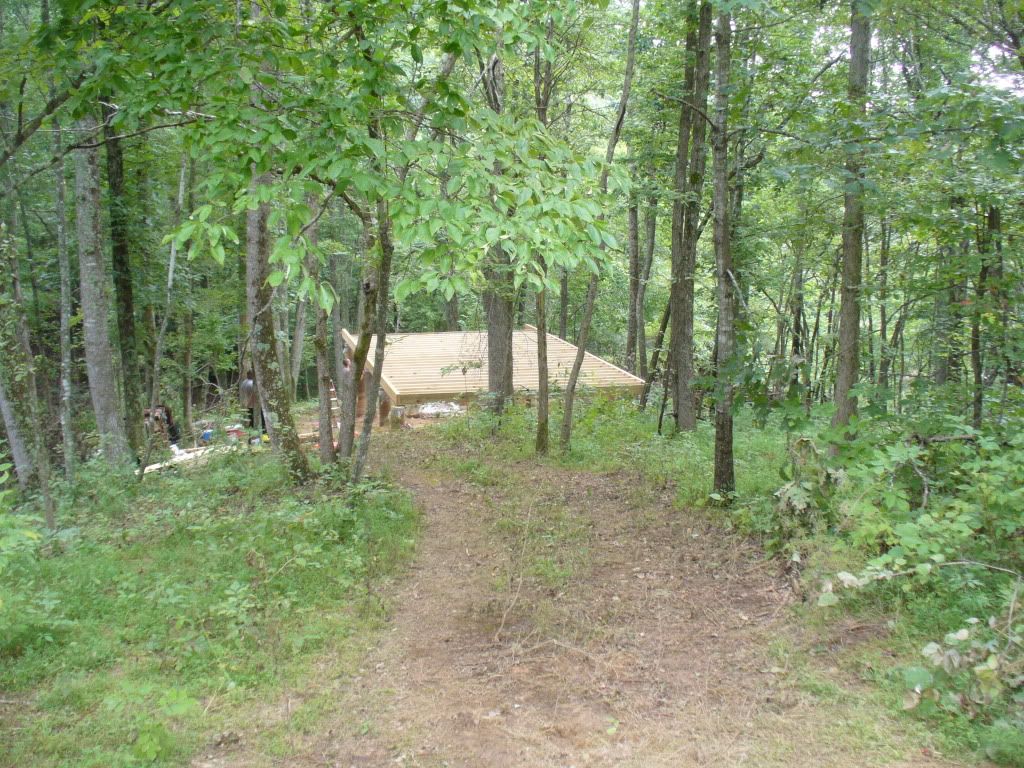
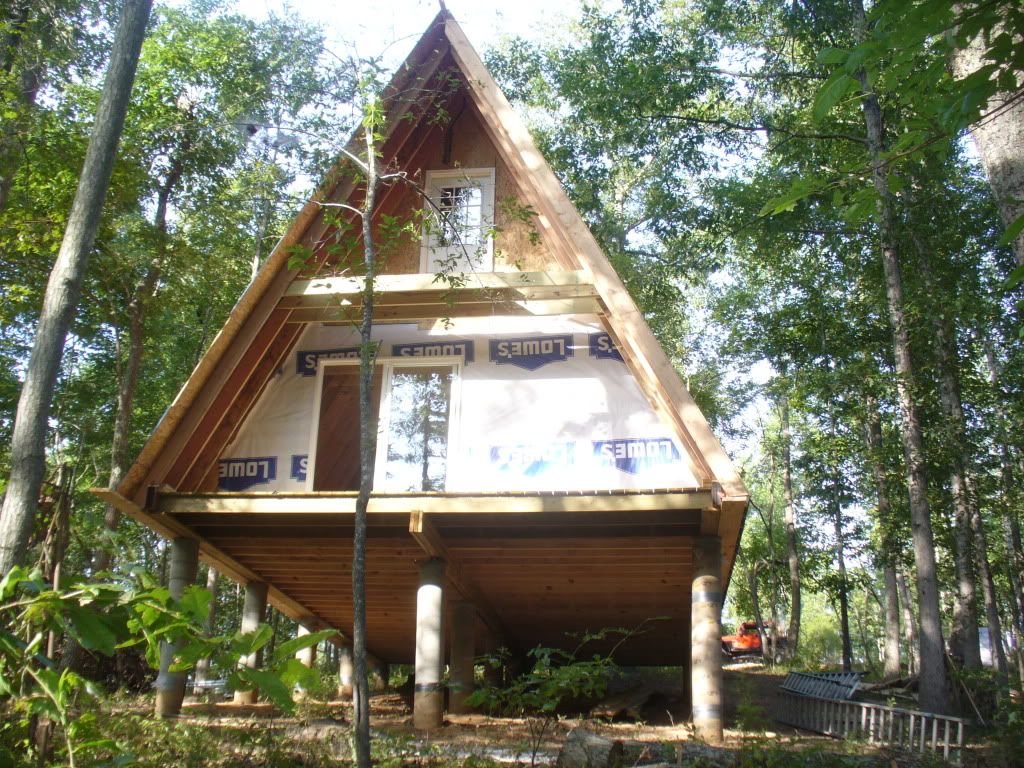
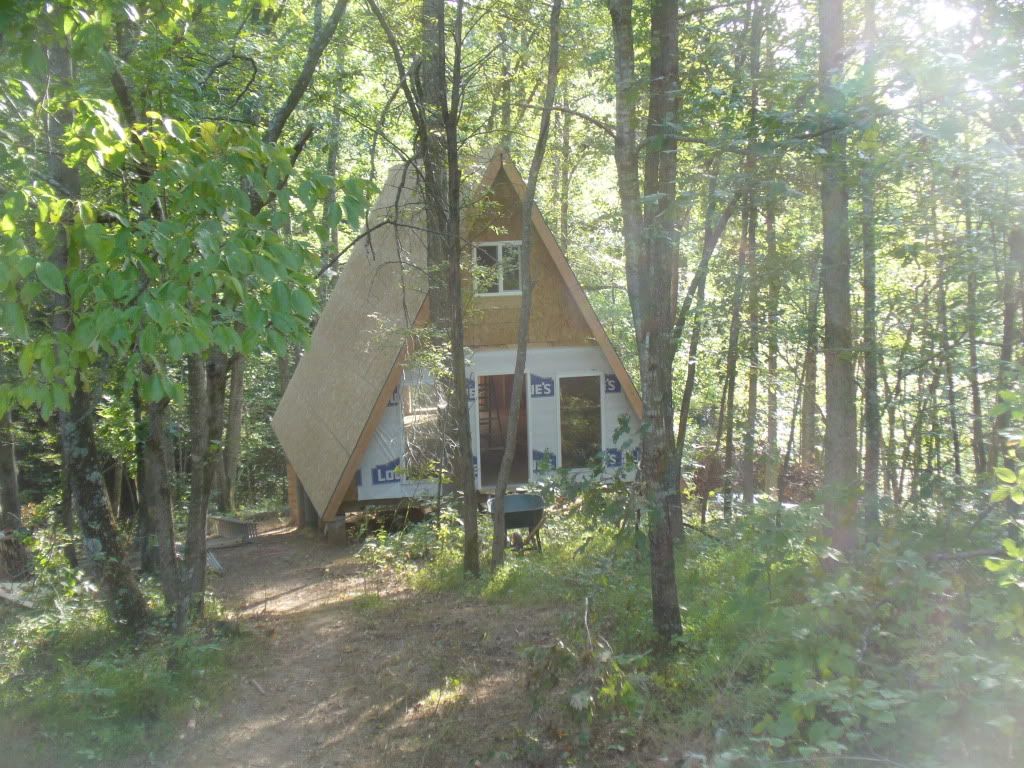
Well anyways I have 1 month to get this place Im building livable. (eviction notice of 30 days from Jul22) Its not gonna be anything too fancy but were hoping to have it dried in for 10k. Foundation will be 12" diameter concrete piers reinforced with rebar spaced every 8 feet apart. 5 piers on either side and 5 down the middle for the center beam. I will try to post pics as I go. I bought 9 acres for $15k will a small spring that runs through the middle and a pond. The final place will be the permanent residence of myself, my fiance, and my 4 year old son. Surrounding land will be home to my 3 german shepherds and chickens. We will have county water until we can afford a well and will be using a solar electric system.
Were going for something like this as the completed project.

Day 1
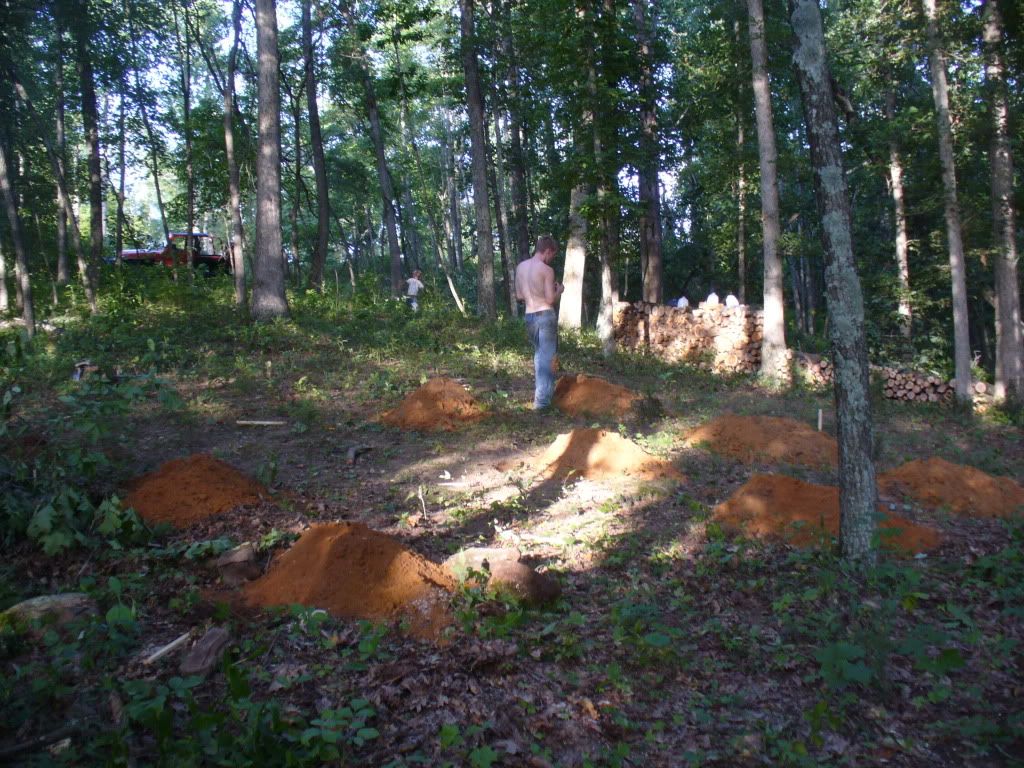
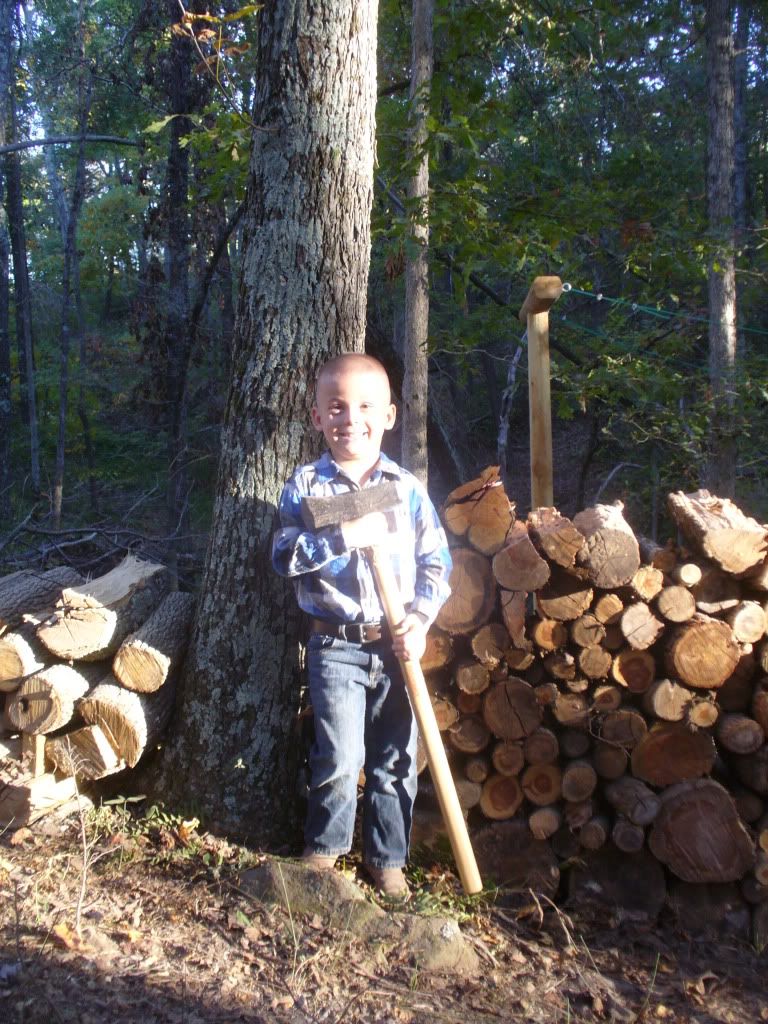
Cleared out the area for the cabin and stacked the wood that was cut. im on the left picking up a piece of firewood. The guy on the right is my best friend since I was about 6 and my main helper through all of this.


Day 2
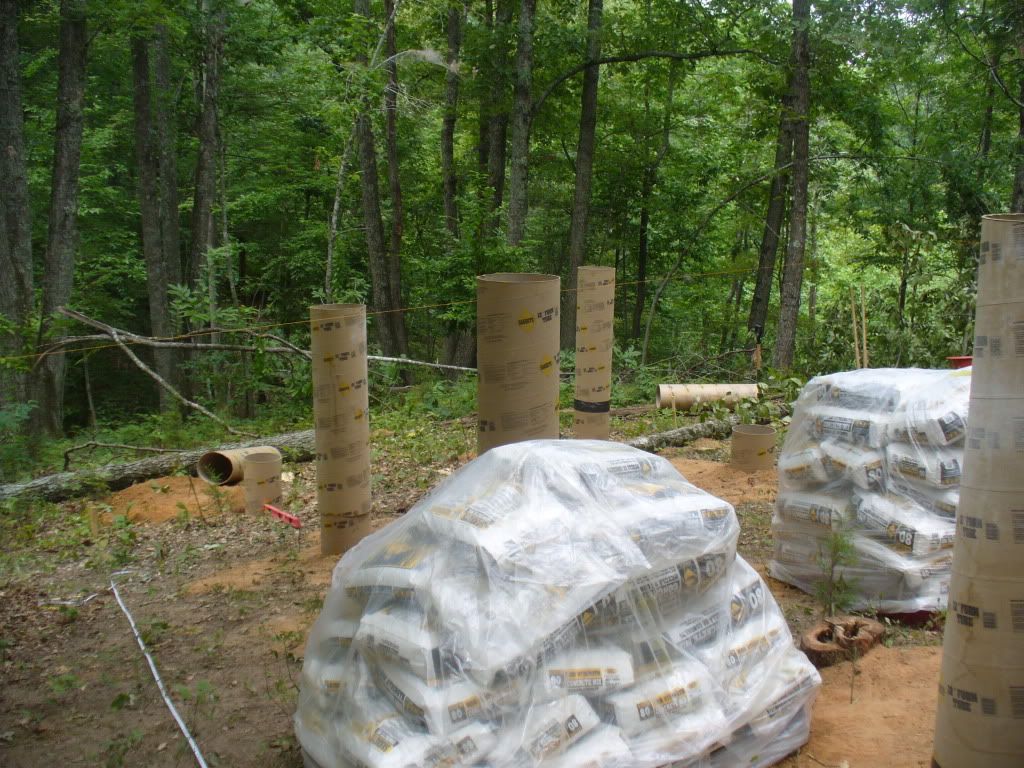
Squared out our area with line levels, stakes, string, and a tape and dug 8 of the 15 holes 3 feet deep 16" diameter for our 12" builders tubes.
Tomorrow we plan on finishing digging and getting all of the builders tubes set in place and squared. Possibly even a little concrete poured.
Looking up towards the edge of the woods. In front of this is a couple acres of fenced off fields thats mine we plan on using for horses.
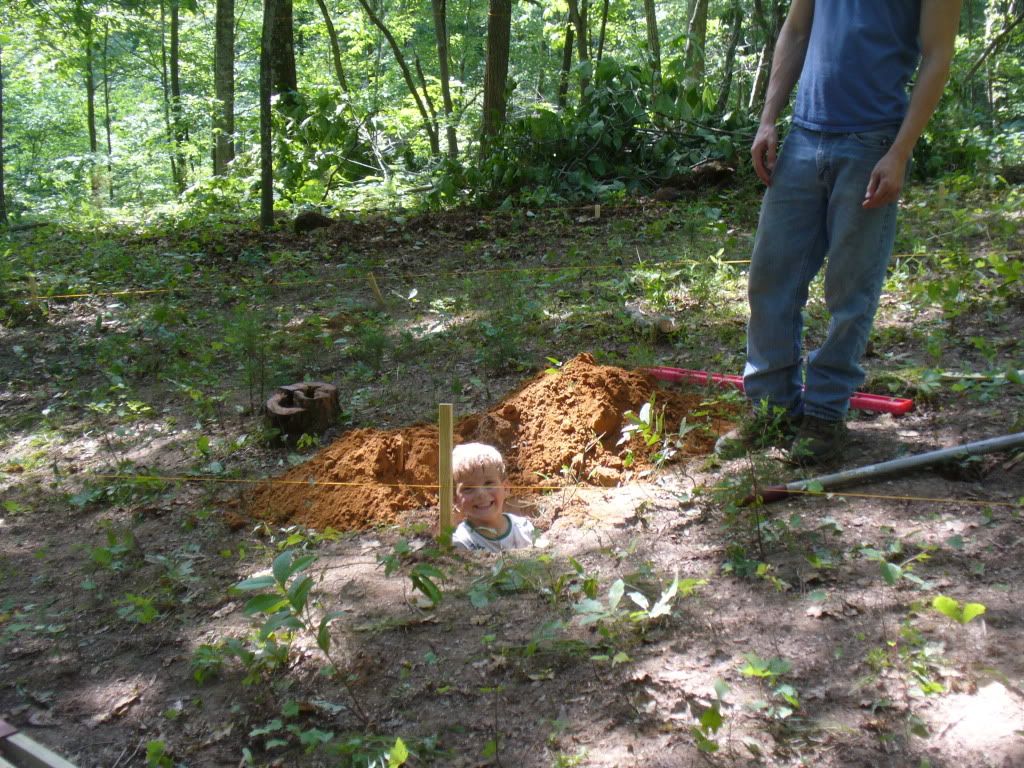
Looking down into the woods
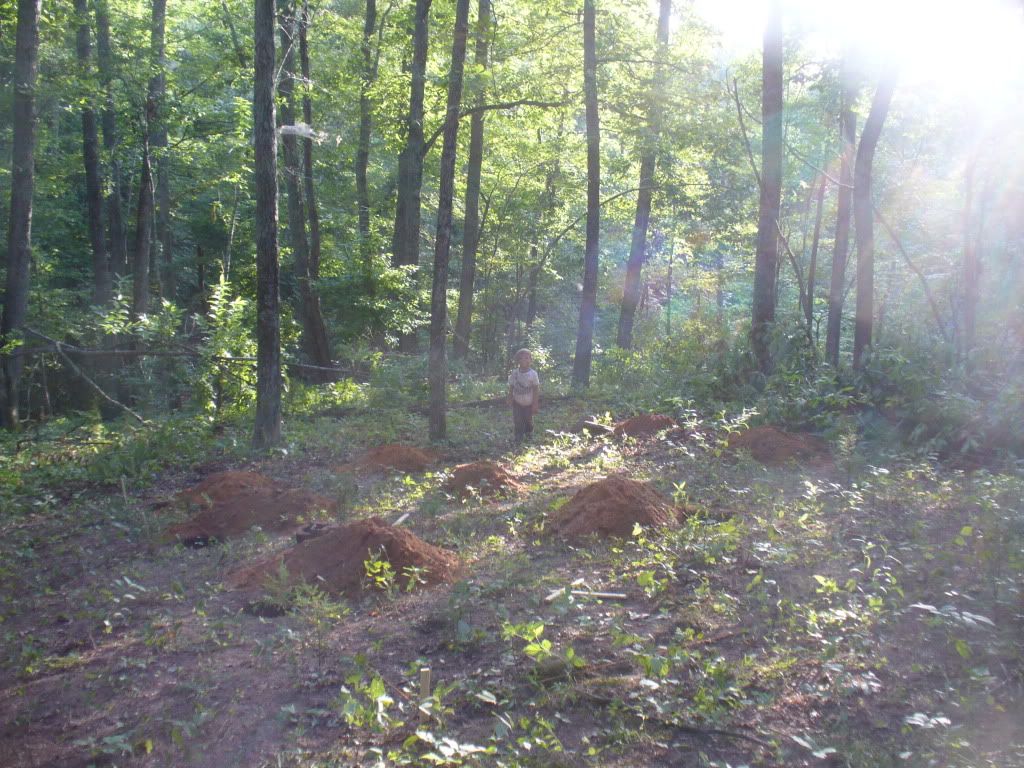
My little helper measuring the depths of the holes :)
Well anyways I have 1 month to get this place Im building livable. (eviction notice of 30 days from Jul22) Its not gonna be anything too fancy but were hoping to have it dried in for 10k. Foundation will be 12" diameter concrete piers reinforced with rebar spaced every 8 feet apart. 5 piers on either side and 5 down the middle for the center beam. I will try to post pics as I go. I bought 9 acres for $15k will a small spring that runs through the middle and a pond. The final place will be the permanent residence of myself, my fiance, and my 4 year old son. Surrounding land will be home to my 3 german shepherds and chickens. We will have county water until we can afford a well and will be using a solar electric system.
Were going for something like this as the completed project.
Day 1
Cleared out the area for the cabin and stacked the wood that was cut. im on the left picking up a piece of firewood. The guy on the right is my best friend since I was about 6 and my main helper through all of this.
Day 2
Squared out our area with line levels, stakes, string, and a tape and dug 8 of the 15 holes 3 feet deep 16" diameter for our 12" builders tubes.
Tomorrow we plan on finishing digging and getting all of the builders tubes set in place and squared. Possibly even a little concrete poured.
Looking up towards the edge of the woods. In front of this is a couple acres of fenced off fields thats mine we plan on using for horses.
Looking down into the woods
My little helper measuring the depths of the holes :)
Title: Re: 20x32 A frame cabin Central KY
Post by: travcojim on July 24, 2010, 10:41:02 AM
Post by: travcojim on July 24, 2010, 10:41:02 AM
Keep up updated, I have wanted to try an A-Frame. Even with the drawbacks I still like them. You have any pics on of interior of your inspiration cabin in the picture?
Title: !
Post by: Tom on July 24, 2010, 10:44:36 AM
Post by: Tom on July 24, 2010, 10:44:36 AM
I look forward to seeing your progress.
As for your Aunt... Life is about lessons. It's sad that a verbal contract means so little these days. Always get it in writing.
Good luck
As for your Aunt... Life is about lessons. It's sad that a verbal contract means so little these days. Always get it in writing.
Good luck
Title: Re: 20x32 A frame cabin Central KY
Post by: Rob_O on July 24, 2010, 11:02:10 AM
Post by: Rob_O on July 24, 2010, 11:02:10 AM
Sounds like you have windows and siding for the new place. Hope you kept the receipts
I'm in Louisville, holler if you need some help.
I'm in Louisville, holler if you need some help.
Title: Re: 20x32 A frame cabin Central KY
Post by: EaglesSJ on July 28, 2010, 09:22:08 AM
Post by: EaglesSJ on July 28, 2010, 09:22:08 AM
already talked to an attorney. if its nailed to the house or buried in the yard i cant take it.
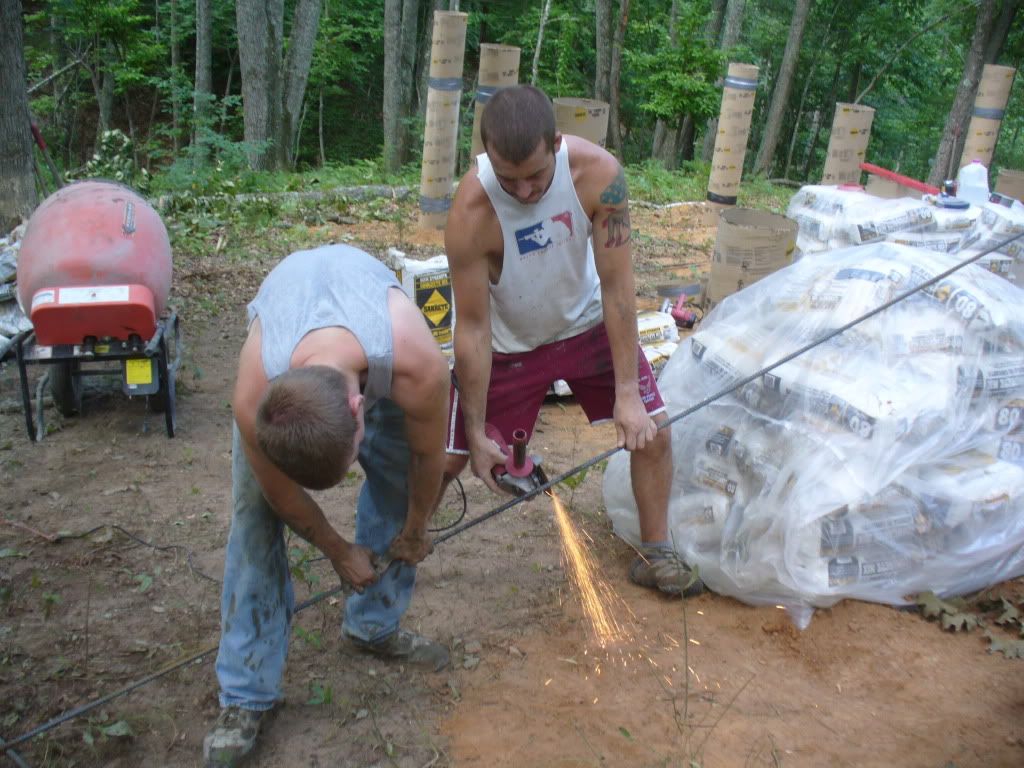
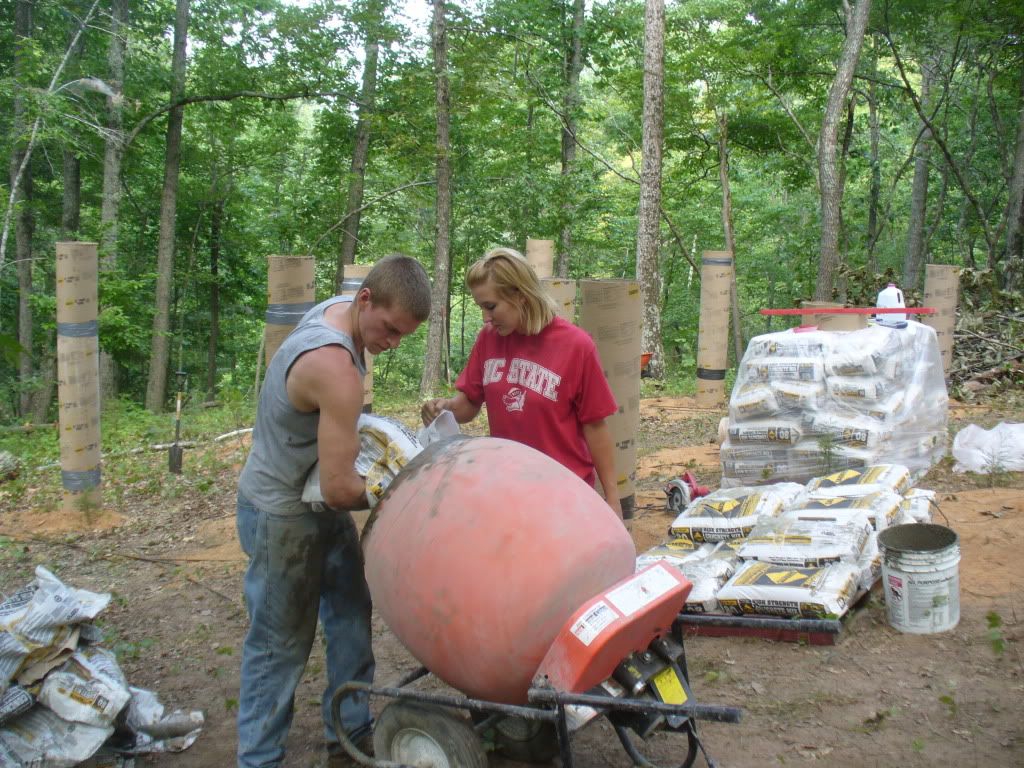
anyways here are some more pics. days 4 and 5 were spent shooting the forms with a transit and pouring concrete. I have to go pour more today. So far I have 120 bags in these big things. Its probably gonna take another 20 or so. also got the driveway excavated.
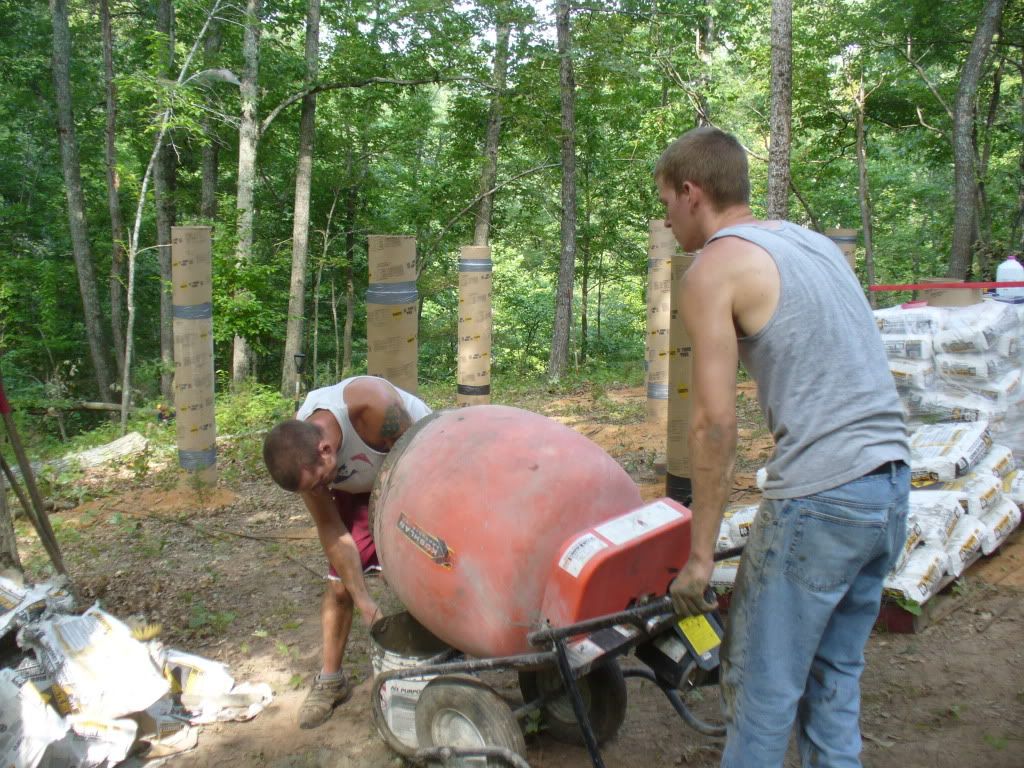
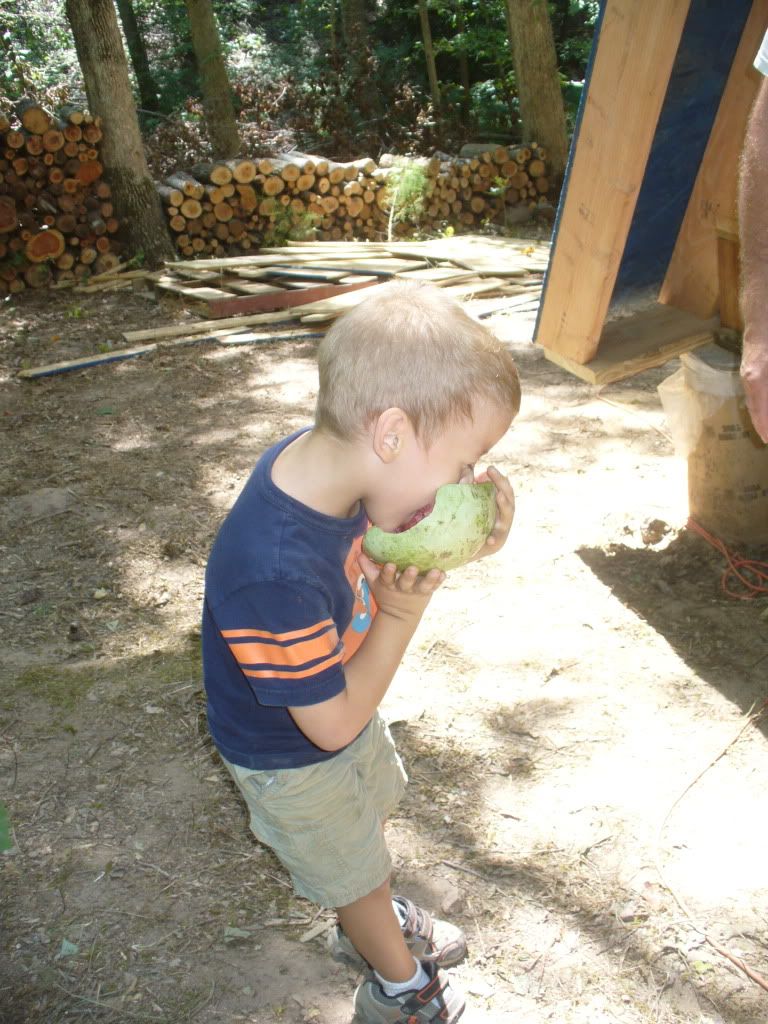
Colton just getting to do whatever it is his little 4 year old heart desires

Which apparently is play in the dirt

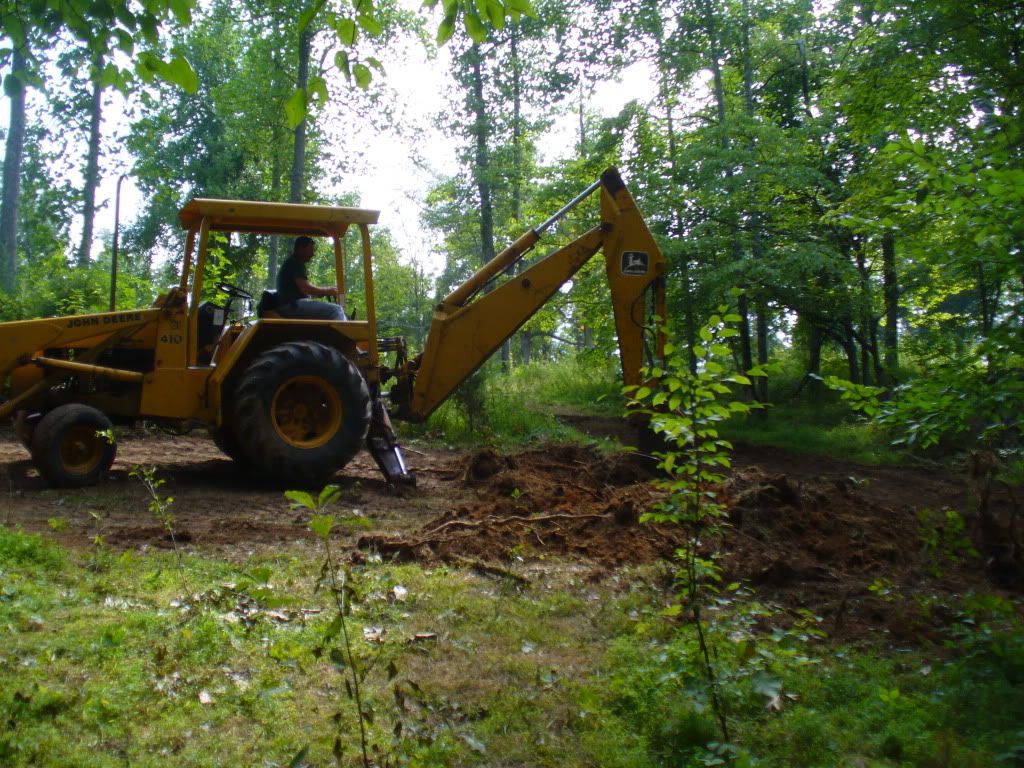
anyways here are some more pics. days 4 and 5 were spent shooting the forms with a transit and pouring concrete. I have to go pour more today. So far I have 120 bags in these big things. Its probably gonna take another 20 or so. also got the driveway excavated.
Colton just getting to do whatever it is his little 4 year old heart desires
Which apparently is play in the dirt
Title: Re: 20x32 A frame cabin Central KY
Post by: rdzone on July 28, 2010, 10:18:41 AM
Post by: rdzone on July 28, 2010, 10:18:41 AM
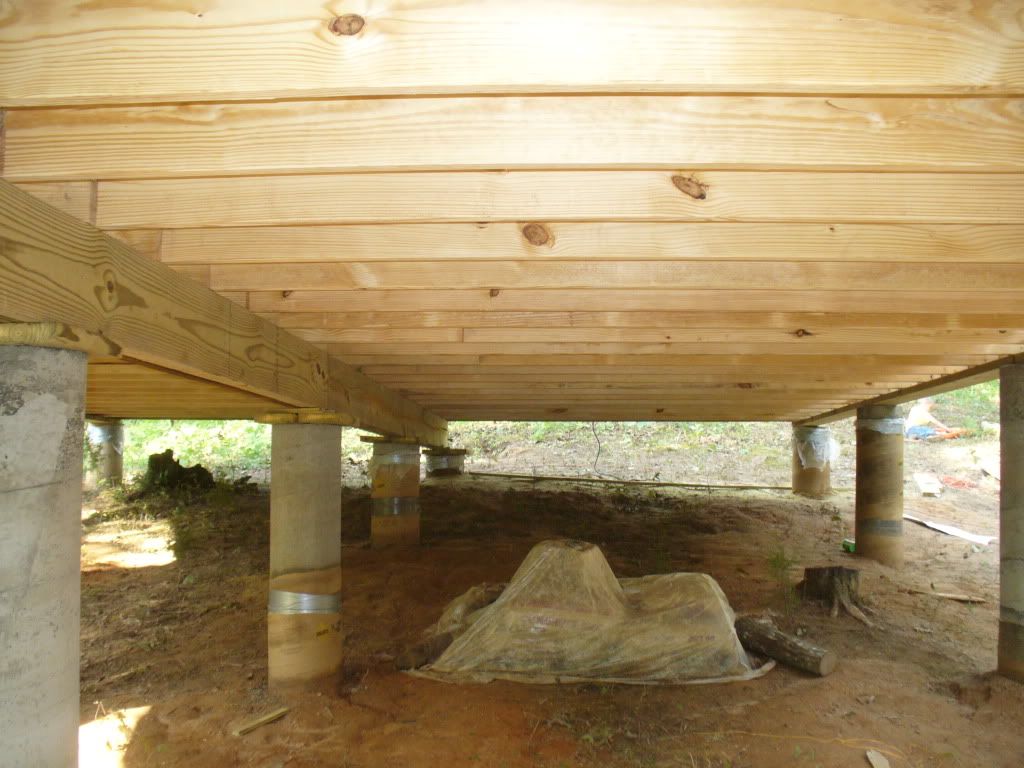
looking good. How tall are those sonotubes sticking out of the ground? I am just curious as I think you stated you only dug the holes 36" deep.
Title: Re: 20x32 A frame cabin Central KY
Post by: EaglesSJ on July 28, 2010, 07:27:25 PM
Post by: EaglesSJ on July 28, 2010, 07:27:25 PM
Quote from: rdzone on July 28, 2010, 10:18:41 AM
looking good. How tall are those sonotubes sticking out of the ground? I am just curious as I think you stated you only dug the holes 36" deep.
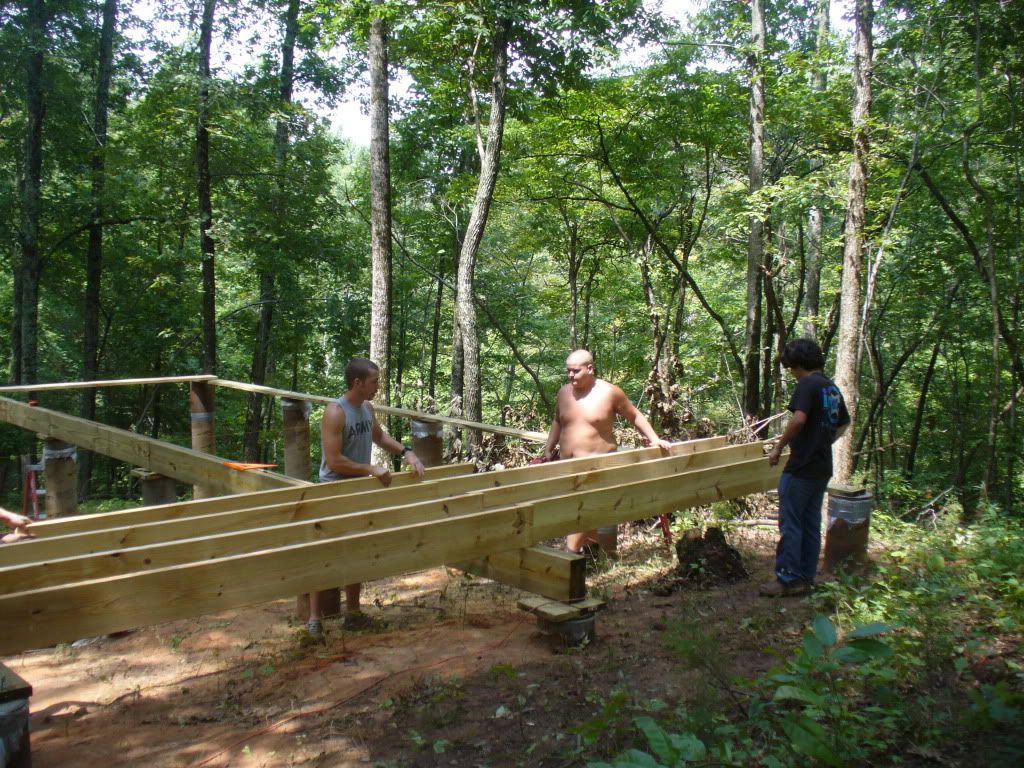
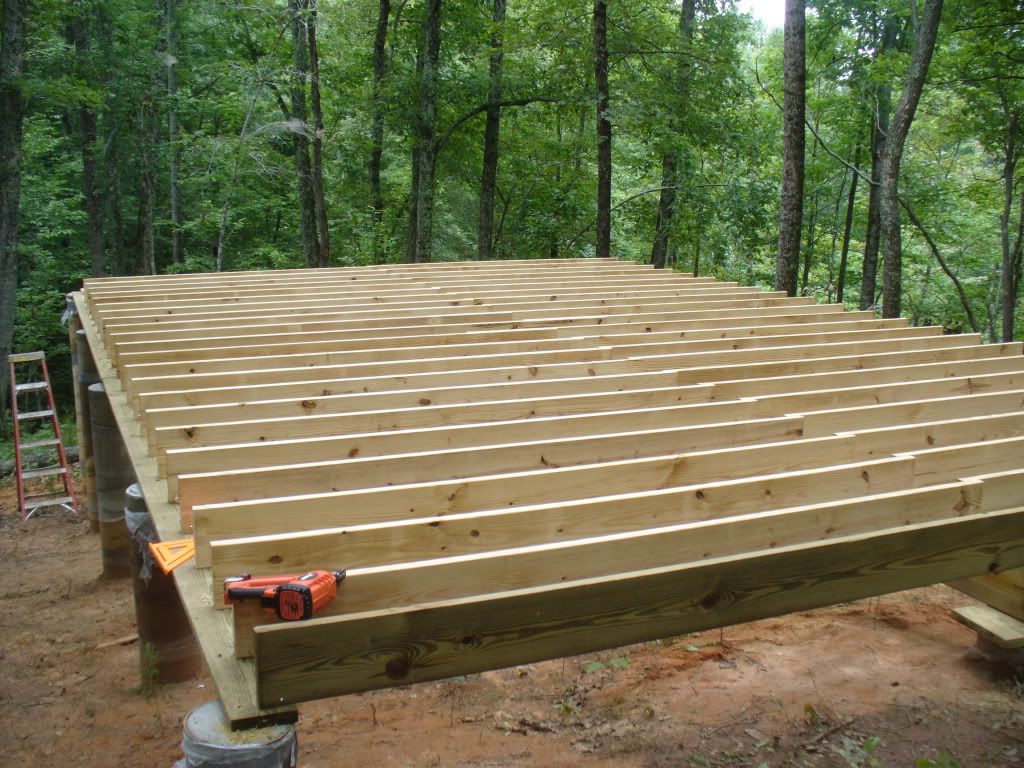
the tallest one is sticking out about 7 feet. all of the others are around 3-5. They are reinforced with 3 pieces of 1/2" rebar each. running the full length of the tube. I finished pouring today and stuck in all the bolts in the top that will be used to bolt a 2x8 plate down on top of the piers which I can then sit my Laminated beams on top of and nail up from the bottom. the center piers are 9.5" shorter than the rest of the piers to allow me to run my center beam that the 20' floor joist will sit on. I am ordering my subfloor lumber package tomorrow and will hopefully have it done before the weekend. thanks for the compliments.
Title: Re: 20x32 A frame cabin Central KY
Post by: buffman on July 30, 2010, 01:17:15 AM
Post by: buffman on July 30, 2010, 01:17:15 AM
Hey Shane! This is Ed. I see that you're working hard, keep it up and tell Lindsay I said hi. I am proud of what you guys are doing, I will be coming back in September on my way to St Louis.
Title: Re: 20x32 A frame cabin Central KY
Post by: EaglesSJ on July 31, 2010, 08:48:56 PM
Post by: EaglesSJ on July 31, 2010, 08:48:56 PM
Quote from: buffman on July 30, 2010, 01:17:15 AM
Hey Shane! This is Ed. I see that you're working hard, keep it up and tell Lindsay I said hi. I am proud of what you guys are doing, I will be coming back in September on my way to St Louis.
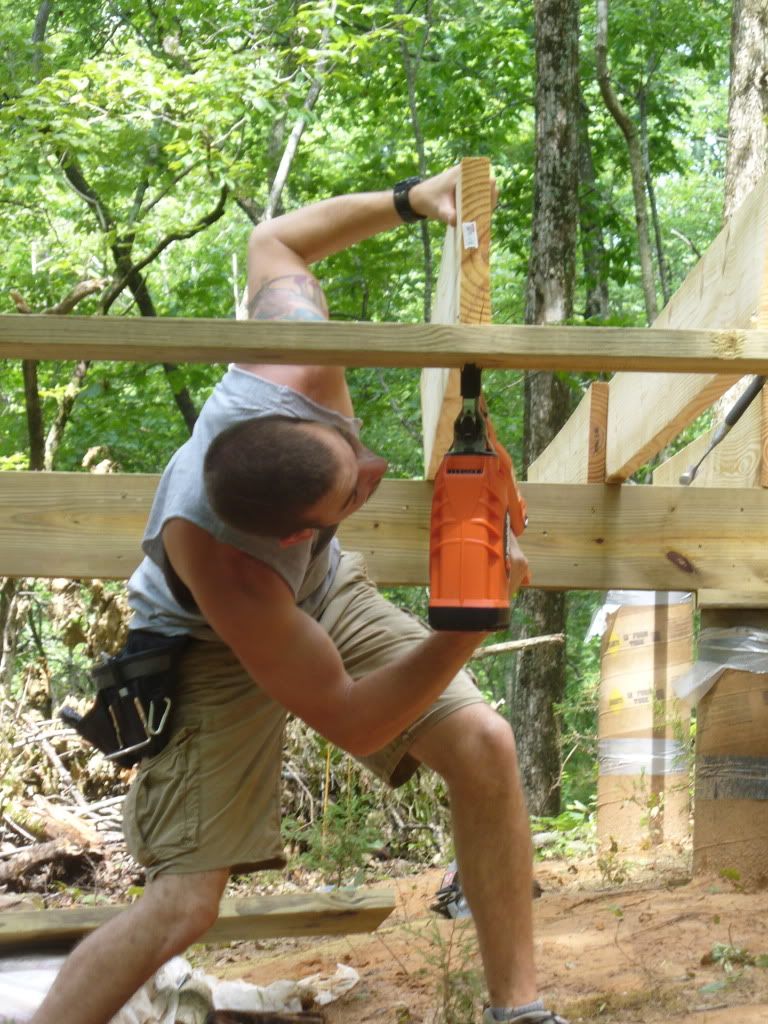
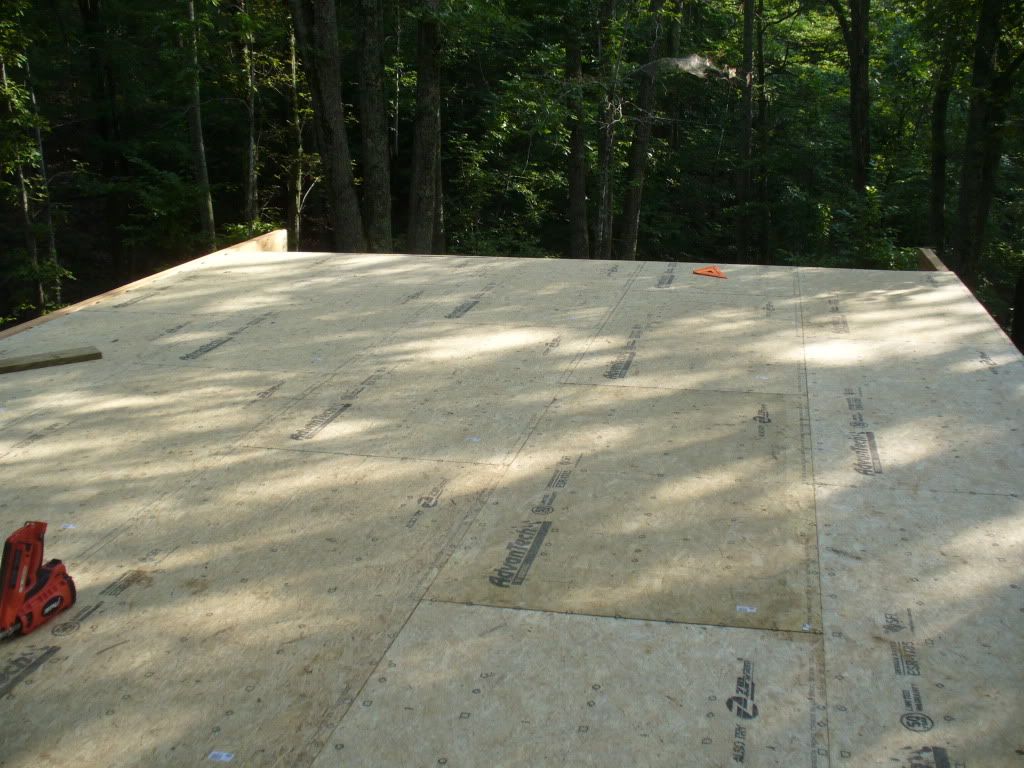
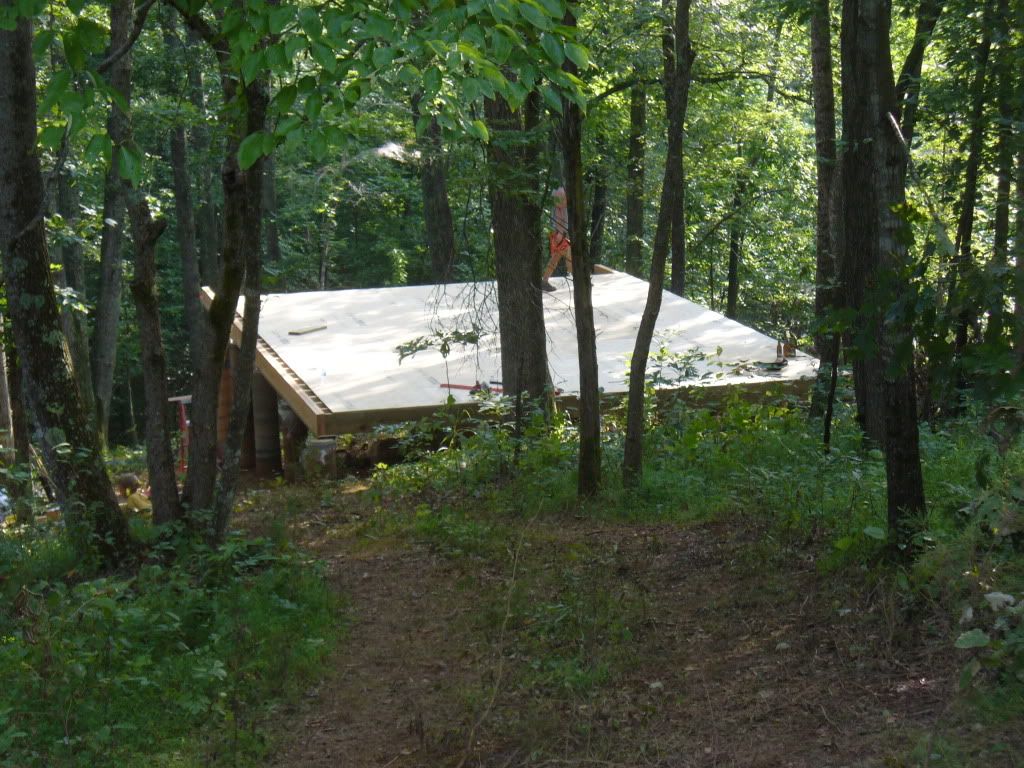
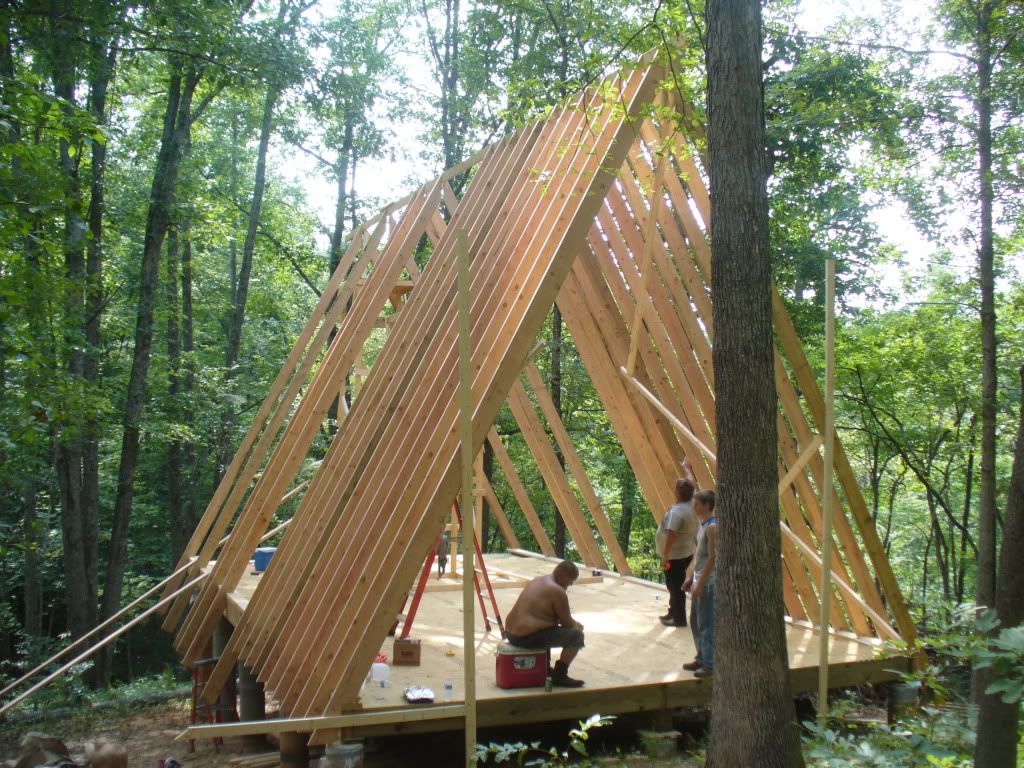
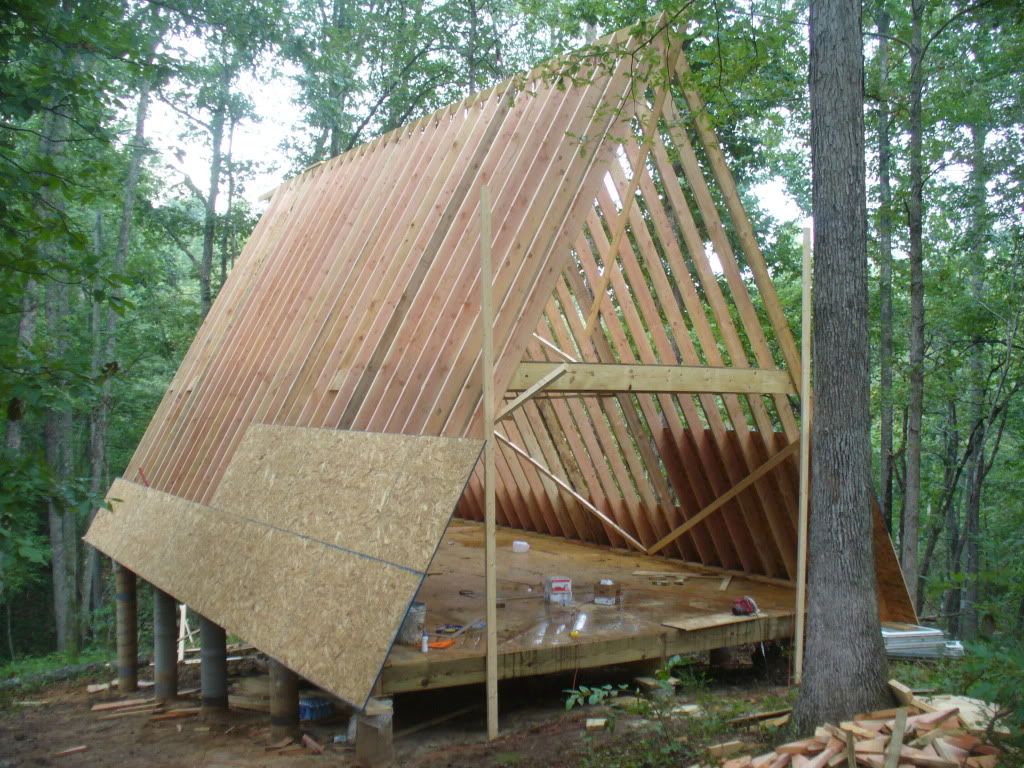
good to hear from you Ed. We got the floor done today and started on the back deck. Im going to order the rafters tomorrow and we should have them up in a couple days after they come in. They have to be special ordered 2x8 26 foot long. Gonna have alot of fun sitting them in huh? Anyways here are some pics of what all we did today with the help of my uncle, his son, and a couple friends.

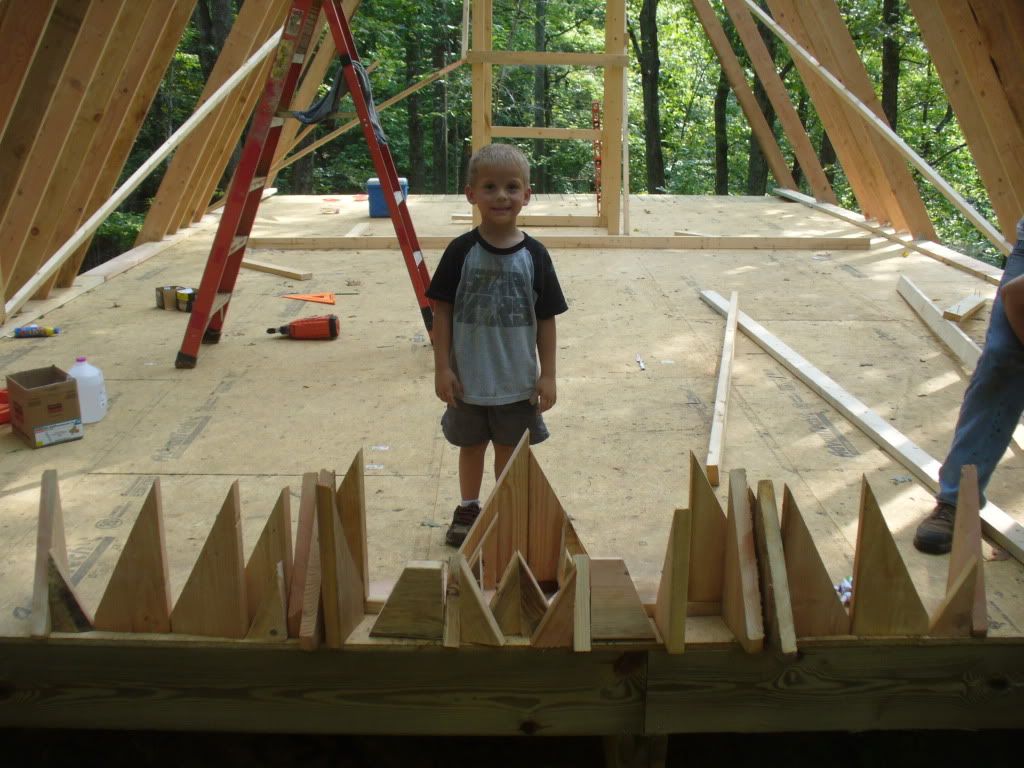
making a rafter pattern


Title: Re: 20x32 A frame cabin Central KY
Post by: EaglesSJ on August 05, 2010, 11:26:05 PM
Post by: EaglesSJ on August 05, 2010, 11:26:05 PM
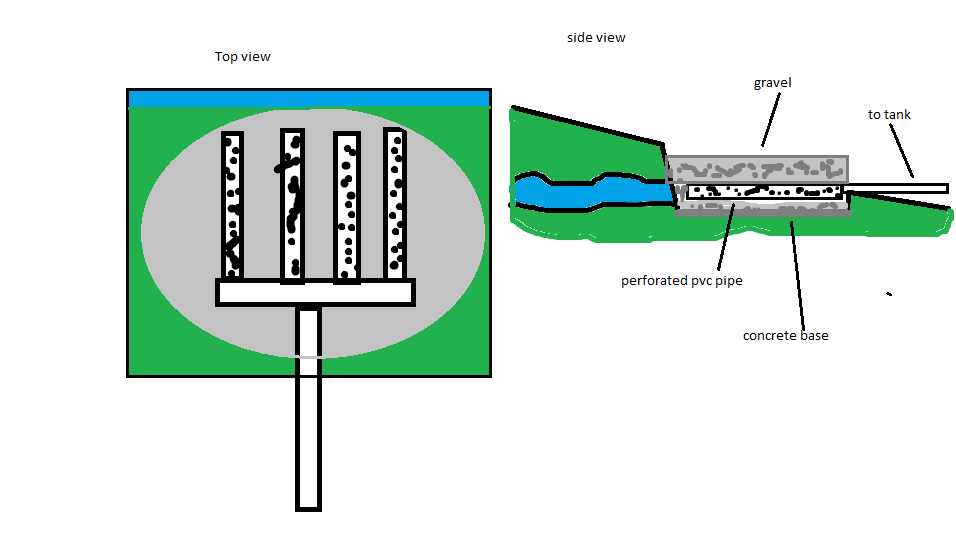
Been trying to figure out what were going to do for water at the place since were going 100% off grid and got to walking around the property today and found a small spring! Lucky me. I dug down about 1 foot and a half in front of where the water was running and it is just seeping out of the ground in various spots so I am going to go back tomorrow and dig a bit bigger hole (3ft wide 3 foot long and about 2 feet deep) and lay some concrete stones in the bottom and line the sides and then build this little system out of 2-3" PVC. This water will only be used for feeding animals and bathing/washing clothes with. It will run down hill to a 500 gallon tank that has a pump in it to push the water back up to the cabin. what are yall's thoughts on this?
Title: Re: 20x32 A frame cabin Central KY
Post by: rick91351 on August 06, 2010, 05:43:46 AM
Post by: rick91351 on August 06, 2010, 05:43:46 AM
I can tell you what we do here and it works very well. Some springs we have improved in this method have been going well for about twenty years. It is a method the Forest Service and BLM required at one time so it just sort of caught on. It is a method you seem to have a pretty good grasp of. However what we do is take a back hoe and dig a trench toward the spring. This trench will be most likely about three foot deep and we most of the time will hit white sand or rock that is what we are looking for. If you do not find that level of strata your chance of this working is some what diminished. We might run two legs but most of time we find we have just as much water or more with one long leg. When you go past the point of the spring you will know it. Stop digging.
We then back fill about six or eight inches of good clean drain rock or sandy gravel will work well. Lay in your PVC drain pipe and then cover with a foot or more drain rock if available. If not the largest corse sand and gravel you can find. Next we cover that with several layers of plastic sheeting. At the end where you are going to bring the water out of we place a solid cap that we have bored a inch and a quarter hole and secured a ply pipe fitting. Glue, screw or what ever method but we want it to be water tight. Hook to it a inch and quarter ply pipe and run it toward your tank or what ever or where ever you are gong. About fifteen feet we cut and fit in a tee fitting and to that we place a length of ply pipe straight up in the air about ten feet with a very good metal window screen clamped to the end. This when we back fill will get a wood post or a long metal tee post. to protect it. The purpose of it is to prevent the pipe from air locking. We then back fill with top soil. The sheeting prevents the top soil from leaching in to the drain material or rock. If you do it in a sanitary manor and with a little caution I would think you could have your water tested in a few months and you very well might have good potable water.
I have attached a couple photos of one I put in several years ago that is still running strong today. The tire tanks work very well and are free. We bring the ply pipe up from the bottom the loop another piece of ply to the next tank and if you want to the next and so on. On each the inlet is lower than the overflow of course which sets the maximum level of the water in the tank of course.

If you note fairly centered on the tire in the distance there is a post sticking up that is where the vent is located.

This year I took the over flow from that spring and ran it in to this ply tank that we use to irrigate this young orchard. This picture was taken several years ago very late in the year. So today the trees are larger. We still do not allow them to have fruit because they are still very immature but growing well! With that little spring we can empty that tank in the evening. Next morning it will be full and the cows and calves about thirty of them will have came in and watered there.
Two more things if your spring quits running use the vent or the end block it off the best you can and take your compressor and shoot air in to the pipe this will move any air that might be blocking the spring water. Next do not let trees or brush start back in this area where you have excavated it will shorten the life span of your work greatly. You will have to dig it all out and do it over.
We then back fill about six or eight inches of good clean drain rock or sandy gravel will work well. Lay in your PVC drain pipe and then cover with a foot or more drain rock if available. If not the largest corse sand and gravel you can find. Next we cover that with several layers of plastic sheeting. At the end where you are going to bring the water out of we place a solid cap that we have bored a inch and a quarter hole and secured a ply pipe fitting. Glue, screw or what ever method but we want it to be water tight. Hook to it a inch and quarter ply pipe and run it toward your tank or what ever or where ever you are gong. About fifteen feet we cut and fit in a tee fitting and to that we place a length of ply pipe straight up in the air about ten feet with a very good metal window screen clamped to the end. This when we back fill will get a wood post or a long metal tee post. to protect it. The purpose of it is to prevent the pipe from air locking. We then back fill with top soil. The sheeting prevents the top soil from leaching in to the drain material or rock. If you do it in a sanitary manor and with a little caution I would think you could have your water tested in a few months and you very well might have good potable water.
I have attached a couple photos of one I put in several years ago that is still running strong today. The tire tanks work very well and are free. We bring the ply pipe up from the bottom the loop another piece of ply to the next tank and if you want to the next and so on. On each the inlet is lower than the overflow of course which sets the maximum level of the water in the tank of course.
If you note fairly centered on the tire in the distance there is a post sticking up that is where the vent is located.
This year I took the over flow from that spring and ran it in to this ply tank that we use to irrigate this young orchard. This picture was taken several years ago very late in the year. So today the trees are larger. We still do not allow them to have fruit because they are still very immature but growing well! With that little spring we can empty that tank in the evening. Next morning it will be full and the cows and calves about thirty of them will have came in and watered there.
Two more things if your spring quits running use the vent or the end block it off the best you can and take your compressor and shoot air in to the pipe this will move any air that might be blocking the spring water. Next do not let trees or brush start back in this area where you have excavated it will shorten the life span of your work greatly. You will have to dig it all out and do it over.
Title: Re: 20x32 A frame cabin Central KY
Post by: John Raabe on August 06, 2010, 10:33:44 AM
Post by: John Raabe on August 06, 2010, 10:33:44 AM
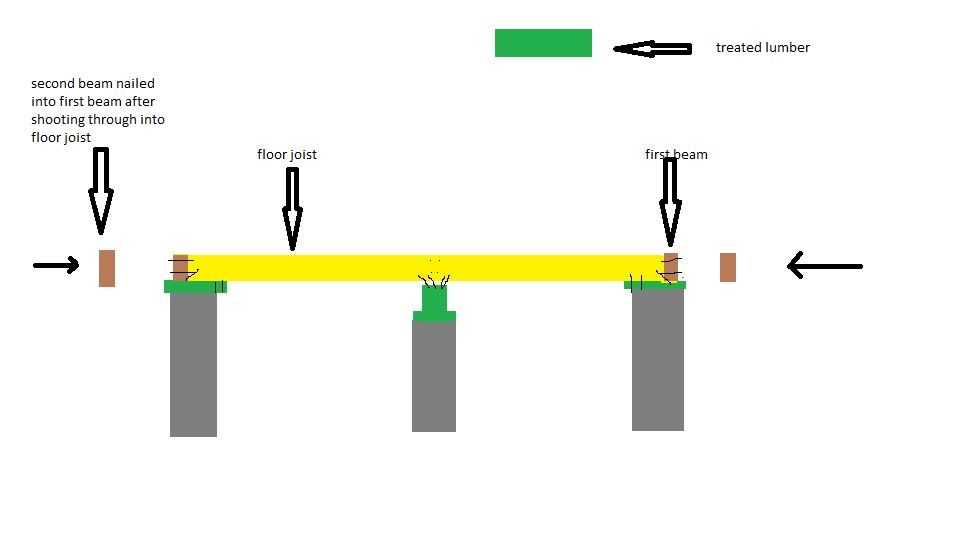
I know you are not working from any of my plans here, but I'm concerned that you may not have a sufficient support beam under the outside of your joists. See if these diagrams explain the concern. Perhaps there are things going on I can't see in the pictures.


Also, you are probably just testing the slope of the rafters in the photo above, but they are pretty skinny for real roof rafters!
Finally, if you are going to add a loft floor to the A-frame (as shown in the first picture) you will have that load to support as well. How does it get to the beams? It all adds UP!
Title: Re: 20x32 A frame cabin Central KY
Post by: NM_Shooter on August 06, 2010, 02:48:52 PM
Post by: NM_Shooter on August 06, 2010, 02:48:52 PM
I'm a little concerned about the lack of beams as well. You might want to consider adding an additional rim joist. However, this is still a bit of a deviation from other foundation practices, and having an engineer check on this would not be a bad idea. I hate to bring this up now, but you should consider using joist hangers to better support the joist ends. The 2x material that you have placed to line up the joists does not provide any significant structural support.
Make sure you brace your tall piers too. Any racking that starts will result in catastrophe, and I would hate for your family to be inside if it were to happen.
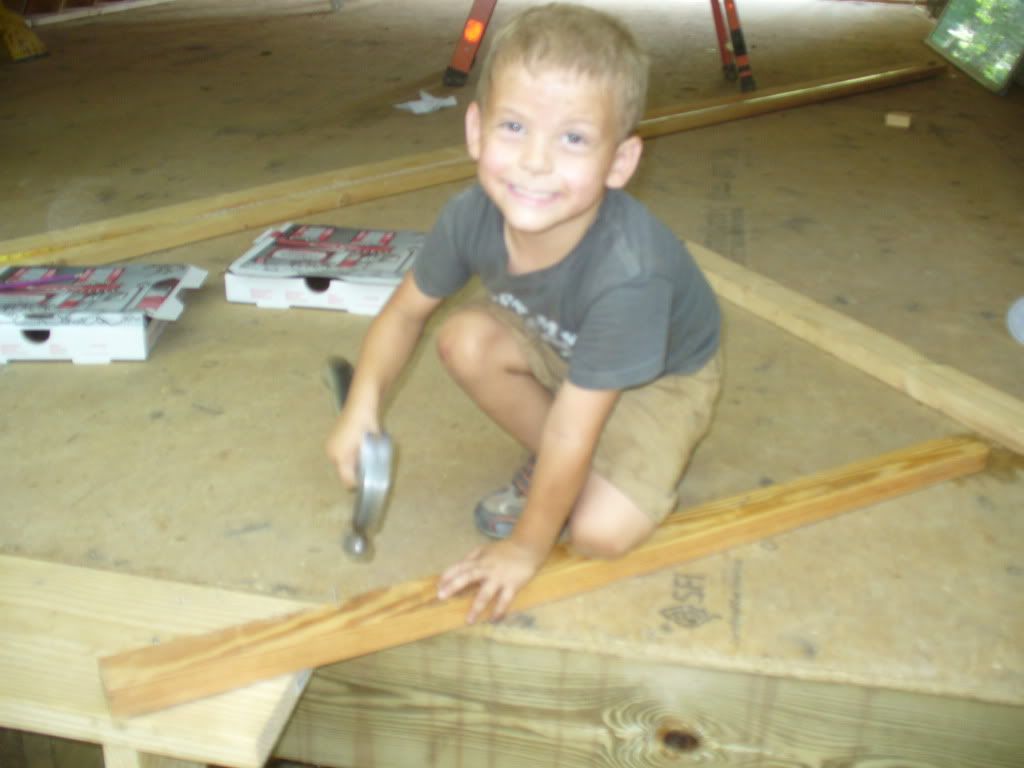
Looks like an awesome site! Give those kids some hammers!
-f-
Make sure you brace your tall piers too. Any racking that starts will result in catastrophe, and I would hate for your family to be inside if it were to happen.
Looks like an awesome site! Give those kids some hammers!
-f-
Title: Re: 20x32 A frame cabin Central KY
Post by: EaglesSJ on August 06, 2010, 04:27:47 PM
Post by: EaglesSJ on August 06, 2010, 04:27:47 PM
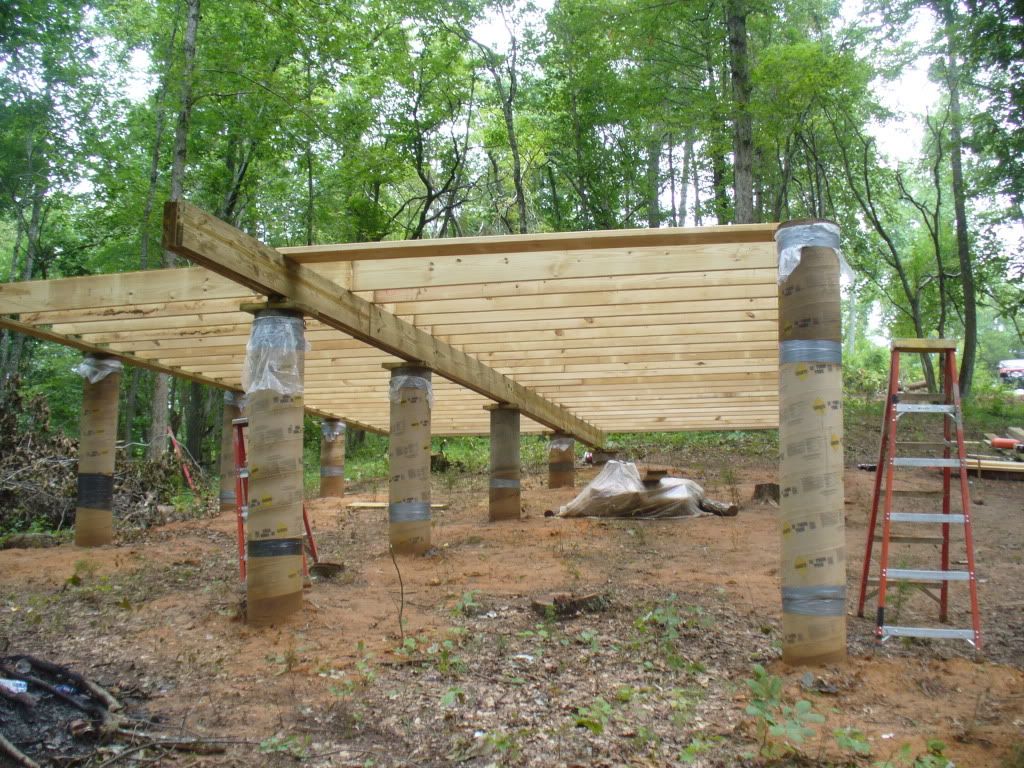
I will be drill holes and inserting anchor bolts into the bottom 9 concrete piers and strapping them in an X pattern with steel cables so if one wanted to move it would have to pull down all nine. And thats just not going to happen. They are already all tied together with a 2x8 plate that is bolted down with 1/2 anchor bolts sunk 9" into the concrete. The outside beams are 2 2x10 LVL Beams (laminated wood) They sit on a 2x8 treated plate that runs all the way from pier to pier and is lag bolted down via bolts that I sunk in the concrete before it hardened. Then that "mud seal" 2x8 plate is shot up from the bottom into the beams with 16's in 50 or so spots. Each beam is 50 times stronger than a regular 2x10 per the manufacturer. And I used 2 of them on each side so it should more than support the load of the roof. The floor joist also sit on this 2x8 mud seal and are shot up from the bottom and also toe nailed in and then shot in from the side of the first beam before we nailed the second beam in place on each side.and they overlap on the center beam This may sound confusing as it did to me when my uncle was explaining it all to me the first time. Here is a little pic i drew up to maybe help you understand how its going together. and here is the link to the beams that I bought. They are solid pieces 36' long each. 4 of them 2 per side. The lumber company suggested I only use one per side but I thought it best to overkill than chance it. Also the rafters are just a pattern to get an idea of what it would look like at a certain height. we are using 26 foot 2x8s for the rafters. spaced every 16"a
http://www.gp.com/build/product.aspx?pid=1392
http://www.gp.com/build/product.aspx?pid=1392
Title: Re: 20x32 A frame cabin Central KY
Post by: EaglesSJ on August 06, 2010, 04:39:44 PM
Post by: EaglesSJ on August 06, 2010, 04:39:44 PM
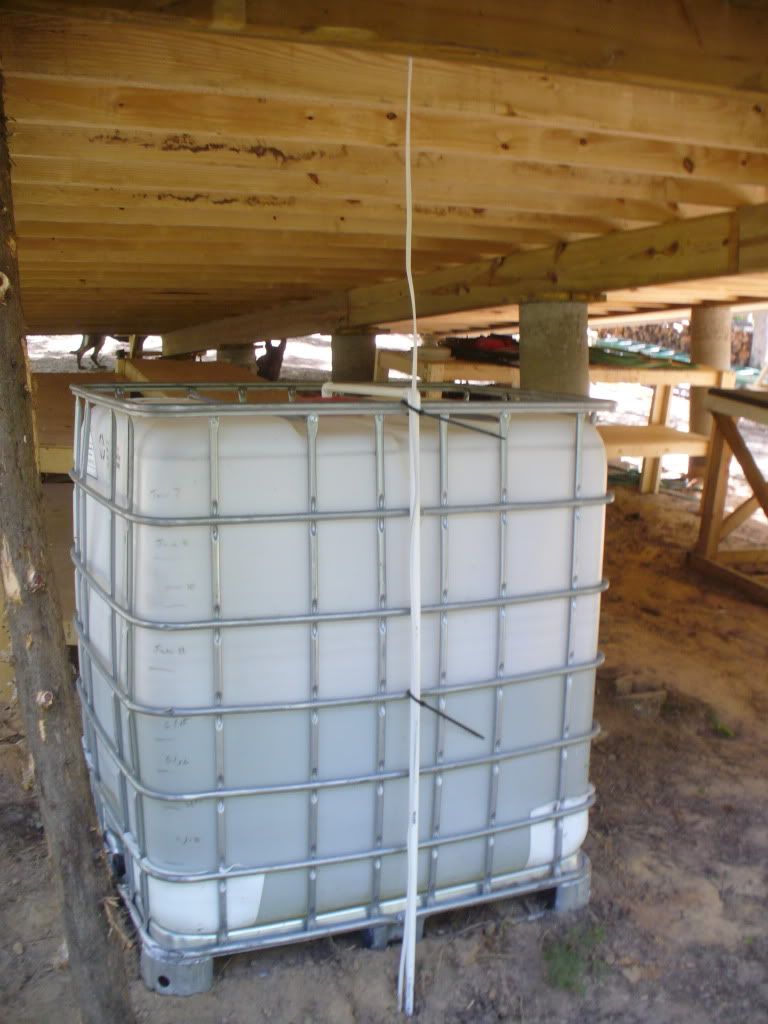
Also forget to say thanks for your input and give an update on the spring. I got my collection pipe system installed and gravel/bigger rock poured on top today and i have a flow rate of about 1/3 a gallon per minute. Or 480 a day. Last month we used 8000 gallons of water with a typical 5g per flush toilet and watering our animals and not even trying to conserve. That comes out to only 266 a day of usage. In this cabin were going to have a composting toilet (no water) and a shower (we currently only have a tub) so we should be able to get down to about 180-200 gallons a day EASY. If so we will have 280g of overflow every single day. I am currently looking on craigslist and other sources for a 2-3 hundred gallon tank to downhill from our spring. I will be using some kind of pressure tank/auto pump to feed the house.
Title: Re: 20x32 A frame cabin Central KY
Post by: John Raabe on August 06, 2010, 04:51:46 PM
Post by: John Raabe on August 06, 2010, 04:51:46 PM
Thanks for the update EaglesSJ:
That sounds better than what I was seeing. You have an interesting system I've not seen before.
That sounds better than what I was seeing. You have an interesting system I've not seen before.
Title: Re: 20x32 A frame cabin Central KY
Post by: EaglesSJ on August 06, 2010, 05:47:05 PM
Post by: EaglesSJ on August 06, 2010, 05:47:05 PM
It is definitely out of the ordinary, but I am hoping that it all turns out ok. I am building this with a very simple, almost primitive mindset though. When I was sitting there amongst the rocks today washing the dirt off my hands via the spring that I just dug out I felt as though I had stepped back in time 1000 years and it gave me a very deep appreciation for the the small pencil sized stream that was flowing through my hands. Knowing that this simple water collection system would be what kept me and the two that I am responsible for alive. Anyways enough rambling I suppose. I will post more pics when I get more done. I am waiting on lowes to deliver the rafters.
Title: Re: 20x32 A frame cabin Central KY
Post by: John Raabe on August 08, 2010, 06:41:07 PM
Post by: John Raabe on August 08, 2010, 06:41:07 PM
Best wishes on the project. You have a lovely spot there.
Title: Re: 20x32 A frame cabin Central KY
Post by: EaglesSJ on August 09, 2010, 07:02:37 PM
Post by: EaglesSJ on August 09, 2010, 07:02:37 PM
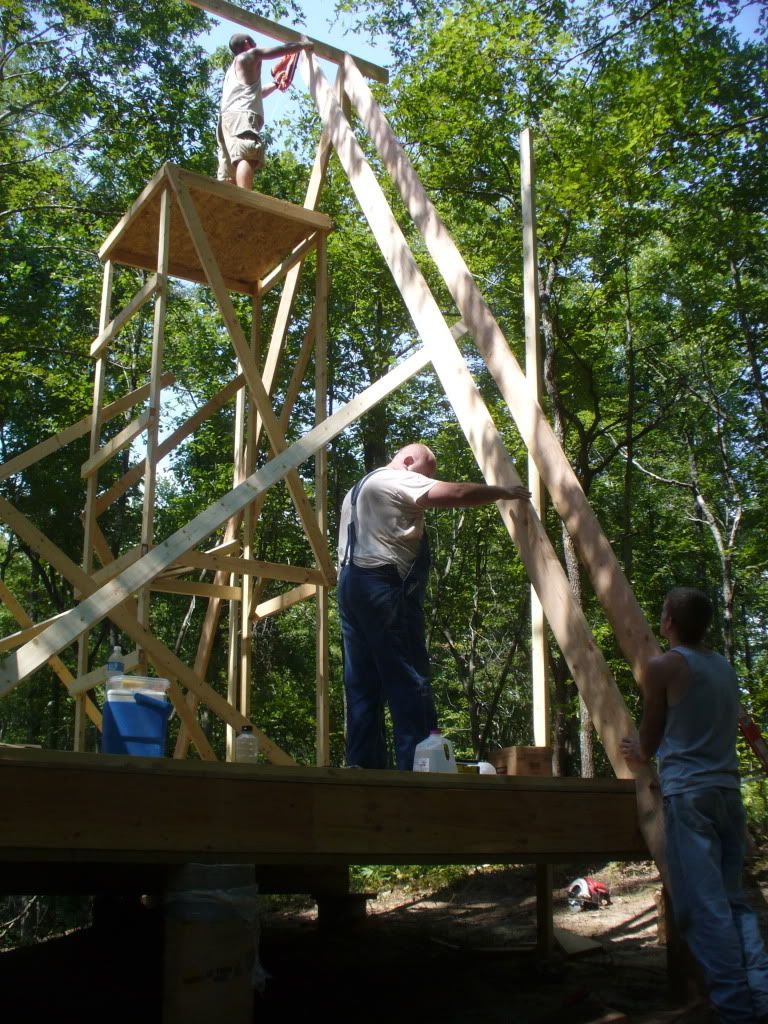
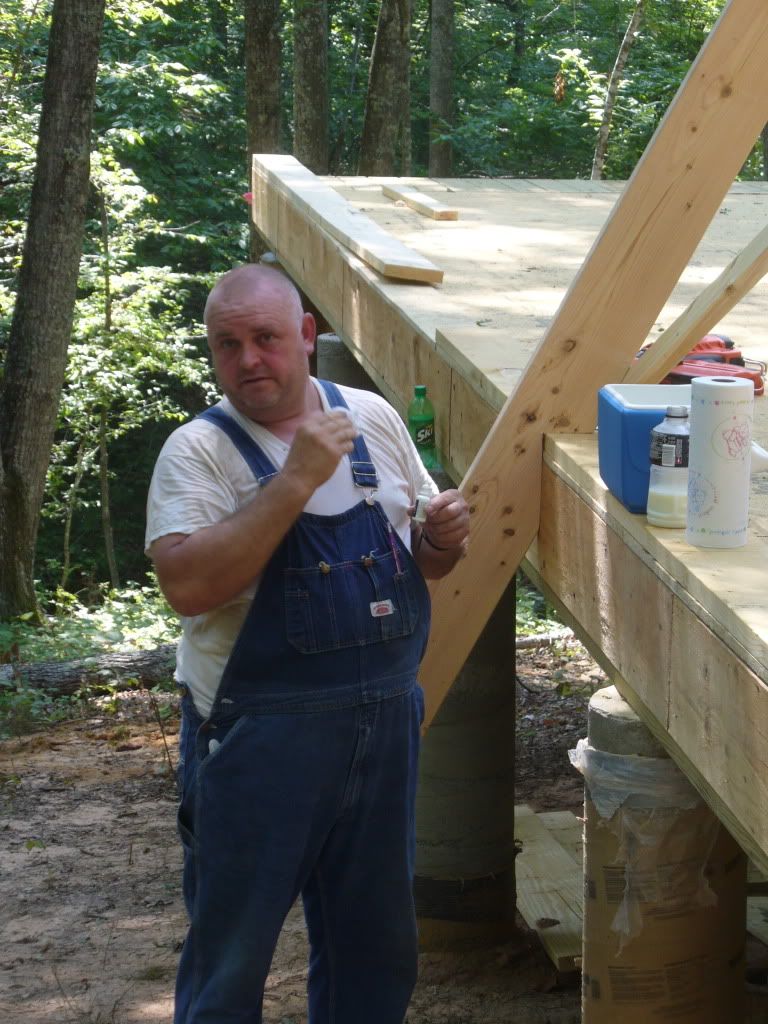
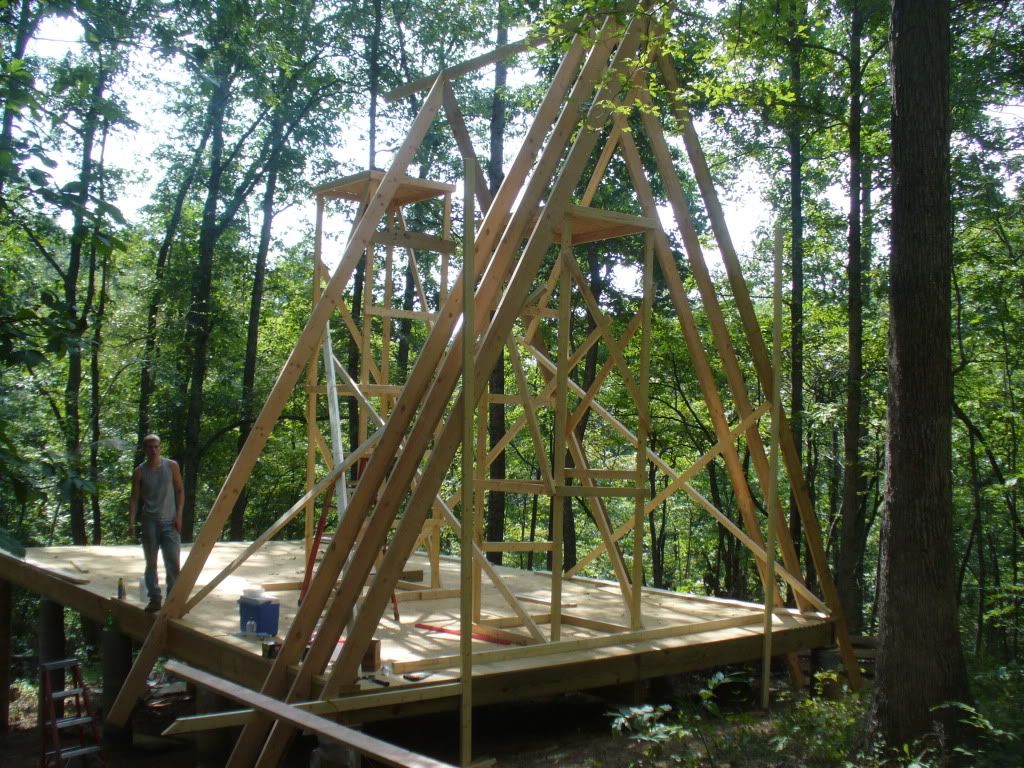
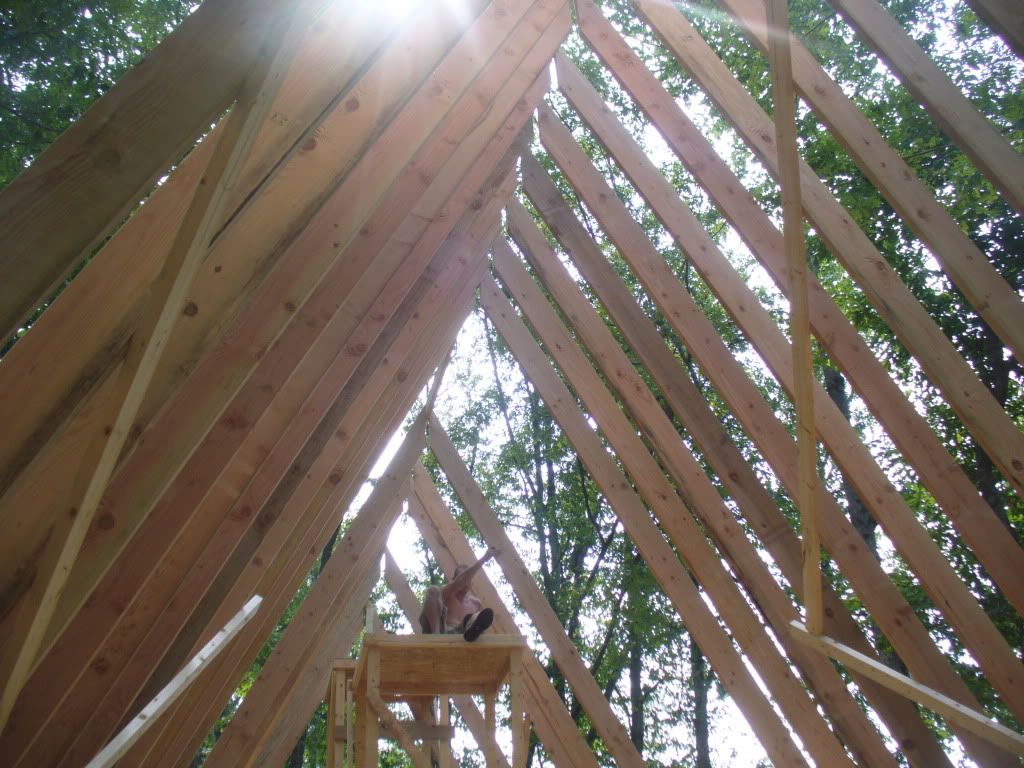
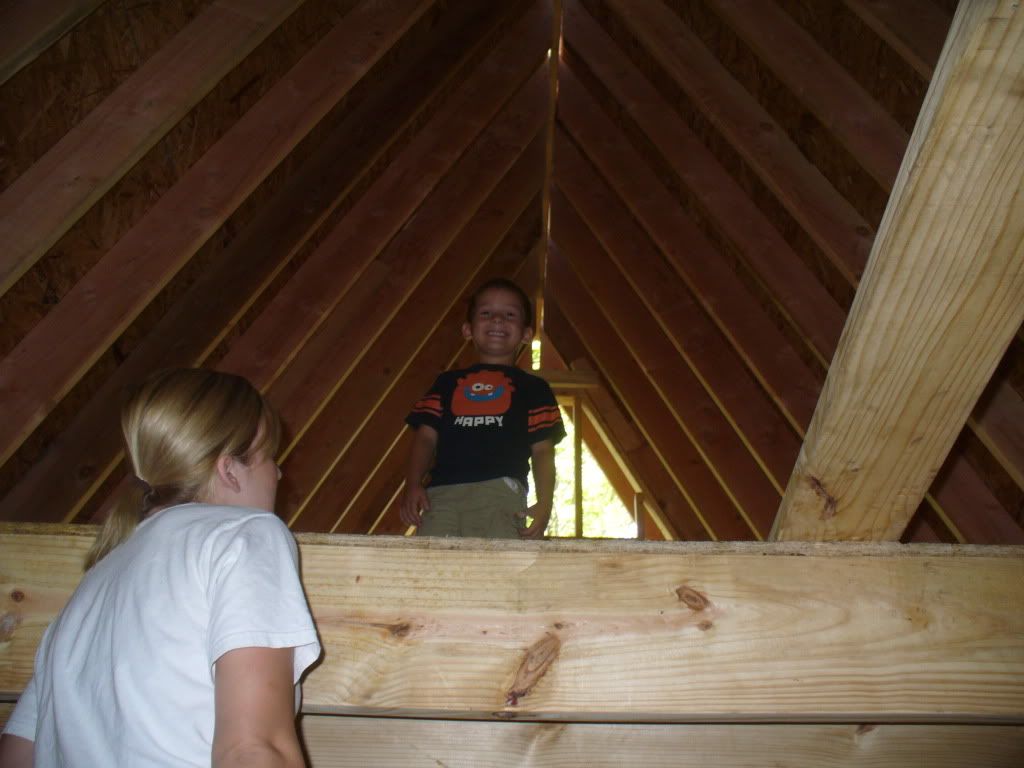
Got 8 of the rafters in and got all of the rest cut for tomorrow. These things are HEAVY! 26 foot 2x8s and you have to lift em up on that rickety scaffolding. Scary. But anyways here are some pics. Thats my dad in the overalls.

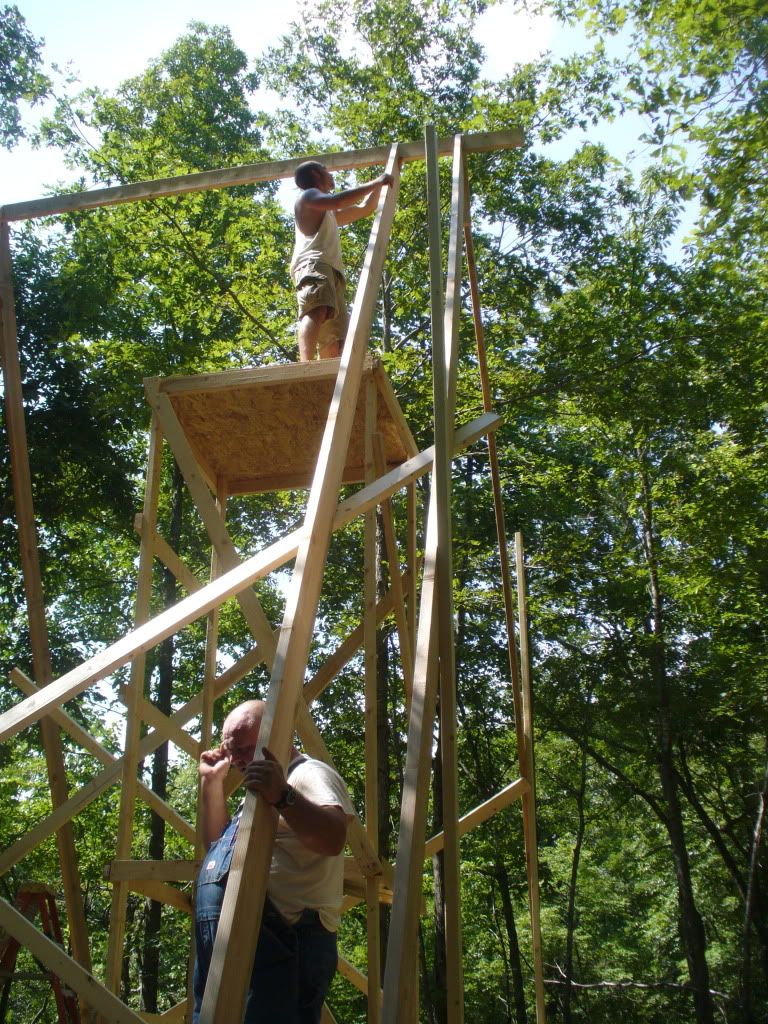

And the spring in work

Wish us luck for tomorrow. Gonna be a long day.
And the spring in work
Wish us luck for tomorrow. Gonna be a long day.
Title: Re: 20x32 A frame cabin Central KY
Post by: bayview on August 09, 2010, 09:04:41 PM
Post by: bayview on August 09, 2010, 09:04:41 PM
You are moving right along . . . Looks like you have a good crew! [cool]
/
Title: Re: 20x32 A frame cabin Central KY
Post by: EaglesSJ on August 10, 2010, 06:30:10 PM
Post by: EaglesSJ on August 10, 2010, 06:30:10 PM
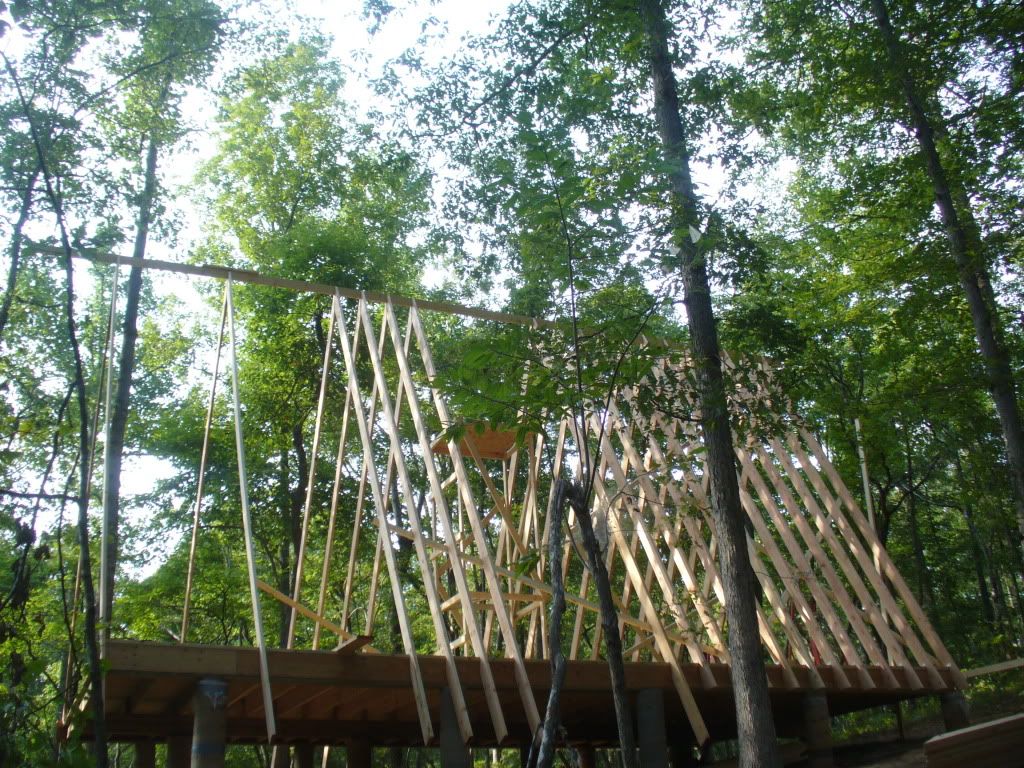
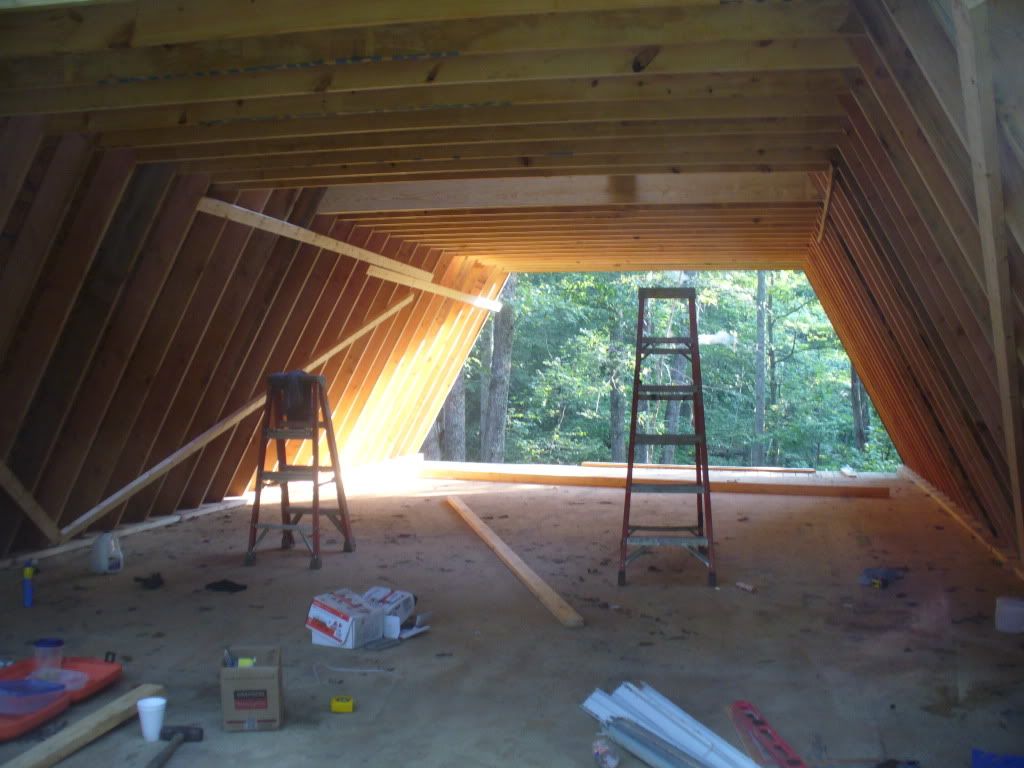
More of today. Hopefully all rafters will be done tomorrow and part of the second floor. Maybe :)
Title: Re: 20x32 A frame cabin Central KY
Post by: TeeCee19 on August 11, 2010, 02:28:37 PM
Post by: TeeCee19 on August 11, 2010, 02:28:37 PM
Congrats and welcome to the site.. w*
Project looks great. I had planned to build an A Frame originally, but, after not being able to find many plans and the negative comments on buidling I changed my mind. HOWEVER, I love your picture of the "proposed" finish of yours and Im sorta RE-enthused again about an A frame. I lived in one for part of my college life and I loved it. It burned down a year after I graduated.
Please tell me where you got your plans from or where i can peek at them.
Title: Re: 20x32 A frame cabin Central KY
Post by: EaglesSJ on August 11, 2010, 09:00:11 PM
Post by: EaglesSJ on August 11, 2010, 09:00:11 PM
Quote from: TeeCee19 on August 11, 2010, 02:28:37 PM
Congrats and welcome to the site.. w*
Project looks great. I had planned to build an A Frame originally, but, after not being able to find many plans and the negative comments on buidling I changed my mind. HOWEVER, I love your picture of the "proposed" finish of yours and Im sorta RE-enthused again about an A frame. I lived in one for part of my college life and I loved it. It burned down a year after I graduated.
Please tell me where you got your plans from or where i can peek at them.
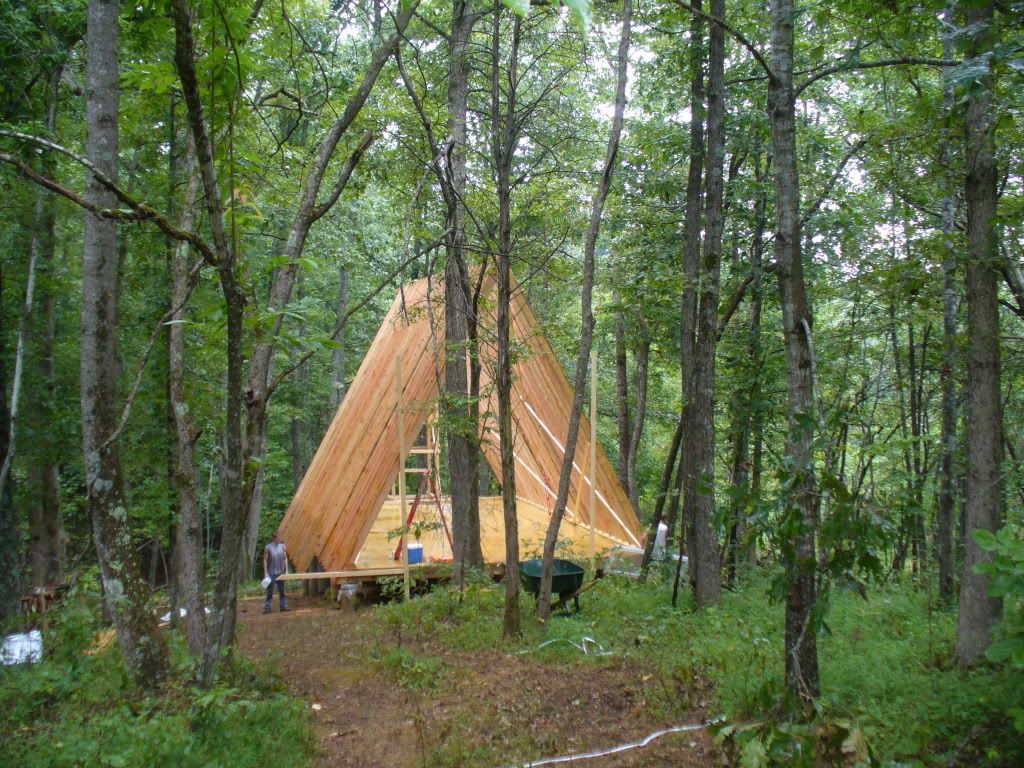
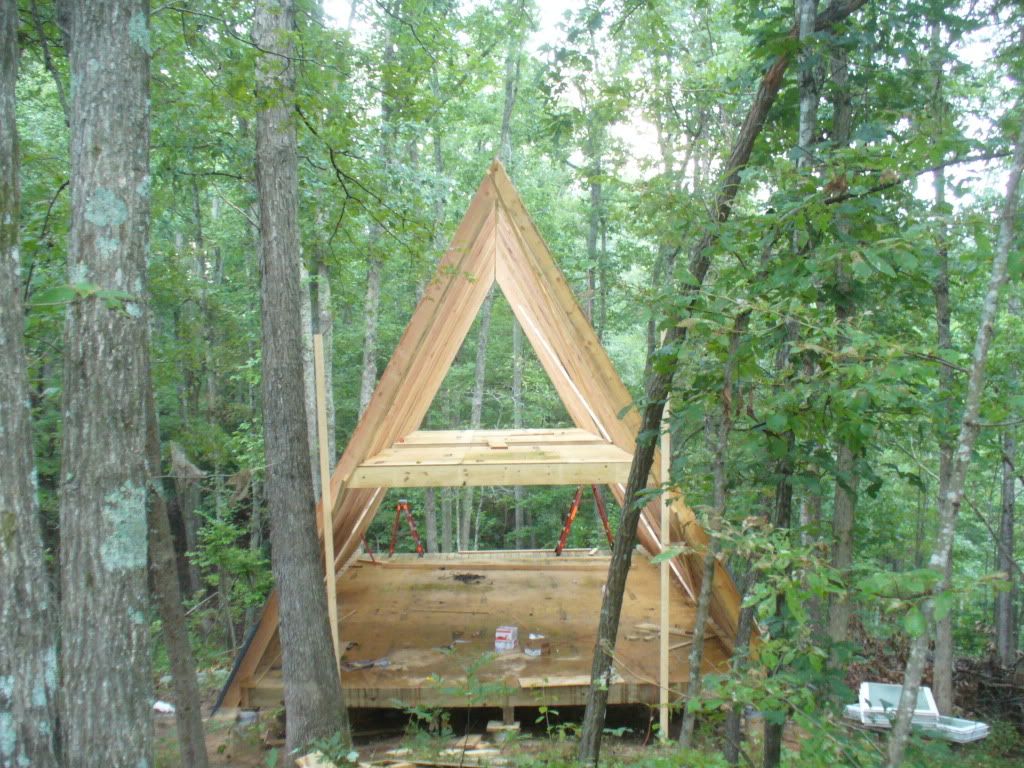
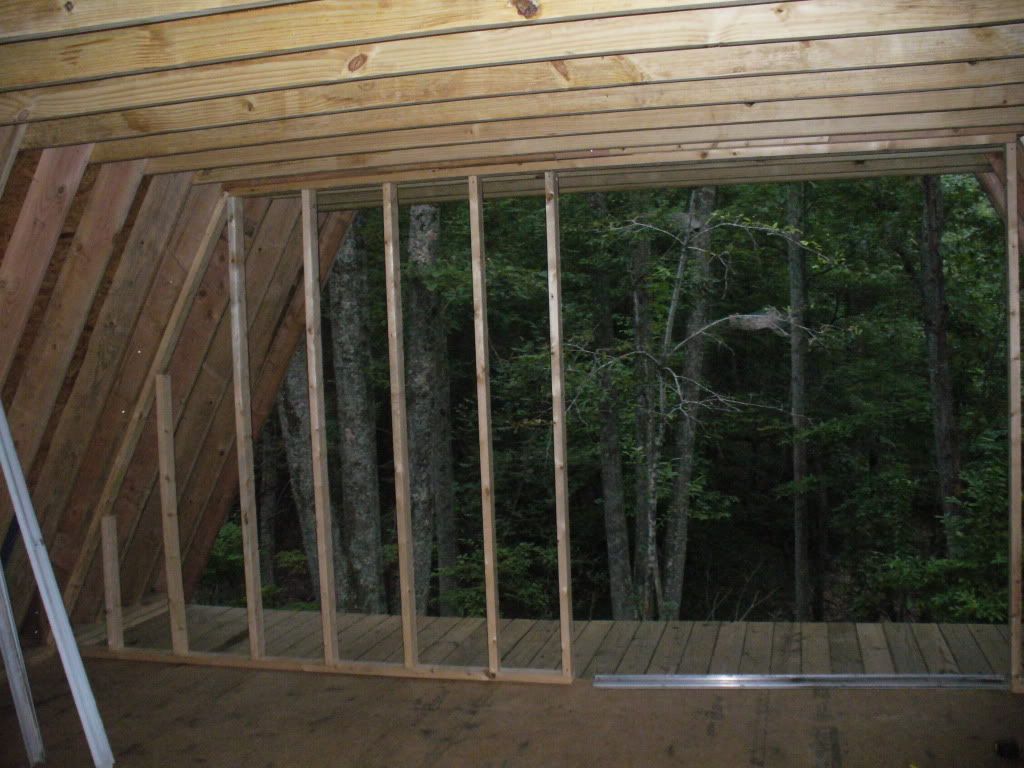
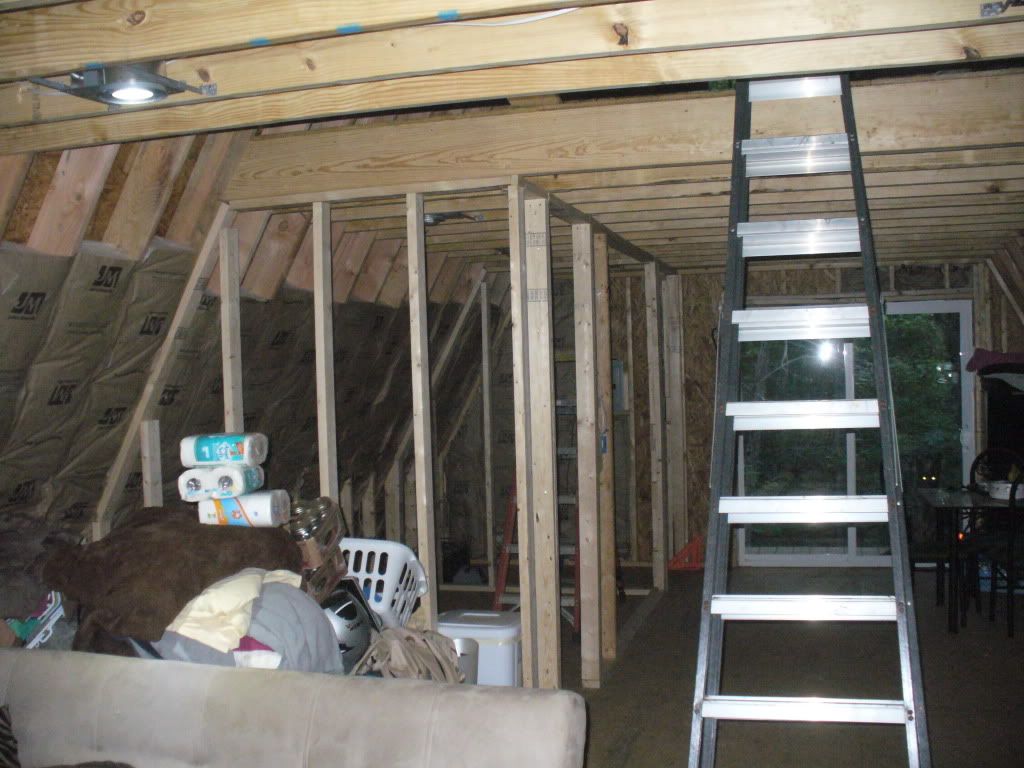
There are no plans. Im just winging it all. we did 20 wide by 32 long with a 24 pitch roof which makes it 20 ft tall in the very center. Im doing 7' 8" ceilings downstairs which will give me a bit more headroom upstairs. The rooms upstairs will be 12' wide at the bottom and about 5' wide at the top of your head. My sons room will be 12x12 and ours will be 12x16 and I am leaving a 4 foot opening in the center for a big set of stairs.
Title: Re: 20x32 A frame cabin Central KY
Post by: Don_P on August 12, 2010, 04:59:39 AM
Post by: Don_P on August 12, 2010, 04:59:39 AM
Drinking my coffee, avoiding the plans I'm sketching and looking at others pics c*. Do fill the ridge before you're done. You're bearing on the toes of the rafters up top, that'll split them over time, they need to bear on their heels.
Title: Re: 20x32 A frame cabin Central KY
Post by: EaglesSJ on August 12, 2010, 08:19:16 AM
Post by: EaglesSJ on August 12, 2010, 08:19:16 AM
Quote from: Don_P on August 12, 2010, 04:59:39 AM
Drinking my coffee, avoiding the plans I'm sketching and looking at others pics c*. Do fill the ridge before you're done. You're bearing on the toes of the rafters up top, that'll split them over time, they need to bear on their heels.
were putting a 2x12 in from the bottom after we get the second floor in. I was just tired of being up so high on that scaffolding.
Title: Re: 20x32 A frame cabin Central KY
Post by: EaglesSJ on August 12, 2010, 08:45:16 PM
Post by: EaglesSJ on August 12, 2010, 08:45:16 PM
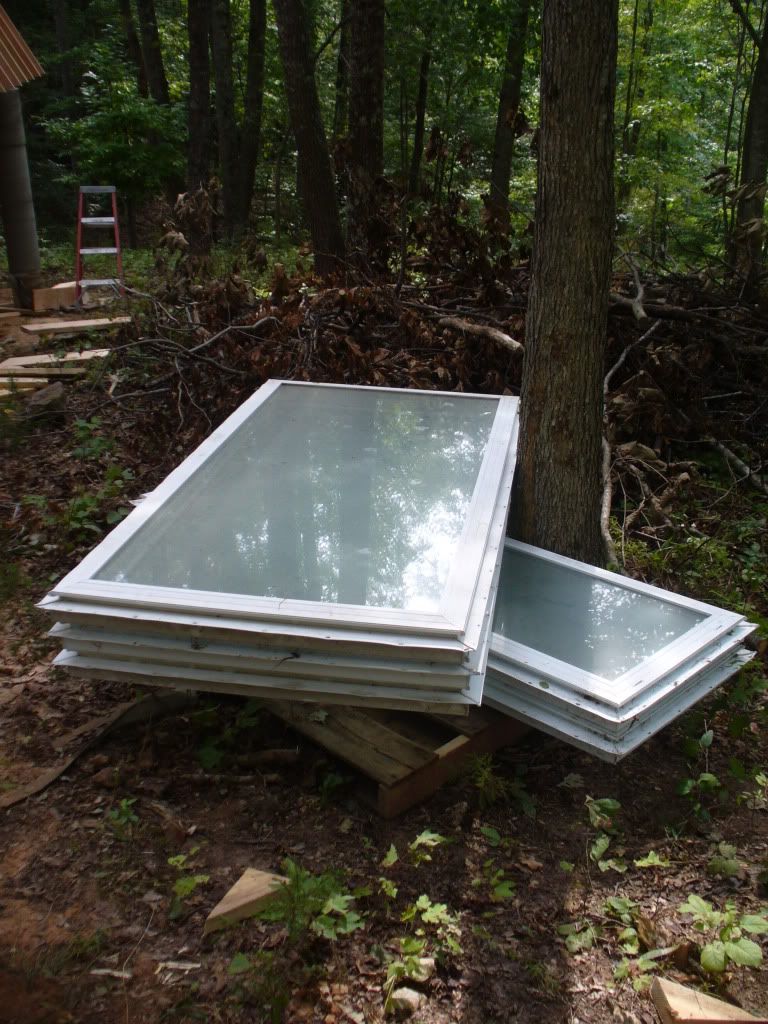
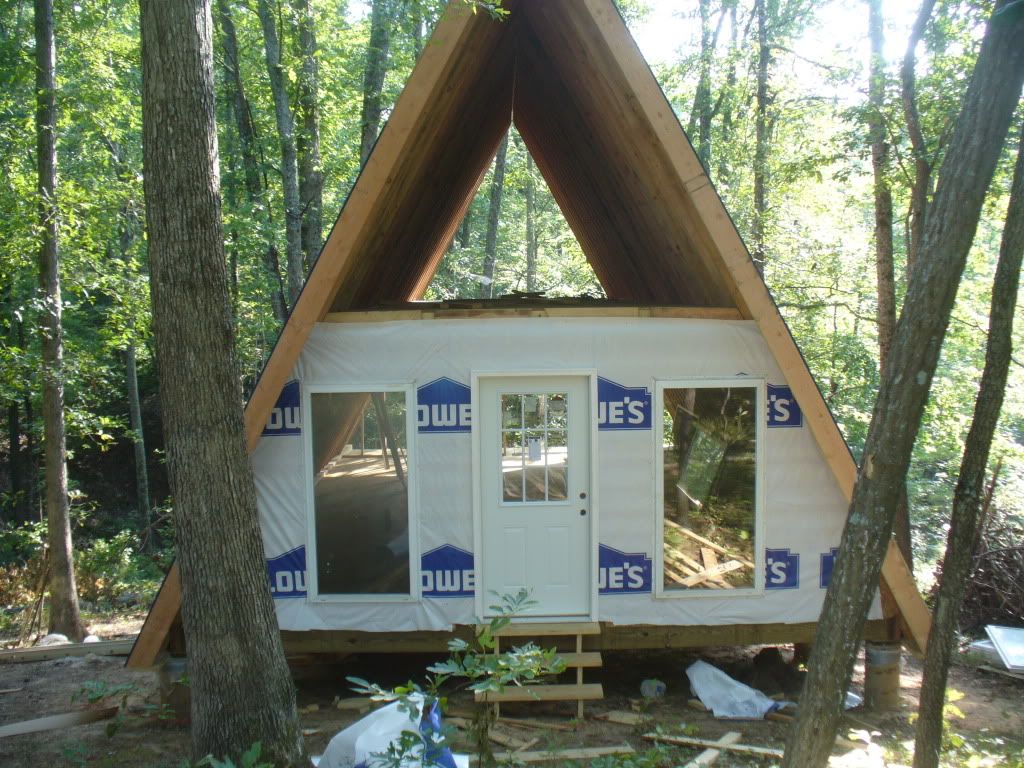
scored these double pane argon filled windows for $200 for 5 of them. 2 of them are 2'x5' and 3 of them are 3' by 5'. They came out of someones sunroom. they are foggy looking because the dew was on them.
Title: Re: 20x32 A frame cabin Central KY
Post by: EaglesSJ on August 13, 2010, 07:59:11 PM
Post by: EaglesSJ on August 13, 2010, 07:59:11 PM
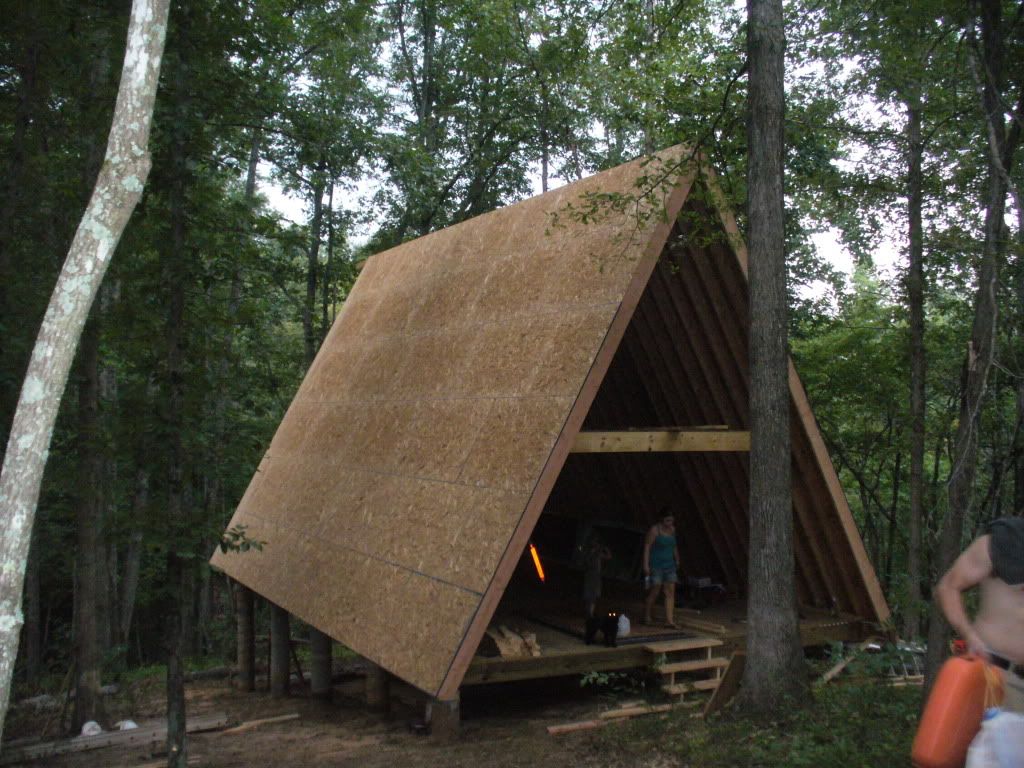
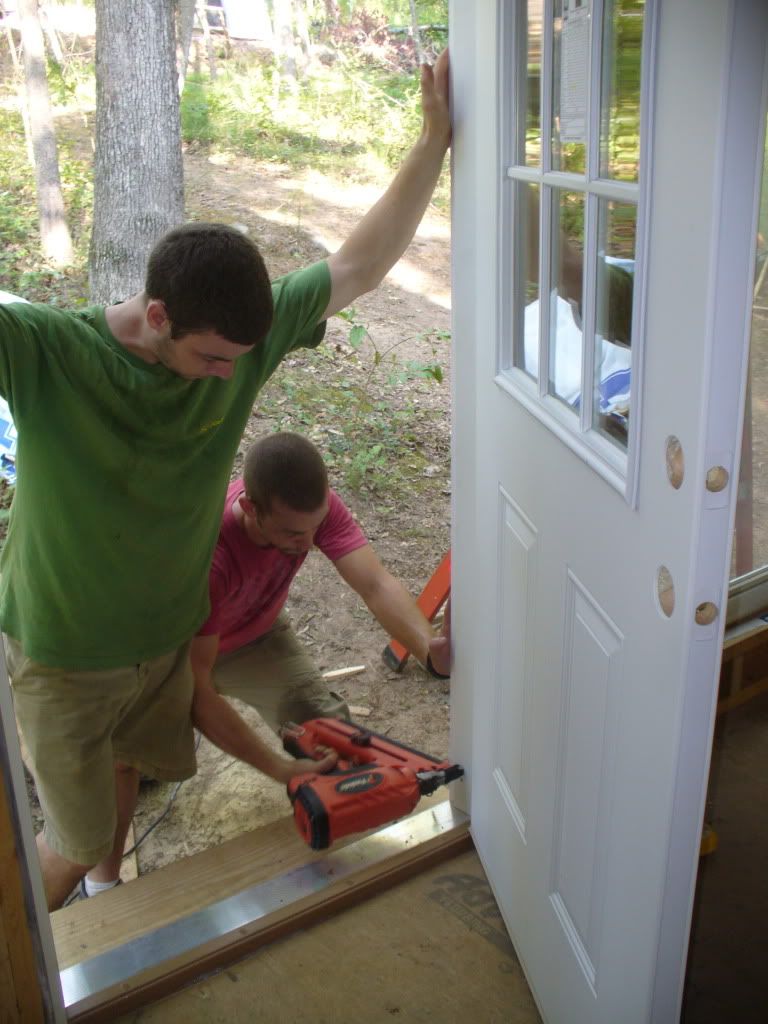
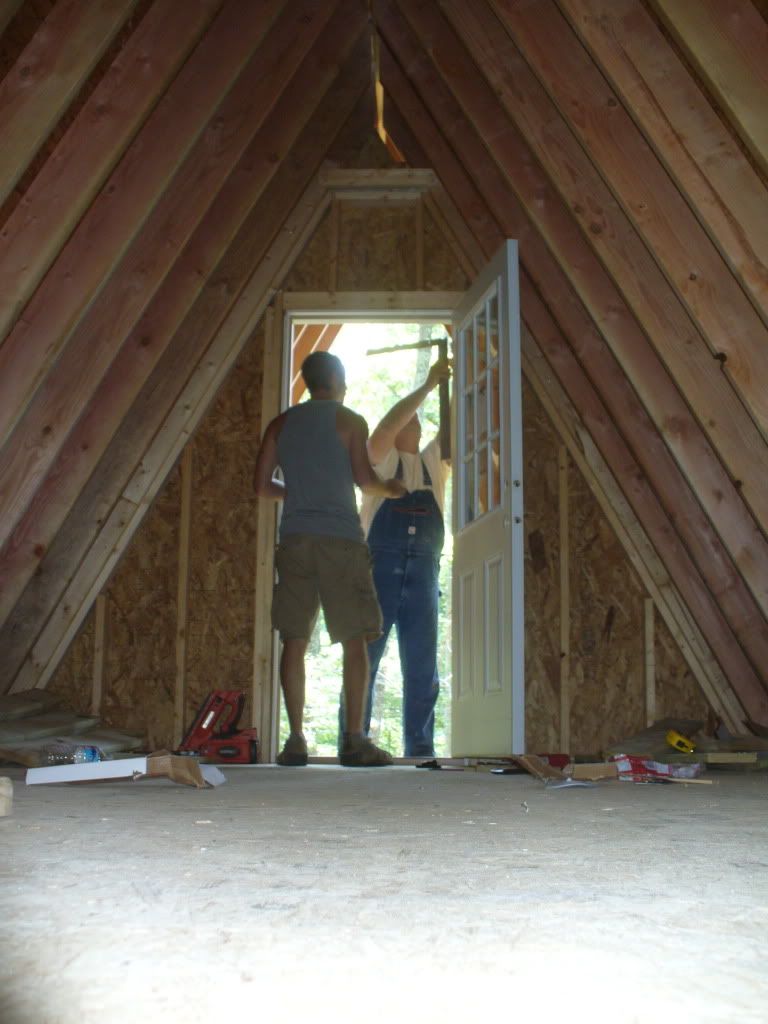
More from today. I also got the rear deck leading out of our room done.
Title: Re: 20x32 A frame cabin Central KY
Post by: Alasdair on August 13, 2010, 08:04:12 PM
Post by: Alasdair on August 13, 2010, 08:04:12 PM
No flys on you! At this rate you'll be moved in by September! :)
Title: Re: 20x32 A frame cabin Central KY
Post by: EaglesSJ on August 13, 2010, 08:41:06 PM
Post by: EaglesSJ on August 13, 2010, 08:41:06 PM
Quote from: Alasdair on August 13, 2010, 08:04:12 PM
No flys on you! At this rate you'll be moved in by September! :)
Ill be evicted on august 22 so were hoping to have it dried in by then at least. Thats why were working so hard on it
Title: Re: 20x32 A frame cabin Central KY
Post by: EaglesSJ on August 14, 2010, 10:51:58 PM
Post by: EaglesSJ on August 14, 2010, 10:51:58 PM
Title: Re: 20x32 A frame cabin Central KY
Post by: MushCreek on August 15, 2010, 01:32:08 PM
Post by: MushCreek on August 15, 2010, 01:32:08 PM
It's coming along great! That's some roof- makes a 12/12 seem like a walk in the park. Nice family, too!
Title: Re: 20x32 A frame cabin Central KY
Post by: EaglesSJ on August 15, 2010, 05:22:54 PM
Post by: EaglesSJ on August 15, 2010, 05:22:54 PM
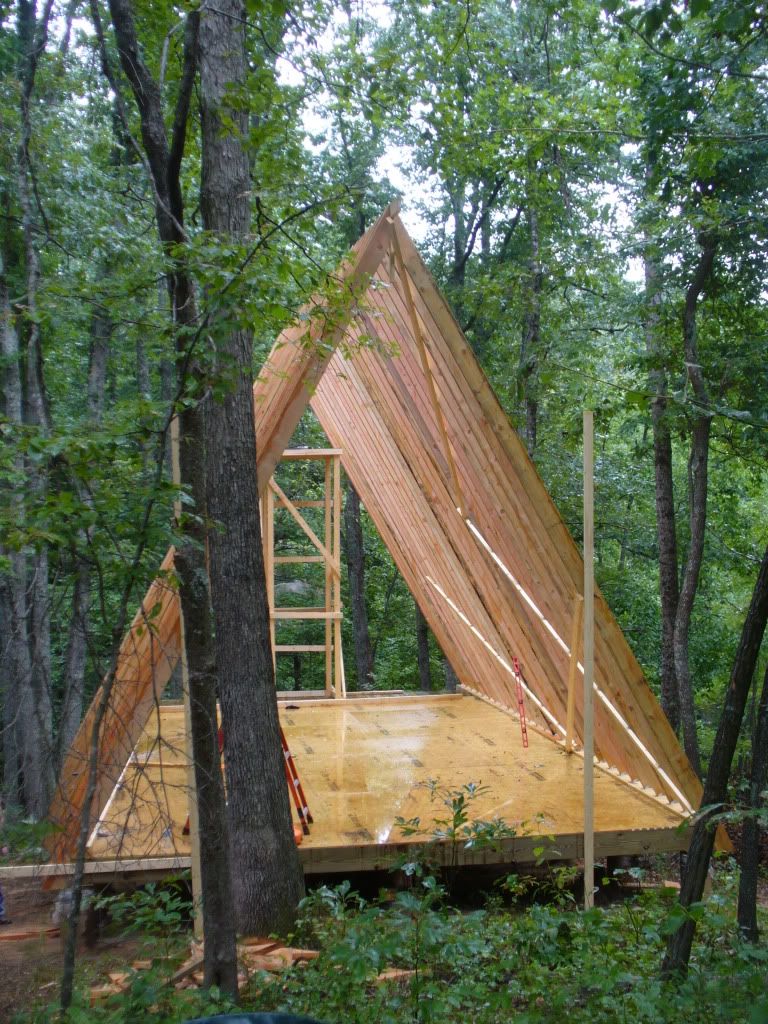
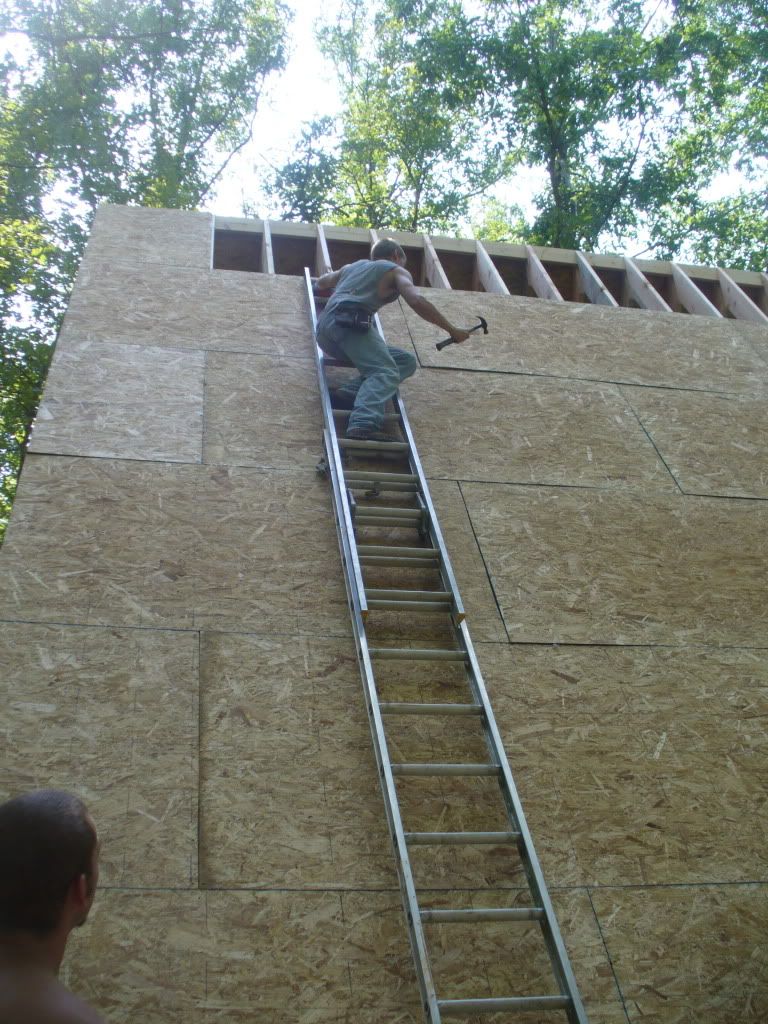
more from today. Only worked about 3 hrs today. Im tired. been going for 3 weeks everyday.
Title: Re: 20x32 A frame cabin Central KY
Post by: EaglesSJ on August 15, 2010, 05:25:51 PM
Post by: EaglesSJ on August 15, 2010, 05:25:51 PM
Quote from: MushCreek on August 15, 2010, 01:32:08 PM
It's coming along great! That's some roof- makes a 12/12 seem like a walk in the park. Nice family, too!
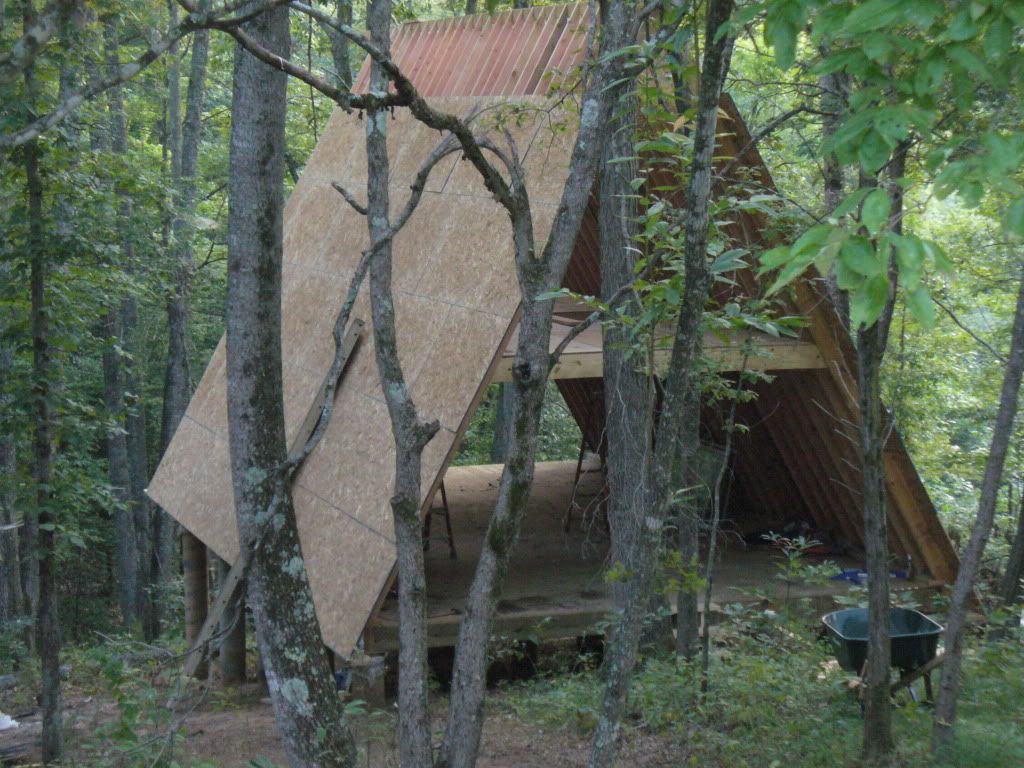
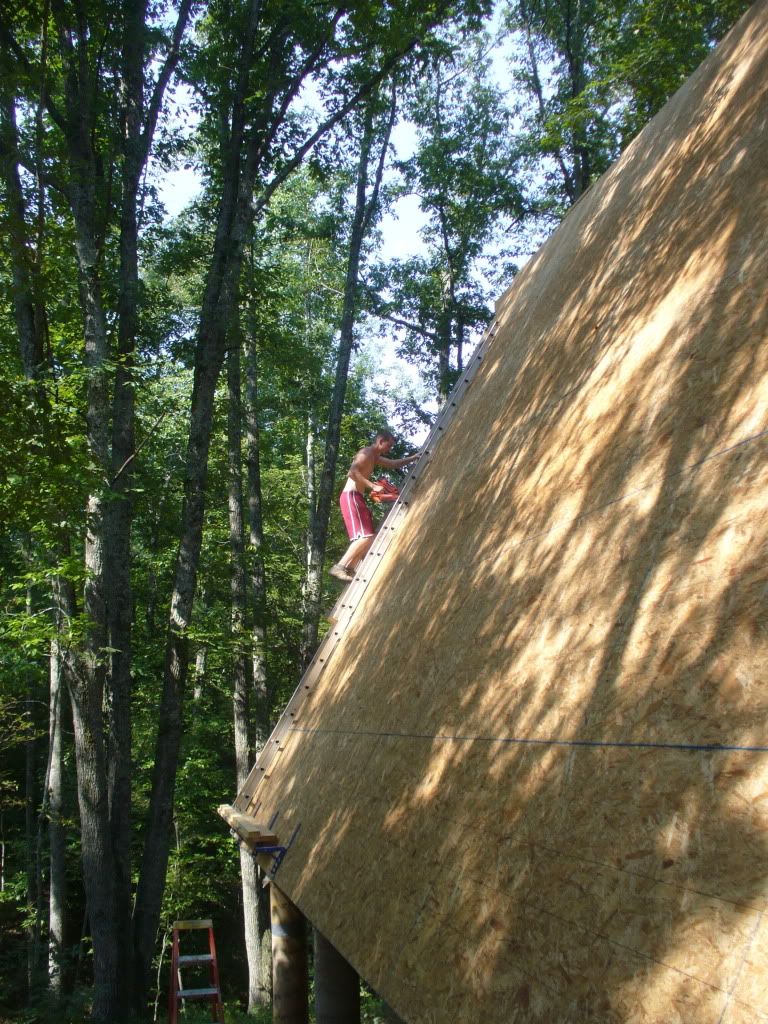
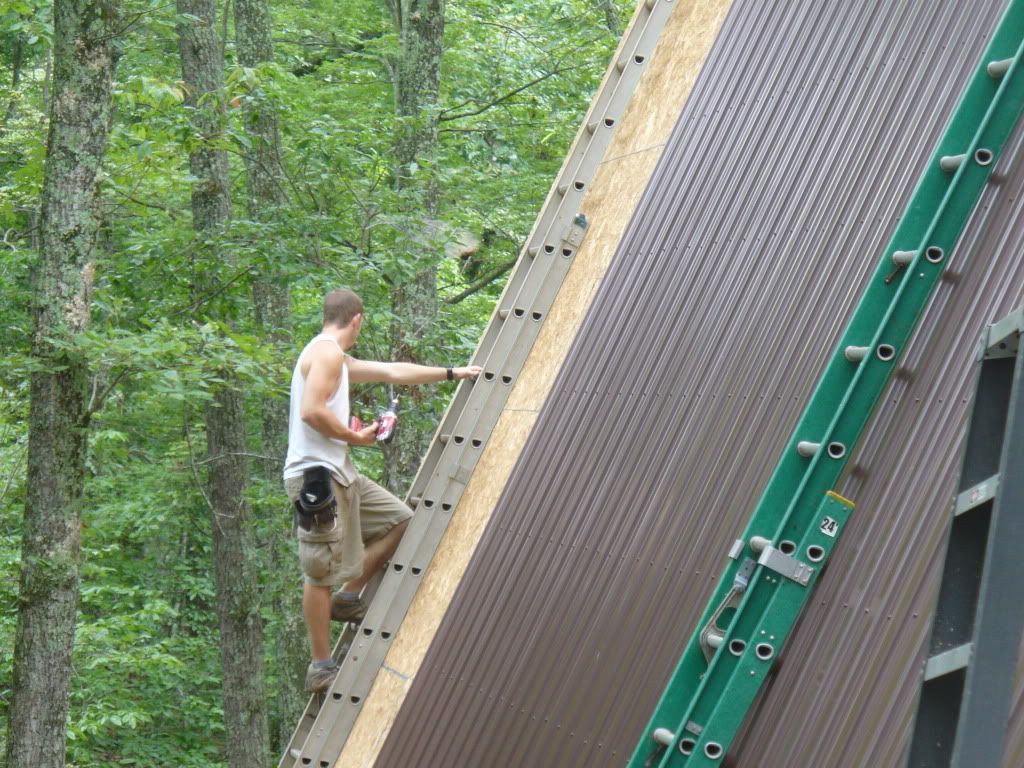
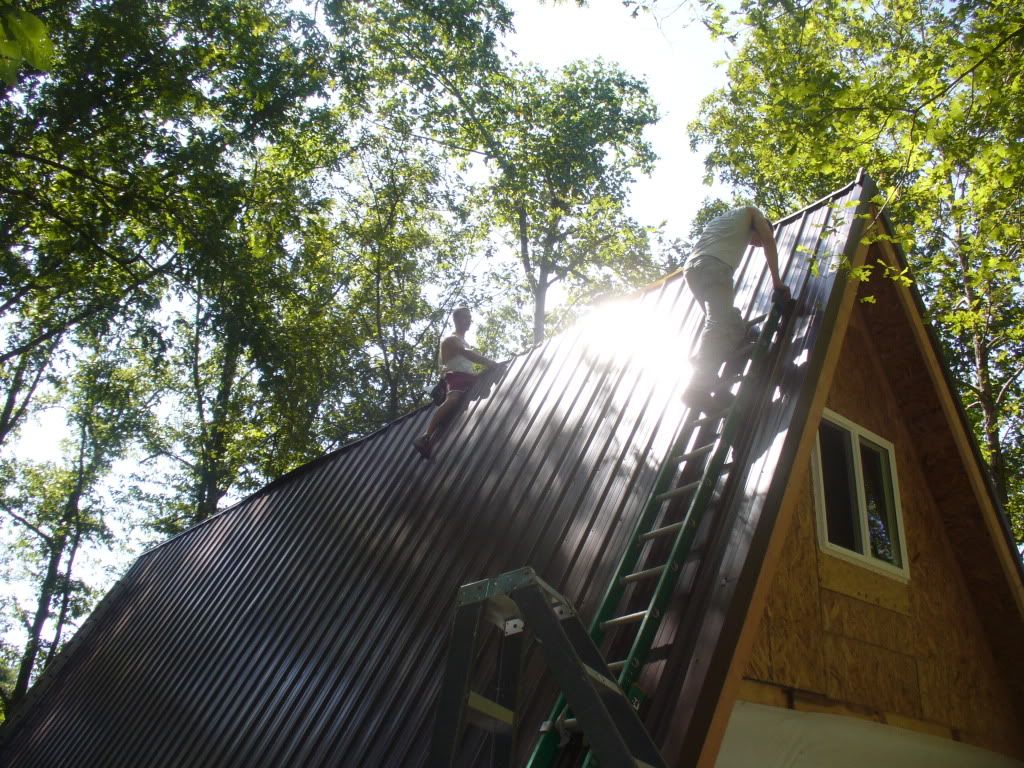
yeah putting on that sheeting has been the scariest job yet by FAR! Glad its behind me. Now onto the metal roofing :(
Title: Re: 20x32 A frame cabin Central KY
Post by: jdejarn on August 15, 2010, 08:07:09 PM
Post by: jdejarn on August 15, 2010, 08:07:09 PM
Outstanding job!! Great run under a tight deadline! One week to go and looks like you are set to make it to the dry point! Good going to you and your crew!
Title: Re: 20x32 A frame cabin Central KY
Post by: Don_P on August 15, 2010, 08:16:25 PM
Post by: Don_P on August 15, 2010, 08:16:25 PM
Makin tracks! Do keep a check on your tiredness... if that's even a word, I'm sure you know when accidents happen. I got launched down the mountain by my ribcage Friday. It wasn't bright, one last tree, working hot and tired. Needless to say I wasn't moving too fast yesterday d*.
Title: Re: 20x32 A frame cabin Central KY
Post by: Tom on August 16, 2010, 07:00:06 AM
Post by: Tom on August 16, 2010, 07:00:06 AM
Gotta second Don's warning. Fatigue creeps up on you. That's when accidents happen.
Looks good though!
Looks good though!
Title: Re: 20x32 A frame cabin Central KY
Post by: John Raabe on August 16, 2010, 08:33:56 AM
Post by: John Raabe on August 16, 2010, 08:33:56 AM
Looking good - your progress is streaming along at quite a clip.
Hope everyone (Don_P and all) are healing well. We all need a reminder now and again - to keep the focus!
Hope everyone (Don_P and all) are healing well. We all need a reminder now and again - to keep the focus!
Title: Re: 20x32 A frame cabin Central KY
Post by: texasgun on August 16, 2010, 01:40:20 PM
Post by: texasgun on August 16, 2010, 01:40:20 PM
[cool] You guys are something else in less than 30 days you took a dream and ran with it. I know how it feels being cheated out of money and the way it makes you feel about that person and I hope that dosent stress your relationship with any of your other family. Your aunt might of gotten 4 grand of free work and materials but it is now quite apparent she lost alot more in cheating a very talented nephew that she will regret next time her house needs repaired. Anyway sorry about the rant but just had to coment on your project because it is most impressive fwiw I think you all deserve a couple of days off.
Title: Re: 20x32 A frame cabin Central KY
Post by: EaglesSJ on August 16, 2010, 05:56:28 PM
Post by: EaglesSJ on August 16, 2010, 05:56:28 PM
Quote from: texasgun on August 16, 2010, 01:40:20 PM
[cool] You guys are something else in less than 30 days you took a dream and ran with it. I know how it feels being cheated out of money and the way it makes you feel about that person and I hope that dosent stress your relationship with any of your other family. Your aunt might of gotten 4 grand of free work and materials but it is now quite apparent she lost alot more in cheating a very talented nephew that she will regret next time her house needs repaired. Anyway sorry about the rant but just had to coment on your project because it is most impressive fwiw I think you all deserve a couple of days off.
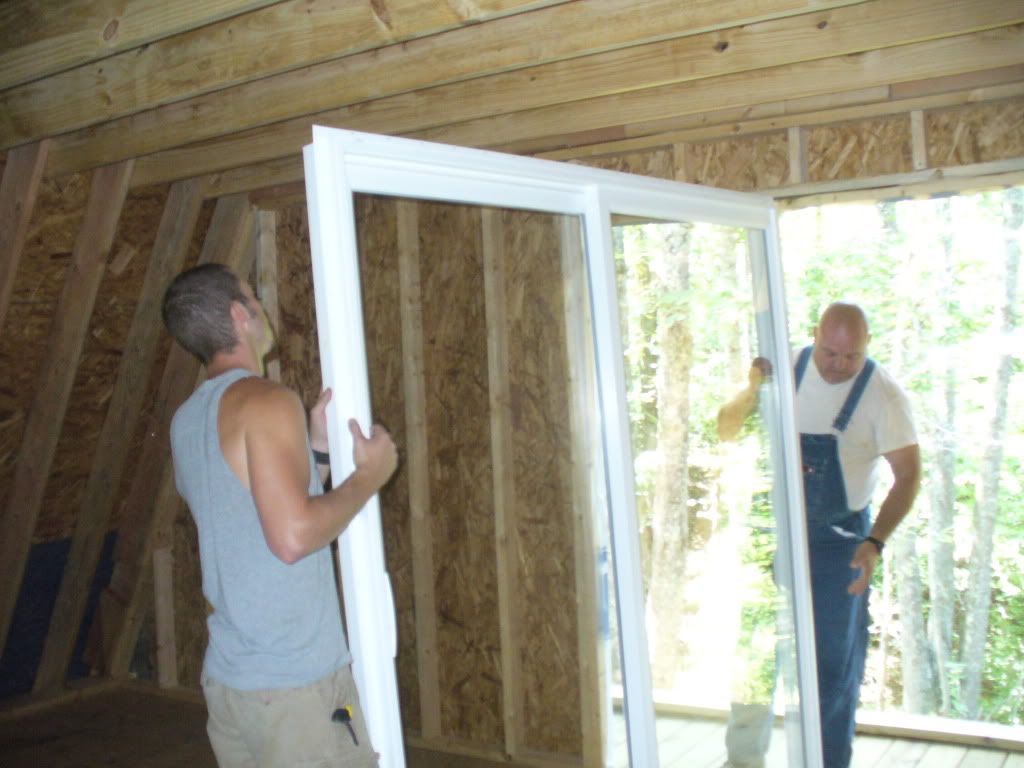
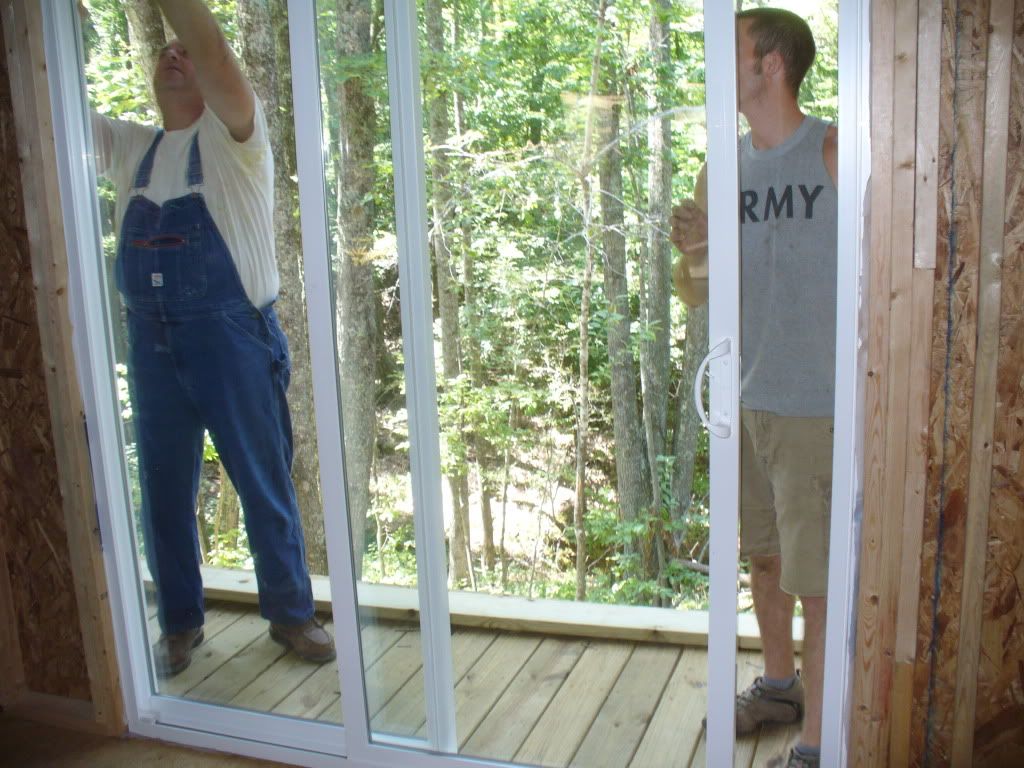
I appreciate your kind words. This is my first construction experience as it is my friends also but were doing pretty good all in all. I am not that bitter over the whole ordeal although my fiance and I have thought about all the nice things that we could get for the new place with the money we spent on this one lol. Bought lessons are always the best lessons though. My only concern for them is now the entire family has turned on them because of how they have done us and when they get a bit older and no one is there for em Im sure they will regret alot of things. Oh well, no use in living in the past. Were getting the chance to build OUR dream home now instead of fixing up someone elses to make it livable. Anyways I will report with more pictures later. Its off to lowes for a patio door!
Title: Re: 20x32 A frame cabin Central KY
Post by: Texas Tornado on August 16, 2010, 06:26:18 PM
Post by: Texas Tornado on August 16, 2010, 06:26:18 PM
Quote from: Don_P on August 12, 2010, 04:59:39 AM
Drinking my coffee, avoiding the plans I'm sketching and looking at others pics c*. Do fill the ridge before you're done. You're bearing on the toes of the rafters up top, that'll split them over time, they need to bear on their heels.
Can you post a picture explaining this?
Title: Re: 20x32 A frame cabin Central KY
Post by: Texas Tornado on August 16, 2010, 06:37:00 PM
Post by: Texas Tornado on August 16, 2010, 06:37:00 PM
http://www.homedepot.com/webapp/wcs/stores/servlet/ProductDisplay?storeId=10051&productId=100375081&langId=-1&catalogId=10053&ci_sku=100375081&ci_src=14110944&cm_mmc=shopping-_-googlebase-_-D22X-_-100375081&locStoreNum=581&marketID=40
I was told to make sure I used plywood clips between the sheets for any roofing, have codes changed? ???
I was told to make sure I used plywood clips between the sheets for any roofing, have codes changed? ???
Title: Re: 20x32 A frame cabin Central KY
Post by: MountainDon on August 16, 2010, 08:18:10 PM
Post by: MountainDon on August 16, 2010, 08:18:10 PM
Quote from: Texas Tornado on August 16, 2010, 06:26:18 PMQuote from: Don_P on August 12, 2010, 04:59:39 AM
Drinking my coffee, avoiding the plans I'm sketching and looking at others pics c*. Do fill the ridge before you're done. You're bearing on the toes of the rafters up top, that'll split them over time, they need to bear on their heels.
Can you post a picture explaining this?
Good question...
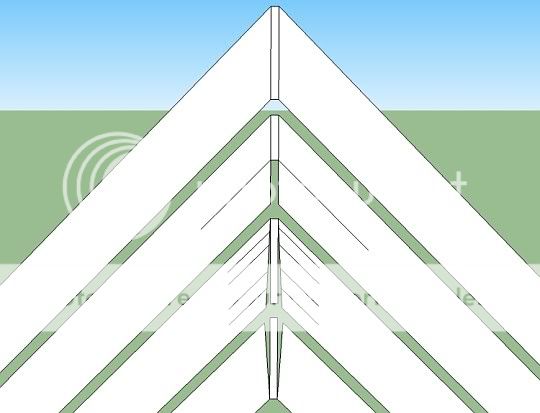
Here is what Don_P was referring to. In the early photos the rafters had their points (toes) resting on the ridge board. That is only the toes.
Another board should be added below the first one in order to have the heels of the rafters supported.
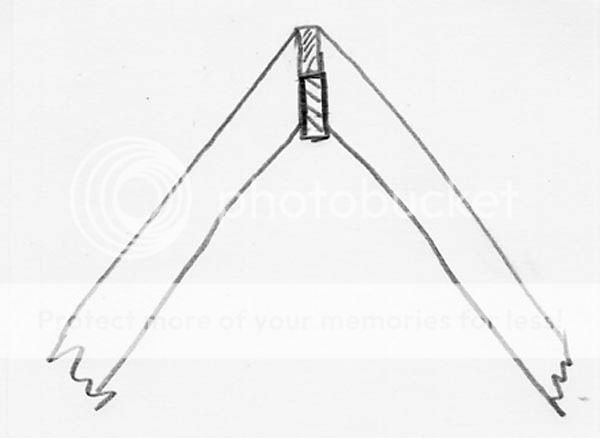
This becomes even more important as the roof pitch decreases. Eventually the rafters may split if the heels are not supported.
Title: Re: 20x32 A frame cabin Central KY
Post by: Don_P on August 16, 2010, 09:07:23 PM
Post by: Don_P on August 16, 2010, 09:07:23 PM
MD got it while I was drawing and looking up stuff,
Last first,
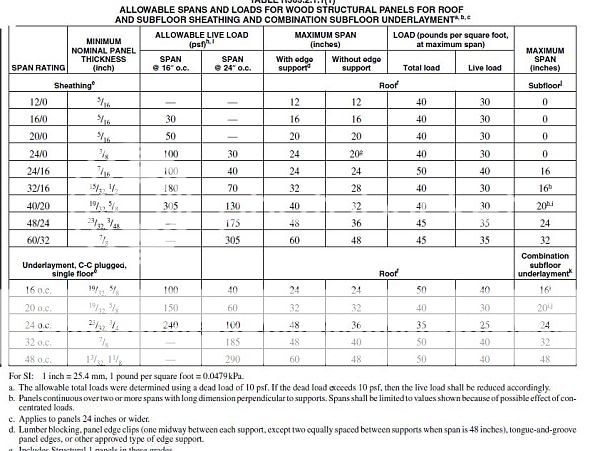
table R503.2.1.1(1)...now howcum you can find anything in the Bible with less than half that many numbers, but I digress ??? gives the maximum span for roof sheathing with and without edge support (clips). Very few applications actually require clips...I always use them having seen enough ugly spots on roofs that didn't. I was sticking them on 5/8 sheathing that was framed on 16" centers today, way overkill for edge support, but they are cheap and also space the sheets so I just go ahead and do it. This is a screenshot of that table, pay attention to the max live loads as well;
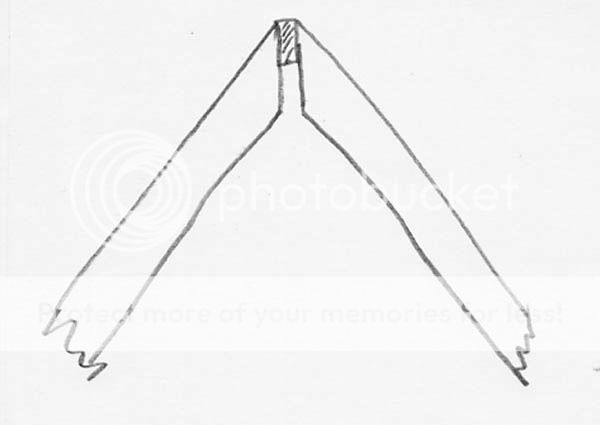
This is a sketch of 4 pairs of rafters,
the upper one is correct, the entire plumb cut at the peak of the rafters is fully bearing on the ridge.
The second from the top is bearing on the toe half of the plumb cut, the ridge isn't tall enough, I've drawn where it can split the rafters if it is heavily loaded. It isn't code but if the ridge were slipped down to the bottom of the plumb cut it would be fine.
The third one from the top is a bad plumb angle leaving a gap and bearing on the toe of the cut. It will fail by "feathering", splitting into many soft edges until each bears against the ridge. Shim this cut and correct your pattern.
The bottom is another bad angle cut but is bearing on the heel... if you're going to err this is the better way to be, it won't split the rafter, it will crush into the ridge until it has enough area to take the load. But again fix your pattern....unless you are framing with green material then it becomes an art, you cut this way just enough so that when the rafter is dry it become like the top drawing, think about how a miter dries.
EaglesSJ; I agree with your outlook. "The wheel of life turns slowly but grinds thoroughly". Sounds like a Willie Nelson song ;)
Last first,
table R503.2.1.1(1)...now howcum you can find anything in the Bible with less than half that many numbers, but I digress ??? gives the maximum span for roof sheathing with and without edge support (clips). Very few applications actually require clips...I always use them having seen enough ugly spots on roofs that didn't. I was sticking them on 5/8 sheathing that was framed on 16" centers today, way overkill for edge support, but they are cheap and also space the sheets so I just go ahead and do it. This is a screenshot of that table, pay attention to the max live loads as well;
This is a sketch of 4 pairs of rafters,
the upper one is correct, the entire plumb cut at the peak of the rafters is fully bearing on the ridge.
The second from the top is bearing on the toe half of the plumb cut, the ridge isn't tall enough, I've drawn where it can split the rafters if it is heavily loaded. It isn't code but if the ridge were slipped down to the bottom of the plumb cut it would be fine.
The third one from the top is a bad plumb angle leaving a gap and bearing on the toe of the cut. It will fail by "feathering", splitting into many soft edges until each bears against the ridge. Shim this cut and correct your pattern.
The bottom is another bad angle cut but is bearing on the heel... if you're going to err this is the better way to be, it won't split the rafter, it will crush into the ridge until it has enough area to take the load. But again fix your pattern....unless you are framing with green material then it becomes an art, you cut this way just enough so that when the rafter is dry it become like the top drawing, think about how a miter dries.
EaglesSJ; I agree with your outlook. "The wheel of life turns slowly but grinds thoroughly". Sounds like a Willie Nelson song ;)
Title: Re: 20x32 A frame cabin Central KY
Post by: EaglesSJ on August 16, 2010, 09:16:04 PM
Post by: EaglesSJ on August 16, 2010, 09:16:04 PM
d*
Title: Re: 20x32 A frame cabin Central KY
Post by: phalynx on August 16, 2010, 09:57:41 PM
Post by: phalynx on August 16, 2010, 09:57:41 PM
EaglesSJ, just a note. If I remember correctly from my many conversations with the state when I was looking at moving to KY, the plumbing code is something you cannot bypass even if you are off grid. Make sure you get the permits for that and do it well. I have read many horror stories of people who thought they would get away with it and didn't. I found it funny that KY didn't have many building permits and inspections for shell construction but plumbing is a totally different animal.
Title: Re: 20x32 A frame cabin Central KY
Post by: EaglesSJ on August 16, 2010, 10:18:11 PM
Post by: EaglesSJ on August 16, 2010, 10:18:11 PM
d*
Title: Re: 20x32 A frame cabin Central KY
Post by: Texas Tornado on August 17, 2010, 05:47:33 PM
Post by: Texas Tornado on August 17, 2010, 05:47:33 PM
Mountain Don and Don, Thank you so much for the details!!! Seeing what you are talking about really helps me get my head wrapped around it 8)
So would the clips be needed on the flooring as well?
So would the clips be needed on the flooring as well?
Title: Re: 20x32 A frame cabin Central KY
Post by: EaglesSJ on August 17, 2010, 06:28:55 PM
Post by: EaglesSJ on August 17, 2010, 06:28:55 PM
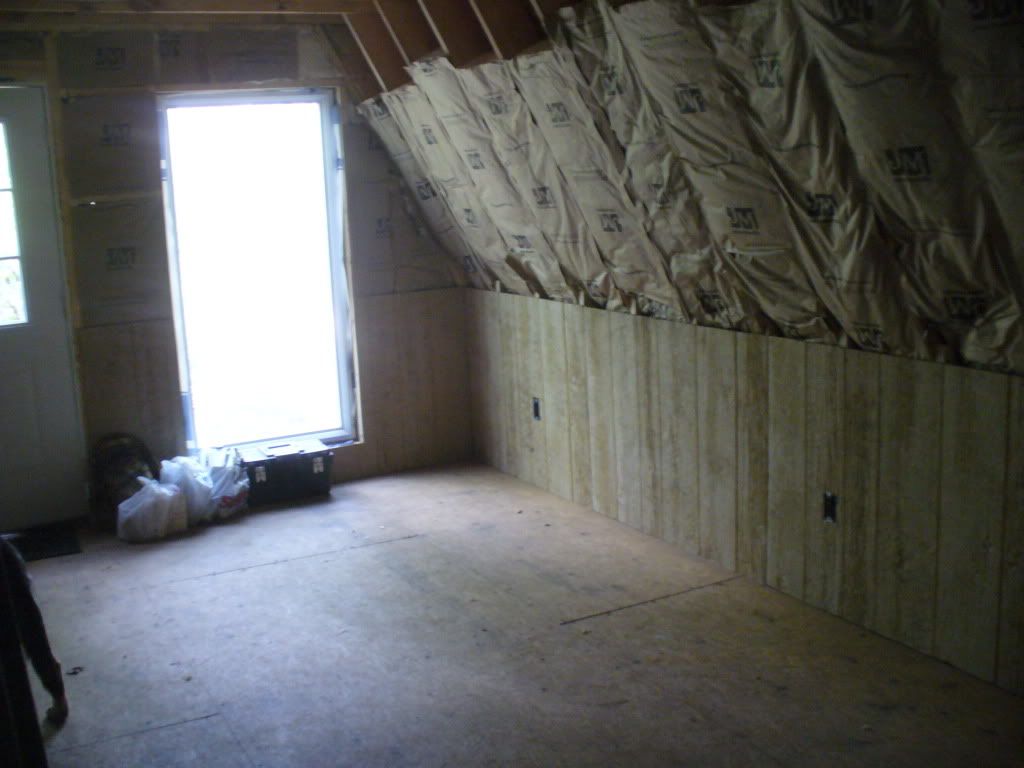
Pics from today.


our room 12x16
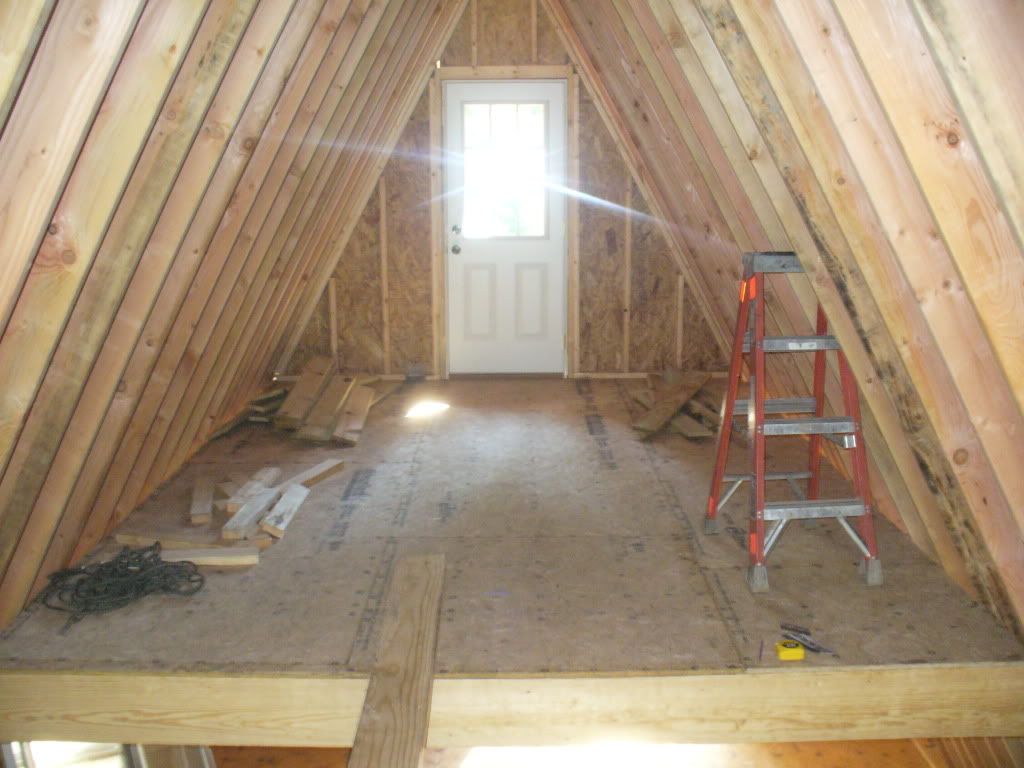
Coltons room 12x12
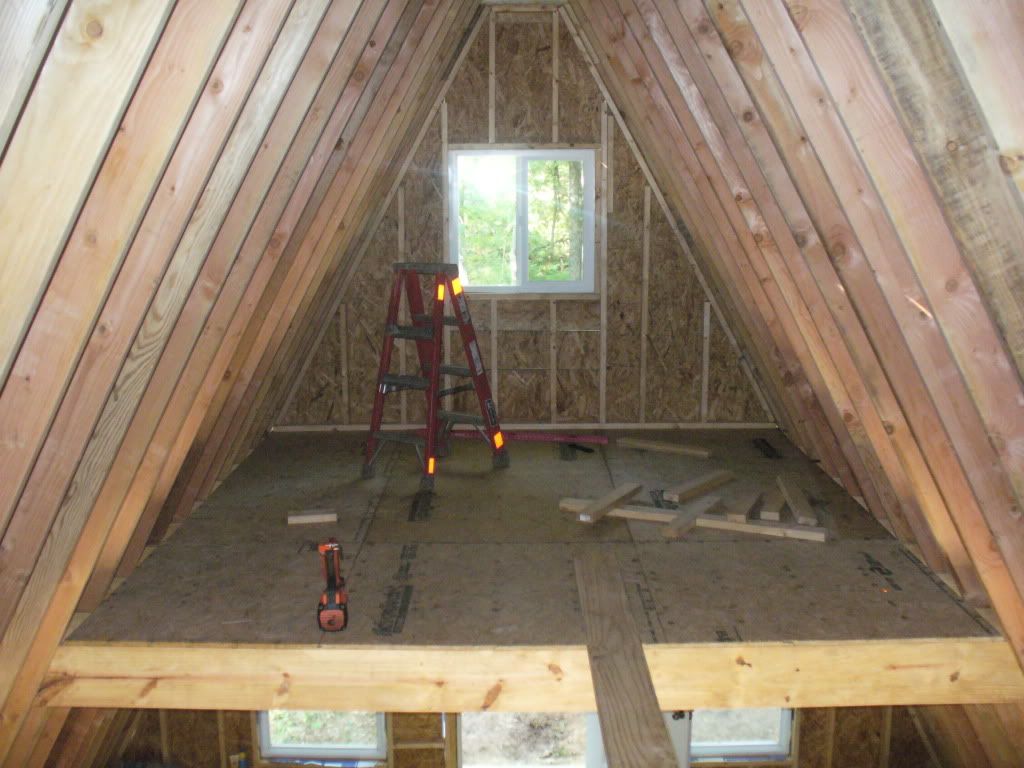
a days work


our room 12x16
Coltons room 12x12
a days work
Title: Re: 20x32 A frame cabin Central KY
Post by: Don_P on August 17, 2010, 07:40:22 PM
Post by: Don_P on August 17, 2010, 07:40:22 PM
TT, Floor sheathing should "normally" be edge supported but this is usually done by using T&G ply. You can use square edge ply if you block the unsupported edges with lumber, use an additional layer of underlayment or cover it with 3/4 flooring laid at right angles to the joists. But you wouldn't get edge support on a floor by using clips, the bumps would give you trouble later. We've been in a round of rain for the past few days. we used Advantech on the main floor and sent Mrs homeowner to get more for the loft floor. The guys at Lowes charged her for Advantech but loaded an off brand. Both floors got 2 coats of porch paint, the loft floor has seen one less rain but is popping some blisters. If there's any more questions on any of this we should probably start another thread, my quick morning coffee comment took a longwinded turn ;).
Title: Re: 20x32 A frame cabin Central KY
Post by: phalynx on August 17, 2010, 07:58:23 PM
Post by: phalynx on August 17, 2010, 07:58:23 PM
You are certainly moving at a great pace. I know it feels good seeing it "looking" complete. Are you using pressure treated wood under the deck area including the beams? You don't want rot creeping into your structure. If not, perhaps there is something you can do to shed the water.
Title: Re: 20x32 A frame cabin Central KY
Post by: OzarkBrandon on August 17, 2010, 08:23:10 PM
Post by: OzarkBrandon on August 17, 2010, 08:23:10 PM
It is coming together nicely; you are going to have a great little cabin! Thanks for the pics, it takes my mind off of the tiny appartment I am stuck in!
Title: Re: 20x32 A frame cabin Central KY
Post by: EaglesSJ on August 17, 2010, 09:15:47 PM
Post by: EaglesSJ on August 17, 2010, 09:15:47 PM
Quote from: phalynx on August 17, 2010, 07:58:23 PM
You are certainly moving at a great pace. I know it feels good seeing it "looking" complete. Are you using pressure treated wood under the deck area including the beams? You don't want rot creeping into your structure. If not, perhaps there is something you can do to shed the water.
it feels GREAT!!!! and yes I am using treated lumber on anything that will be "outside"
Title: Re: 20x32 A frame cabin Central KY
Post by: EaglesSJ on August 22, 2010, 11:54:06 PM
Post by: EaglesSJ on August 22, 2010, 11:54:06 PM
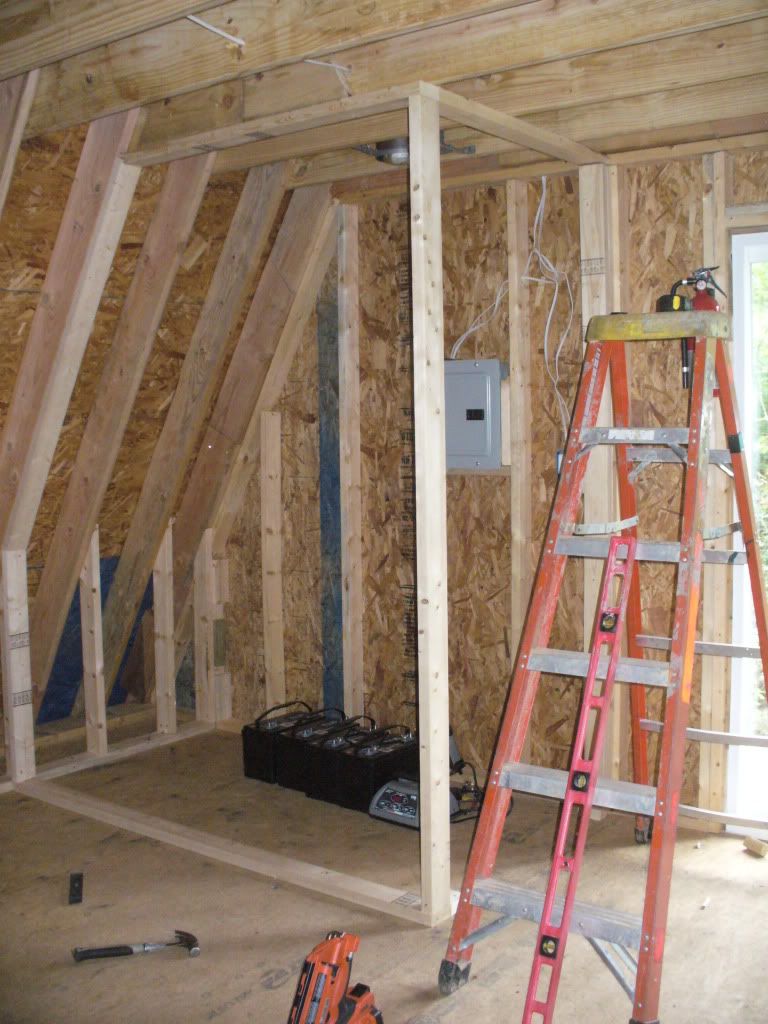
I am currently wiring for electric and I am setting up my battery bank. I bought 4 125AH deep cycle batteries that I will be charging off of a generator/solar. Can you guys recommend a good charger for me?
Title: Re: 20x32 A frame cabin Central KY
Post by: rocking23nf on August 23, 2010, 10:03:12 AM
Post by: rocking23nf on August 23, 2010, 10:03:12 AM
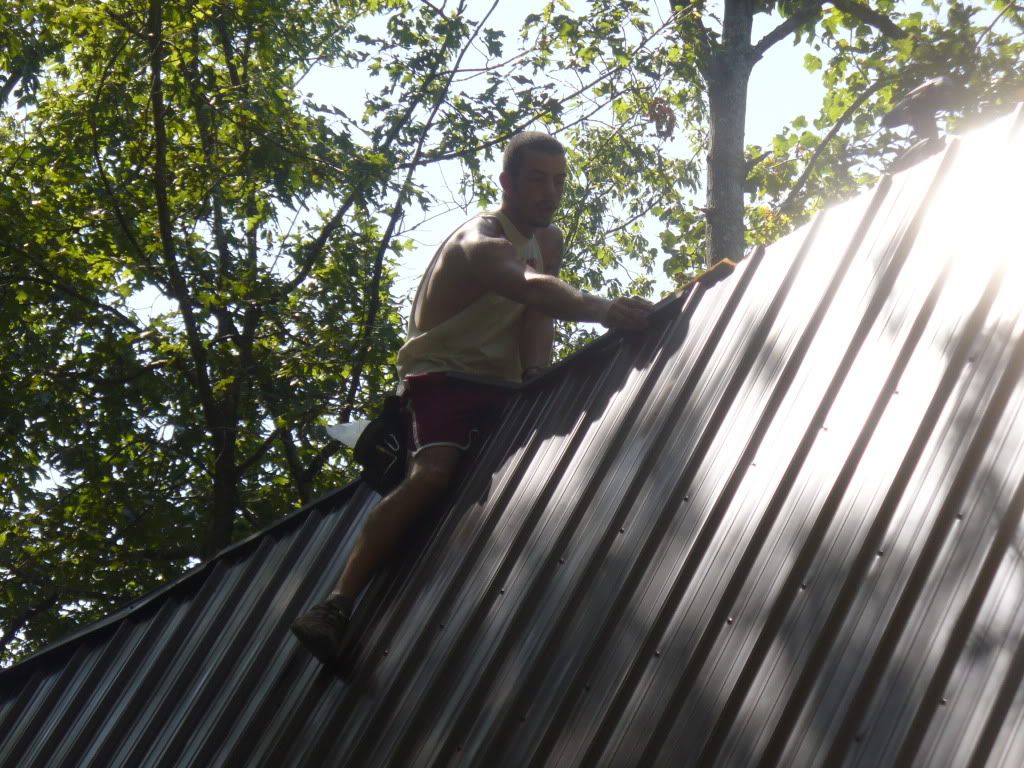
Cant believe you work at that height without a harness. Thats a long ways down!
Title: Re: 20x32 A frame cabin Central KY
Post by: EaglesSJ on August 24, 2010, 07:41:33 PM
Post by: EaglesSJ on August 24, 2010, 07:41:33 PM
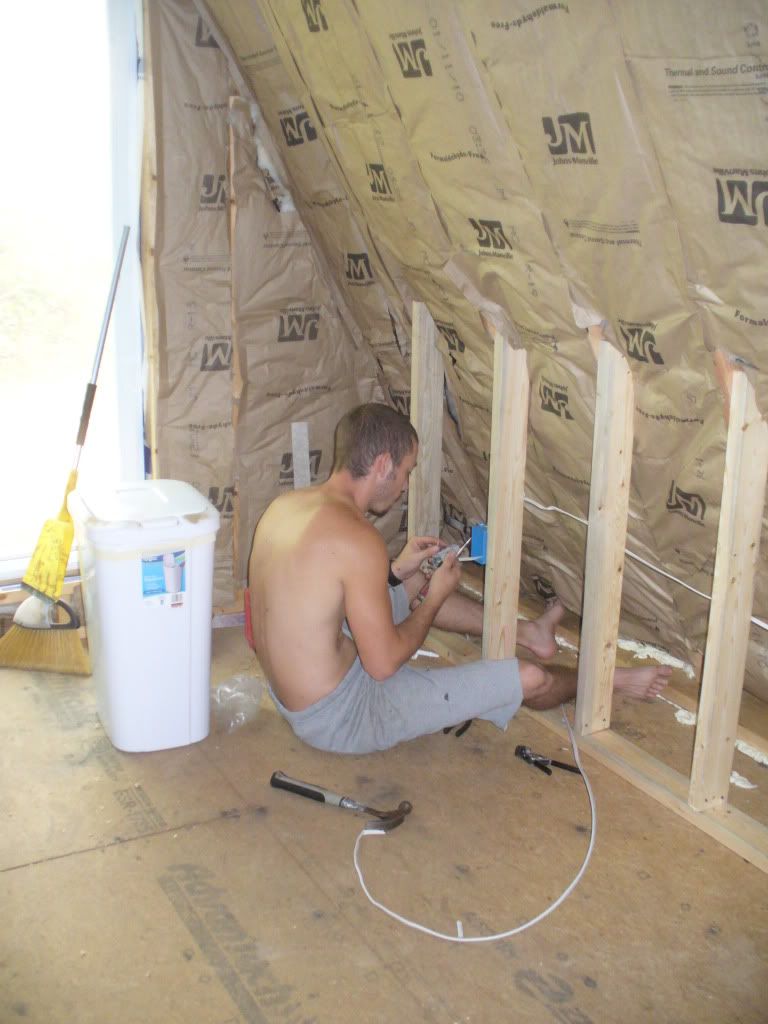
Finished some of the lighting. bulbs are LED 3.
5 watts each. bout as bright as a 60w incandescent
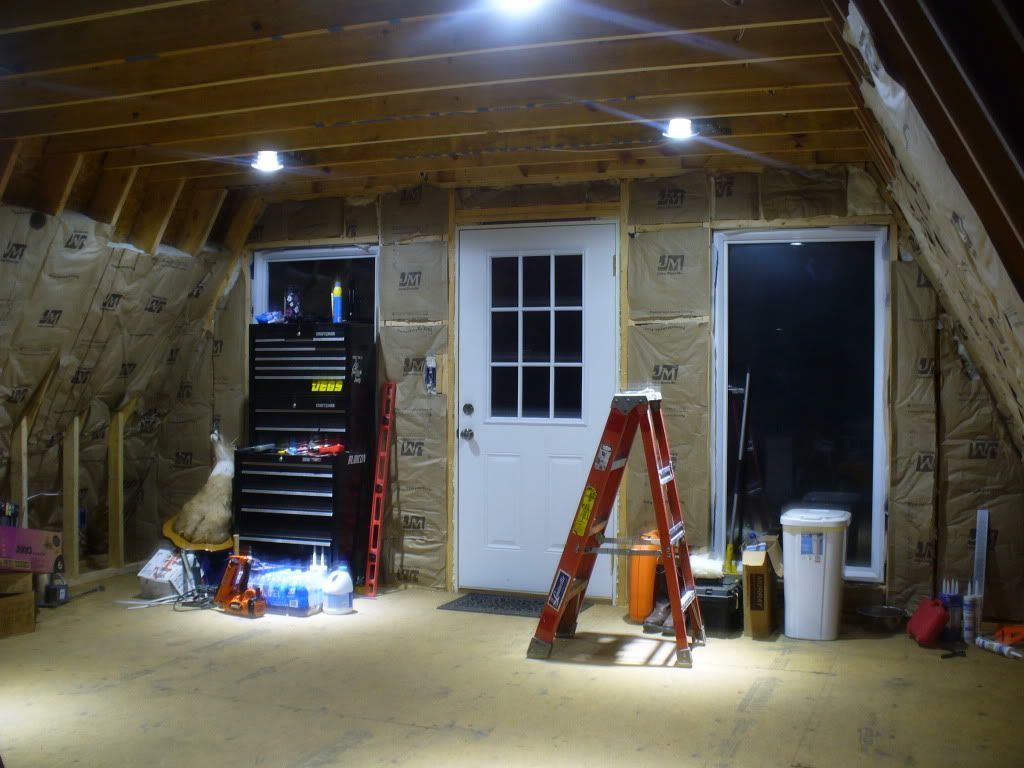
My POWER closet
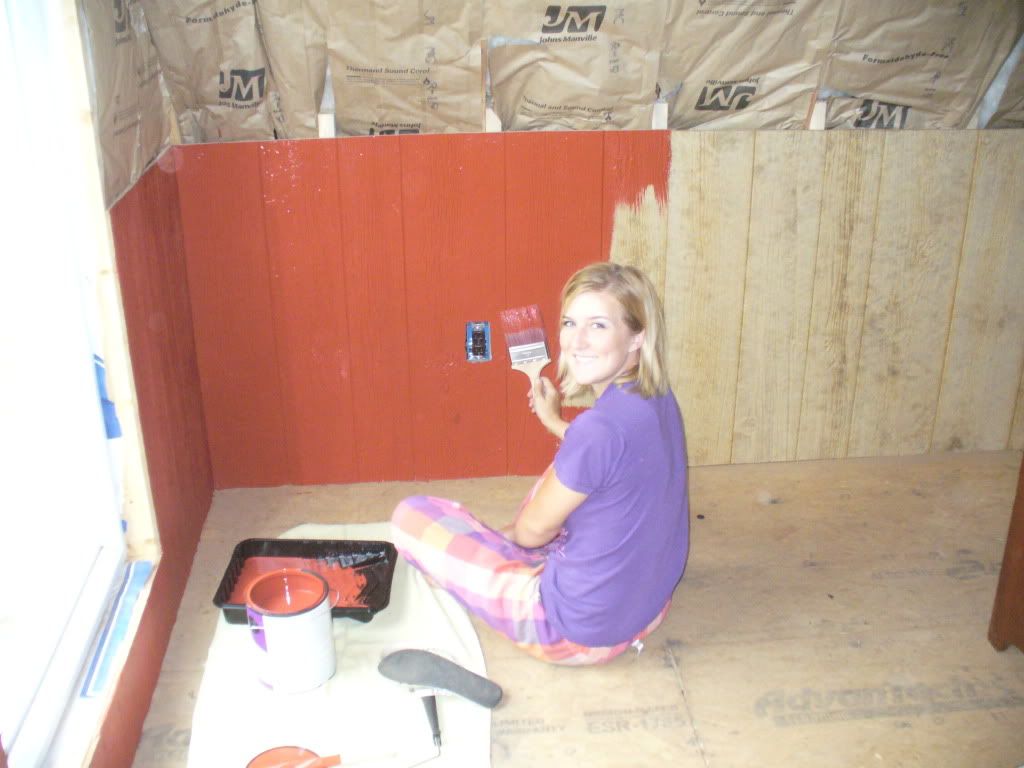
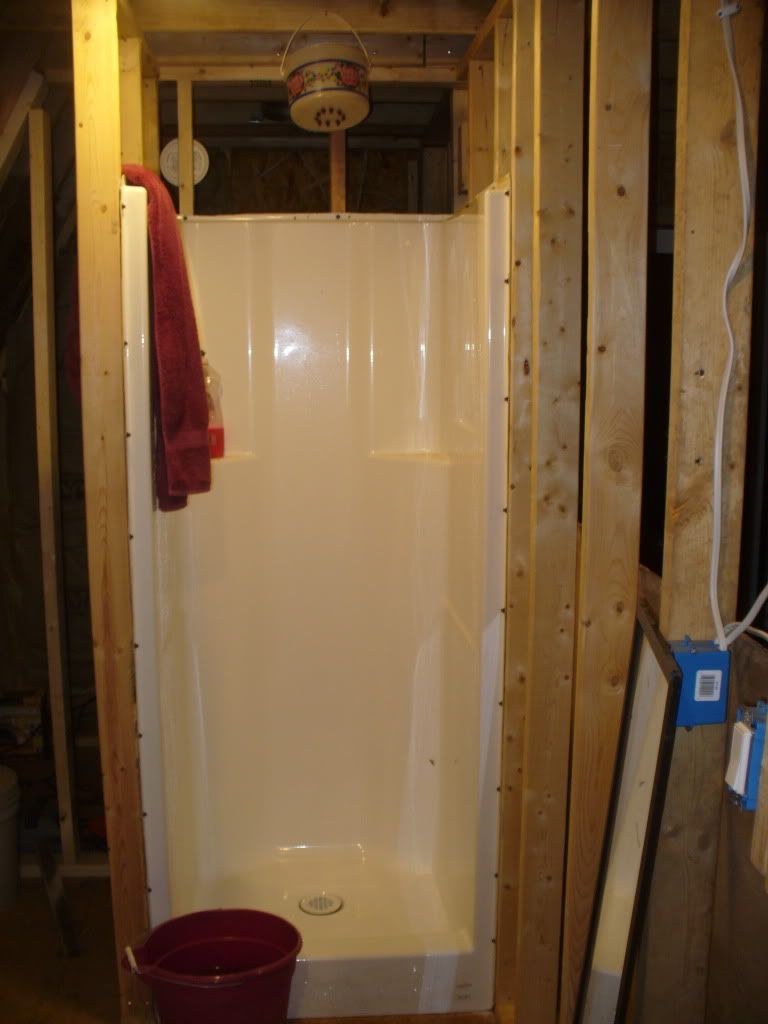
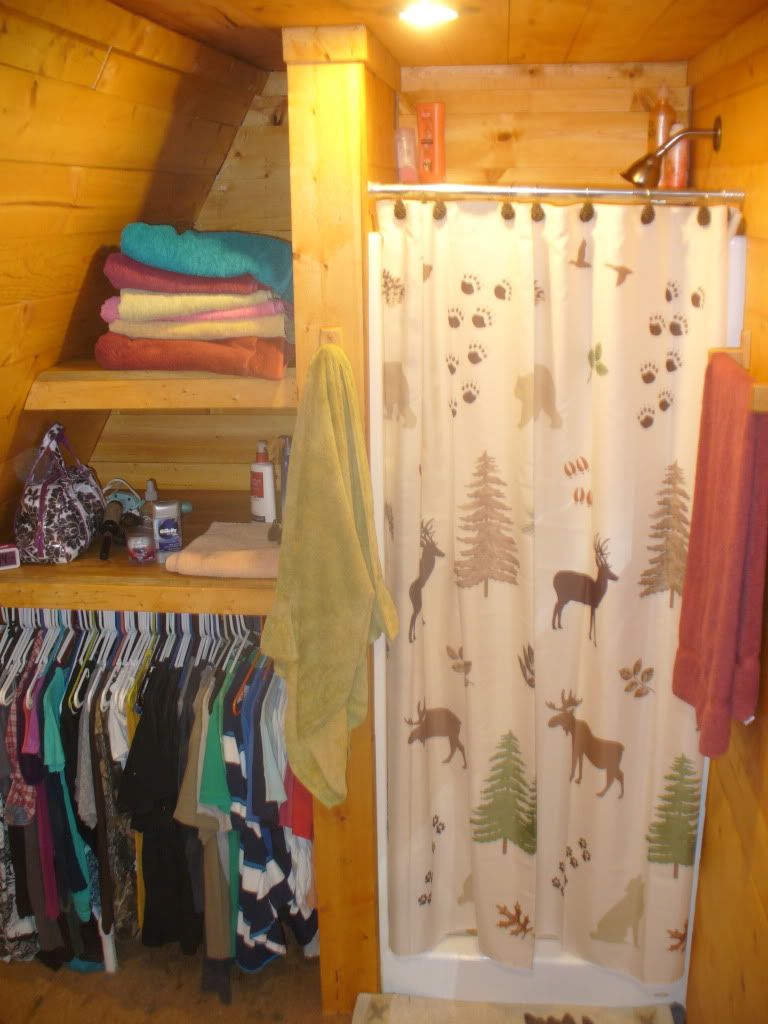
Bathroom
Title: Re: 20x32 A frame cabin Central KY
Post by: phalynx on August 24, 2010, 08:03:04 PM
Post by: phalynx on August 24, 2010, 08:03:04 PM
Wow dude, you need to slow down. You are making some of us look really bad! You have made outstanding progress in such a short time. Is the house warming next week? ;D
Do you have a link to the LED bulbs you used?
Do you have a link to the LED bulbs you used?
Title: Re: 20x32 A frame cabin Central KY
Post by: 325ABN on August 25, 2010, 06:27:59 AM
Post by: 325ABN on August 25, 2010, 06:27:59 AM
Your work ethic is outstanding!
Title: Re: 20x32 A frame cabin Central KY
Post by: astidham on August 25, 2010, 07:18:09 AM
Post by: astidham on August 25, 2010, 07:18:09 AM
Looking good Eagles!!
Title: Re: 20x32 A frame cabin Central KY
Post by: considerations on August 25, 2010, 12:34:02 PM
Post by: considerations on August 25, 2010, 12:34:02 PM
Jiminy Crickets, the good news about that roof is that there is no "air time" before impact if you use it as a slide.
In hot weather you could strap a hose end to the ridge and use it for your own personal water park!
My imaginings are running rampant... ;D
In hot weather you could strap a hose end to the ridge and use it for your own personal water park!
My imaginings are running rampant... ;D
Title: Re: 20x32 A frame cabin Central KY
Post by: bayview on August 25, 2010, 02:18:48 PM
Post by: bayview on August 25, 2010, 02:18:48 PM
You may want to "encase" the batteries with some sort of box and have them vent outside . . .
/.
Title: Re: 20x32 A frame cabin Central KY
Post by: mldrenen on August 25, 2010, 02:49:26 PM
Post by: mldrenen on August 25, 2010, 02:49:26 PM
your progress is impressive. it's really coming along nicely.
one quick question about the roof. i've never installed a metal roof, but i always assumed that you'd want to use some sort of underlayment. did you decide against using one? if so, what was your reasoning?
one quick question about the roof. i've never installed a metal roof, but i always assumed that you'd want to use some sort of underlayment. did you decide against using one? if so, what was your reasoning?
Title: Re: 20x32 A frame cabin Central KY
Post by: Solar Burrito on August 25, 2010, 04:58:31 PM
Post by: Solar Burrito on August 25, 2010, 04:58:31 PM
If you ever need a job, you could show your potential employer this thread as a testament to your work ethic.
Title: Re: 20x32 A frame cabin Central KY
Post by: amollenh on August 26, 2010, 12:34:37 AM
Post by: amollenh on August 26, 2010, 12:34:37 AM
Adorable! That son of yours could be eaten up like a cupcake. Your homestead is awesome. Unfortunate for me I'm still cleaning :( I'm almost done with the outside crap (family hoarder left a piece of property behind). Took me a while but this whole thread of yours is very inspiring and informative. Keep up the good work! People like me need this .info. :) Also, thank you for your service sir.
Title: Re: 20x32 A frame cabin Central KY
Post by: EaglesSJ on August 28, 2010, 01:21:26 AM
Post by: EaglesSJ on August 28, 2010, 01:21:26 AM
Thank you all for the kind comments. I have been trying as hard as I can to get it so we can live more comfortably as we have already moved in. To the question about the lights, here is a link.
http://www.amazon.com/Lights-America-2002LEDP30-65K-LED-Bulb/dp/B001BQ0B4C
Also about the batteries, a box is the next thing on my to do list.
I decided against the tar paper after talking to several roofers in the local area and they said that 1.) with metal it isnt near as important as with shingles and 2.) that as steep of pitch as I am doing it would just be a waste of money because even if I drilled a hole in the metal it would have a hard time leaking because the water will be running off so fast.
Here are a few pics of what I got done since my last post. Sorry I have took so long to update but I have to upload pics/check this thread when I visit folks with internet. I wont have any installed for another week or so.
Title: Re: 20x32 A frame cabin Central KY
Post by: Tom on August 28, 2010, 02:55:10 PM
Post by: Tom on August 28, 2010, 02:55:10 PM
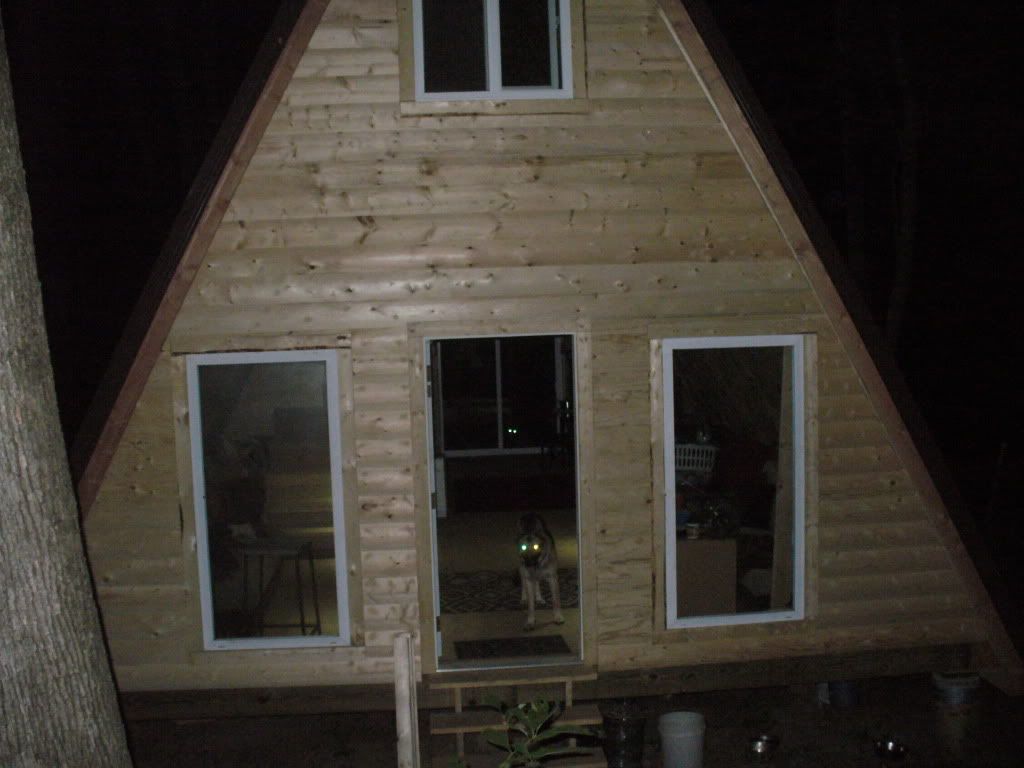
I see that you even installed a home security system... with glowing eyes :o
Title: Re: 20x32 A frame cabin Central KY
Post by: Texas Tornado on August 30, 2010, 09:37:40 AM
Post by: Texas Tornado on August 30, 2010, 09:37:40 AM
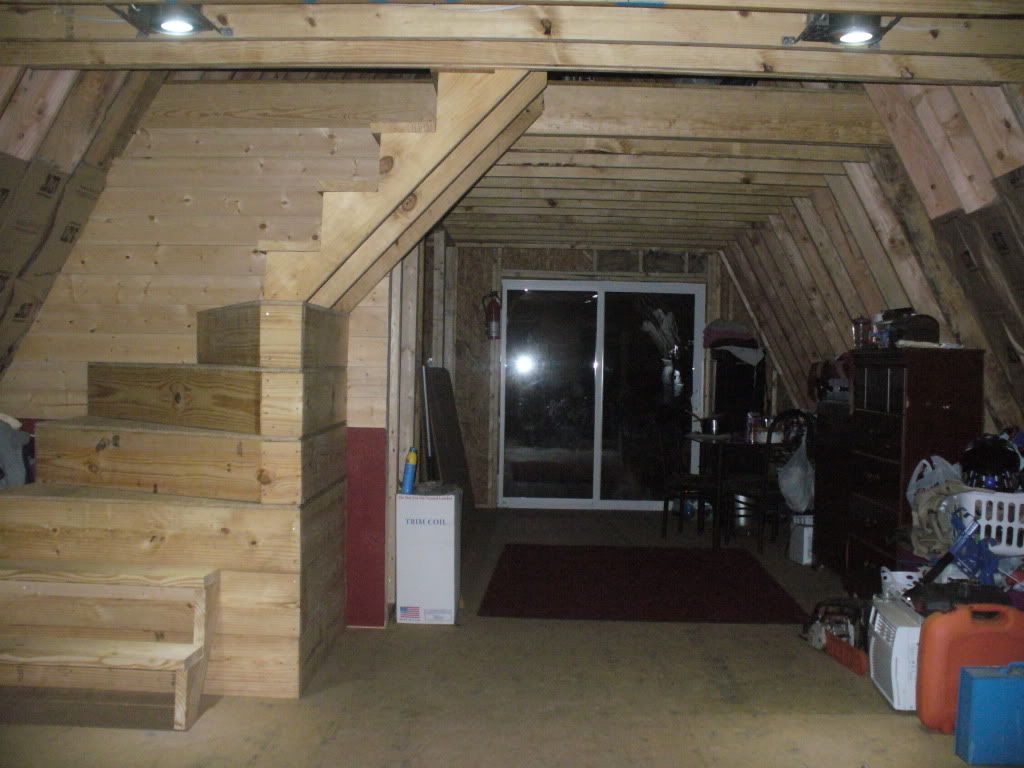
I like the way the stairs are!!!
Title: Re: 20x32 A frame cabin Central KY
Post by: ben2go on September 05, 2010, 11:50:39 PM
Post by: ben2go on September 05, 2010, 11:50:39 PM
Freekin shweet howse.Cute kid and wife.My wife is from Slemp,KY,one of the mining villages in SE region.
Title: Re: 20x32 A frame cabin Central KY
Post by: speedfunk on September 06, 2010, 12:48:42 PM
Post by: speedfunk on September 06, 2010, 12:48:42 PM
Dude, you are moving !! wow.
When I saw your roof without felt paper I thought the same thing. Being that steep there won't be much moisture that will stay on there very long. The only issue you could have is the seems of the sheets of wood. Not a big deal if you ever needed to add it either.
looks awesome! A very cool looking A frame.
Title: Re: 20x32 A frame cabin Central KY
Post by: EaglesSJ on September 06, 2010, 01:24:10 PM
Post by: EaglesSJ on September 06, 2010, 01:24:10 PM
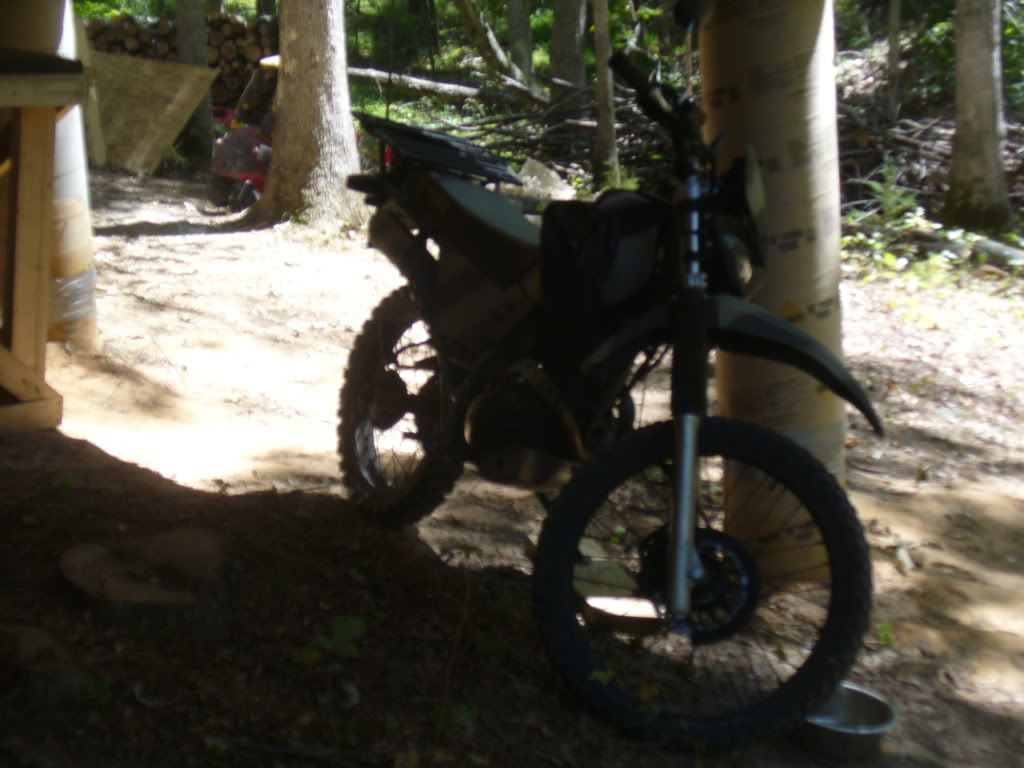
well we are starting to slow up a bit as money is getting kinda tight now that we spent about 10k. But here are the latest progress pics. I got water ran up to right under the cabin and we need to get a pump and pressure tank. Ordered my tankless water heater last night and cut the saplings today to make my back porch railing. Skinned about half of them and now were headed to lowes to get some stain for the exterior and some paint for the table I built to feed the squirrels and such off of. My son is loving his new found freedom in the woods to roam and explore. I also picked up a "survival vehicle" pretty cheap and painted it in true redneck fashion. Gets 95-105 MPG and goes about 65-70 mph. Not bad.

Title: Re: 20x32 A frame cabin Central KY
Post by: OlJarhead on September 06, 2010, 02:04:47 PM
Post by: OlJarhead on September 06, 2010, 02:04:47 PM
First let me say AWESOME!
For a flyboy you're alright *just razzing ya*. In fact I have to admit you've done what most dream about (including me) -- in a year I'm not where you are! BRAVO!
Second, you mentioned malignant melanoma :( What's the prognosis? Did you receive VA Benefits and disability? I hope that you've had treatment and it was sent into remission my friend. Please let us know.
Lastly, I have to say that you site and build are quite impressive and overall inspiring. Many dream of off the grid living but few actually take the plunge, so when you get done you might want to thank that Aunt ;) after all, you will be free of much of what we are slave to today!
Cheers and well met.
Erik
Title: Re: 20x32 A frame cabin Central KY
Post by: MushCreek on September 06, 2010, 02:32:53 PM
Post by: MushCreek on September 06, 2010, 02:32:53 PM
If any one needed a reason to head out to the woods, the picture with the turtle says it all!
Awesome work on the cabin- you guys are crazy fast!
Awesome work on the cabin- you guys are crazy fast!
Title: Re: 20x32 A frame cabin Central KY
Post by: astidham on September 06, 2010, 06:34:30 PM
Post by: astidham on September 06, 2010, 06:34:30 PM
EaglesSJ, your A-frame is very impressive.
I cant believe how fast it has came together, good work!
I cant believe how fast it has came together, good work!
Title: Re: 20x32 A frame cabin Central KY
Post by: havoc on September 07, 2010, 01:50:07 PM
Post by: havoc on September 07, 2010, 01:50:07 PM
Hey there Jeep buddy,
I followed your thread from the link off your Jeep Forum Profile. Just wanted to say that you have done a great job on the house, and you have a very nice looking family..and how come you haven't posted your gal on the Hottest Wife/Girlfriend thread on jeep Forum??? She's a keeper. [cool]
AS for the house, I have an idea for your water. I was stationed in Okinawa and when we lived off base, we had water rationing. It was during the summer and our house could only have the water on odd numbered days. What the land lord did was put a water tank on the roof of the house. The tank had a float valve that would stop the water from being pumped in when the tank was full. It was like a toilet tank valve. When we were on the odd numbered days our tank would fill up so that on the even numbered days we would have water.
Now where I am going with this is water pressure..with the tank higher than the rest of the house we always had good water pressure for doing dishes, showering and whatnot. Since your already pumping water up hill from your spring, why not put your water tank up on some stilts next to the house out back. As long as it's higher than your shower head and faucets you'd have good water pressure and wouldn't have to worry about an additional pump in the house tank. You could rig the level switch to kick the pump on or off for the pump at the bottom of the hill down at the spring. If you know anything about plumbing, I do not, or you know a plumber get with him/her about pipe reduction. I believe that you could have like a 2 inch pipe coming out of the elevated tank and then reduce it down to 1 inch at each faucet to get you even more pressure.
Good Luck and keep us posted!
Your keep buddy,
Mike
havoc64
Title: Re: 20x32 A frame cabin Central KY
Post by: OlJarhead on September 07, 2010, 02:56:33 PM
Post by: OlJarhead on September 07, 2010, 02:56:33 PM
Quote from: havoc on September 07, 2010, 01:50:07 PM
Hey there Jeep buddy,
I followed your thread from the link off your Jeep Forum Profile. Just wanted to say that you have done a great job on the house, and you have a very nice looking family..and how come you haven't posted your gal on the Hottest Wife/Girlfriend thread on jeep Forum??? She's a keeper. [cool]
AS for the house, I have an idea for your water. I was stationed in Okinawa and when we lived off base, we had water rationing. It was during the summer and our house could only have the water on odd numbered days. What the land lord did was put a water tank on the roof of the house. The tank had a float valve that would stop the water from being pumped in when the tank was full. It was like a toilet tank valve. When we were on the odd numbered days our tank would fill up so that on the even numbered days we would have water.
Now where I am going with this is water pressure..with the tank higher than the rest of the house we always had good water pressure for doing dishes, showering and whatnot. Since your already pumping water up hill from your spring, why not put your water tank up on some stilts next to the house out back. As long as it's higher than your shower head and faucets you'd have good water pressure and wouldn't have to worry about an additional pump in the house tank. You could rig the level switch to kick the pump on or off for the pump at the bottom of the hill down at the spring. If you know anything about plumbing, I do not, or you know a plumber get with him/her about pipe reduction. I believe that you could have like a 2 inch pipe coming out of the elevated tank and then reduce it down to 1 inch at each faucet to get you even more pressure.
Good Luck and keep us posted!
Your keep buddy,
Mike
havoc64
Wait, what? I'm a JeepForum member too....I'll have to pop over there and see which thread you're chatting about :)
COOL
Also MountainDon is a Jeep nut too
Title: Re: 20x32 A frame cabin Central KY
Post by: MountainDon on September 07, 2010, 03:51:51 PM
Post by: MountainDon on September 07, 2010, 03:51:51 PM
w* havoc
I have a box full of nuts from old Jeeps. ;D
On the water pressure from an elevated tank...
Reducing larger pipes down to smaller does not increase pressure. Pressure is totally dependent on the height of the water column; 0.43 psi per foot of water column height. That could be a 4 foot diameter tank or a one inch diameter pipe. If both are 20 feet high you will have 8.6 pounds of pressure at the bottom. A large pipe will increase volume. When the large pipe goes into a smaller pipe the will be a short spurt of increased flow when the small diameter faucet is opened but that will quickly be reduced to the same pressure. Sometimes increased flow will make up for the low pressure; that would require a large pipe all the way.
Title: Re: 20x32 A frame cabin Central KY
Post by: havoc on September 07, 2010, 04:46:26 PM
Post by: havoc on September 07, 2010, 04:46:26 PM
Thanks for correction Mountain Don...like I said..I am not a plumber...although the wife makes me try to be one..she makes me try all kinds of things, Plumbing, Electrical work, Roofing, painting, landscaping..... :-\
Yea all I know about the tank and plumbing of it is what I saw on the roof...I had to climb up there to check the float thing as it was over flowing with water. The land lord wanted to know if the float was stuck before a maintenance man was dispatched...lol..man there's another woman trying to get me to do stuff I am not trained on...lol
Well have a good one!
mike
Title: Re: 20x32 A frame cabin Central KY
Post by: Solar Burrito on September 07, 2010, 07:13:01 PM
Post by: Solar Burrito on September 07, 2010, 07:13:01 PM
Reducing the pipe size might not increase the pressure technically but it speeds up the water making feel like a shower. I'm planing on doing a similar system with a tank on the hill but haven't started besides putting the tank on the hill. I plan to use 1.5" pipe going down the hill to try to get more power. Maybe it dosen't matter but it's better to have more water than Less I think...
If you do something like this take some pics. That toilet valve float idea sound cool. When I lived in Mexico we had a tank on the roof too, it was the water heater also :)
If you do something like this take some pics. That toilet valve float idea sound cool. When I lived in Mexico we had a tank on the roof too, it was the water heater also :)
Title: Re: 20x32 A frame cabin Central KY
Post by: texasgun on September 08, 2010, 10:00:19 AM
Post by: texasgun on September 08, 2010, 10:00:19 AM
Instead of the toilet float go to tractor supply and get a brass water trough float lasts alot longer. ;D
Title: Re: 20x32 A frame cabin Central KY
Post by: EaglesSJ on September 08, 2010, 12:26:38 PM
Post by: EaglesSJ on September 08, 2010, 12:26:38 PM
Thank you all for your kind comments. As for the melanoma, it went into full remission I still go in for check ups every couple months for the next 5 years to make sure it stays gone. I receive full VA care. As for the situation with my aunt, everyday I wake up to the sound of woodpeckers and watch the hummingbirds and squirrels eating from my feeders I am very thankful that things worked out how they did.
In later news I picked up a tiny little diesel generator for $300 that uses basically no fuel at all that I can charge my batteries with while im saving up for the solar panels. Were thrilled to have it as the gas generator we have used a ton of fuel. Sorry for the short reply but were headed to lowes to purchase some kitchen cabinets, a bathroom sink, and a few other things. I will update with pics soon.
In later news I picked up a tiny little diesel generator for $300 that uses basically no fuel at all that I can charge my batteries with while im saving up for the solar panels. Were thrilled to have it as the gas generator we have used a ton of fuel. Sorry for the short reply but were headed to lowes to purchase some kitchen cabinets, a bathroom sink, and a few other things. I will update with pics soon.
Title: Re: 20x32 A frame cabin Central KY
Post by: EaglesSJ on September 08, 2010, 02:00:33 PM
Post by: EaglesSJ on September 08, 2010, 02:00:33 PM
Quote from: havoc on September 07, 2010, 01:50:07 PM
Hey there Jeep buddy,
I followed your thread from the link off your Jeep Forum Profile. Just wanted to say that you have done a great job on the house, and you have a very nice looking family..and how come you haven't posted your gal on the Hottest Wife/Girlfriend thread on jeep Forum??? She's a keeper. [cool]
AS for the house, I have an idea for your water. I was stationed in Okinawa and when we lived off base, we had water rationing. It was during the summer and our house could only have the water on odd numbered days. What the land lord did was put a water tank on the roof of the house. The tank had a float valve that would stop the water from being pumped in when the tank was full. It was like a toilet tank valve. When we were on the odd numbered days our tank would fill up so that on the even numbered days we would have water.
Now where I am going with this is water pressure..with the tank higher than the rest of the house we always had good water pressure for doing dishes, showering and whatnot. Since your already pumping water up hill from your spring, why not put your water tank up on some stilts next to the house out back. As long as it's higher than your shower head and faucets you'd have good water pressure and wouldn't have to worry about an additional pump in the house tank. You could rig the level switch to kick the pump on or off for the pump at the bottom of the hill down at the spring. If you know anything about plumbing, I do not, or you know a plumber get with him/her about pipe reduction. I believe that you could have like a 2 inch pipe coming out of the elevated tank and then reduce it down to 1 inch at each faucet to get you even more pressure.
Good Luck and keep us posted!
Your keep buddy,
Mike
havoc64
Hey there! This is Shanes fiance :)
I wanted to start off by saying thank you for the compliment, that was very sweet of you! He has put me on that thread before, but its been awhile because we dont have internet where we live right now. I think we are going to end up having to get a cable dug down to the cabin, but we really dont want to have to do that. Weve gone so much out of the way to make the cabin off the grid i just feel that would defeat the purpose lol. Any other ideas about internet anyone?
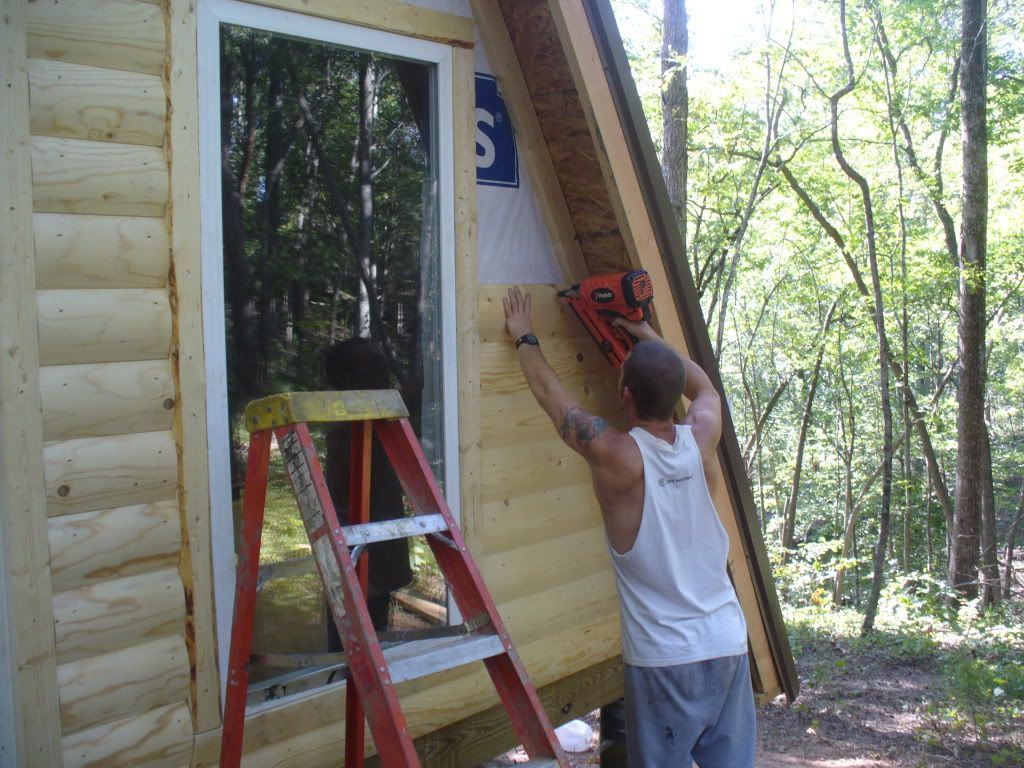
Shane has done such a great job working on our home, im a very lucky girl to have someone so devoted to his family to work so hard like he does. Ive been the photographer for most of the projects hes been doing, but ive helped as much as I could, keeping him fed and cleaning as much as I could. We both filled in the nail holes and sanded them down before we stained the siding yesterday. Amazing how different it looks with just a little stain. We finished painting the outdoor windows today too. I cant wait to get my kitchen in, ive missed cooking! :P
Anyways, just wanted to put my input on here, I know shane mostly does this thread. He really appreciates everyones advice and motivational words, makes him feel very good about all he has done! Thanks again guys!
-Lindsay
Title: Re: 20x32 A frame cabin Central KY
Post by: ben2go on September 08, 2010, 07:17:26 PM
Post by: ben2go on September 08, 2010, 07:17:26 PM
Broad band thru a satellite TV provider.A wireless internet hub thru a cell phone company,if you have service there.I have no service in the mountains of KY.Cable internet would have fastest data speeds and be a more stable connection.
Title: Re: 20x32 A frame cabin Central KY
Post by: phalynx on September 08, 2010, 07:18:34 PM
Post by: phalynx on September 08, 2010, 07:18:34 PM
Wild Blue is a reasonable satellite internet...
Title: Internet Connection in the Sticks..
Post by: havoc on September 09, 2010, 10:47:02 AM
Post by: havoc on September 09, 2010, 10:47:02 AM
Oh yea, I remember the pic, Denim Skirt and Boots at the fair...(acutally I just looked it up..lol)
As for the internet, you could contact your cell phone provider. Most of them now have wireless broadband. I set up a neighbor this way. There's a router that the provider sells that has an air card slot in it. The aircard is the connection to the net like a cable would be normally.
Also a lot of laptop makers can build in GOBI air cards into their laptops. You could go that route as well.
Satellite connections sometimes need a phone line for the upward connection, so that might not be an option.
There's also Microwave in some areas. My Aunt and Uncle use Microwave internet as they are out in the Sticks.
And your both welcome for the complements...
Happy Trails!
mike
Title: Re: 20x32 A frame cabin Central KY
Post by: John Raabe on September 09, 2010, 12:44:45 PM
Post by: John Raabe on September 09, 2010, 12:44:45 PM
I don't know if this might be of interest but it is a way of getting internet through the cell phone network.
Virgin MiFi - http://pogue.blogs.nytimes.com/2010/09/03/more-on-the-virgin-mifi/
Virgin MiFi - http://pogue.blogs.nytimes.com/2010/09/03/more-on-the-virgin-mifi/
Title: Re: 20x32 A frame cabin Central KY
Post by: EaglesSJ on September 09, 2010, 01:01:34 PM
Post by: EaglesSJ on September 09, 2010, 01:01:34 PM
I have tried the internet through wireless companies. Nobody can get a signal to where we live. the nearest tower is 8 miles and because there are so many trees i cant really get anything.
Title: Re: 20x32 A frame cabin Central KY
Post by: phalynx on September 09, 2010, 02:21:21 PM
Post by: phalynx on September 09, 2010, 02:21:21 PM
Satellite companies do NOT require a phone line. They are 2-way dishes. They can be an easy solution.
Title: Re: 20x32 A frame cabin Central KY
Post by: MountainDon on September 09, 2010, 02:36:51 PM
Post by: MountainDon on September 09, 2010, 02:36:51 PM
Some used to in the old, early days of sat dish internet.
Title: Re: 20x32 A frame cabin Central KY
Post by: HomeschoolMom on September 09, 2010, 05:37:25 PM
Post by: HomeschoolMom on September 09, 2010, 05:37:25 PM
Wow! I am glad I decided to poke my head into this thread tonight. You move fast! :)
We use a mobile broadband card in an area with horrible service. We added a trucker antenna and an amplifier and we get pretty good internet. Not sure if that is an option or if it is something you want to invest in only to be unsure if it will work or not. But an idea.
Keep up the good work!
We use a mobile broadband card in an area with horrible service. We added a trucker antenna and an amplifier and we get pretty good internet. Not sure if that is an option or if it is something you want to invest in only to be unsure if it will work or not. But an idea.
Keep up the good work!
Title: Re: 20x32 A frame cabin Central KY
Post by: EaglesSJ on September 20, 2010, 08:37:41 PM
Post by: EaglesSJ on September 20, 2010, 08:37:41 PM
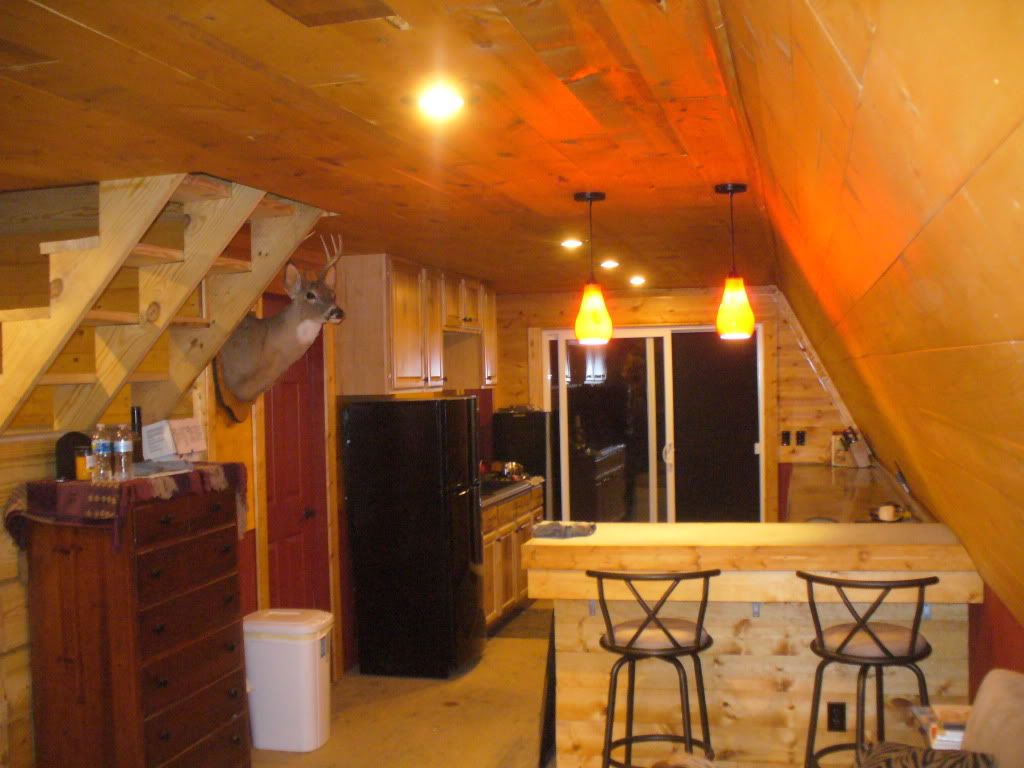
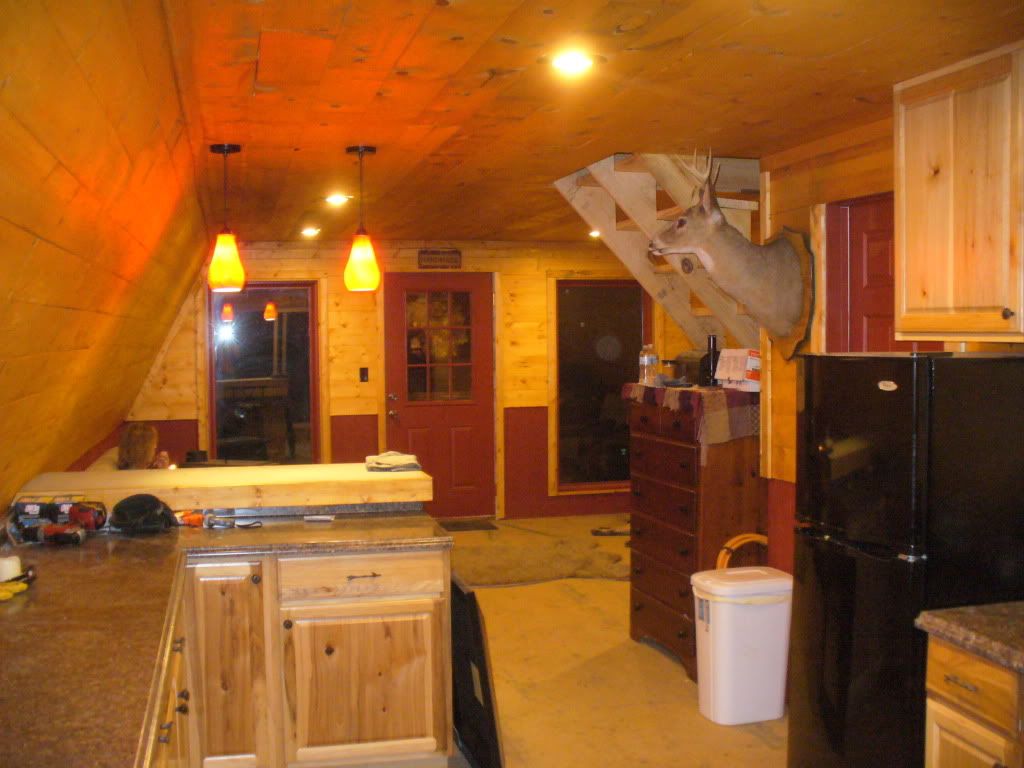
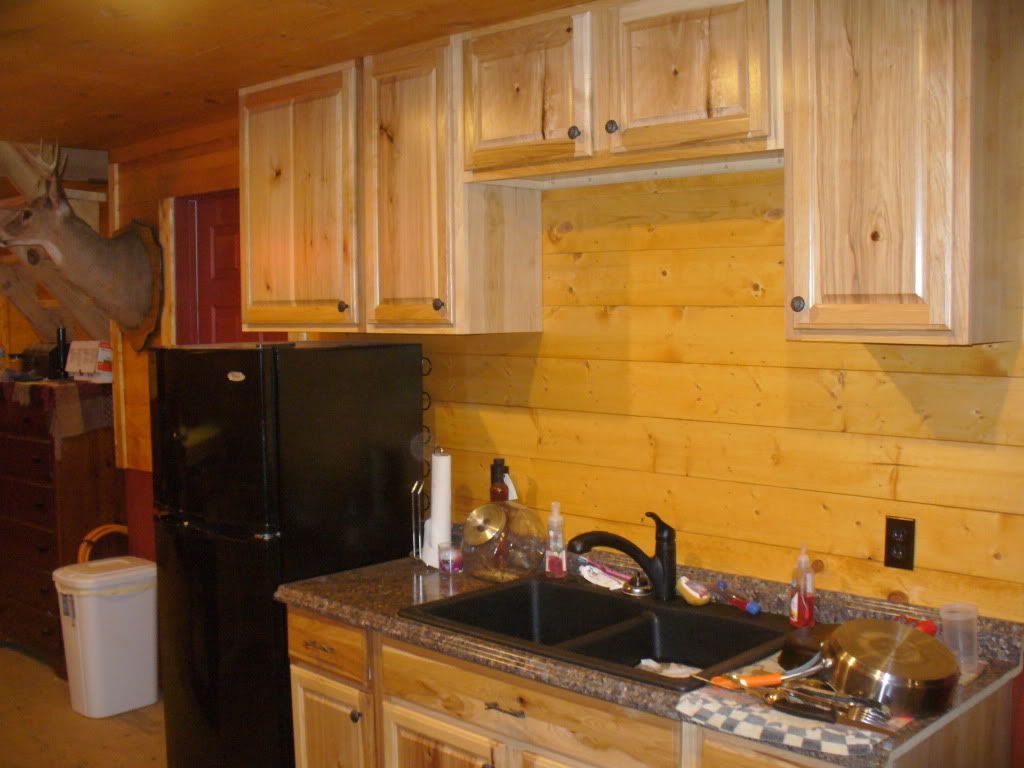
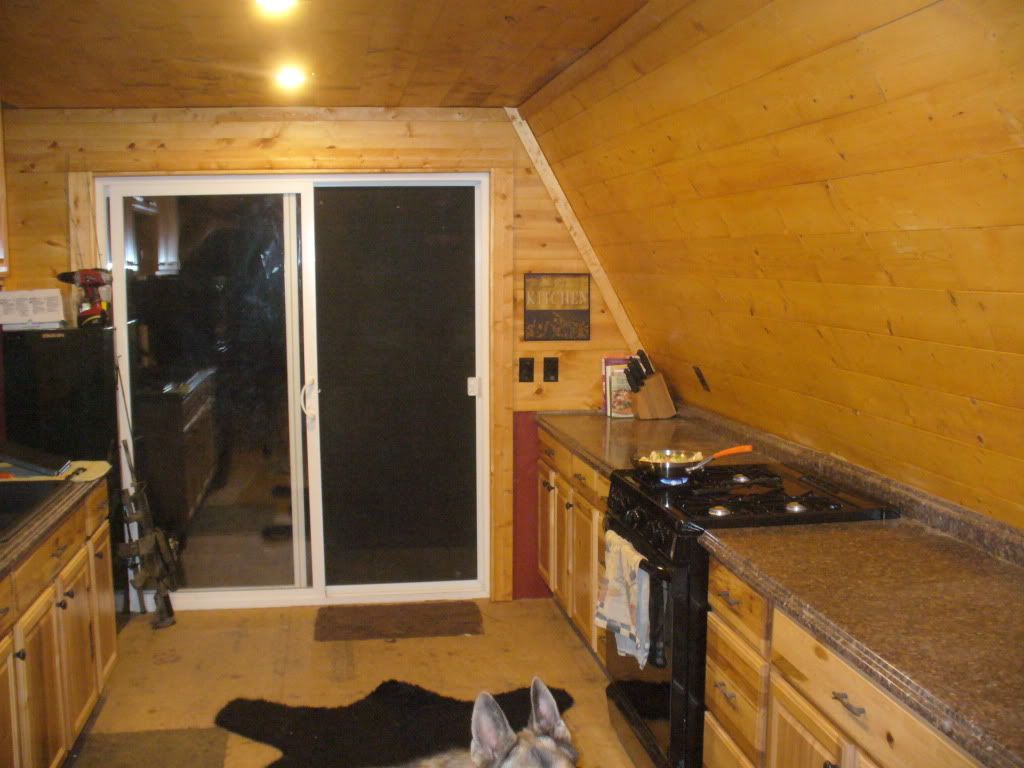
Been awhile but I have been super busy. We still need to put down flooring but here are some progress pics. We got hot water, washing machine, and everything else installed also. Here is a pic of the living room and kitchen. Cabinets are hickory with little bronze twigs and leaves for knobs and handles. any questions feel free to ask.
Title: Re: 20x32 A frame cabin Central KY
Post by: bayview on September 20, 2010, 08:47:24 PM
Post by: bayview on September 20, 2010, 08:47:24 PM
Your progress is amazing! Congratulations . . . Job well done!
/.
Title: Re: 20x32 A frame cabin Central KY
Post by: ben2go on September 20, 2010, 09:03:31 PM
Post by: ben2go on September 20, 2010, 09:03:31 PM
Looking awesome.Like the openess of the main floor.
Title: Re: 20x32 A frame cabin Central KY
Post by: phalynx on September 20, 2010, 10:31:31 PM
Post by: phalynx on September 20, 2010, 10:31:31 PM
Looks good. I see a cookie jar too!!!!! Kitchen is now perfect....
Title: Re: 20x32 A frame cabin Central KY
Post by: astidham on September 21, 2010, 03:44:58 PM
Post by: astidham on September 21, 2010, 03:44:58 PM
Very nice work Eagles.
Where is your stove at by the way?
Where is your stove at by the way?
Title: Re: 20x32 A frame cabin Central KY
Post by: EaglesSJ on September 23, 2010, 01:04:04 PM
Post by: EaglesSJ on September 23, 2010, 01:04:04 PM
Quote from: astidham on September 21, 2010, 03:44:58 PM
Very nice work Eagles.
Where is your stove at by the way?
I just installed it last night. It is on the right side of the kitchen across from the fridge. ill get some more pics.
Title: Re: 20x32 A frame cabin Central KY
Post by: Tickhill on September 24, 2010, 04:12:31 AM
Post by: Tickhill on September 24, 2010, 04:12:31 AM
Awesome work on the cabin! Just a note on internet service, I had HughesNet for 18 months before we got DSL and really had no problems. Had to switch satellites one time because the bird broke but a service tech came out and took care of it. Being off grid, you would not have to worry so much about the Fair Access Policy, you probably would not be YouTubing off of batteries. If you exceed your download quota, based on package, they will throttle your bandwidth down to about dial speed for 24 hours. This happened to us 3 times during the 18 months.
Title: Re: 20x32 A frame cabin Central KY
Post by: EaglesSJ on October 12, 2010, 01:13:54 PM
Post by: EaglesSJ on October 12, 2010, 01:13:54 PM
A few more pics, were slowing up a bit. Been spending alot of time cutting and splitting wood. Were hoping to lay the linoleum and hardwood flooring in the kitchen and living room respectively this weekend.
Hand peeled log railing I been working at.
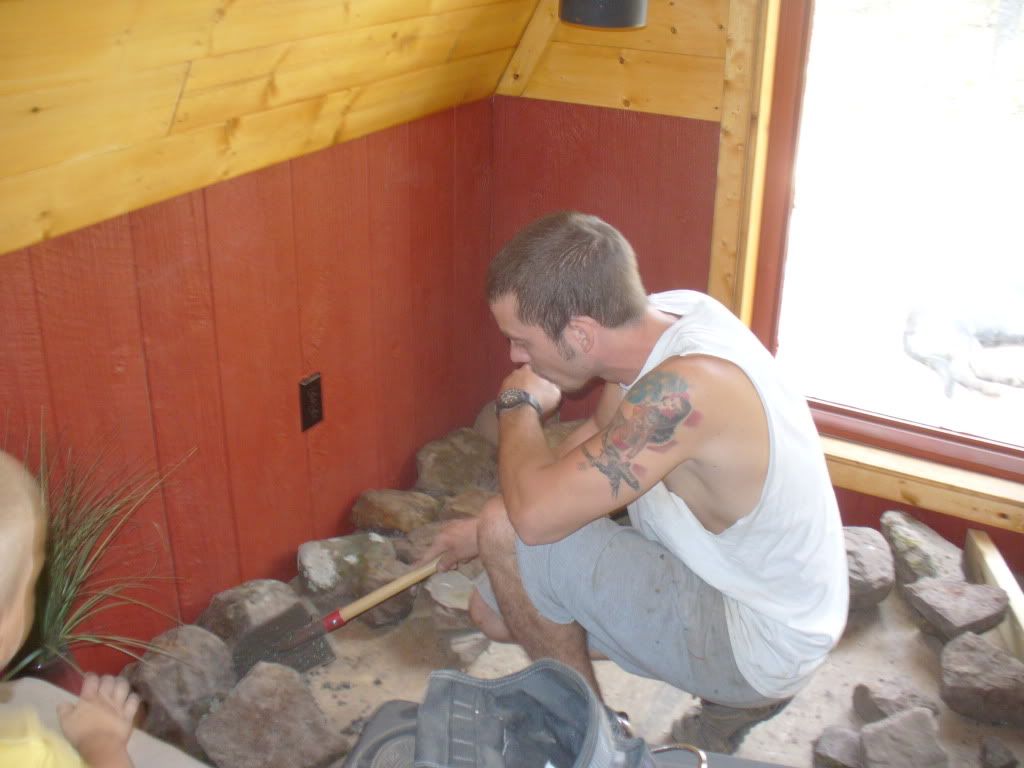
Rock fireplace
A couple others.
Hand peeled log railing I been working at.
Rock fireplace
A couple others.
Title: Re: 20x32 A frame cabin Central KY
Post by: nathan.principe on October 12, 2010, 01:52:52 PM
Post by: nathan.principe on October 12, 2010, 01:52:52 PM
Ive been following your thread for quite a long time now but this is my first post on it, so let me just say VERY IMPRESSIVE! I think you were a contractor in another life. Great design and great execution
Title: Re: 20x32 A frame cabin Central KY
Post by: bayview on October 12, 2010, 02:05:01 PM
Post by: bayview on October 12, 2010, 02:05:01 PM
You really have made this house a home! Congratulations!
It looks like you really have it all together . . .
A handsome young woods-man you have there!
/.
Title: Re: 20x32 A frame cabin Central KY
Post by: phalynx on October 12, 2010, 10:30:45 PM
Post by: phalynx on October 12, 2010, 10:30:45 PM
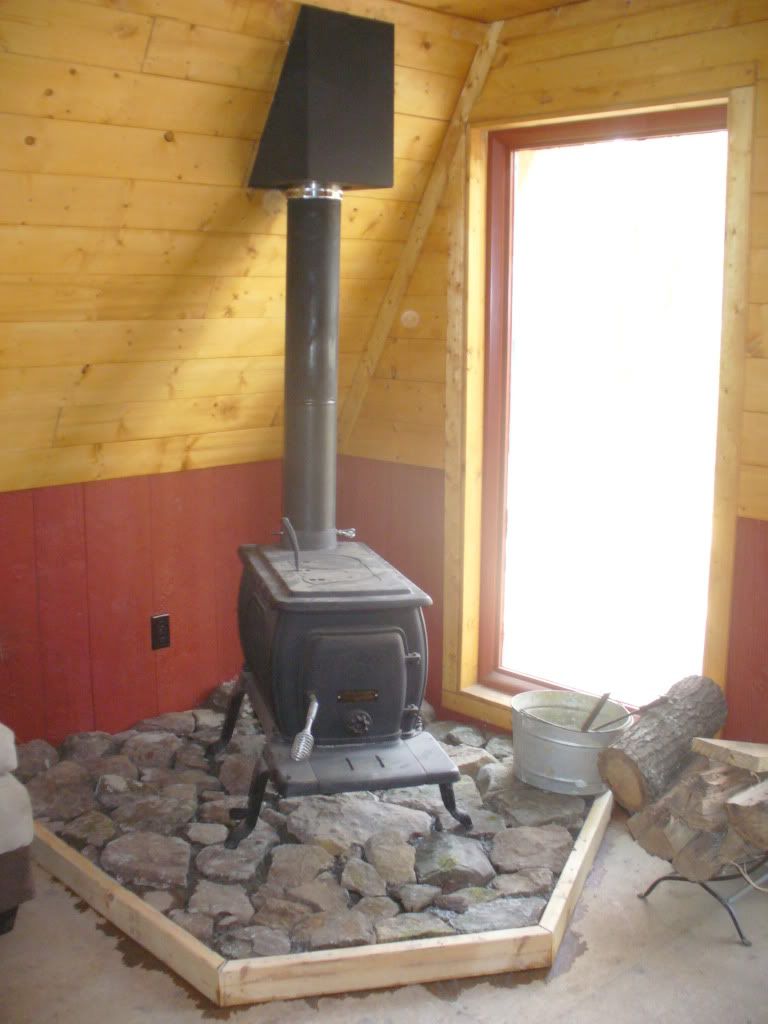
Great job. I would be happy living in there! I will point out one thing, you should put something on the wall/ceiling above the stove to protect the wood from the heat. It will dry the wood out quickly and cause it to catch fire quickly. It may already be in your plans.
Title: Re: 20x32 A frame cabin Central KY
Post by: MountainDon on October 12, 2010, 10:37:40 PM
Post by: MountainDon on October 12, 2010, 10:37:40 PM
Quote from: phalynx on October 12, 2010, 10:30:45 PMI will point out one thing, you should put something on the wall/ceiling above the stove to protect the wood from the heat.
That could be done with a metal sheet with a 3/4 to 1 inch air space behind it. Good point phalynx.
Also that is something that should be done with the wood stove and chimney. The black pipe is actually way too close to combustible material by the looks of it. It is usually recommended that black single wall pipe be kept 18 inches from combustibles. Less is possible with heat shields or special double wall pipe. What clearance recommendations came with that wood stove? It also seems rather close to the walls which appear to be wood. ??? Nice looking wood though. :D
Title: Re: 20x32 A frame cabin Central KY
Post by: phalynx on October 13, 2010, 08:26:04 AM
Post by: phalynx on October 13, 2010, 08:26:04 AM
I like the AR-15 too. 8)
Title: Re: 20x32 A frame cabin Central KY
Post by: EaglesSJ on October 14, 2010, 10:00:28 PM
Post by: EaglesSJ on October 14, 2010, 10:00:28 PM
Thanks for all the compliments and concerns all. The safe distance that came with the stove is 18" However the flashpoint for "wood" is about 430 degrees if I remember correctly. Even with the hottest fire I have burned so far the wood right up next to the pipe only gets to about 170 degrees F. This may be that I am not burning as hot a fire as I think. Not sure. But it is well below the flashpoint at which wood begins to char. I shot the temp with a laser to get my findings. I am assuming its pretty accurate. Any comments??? Always want to stay on the safe side but the wood stove couldnt get any more clearance because of 1. my sons room upstairs and 2. it would have been out in the middle of the floor down here.
Title: Re: 20x32 A frame cabin Central KY
Post by: EaglesSJ on October 14, 2010, 10:13:39 PM
Post by: EaglesSJ on October 14, 2010, 10:13:39 PM
A few more pics. Hard to believe I went from raking leaves to square off a plot on a hill to what I have now in less than 3 months.
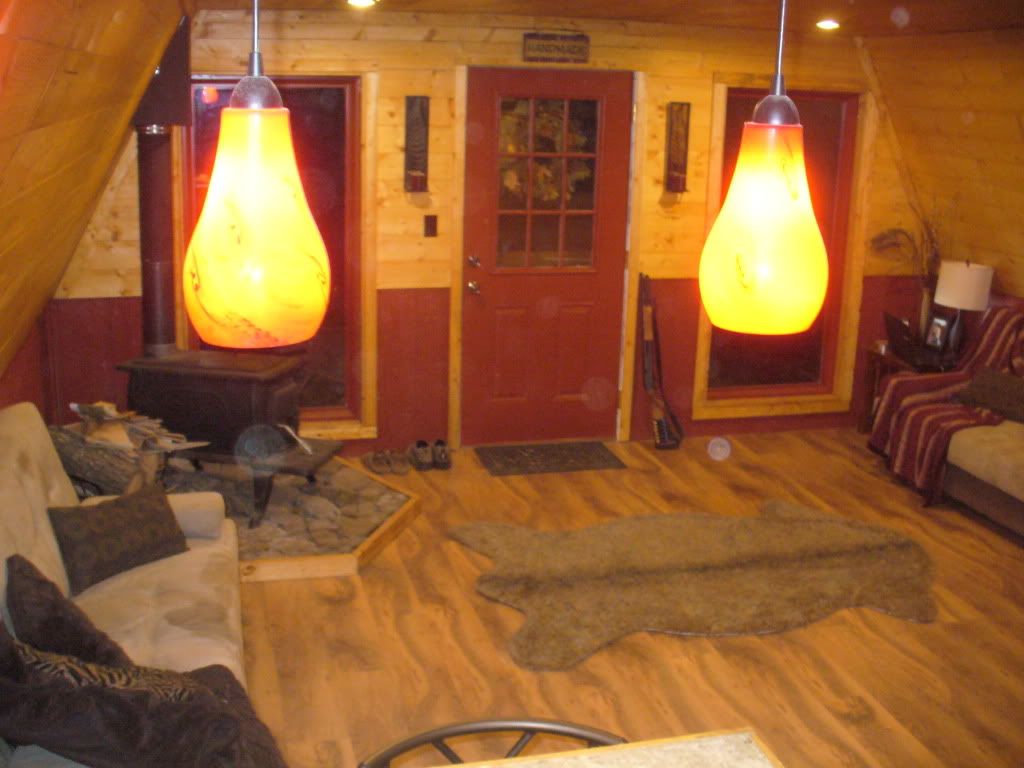
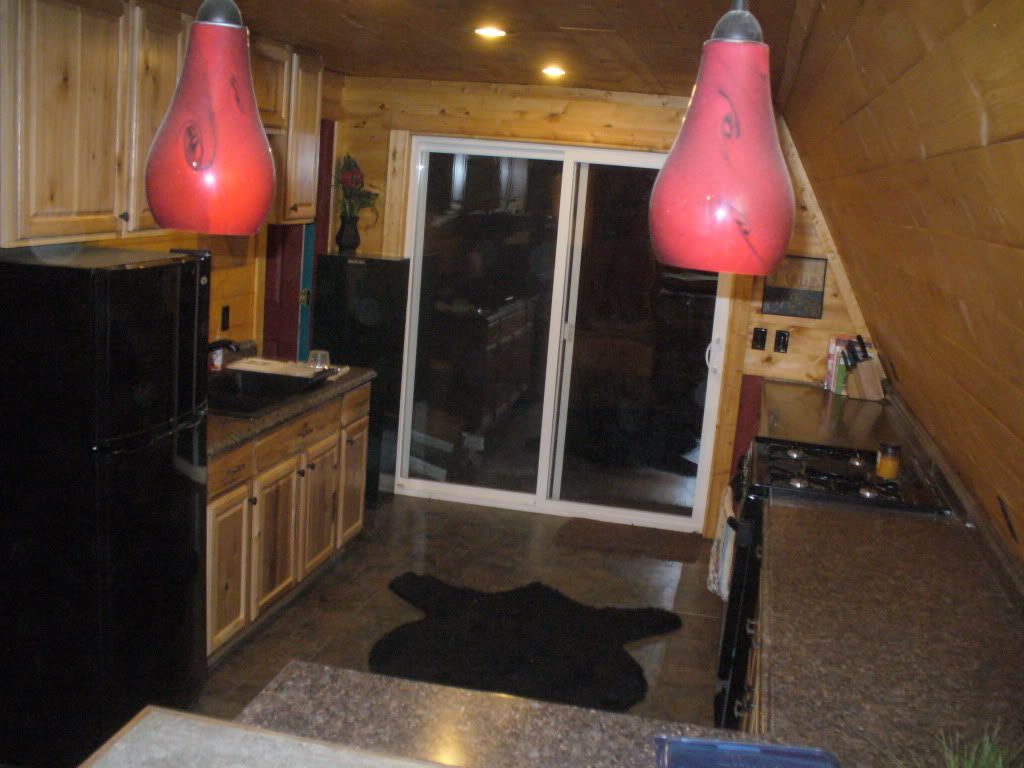
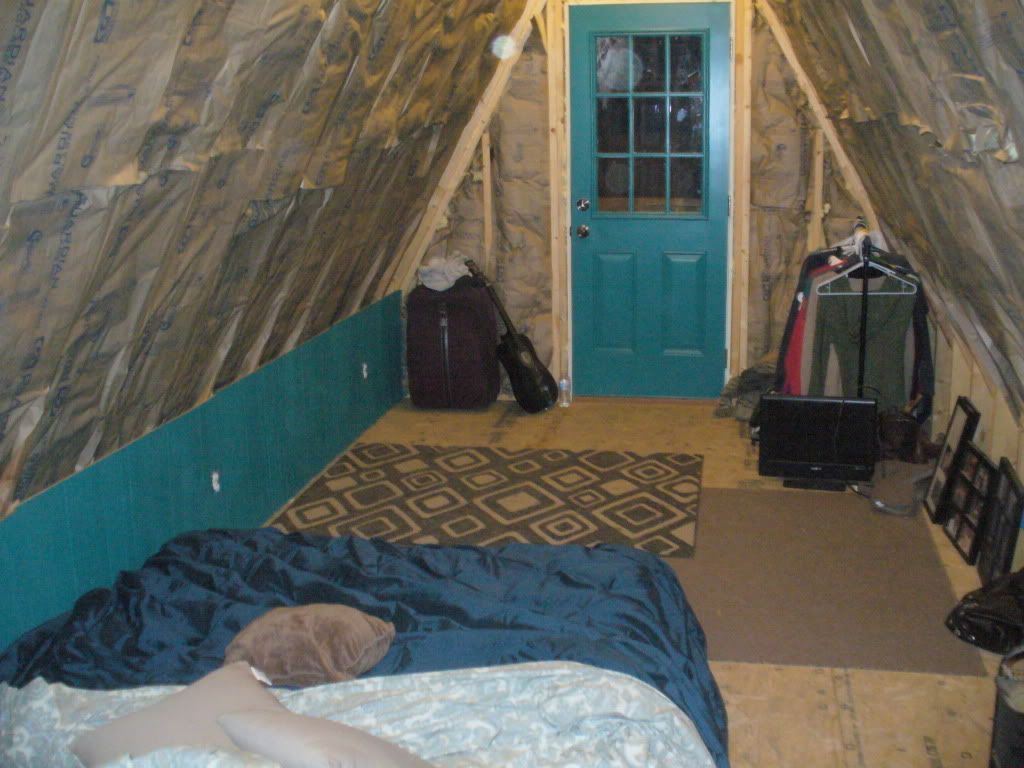
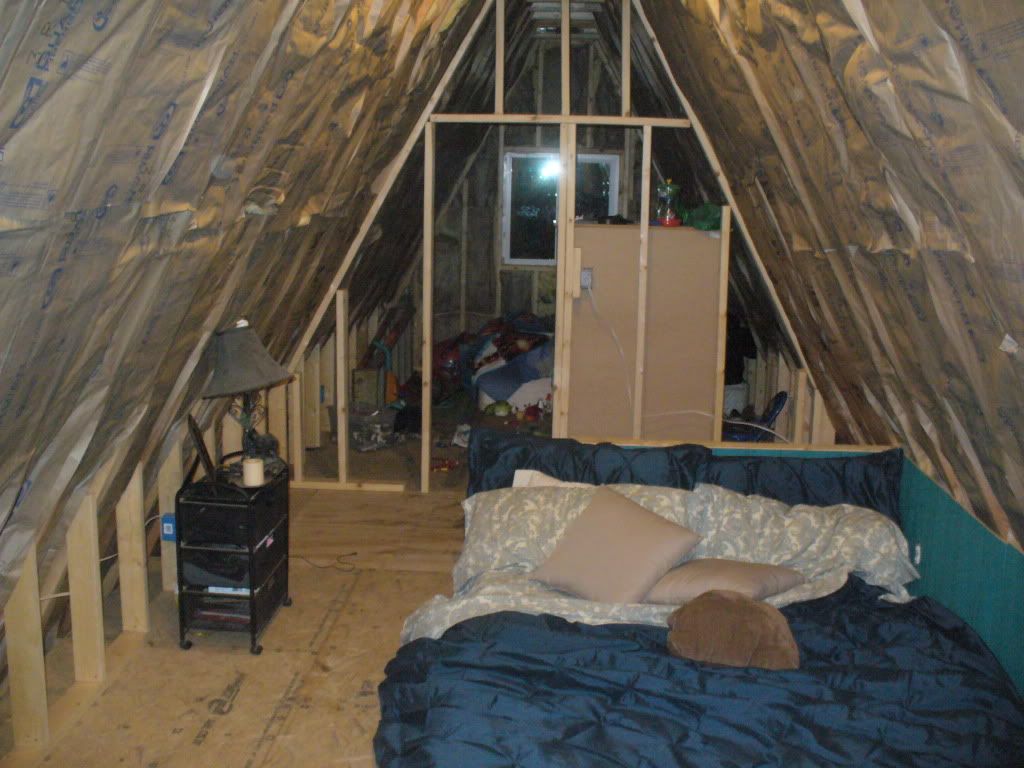
Title: Re: 20x32 A frame cabin Central KY
Post by: rick91351 on October 14, 2010, 10:30:20 PM
Post by: rick91351 on October 14, 2010, 10:30:20 PM
Wow great job. About the stove and piping I think I would follow Mt. Don's advice. But then I am very paranoid about fire. I have lost a friend in a house fire and went through one as a child as well, however neither were caused by wood stoves. (Both electrical.) Just no sense taking chances. That said we do heat mostly with wood and I do feel it can be safe.
Title: Re: 20x32 A frame cabin Central KY
Post by: MountainDon on October 14, 2010, 10:36:21 PM
Post by: MountainDon on October 14, 2010, 10:36:21 PM
Yes, you certainly have done a lot in a relatively short time. :)
Flash point is one thing to be concerned about. There's an old thread around here on the subject of the dangers of exposing wood to medium levels, even low levels of heat, over prolonged periods of time. However, I have not had much luck finding it. The other, lesser known, concern centers around the formation of pyrophoric carbon under long term low temperature exposure of wood.
So to cut to the chase here's a link that will prove educational. It's a PDF, 571 KB.
http://www.doctorfire.com/low_temp_wood1.pdf (http://www.doctorfire.com/low_temp_wood1.pdf)
There is also a second companion file http://www.doctorfire.com/low_temp_wood2.pdf (http://www.doctorfire.com/low_temp_wood2.pdf)
Plus here's a forest service lab report...
http://www.nakedwhiz.com/eggbase/fplr1464.pdf (http://www.nakedwhiz.com/eggbase/fplr1464.pdf)
Google books....
http://books.google.com/books?id=vopAAAAAYAAJ&pg=PA41&lpg=PA41&dq=heat+charring+of+wood+steam+heat&source=bl&ots=myx-_uqvIC&sig=FZahOG0e5dGwDFIGQSv5nsE1V1I&hl=en&ei=vcq3TJyzNYO78gaEsvn5CQ&sa=X&oi=book_result&ct=result&resnum=4&sqi=2&ved=0CCEQ6AEwAw#v=onepage&q=heat%20charring%20of%20wood%20steam%20heat&f=false (http://books.google.com/books?id=vopAAAAAYAAJ&pg=PA41&lpg=PA41&dq=heat+charring+of+wood+steam+heat&source=bl&ots=myx-_uqvIC&sig=FZahOG0e5dGwDFIGQSv5nsE1V1I&hl=en&ei=vcq3TJyzNYO78gaEsvn5CQ&sa=X&oi=book_result&ct=result&resnum=4&sqi=2&ved=0CCEQ6AEwAw#v=onepage&q=heat%20charring%20of%20wood%20steam%20heat&f=false)
another...
http://www.interfire.org/res_file/fseab_si.asp (http://www.interfire.org/res_file/fseab_si.asp)
The thread I was looking for came up as a result of a fire at Reed college, if my brain is working......
......
...... Ta-da!!!!
http://countryplans.com/smf/index.php?topic=4332.0 (http://countryplans.com/smf/index.php?topic=4332.0)
Title: Re: 20x32 A frame cabin Central KY
Post by: bayview on October 15, 2010, 06:13:40 AM
Post by: bayview on October 15, 2010, 06:13:40 AM
A side note to MtDons remarks about low temp wood catching on fire . . .
We had a neighbor that found a smoldering bag of charcoal in their garage. Spontaneous combustion . . . We store our charcoal in a small metal garbage can.
/.
Title: Re: 20x32 A frame cabin Central KY
Post by: diyfrank on October 15, 2010, 07:48:16 AM
Post by: diyfrank on October 15, 2010, 07:48:16 AM
I believe It. I just did a demo on an 100 yr + house and there was a lot of chard wood around the fire place and in a few other spots through out the house.
Title: Re: 20x32 A frame cabin Central KY
Post by: phalynx on October 15, 2010, 09:39:21 AM
Post by: phalynx on October 15, 2010, 09:39:21 AM
Glenn had a picture posted here somewhere showing what wood behind a stove looked like over time. The flashpoint of the wood may be 430 today but over time you are drying, aging, and slowly charring the wood. This lowers the flashpoint. Ever smoke a brisket? You do it at 180-200 degrees and it chars up nicely. I would personally error on the side of caution. It's about a $20 insurance policy.
Glenn, do you have pic handy?
Glenn, do you have pic handy?
Title: Re: 20x32 A frame cabin Central KY
Post by: nathan.principe on October 15, 2010, 09:40:10 AM
Post by: nathan.principe on October 15, 2010, 09:40:10 AM
What type of wood flooring is that in your main living area? I really like the looks of it
Title: Re: 20x32 A frame cabin Central KY
Post by: EaglesSJ on October 15, 2010, 11:24:19 AM
Post by: EaglesSJ on October 15, 2010, 11:24:19 AM
the flooring is from a local hardware store. it is made by designer choice. its just 10mm thick laminate wood flooring. after the first few pieces it all went in quick and painless.
as for the fire thing. that was some very informative reading and it seems that there is ALOT more to be concerned with than just the FP. Any ideas on what to do to insulate behind that pipe?
as for the fire thing. that was some very informative reading and it seems that there is ALOT more to be concerned with than just the FP. Any ideas on what to do to insulate behind that pipe?
Title: Re: 20x32 A frame cabin Central KY
Post by: Redoverfarm on October 15, 2010, 11:33:09 AM
Post by: Redoverfarm on October 15, 2010, 11:33:09 AM
I am sure don will give you his take on building or creating an air space as he has done it previously. You could incorporate that air space and camoflauge it with a cultured stone. By using a cultured stone/lathe the thickess would be considerably less than that of real stone. BTW you have done a good job in the amount of time that it has taken you.
Title: Re: 20x32 A frame cabin Central KY
Post by: Shawn B on October 15, 2010, 12:14:11 PM
Post by: Shawn B on October 15, 2010, 12:14:11 PM
I would remove that single wall pipe and replace it with class 3 insulated chimney pipe. Leave a 12"-18" section of single wall pipe from the stove to connect to the class 3 pipe. Add one of those half-moon heat shields on the short section of single wall pipe.
Title: Re: 20x32 A frame cabin Central KY
Post by: MountainDon on October 15, 2010, 02:06:12 PM
Post by: MountainDon on October 15, 2010, 02:06:12 PM
What Shawn suggests would be a huge improvement. Ideally you should have 18" between single wall pipe and combustibles. It's hard to tell how long a section of insulated pipe, down from the ceiling, would be required to get close to that from the pictures. I would recommend getting as close to those minimum clearances as possible. Stove to combustible clearances can be reduced with heat shields on the stove or at the combustible surface. Some stoves will come with or have optional shields. Wall shields of sheet steel, minimum 29 gauge, mounted to create an air space between the metal and the wall (1" minimum in most places, some 7/8") can be used to reduce clearance distance by as much as 66%.
I used metal shields in our gazebo...
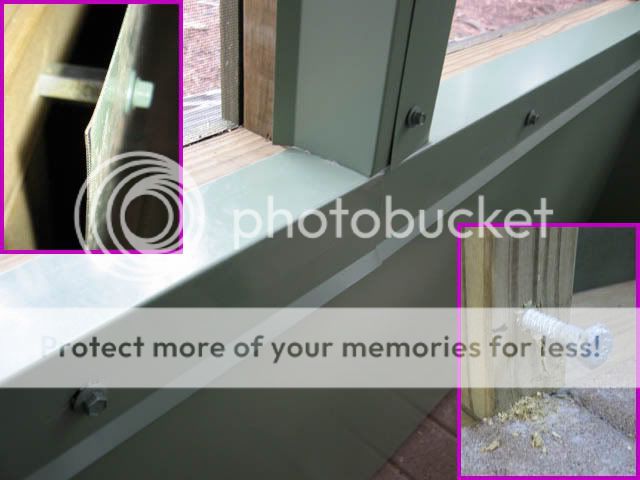
How effective is such a heat shield. Here's a quote from my topic (link below)
"I was curious about just how well the air spaced steel behind the chiminea cut down the temperature behind the steel. (Forgot to take a photo). I drilled a 5/32" hole thru the siding from the exterior and inserted a dial thermometer to measure the temp between the metal and the wood. There is a gap of just over an inch between the steel panel and the floor. As well there is a 5/8 inch air space between the wood 2x4 sill and the L-shaped metal trim strip to allow air flow out. We stoked up a good fire and after a bit the metal panel at the point the chiminea is closest to was too hot to keep your hand on it for more than a second. The exterior air temp was 65 F. The temp between the metal and wood siding never went over 90 degrees F. I am quite pleased. "
link to page with more info/photos...
http://countryplans.com/smf/index.php?topic=2335.msg35598#msg35598 (http://countryplans.com/smf/index.php?topic=2335.msg35598#msg35598)
I used metal shields in our gazebo...
How effective is such a heat shield. Here's a quote from my topic (link below)
"I was curious about just how well the air spaced steel behind the chiminea cut down the temperature behind the steel. (Forgot to take a photo). I drilled a 5/32" hole thru the siding from the exterior and inserted a dial thermometer to measure the temp between the metal and the wood. There is a gap of just over an inch between the steel panel and the floor. As well there is a 5/8 inch air space between the wood 2x4 sill and the L-shaped metal trim strip to allow air flow out. We stoked up a good fire and after a bit the metal panel at the point the chiminea is closest to was too hot to keep your hand on it for more than a second. The exterior air temp was 65 F. The temp between the metal and wood siding never went over 90 degrees F. I am quite pleased. "
link to page with more info/photos...
http://countryplans.com/smf/index.php?topic=2335.msg35598#msg35598 (http://countryplans.com/smf/index.php?topic=2335.msg35598#msg35598)
Title: Re: 20x32 A frame cabin Central KY
Post by: Betty on October 19, 2010, 10:08:11 PM
Post by: Betty on October 19, 2010, 10:08:11 PM
GREAT JOB!!! You've made some amazing progress, your family must be so proud. Keep posting those pics, I can't wait to see what's next.
Title: Re: 20x32 A frame cabin Central KY
Post by: dollarcounter on October 29, 2010, 01:54:47 PM
Post by: dollarcounter on October 29, 2010, 01:54:47 PM
Hi all, This is my first time posting. This retro-cool updated A-frame has been a favorite to follow in this forum. The metal roofing seems to make the overall design even more dramatic. Lindsey's pix have been great. I read in one of the other threads where another DIY-er attempted an A-frame, only to have it collapse during a wind storm during the early construction stages; it prompted him to go with another, more conventional design. I am a former draftsman and worked for 3 modular home builders (all bankrupt), so this particular style is one with which I'm less familiar. I've seen some of the A-frame house plans on-line. A lot of them have the bump-outs to offset some of the space-planning challenges posed by all of those slanty walls. A lot of the on-line plans are also very wide; so it seems they'd require extremely long and unwieldy rafters. But Shane seems to have made a plan just 20 ft wide work very well w/o any compromises in the basic triangular shape (though handling those 26 ft 2x8's used for rafters sure looked challenging to me). While this A-frame is 32 ft in length, I can't say that I've seen any plans that are actually any longer than 36 ft. So, I was wondering what the reason for that is?? Is there too much undulation in going any longer than 36 ft or so which makes sheathing and roofing an A-frame overly difficult?? Is there some guideline which would dictate the maximum length based on the width?? I'd be curious to read a reply from anyone who wants to weigh in. Shane and Lindsey, thanks for sharing this blast from the past and congrats on constructing such a cool house. Michael from Chicago.
Title: Re: 20x32 A frame cabin Central KY
Post by: EaglesSJ on October 29, 2010, 04:31:45 PM
Post by: EaglesSJ on October 29, 2010, 04:31:45 PM
Quote from: dollarcounter on October 29, 2010, 01:54:47 PM
Hi all, This is my first time posting. This retro-cool updated A-frame has been a favorite to follow in this forum. The metal roofing seems to make the overall design even more dramatic. Lindsey's pix have been great. I read in one of the other threads where another DIY-er attempted an A-frame, only to have it collapse during a wind storm during the early construction stages; it prompted him to go with another, more conventional design. I am a former draftsman and worked for 3 modular home builders (all bankrupt), so this particular style is one with which I'm less familiar. I've seen some of the A-frame house plans on-line. A lot of them have the bump-outs to offset some of the space-planning challenges posed by all of those slanty walls. A lot of the on-line plans are also very wide; so it seems they'd require extremely long and unwieldy rafters. But Shane seems to have made a plan just 20 ft wide work very well w/o any compromises in the basic triangular shape (though handling those 26 ft 2x8's used for rafters sure looked challenging to me). While this A-frame is 32 ft in length, I can't say that I've seen any plans that are actually any longer than 36 ft. So, I was wondering what the reason for that is?? Is there too much undulation in going any longer than 36 ft or so which makes sheathing and roofing an A-frame overly difficult?? Is there some guideline which would dictate the maximum length based on the width?? I'd be curious to read a reply from anyone who wants to weigh in. Shane and Lindsey, thanks for sharing this blast from the past and congrats on constructing such a cool house. Michael from Chicago.
Hello Micheal, I appreciate your kind words. The main reason that we built ours just 32' long is simply because of money and location restraints. Spanning 32 ft with a 4 ft back porch gave us 36 ft. And whenever we built on the side of a hill like we did making it any longer would have made the rear support piers about 16 ft tall. And since we were using cardboard builders tubes and hand pouring the concrete in them with 5 gallon buckets this just wasnt an option. Not to mention we started this endeavor not wanting to spend over 20k on the whole place and going to 40-50 ft would have far exceeded our limits. Lindsay and I both wanted something small and easy to keep up. Something cozy, not big and cold.
As far as other A frames go, I think most are built small because the main reason to build an a frame is cost. So if you want to keep it down your gonna have to build small. A frames are cheaper to build because you cut out having to cover the outside of the house with siding, brick, stone, etc. and all the windows and doors. It cost me 600 bucks to put that log siding on the whole house and it was one of the most expensive things we could have bought to put on. Had I of went with t-111 or board and batten this would have been reduced even further. Think how much I saved just on not having to cover the outside of my house in something. And then factor in that we had to buy no windows for the those 2 big sides which saved even more. And then there is the fact that I have 8 inch walls stuffed with insulation instead of the normal 4 which is going to cut energy cost way down...well as much as it can cut it down since Im not on the grid anyways :) But these are some of the reasons that we went with an a frame. Not sure why anyone else did.
As for the guys who blew down. I havent seen that thread yet but I would assume that he didnt brace it properly or tried to build the a's first and then stand them up using a truck or something which just seems dangerous to me anyways. Putting up 26 ft 2x8 rafters weighing in at several hundred pounds each while standing on 2x4 scaffolding 30 ft in the air isnt much fun or real safe either but seemed better than the other method.
Title: Re: 20x32 A frame cabin Central KY
Post by: dollarcounter on October 31, 2010, 03:41:37 PM
Post by: dollarcounter on October 31, 2010, 03:41:37 PM
Thanks for your reply, Shane.
I was just thinkin' that if a 20' wide A-frame were to be constructed with/one ground floor bed room & w/o any bump-outs, it would have to be 40 ft in length minimum. Your description of handling those 26' rafters along with the pix of you up in the air ought to make a lot of DIY-ers reluctant to go any wider than 20 ft given that rafters even longer than yours would be required. Based on your comments, cost now appears to be the only constraint to construction of an A-frame spanning 40 feet in length, or even a bit more. So, that's good to know. It'll be interesting to see how you finish off the upper level. Hopefully, Lindsay continues to post pix of the progress. Thanks again for gettin' back to me.
Michael from Chicago.
Title: Re: 20x32 A frame cabin Central KY
Post by: EaglesSJ on November 13, 2010, 11:35:37 AM
Post by: EaglesSJ on November 13, 2010, 11:35:37 AM
Thought I would post a few more pics of life here at the place we now call home. Not much progress. I have been cutting and splitting alot of wood. Planted a ton of cedar trees up on both sides of the drive leading down and all along the front border of the property. Built a composting bin, chicken coop and went and picked up my chickens from my dads. He had been keeping them in with his chickens for me. I have collected several eggs the past few days and I have just recently begun to supplement their day with artificial light. (3.5 watt LED spotlight on timer) Also added a Trimetric battery monitor, waiting for my shunt to come in to get accurate readings. Also picked up 5 more MAXX-29 batteries. Brings me to a grand total of 1875 Ah. And then below the house you see my temporary set up for the diesel generator we currently use to charge the batteries until we can save up the funds for our solar panels. I also added a dryer vent and a 80mm high efficiency fan for ventilation in the battery room. I was amazed at how much air it moves. And it only uses 1.44 watts!
I tied all my batteries together with a 1/2" copper pipe flattened out and then drilled holes for all the screw on post. This is ALOT cheaper than buying cables to connect all of them. Probably going to cover them with foam pipe insulation to prevent any tool mishaps from stopping my heart. Also upgraded all the battery cables and inverter cables to 1/0 size from the 4 gauge wire. i have noticed an extreme performance gain in my system. I am working on making a heat shield for the wood stove and will post pics when done.
Here are a few pics to supplement all my talking. Two are of the view off the back porch or the small pond stocked with bass. And the other is of the table I built to feed the critters off of.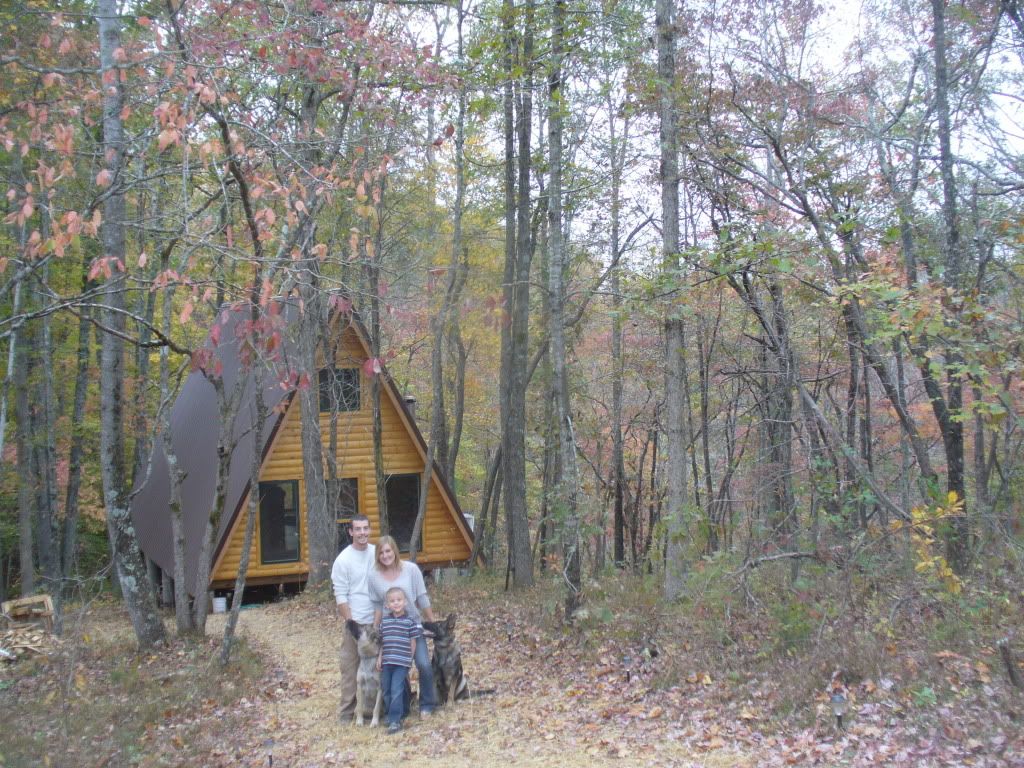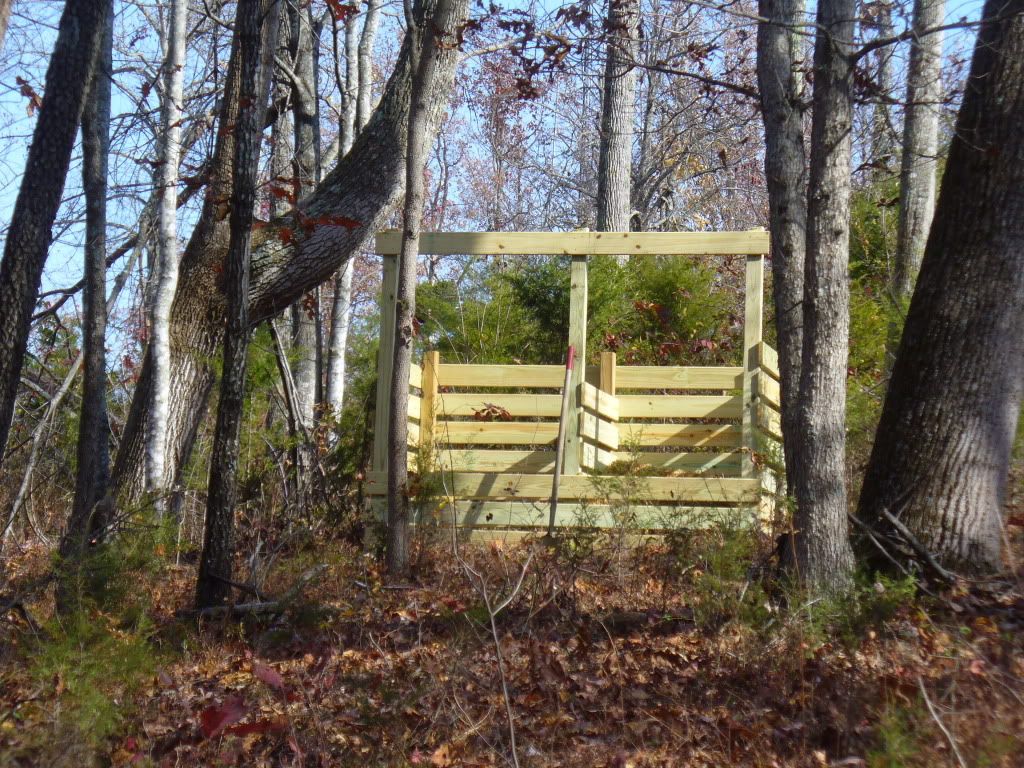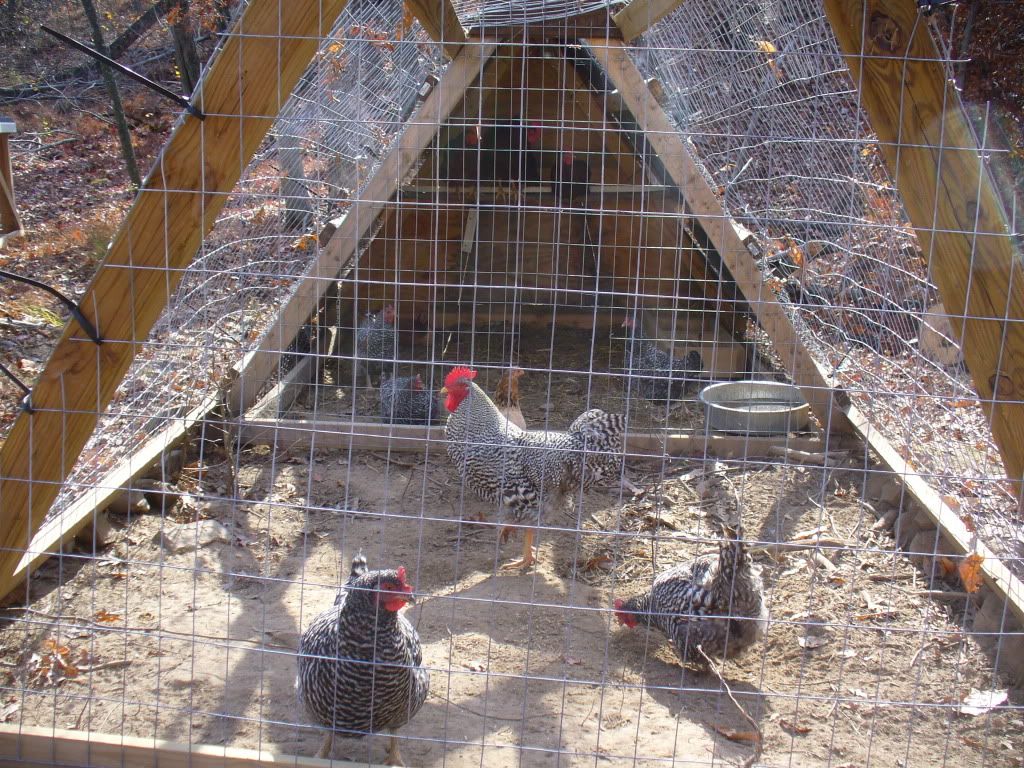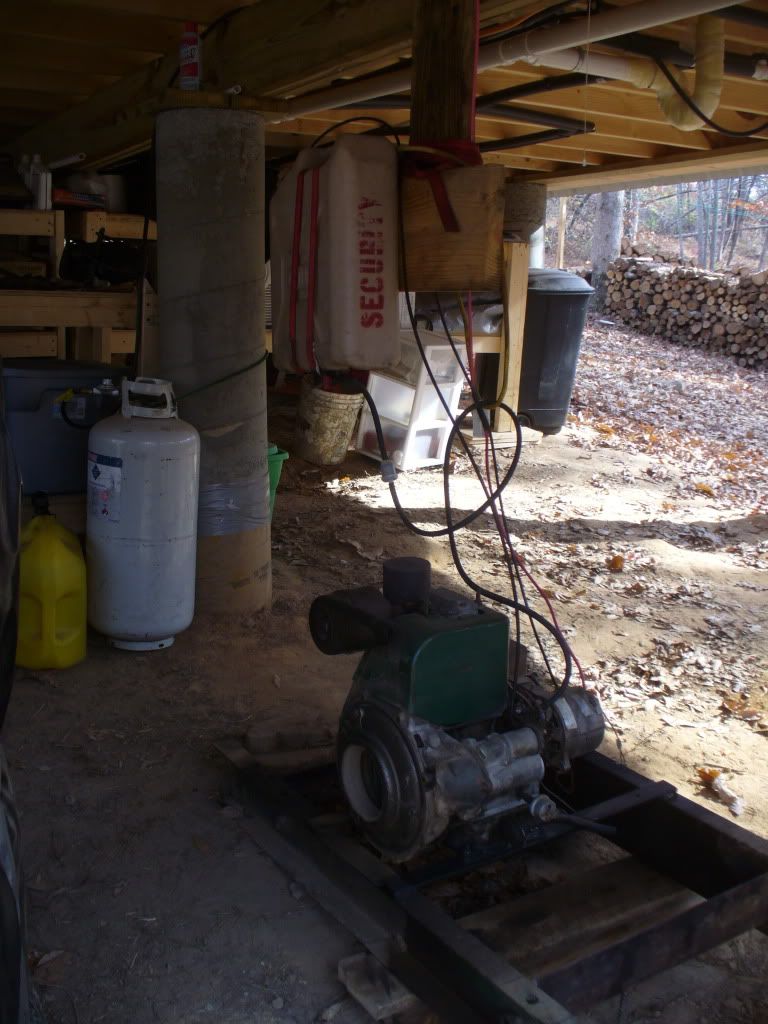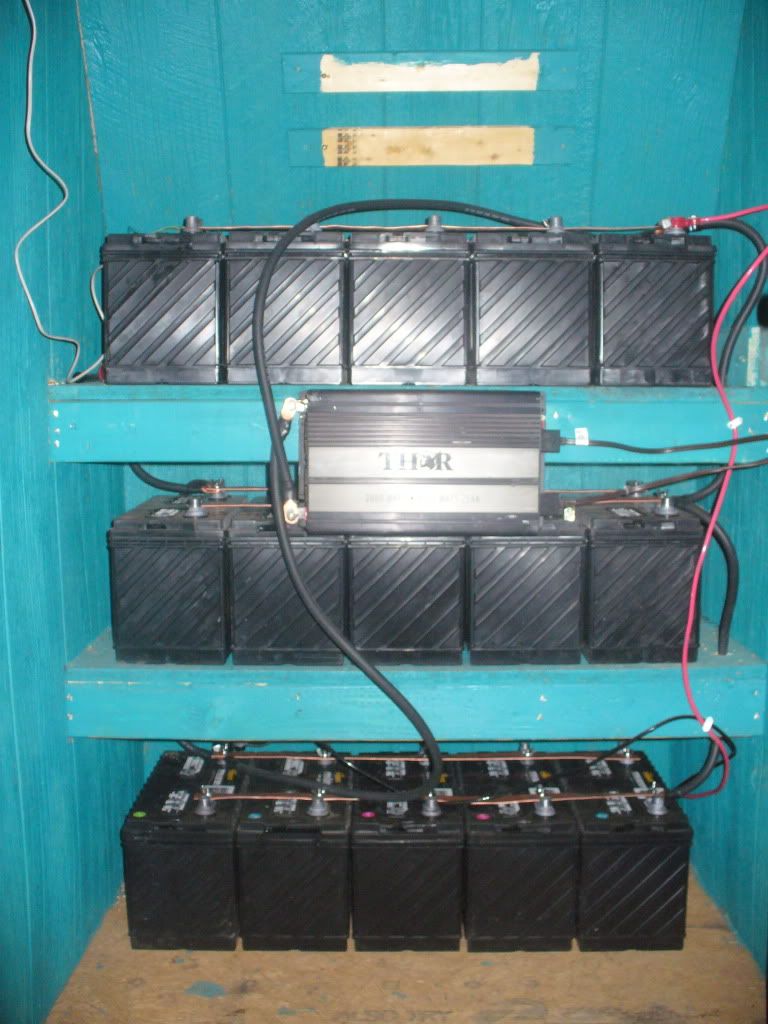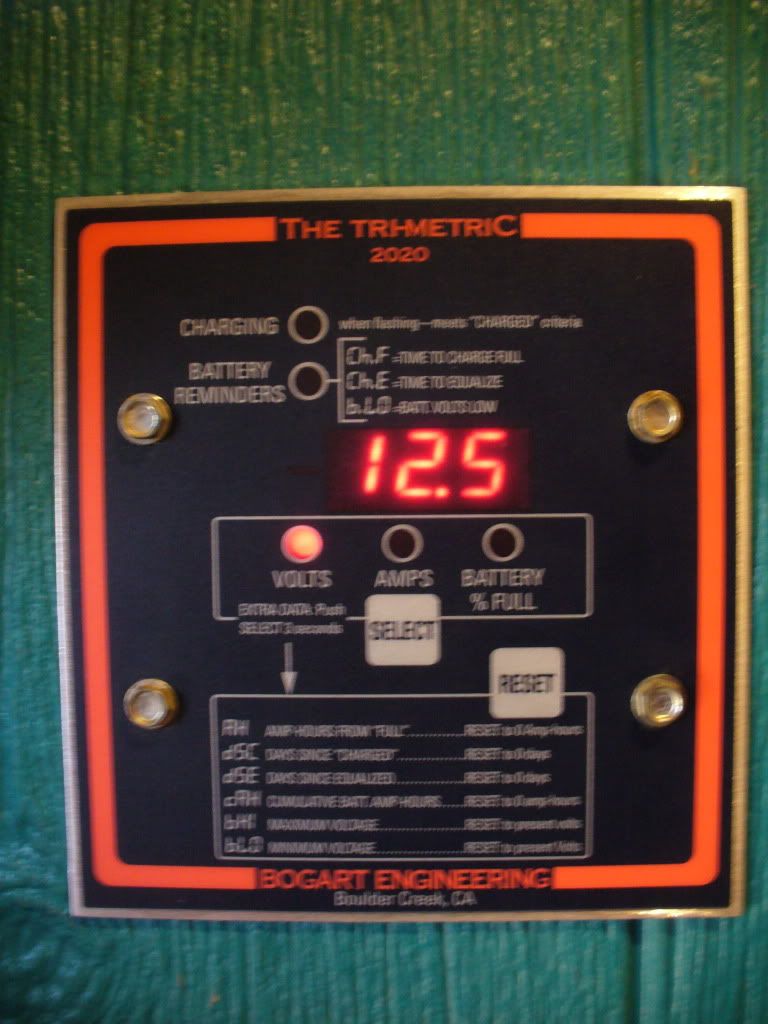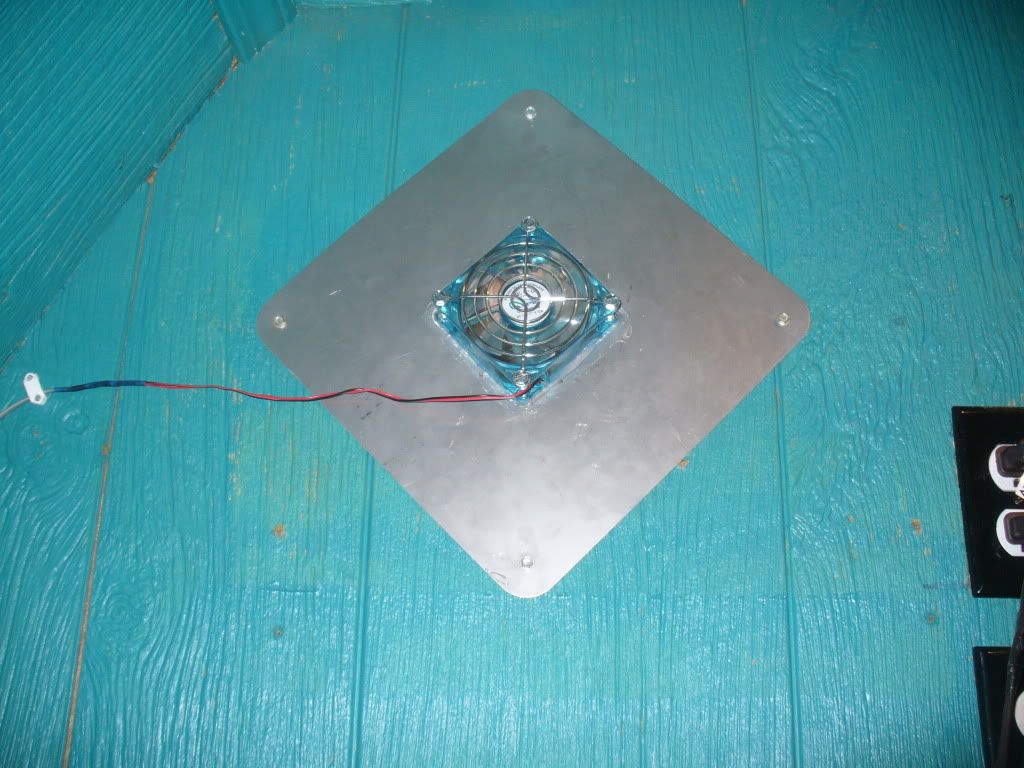
Title: Re: 20x32 A frame cabin Central KY
Post by: bayview on November 13, 2010, 12:18:26 PM
Post by: bayview on November 13, 2010, 12:18:26 PM
Great family portrait!
You have such a "can do" attitude . . . Congratulations! Job well done . . .
Neat trick - using ½ copper pipe for cabling.
This young man is going places. . . I say he should run for congress!
/.
Title: Re: 20x32 A frame cabin Central KY
Post by: phalynx on November 13, 2010, 12:43:59 PM
Post by: phalynx on November 13, 2010, 12:43:59 PM
Certainly something to be proud of. Keep the pictures coming. Its always nice to see how everything looks. So, for a brief moment, you can picture yourself there waking up in the morning with coffee looking out at the view.
Title: Re: 20x32 A frame cabin Central KY
Post by: EaglesSJ on November 16, 2010, 06:11:45 PM
Post by: EaglesSJ on November 16, 2010, 06:11:45 PM
I have kind of a engineering question for you all. Lindsay and I were wanting to stack fire wood in between all the concrete piers because 1. we have to stack it somewhere and 2. it will keep the wind down and hopefully not hit the water pipes as bad. Question is this: Will it cause severe stress on the piers with the wood "leaning" against them?
My thoughts are this:
"if thats all it takes to bring the house down then I didnt have much to start with"
"maybe all the wood stacked in between them will sort of brace them"
and last but not least
"if it does cause a problem and they lean and collapse then Ill have a nice firewood foundation for the house to rest on"
What are some thoughts from you all? Keep in mind this will just be for this year. Next year when it gets warm again I will brace all the piers with steel cable and underpen the house normally to keep the wind out. I just ran out of money this year.
Title: Re: 20x32 A frame cabin Central KY
Post by: dug on November 16, 2010, 06:34:49 PM
Post by: dug on November 16, 2010, 06:34:49 PM
I'm going to throw out a guess here and say that if anything it would sort of brace the piers more than anything else. I can't see how it could cause any damage with the footers in the ground and the piers attached to the beams on top.
A bigger concern would be the potential infestation of bugs, wood rats, rattlesnakes, etc., but probably not a worry over just one season.
A bigger concern would be the potential infestation of bugs, wood rats, rattlesnakes, etc., but probably not a worry over just one season.
Title: Re: 20x32 A frame cabin Central KY
Post by: bayview on November 16, 2010, 08:09:43 PM
Post by: bayview on November 16, 2010, 08:09:43 PM
Quote from: dug on November 16, 2010, 06:34:49 PM
A bigger concern would be the potential infestation of bugs, wood rats, rattlesnakes, etc., but probably not a worry over just one season.
Including termites . . . If you have them in your area . . .
/.
Title: Re: 20x32 A frame cabin Central KY
Post by: MountainDon on November 16, 2010, 08:15:13 PM
Post by: MountainDon on November 16, 2010, 08:15:13 PM
My concern about all that firewood piled under the place I live in stems from seeing how ferocious a pile of firewood will burn when it catches on fire. Before seeing that we kept firewood piled under parts of our cabin. Not any more. No thanks.
I don't think there will be any issues with the piers, just a fire danger.
I don't think there will be any issues with the piers, just a fire danger.
Title: Re: 20x32 A frame cabin Central KY
Post by: EaglesSJ on November 16, 2010, 08:32:42 PM
Post by: EaglesSJ on November 16, 2010, 08:32:42 PM
Quote from: MountainDon on November 16, 2010, 08:15:13 PM
My concern about all that firewood piled under the place I live in stems from seeing how ferocious a pile of firewood will burn when it catches on fire. Before seeing that we kept firewood piled under parts of our cabin. Not any more. No thanks.
I don't think there will be any issues with the piers, just a fire danger.
I seen those pics in your thread. You were lucky that forest fire didnt do more than it did. I have thought about the fire hazard. And decided if it is close enough to burn that wood then it has already surrounded the house anyways.
Title: Re: 20x32 A frame cabin Central KY
Post by: Don_P on November 16, 2010, 08:34:44 PM
Post by: Don_P on November 16, 2010, 08:34:44 PM
I'll be a wet blanket... Get something up to triangularize the piers before winter. We have mud, wind, frost, snow load... this is the trying time on the piers. I had been watching a barn for the past 15 years and commented on it here this past winter. It fell the day the frost went out. Do anything to cross brace it and then do what you gotta do, just don't leave the bugs under there for warm weather, rake all the bark and junk out. A day of yard birds in the spring would about sterilize it under there.
Title: Re: 20x32 A frame cabin Central KY
Post by: poppy on November 17, 2010, 02:54:34 PM
Post by: poppy on November 17, 2010, 02:54:34 PM
I'll also be a wet blanket.
First, the firewood is not going to help or hinder the piers. I agree with others; don't stack it under the cabin. Use a tarp.
Second, even with bracing, that cabin wants to go downhill. It will eventially settle and/or slip or creep down. The combination of gravity and water plus add some breeze from mother nature and something is going to move. Take a close look at your trees in the area; they want to grow vertically, but soil creep will tilt them and they will straighten themselves by bending vertical again.
Whatever you do, divert surface water as far away from the foot print as possible. That requires an uphill swale or french drain or something. A shallow ditch won't do the job with heavy rain. Even if you don't see surface water actually flowing under the cabin, it will weep in from pretty deep.
There are plenty of stable cabins/houses sitting on stilts, but their piers are well anchored with pilings or continous concrete footers and would be deeper than 3' expecially for those downhill piers that are 7' out of the ground.
I'm not trying to alarm you; just trying to look into the future at what water can do.
Title: Re: 20x32 A frame cabin Central KY
Post by: EaglesSJ on November 17, 2010, 05:07:45 PM
Post by: EaglesSJ on November 17, 2010, 05:07:45 PM
Here are a couple threads I came across while searching for others who built on tall piers.
http://countryplans.com/smf/index.php?topic=8555.0
http://countryplans.com/smf/index.php?topic=1312.0
The cabin does not want to go down hill. It wants to push straight down in the ground because that is how gravity works. Also these piers are in basically pure sand so drainage has not been a problem. Even in the heaviest of rains. I plan on adding 3 6x6 post sunk 4 ft in the ground to the rear of the house this week and triangulate them in both directions.
Title: Re: 20x32 A frame cabin Central KY
Post by: EaglesSJ on November 26, 2010, 01:09:31 AM
Post by: EaglesSJ on November 26, 2010, 01:09:31 AM
Killed my first chicken and had Lindsay cook him up. We had 5 roosters to 7 hens and so the hens were getting mauled so Im gonna kill one a week until we get em thinned out a bit. Also built a storage shelf/closet area in the bathroom so she could hang up clothes this winter to let them dry since it will be too cold outside for the clothes line. Headed out tomorrow to buy the supplies for pier bracing and a front porch. Will update when complete.
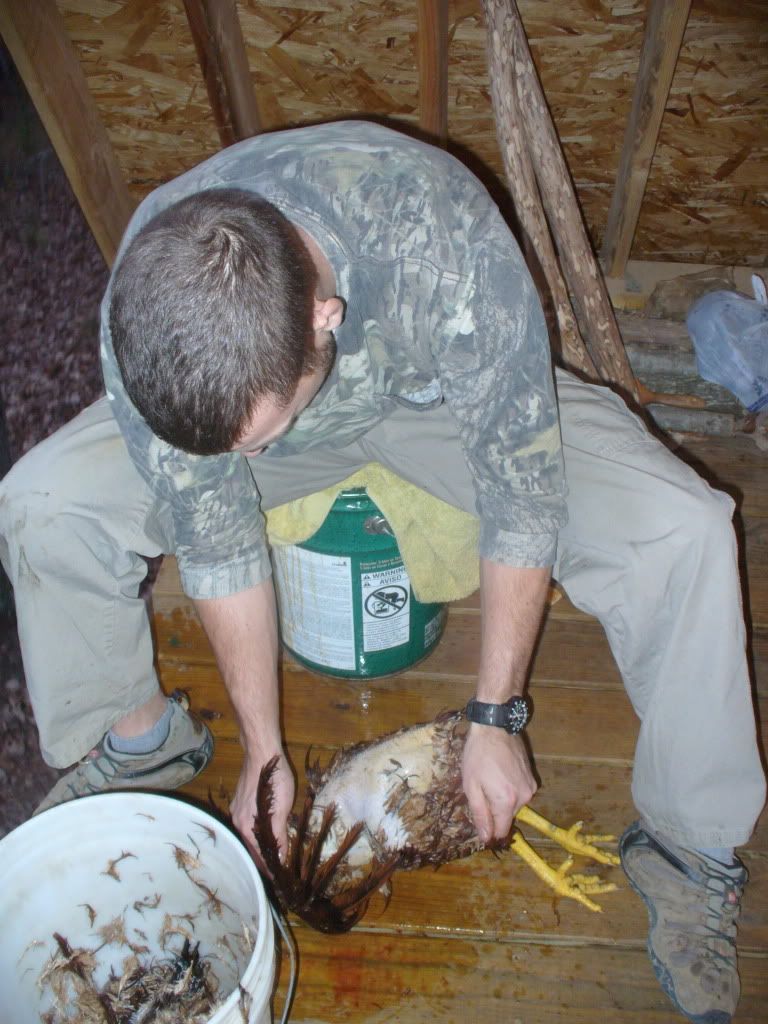
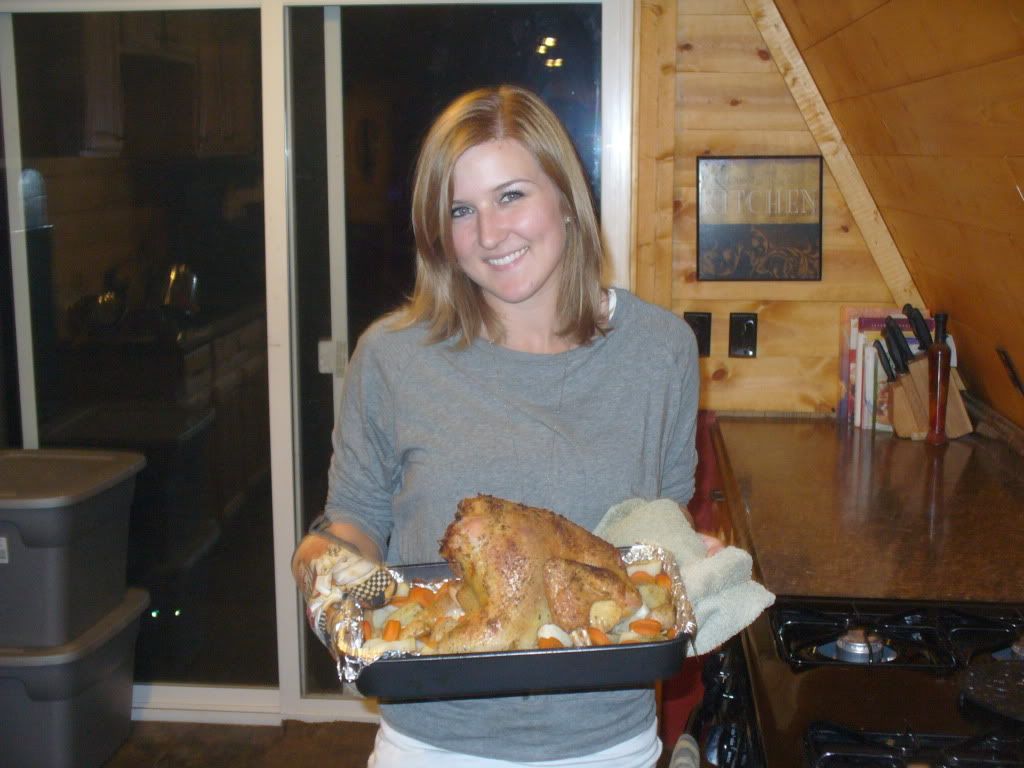
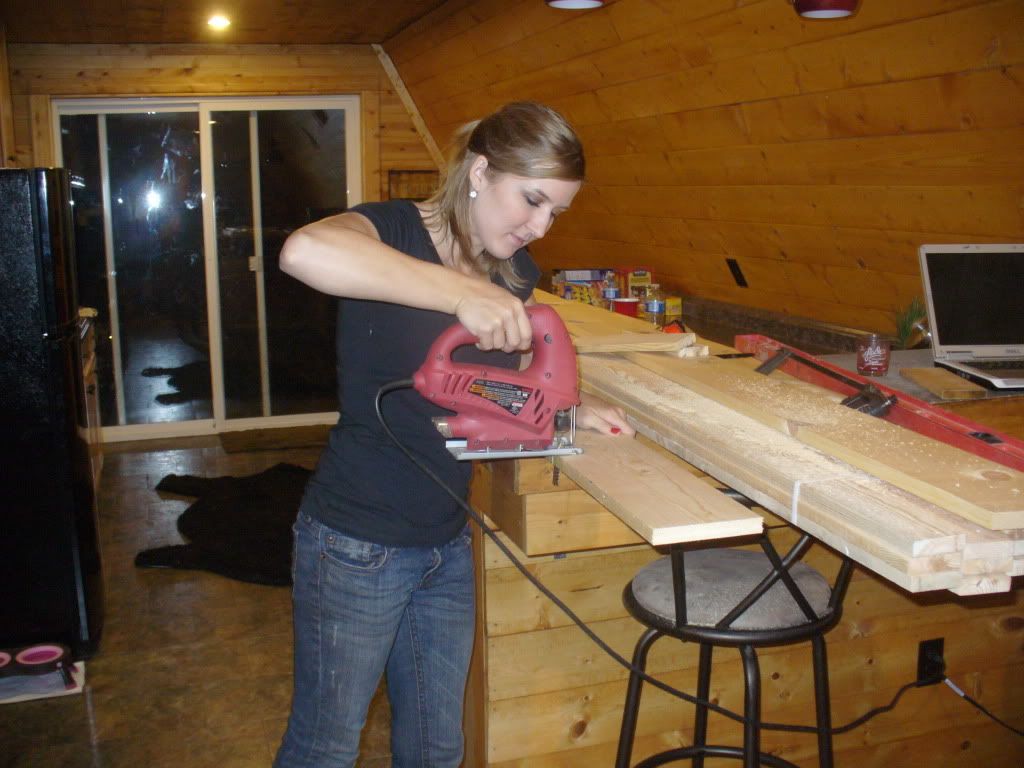
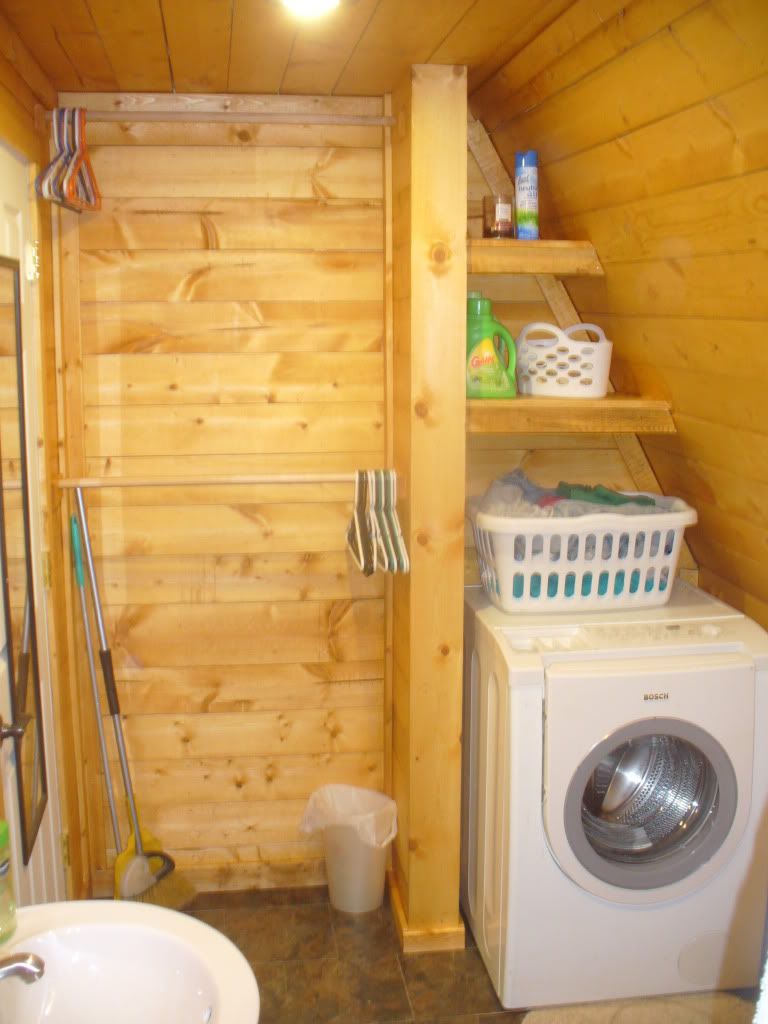
Title: Re: 20x32 A frame cabin Central KY
Post by: IronPatriotTN on November 26, 2010, 01:17:41 AM
Post by: IronPatriotTN on November 26, 2010, 01:17:41 AM
She can cook, handle a saw, and is pretty to boot. :)
You are a lucky man. She's a keeper. lol. ;)
Hope y'all had a nice Thanksgiving.
~Ron
You are a lucky man. She's a keeper. lol. ;)
Hope y'all had a nice Thanksgiving.
~Ron
Title: Re: 20x32 A frame cabin Central KY
Post by: Don_P on November 26, 2010, 08:37:04 AM
Post by: Don_P on November 26, 2010, 08:37:04 AM
Looks like you had a fine Thanksgiving. We made the mistake of keeping the toughest rooster in the hopes that he would best defend the ladies. He considered us something to defend the flock from. After flogging both of us I was more than happy to throw him in the stew pot d*.
I hadn't kept up with the thread for a little while. Piers resist two loads. The first concern is gravity, vertical, loads. The second is lateral, horizontal, loads. These come from wind or seismic. When I get back engineering these have been analyzed, then they go on to check various combinations of those loads. Poppy's concern of slope movement is something that can be seen as you drive around and something I look at when we get to a new site. If you see trees with "pistol butts" the slope is moving and trees are straightening up as the slope moves.
I hadn't kept up with the thread for a little while. Piers resist two loads. The first concern is gravity, vertical, loads. The second is lateral, horizontal, loads. These come from wind or seismic. When I get back engineering these have been analyzed, then they go on to check various combinations of those loads. Poppy's concern of slope movement is something that can be seen as you drive around and something I look at when we get to a new site. If you see trees with "pistol butts" the slope is moving and trees are straightening up as the slope moves.
Title: Re: 20x32 A frame cabin Central KY
Post by: EaglesSJ on November 26, 2010, 11:43:31 AM
Post by: EaglesSJ on November 26, 2010, 11:43:31 AM
Woke up this morning to a light dusting of snow. I was more than happy to sit by this cozy little fire with the stove door open and watch the wood pop and crackle while I ate my breakfast and looked out to the white woods. Why anyone would want to live in the city is beyond me.
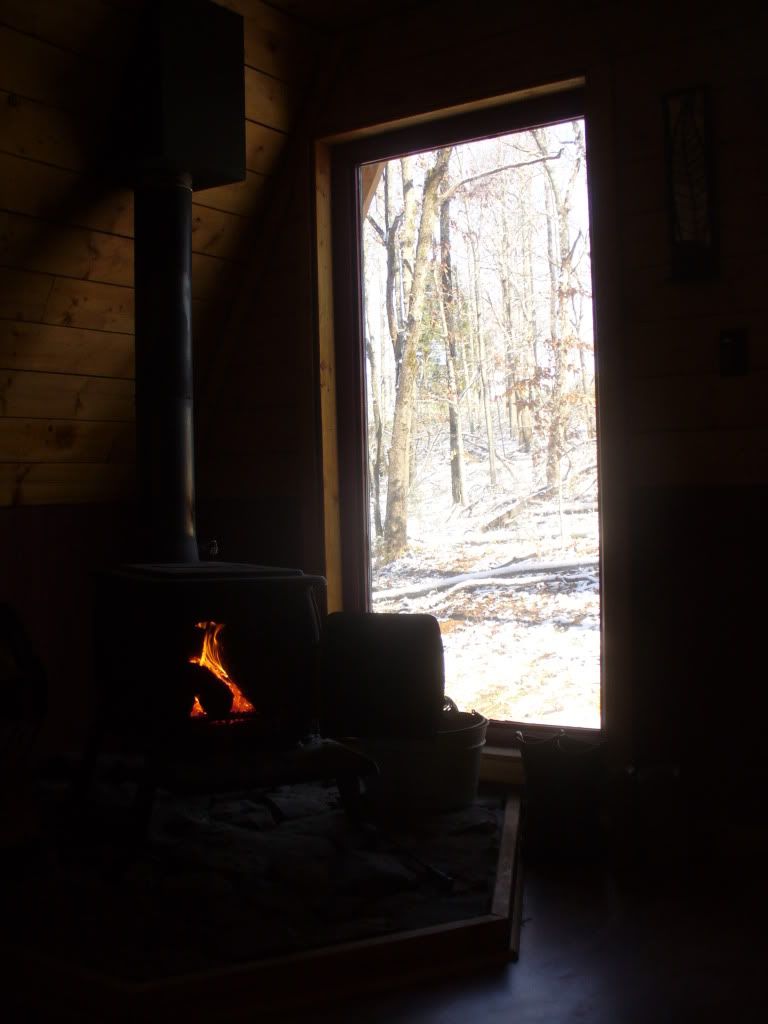
Title: Re: 20x32 A frame cabin Central KY
Post by: Redoverfarm on November 26, 2010, 12:42:04 PM
Post by: Redoverfarm on November 26, 2010, 12:42:04 PM
Quote from: EaglesSJ on November 26, 2010, 11:43:31 AM
Woke up this morning to a light dusting of snow. I was more than happy to sit by this cozy little fire with the stove door open and watch the wood pop and crackle while I ate my breakfast and looked out to the white woods. Why anyone would want to live in the city is beyond me.
I haven't figured that one out either.
Title: Re: 20x32 A frame cabin Central KY
Post by: phalynx on November 26, 2010, 12:43:54 PM
Post by: phalynx on November 26, 2010, 12:43:54 PM
Amen brother!
Title: Re: 20x32 A frame cabin Central KY
Post by: OlJarhead on November 28, 2010, 11:29:37 AM
Post by: OlJarhead on November 28, 2010, 11:29:37 AM
Love it :)
Nice thing about chickens, they taste good, lay good tasting eggs and make great fertilizer :D
Nice thing about chickens, they taste good, lay good tasting eggs and make great fertilizer :D
Title: Re: 20x32 A frame cabin Central KY
Post by: EaglesSJ on November 28, 2010, 01:09:27 PM
Post by: EaglesSJ on November 28, 2010, 01:09:27 PM
Finished my front deck and the rear support post and bracing. In the upper 20's here so it made for some cold working days.
I used 6x6 post sunk 3.5 feet in the ground and 4x4s for bracing with the exception of the middle post where I added a couple of 2x6s to brace against the center beam. I bolted all of this together with 1/2" bolts 2 per joint.
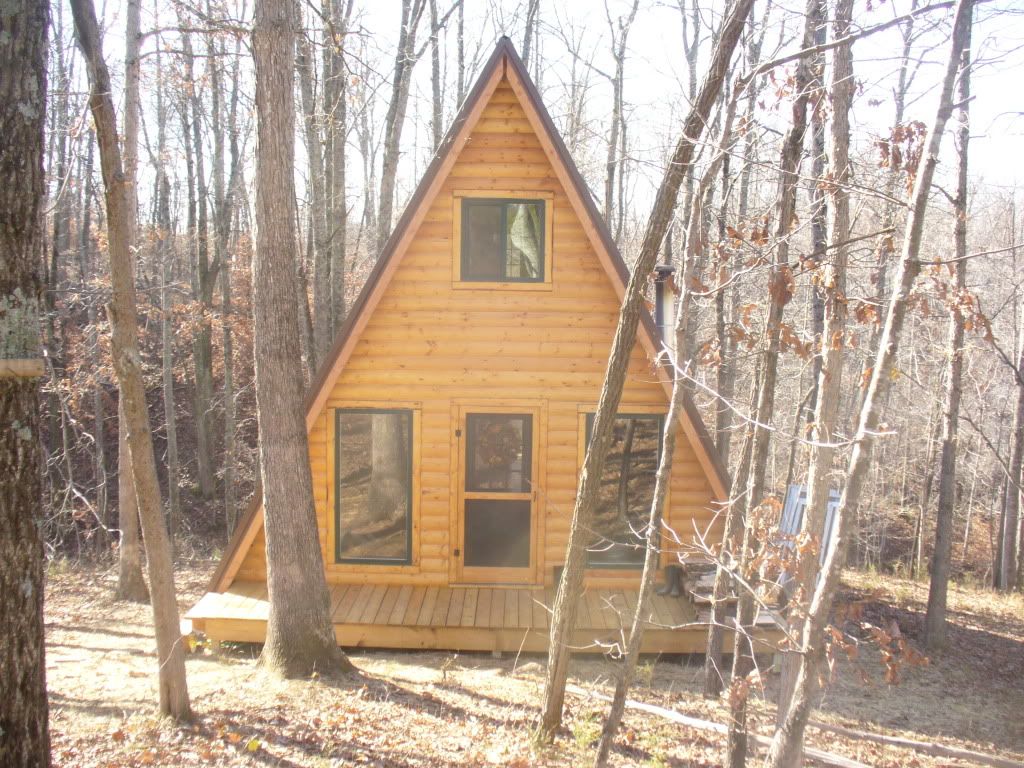
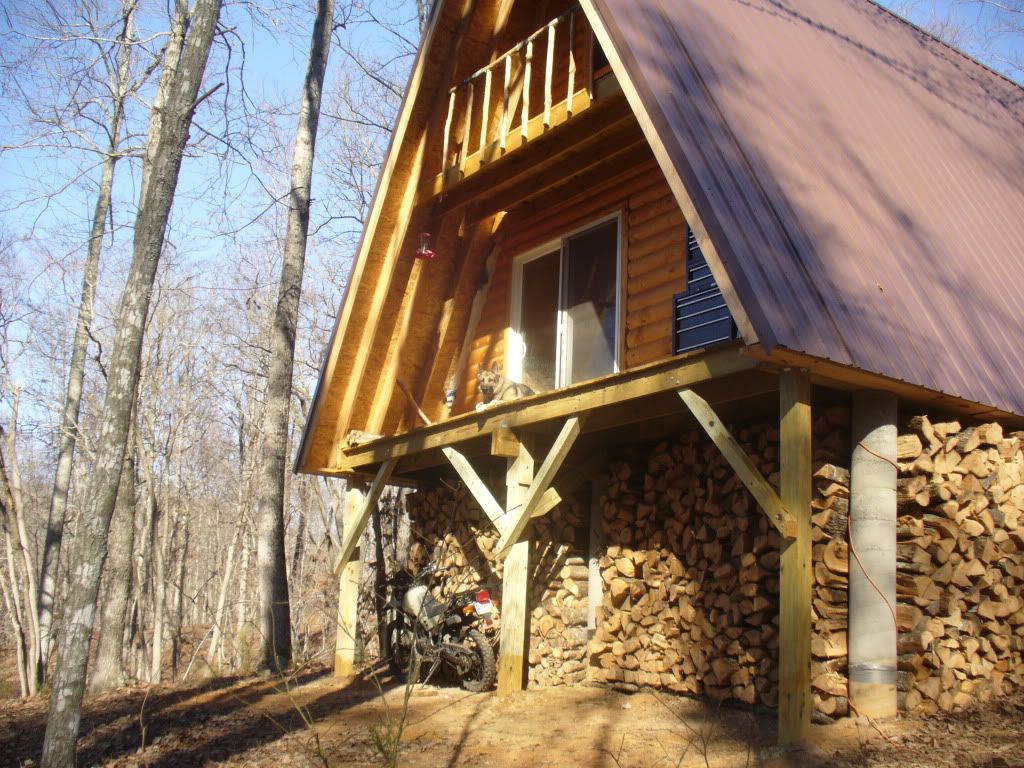
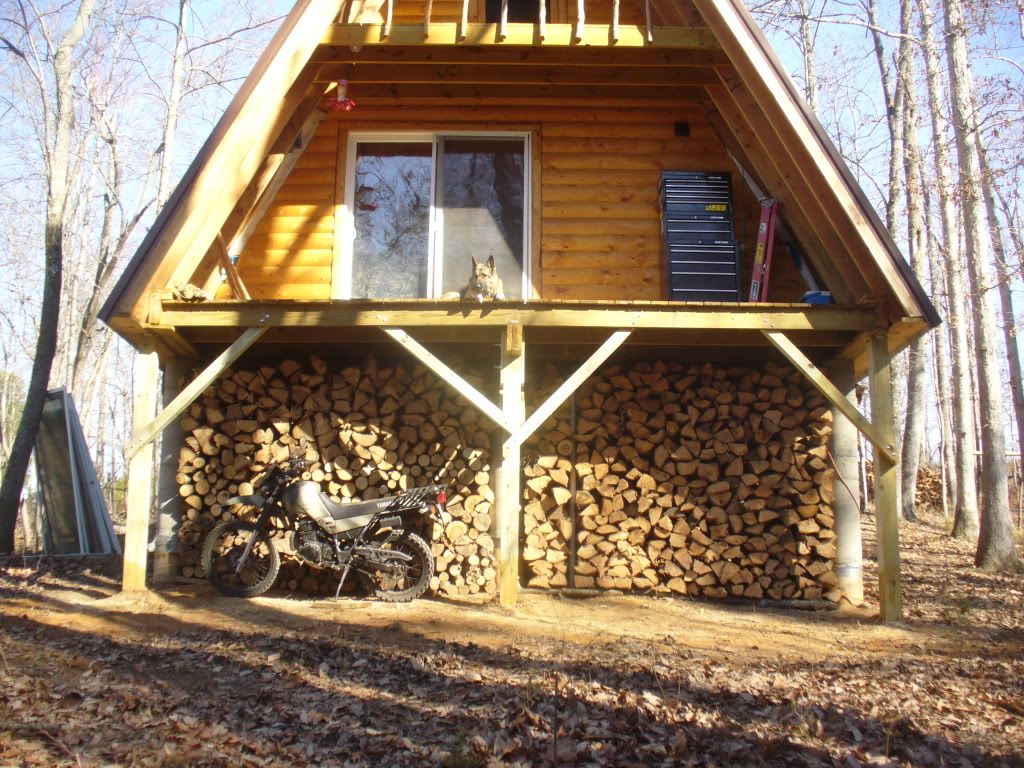
I used 6x6 post sunk 3.5 feet in the ground and 4x4s for bracing with the exception of the middle post where I added a couple of 2x6s to brace against the center beam. I bolted all of this together with 1/2" bolts 2 per joint.
Title: Re: 20x32 A frame cabin Central KY
Post by: astidham on November 28, 2010, 04:47:10 PM
Post by: astidham on November 28, 2010, 04:47:10 PM
the bracing looks very strong!
Title: Re: 20x32 A frame cabin Central KY
Post by: ben2go on December 02, 2010, 12:13:45 AM
Post by: ben2go on December 02, 2010, 12:13:45 AM
Awsome!We barely left KY before it started snowing.
Title: Re: 20x32 A frame cabin Central KY
Post by: EaglesSJ on December 02, 2010, 07:02:11 PM
Post by: EaglesSJ on December 02, 2010, 07:02:11 PM
went building the whole house with no troubles and was nailing in the gutter board today and it shot through my finger. went in bout where my fingernail started and went back about 3/4 of an inch. split my nail and blood sprayed all over the under side of the house like spray paint. Lindsay was scared to death cause when it happened it bled so bad it looked like i shot my finger off. i took this picture about 7 hrs after it happened and it was still bleeding through the gauze. nasty stuff. lesson learned, slow down and watch what your doing.
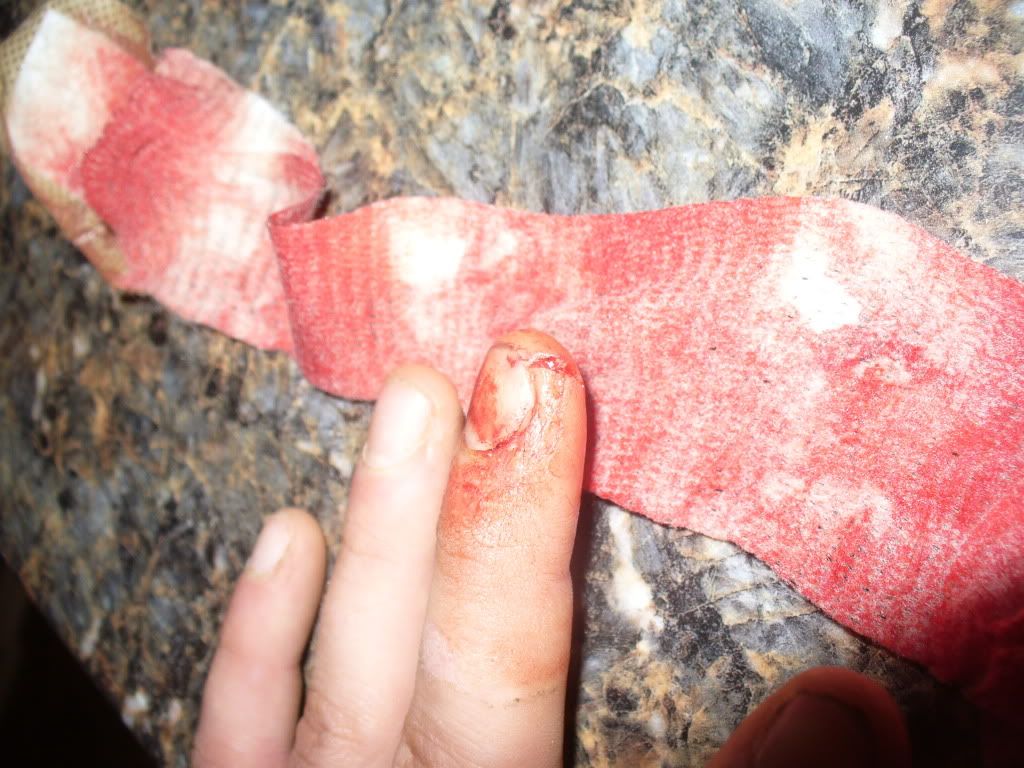
Title: Re: 20x32 A frame cabin Central KY
Post by: bayview on December 02, 2010, 07:19:18 PM
Post by: bayview on December 02, 2010, 07:19:18 PM
Sorry to hear about the finger injury . . . Seems that many of us on this forum have had similar experiences . . . I think we could almost start a whole new topic with our construction injuries.
/.
Title: Re: 20x32 A frame cabin Central KY
Post by: IronPatriotTN on December 03, 2010, 02:15:11 AM
Post by: IronPatriotTN on December 03, 2010, 02:15:11 AM
Looks like that needs a couple of stitches bro. :o
Title: Re: 20x32 A frame cabin Central KY
Post by: EaglesSJ on December 08, 2010, 11:38:06 AM
Post by: EaglesSJ on December 08, 2010, 11:38:06 AM
Ok so even after putting foam insulation on the pipes and then wrapping them with regular pipe insulation and sealing off under the house my pipes are still freezing daily. Any idea what I can do to prevent this from happening without using heat tape as we dont have the extra electric to pull it. thanks in advance.
Title: Re: 20x32 A frame cabin Central KY
Post by: Solar Burrito on December 08, 2010, 11:47:40 AM
Post by: Solar Burrito on December 08, 2010, 11:47:40 AM
Can you tuck them under the house more, then put fiberglass insulation on the outside side of them to trap a little house heat around the pipes? Not sure where your pipes are now...
So I guess it does get cold in Kentucky... ???
So I guess it does get cold in Kentucky... ???
Title: Re: 20x32 A frame cabin Central KY
Post by: rdzone on December 08, 2010, 12:23:28 PM
Post by: rdzone on December 08, 2010, 12:23:28 PM
Where are they freezing in the house or outside? If they are freezing outside you can always build an insulated box around them. Is there a way you can get some of the inside heat to them just enough to keep them from freezing? A little 12volt fan to circulate warm air around them?
Title: Re: 20x32 A frame cabin Central KY
Post by: EaglesSJ on December 08, 2010, 12:50:39 PM
Post by: EaglesSJ on December 08, 2010, 12:50:39 PM
Its supposed to be 2 degrees here sunday so yeah it gets cold. The pipes are outside under the house. about an inch below the floor joist. I think Im gonna try putting insulation in the floor and then some on the outside of them and covering it all with black plastic and seeing if it will trap a bit of heat from the house around them. I really dont know what else to do. It has been a miserable winter so far.
Title: Re: 20x32 A frame cabin Central KY
Post by: dug on December 08, 2010, 01:16:49 PM
Post by: dug on December 08, 2010, 01:16:49 PM
That's a tough problem, I've been battling it for years in the two trailers on my property. I skirted and insulated them and now they only rarely freeze, if it gets below 5 degrees. I hope your idea works, but if not I was wondering if heat tape could be coupled to a thermostat so it only kicks in when the temps get critical? Might not consume too much juice that way and sure beats fixing busted pipes.
Title: Re: 20x32 A frame cabin Central KY
Post by: AdironDoc on December 08, 2010, 02:23:55 PM
Post by: AdironDoc on December 08, 2010, 02:23:55 PM
Was following this thread and couldn't help noticing you two are fellow Jeep Forum members. I'm a lifetime supporter there as well and can't tell you how much time, money, and aggravation I've saved from the collective wisdom there. Seems many of us travel is similar circles.
Cheers!
DocJake (JF)
Cheers!
DocJake (JF)
Quote from: OlJarhead on September 07, 2010, 02:56:33 PMQuote from: havoc on September 07, 2010, 01:50:07 PM
Hey there Jeep buddy,
I followed your thread from the link off your Jeep Forum Profile. Just wanted to say that you have done a great job on the house, and you have a very nice looking family..and how come you haven't posted your gal on the Hottest Wife/Girlfriend thread on jeep Forum??? She's a keeper. [cool]
AS for the house, I have an idea for your water. I was stationed in Okinawa and when we lived off base, we had water rationing. It was during the summer and our house could only have the water on odd numbered days. What the land lord did was put a water tank on the roof of the house. The tank had a float valve that would stop the water from being pumped in when the tank was full. It was like a toilet tank valve. When we were on the odd numbered days our tank would fill up so that on the even numbered days we would have water.
Now where I am going with this is water pressure..with the tank higher than the rest of the house we always had good water pressure for doing dishes, showering and whatnot. Since your already pumping water up hill from your spring, why not put your water tank up on some stilts next to the house out back. As long as it's higher than your shower head and faucets you'd have good water pressure and wouldn't have to worry about an additional pump in the house tank. You could rig the level switch to kick the pump on or off for the pump at the bottom of the hill down at the spring. If you know anything about plumbing, I do not, or you know a plumber get with him/her about pipe reduction. I believe that you could have like a 2 inch pipe coming out of the elevated tank and then reduce it down to 1 inch at each faucet to get you even more pressure.
Good Luck and keep us posted!
Your keep buddy,
Mike
havoc64
Wait, what? I'm a JeepForum member too....I'll have to pop over there and see which thread you're chatting about :)
COOL
Also MountainDon is a Jeep nut too
Title: Re: 20x32 A frame cabin Central KY
Post by: MountainDon on December 08, 2010, 03:08:35 PM
Post by: MountainDon on December 08, 2010, 03:08:35 PM
With having off grid electric and no excess for heat tape what I believe you need is an extremely well insulated box/sleeve from cabin floor down to the ground level' possibly into the ground if the frost penetrates any distance. R-30 ??? And then you would need to be able to circulate warmth from the cabin above down into this insulated space, so you would not want that part of the floor insulated at all. A grate or a little door in the floor, that could be opened when it's very cold. Maybe a small DC fan to circulate warm air down.
Title: Re: 20x32 A frame cabin Central KY
Post by: MountainDon on December 08, 2010, 03:09:47 PM
Post by: MountainDon on December 08, 2010, 03:09:47 PM
Maybe a hatch in the floor and room to place some heated bricks down by the pipes(heated on the wood stove). Sort of a PITA to have to change them all the time but it would help.
Title: Re: 20x32 A frame cabin Central KY
Post by: EaglesSJ on December 08, 2010, 07:27:04 PM
Post by: EaglesSJ on December 08, 2010, 07:27:04 PM
Ok so I tackled a few things today. one was to wrap the pipes in ANOTHER layer of insulation and then wrap every single one from tip to tip with duct tape to make them air tight. Then after this was accomplished I insulated the floor with R19 and shoved extra pieces all around the pipes. Im hoping that this will possibly trap some heat from the house down near the pipes as they are all right below the floor joist. Then i made my heat shield for the wood stove. It is made of 2 pieces of thin aluminum sheeting and has a 1/4" spacer between the wall and the second piece of plate so I have 2 air pockets now. What are everyones thoughts on this? Anyway to get rid of even more heat from that pipe before it reaches the ceiling? I have been burning some cool fires as I noticed the wood starting to get very dry and darker in color prior to shield install. Scary stuff. I think that the cooler fires are contributing to my pipes freezing though because we woke up yesterday morning to a shivering 45 degree home. It is a comfortable 65 in here now but the shield is getting pretty hot. I can no longer keep my hand on it near the center. As always thanks for the help!
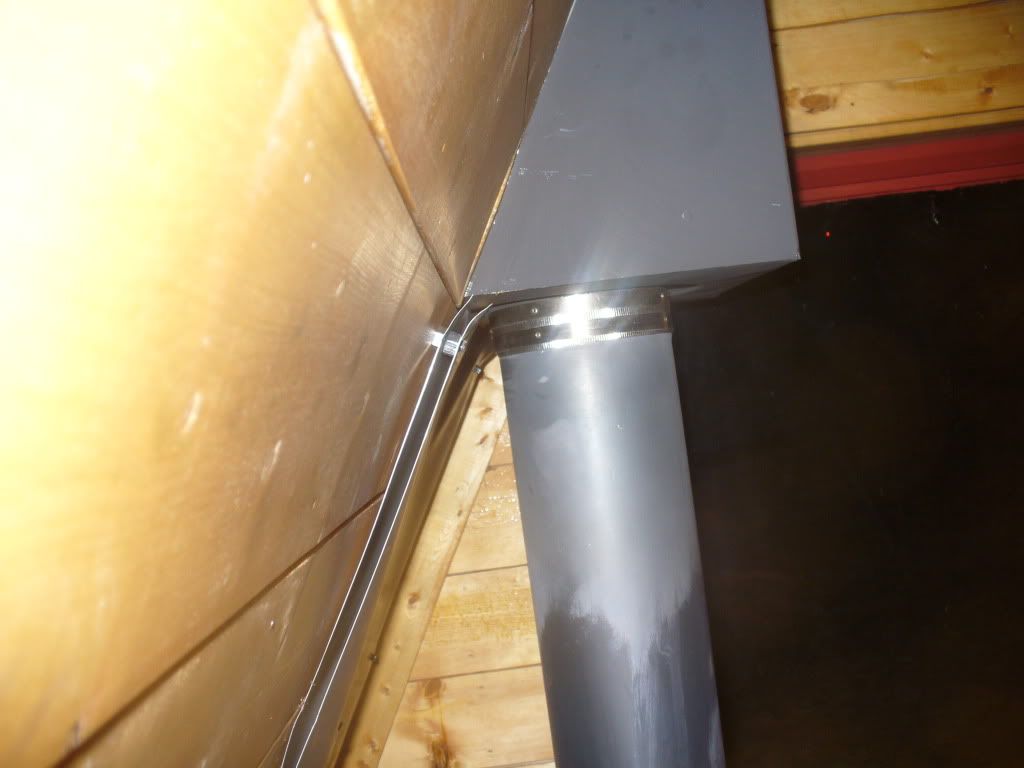
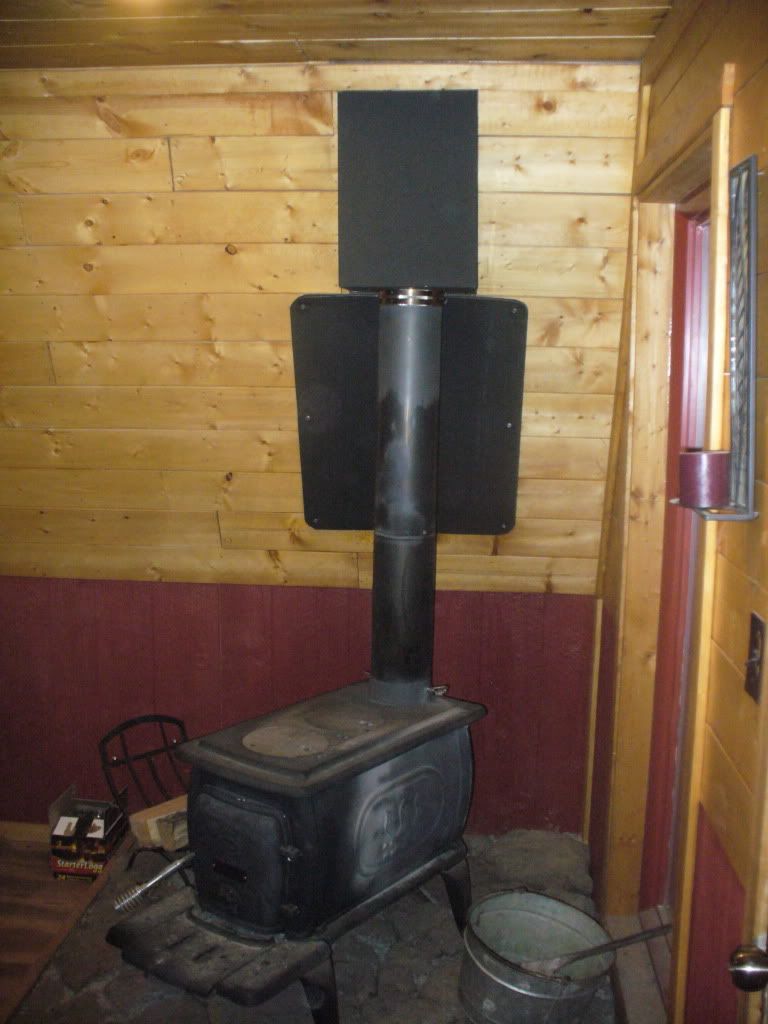
Title: Re: 20x32 A frame cabin Central KY
Post by: astidham on December 08, 2010, 07:39:40 PM
Post by: astidham on December 08, 2010, 07:39:40 PM
Eagles you might want to put hardy backer concrete board on the wall behind your Shield, that should stop any radiant heat that passes through!
Title: Re: 20x32 A frame cabin Central KY
Post by: EaglesSJ on December 08, 2010, 08:13:43 PM
Post by: EaglesSJ on December 08, 2010, 08:13:43 PM
I did one better. I cut out the wood behind the shield and now it has a nice cool breeze that fills the pocket from the cooler air behind the knee wall. And there is no wood left to burn. I did leave a small piece of wood so I would have something to screw into for my little spacers in the middle.
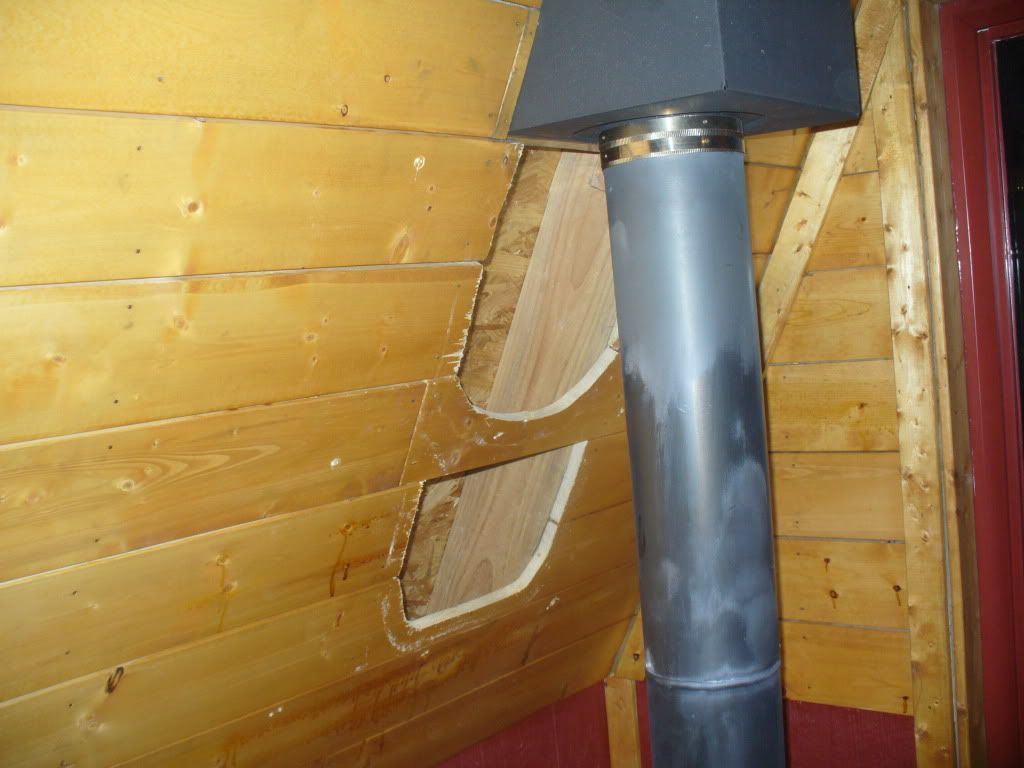
Title: Re: 20x32 A frame cabin Central KY
Post by: Don_P on December 08, 2010, 10:48:56 PM
Post by: Don_P on December 08, 2010, 10:48:56 PM
If you don't have one, smoke detectors are mighty cheap insurance.
Title: Re: 20x32 A frame cabin Central KY
Post by: MountainDon on December 08, 2010, 10:52:34 PM
Post by: MountainDon on December 08, 2010, 10:52:34 PM
On the water pipe insulation....
What kind of insulation? The foam stuff made for pipes? I ask because wrapping some types of insulation with duct tape will crush and reduce the air spaces and it's the encapsulated air that provides the insulation.
Insulation is fine as far as it goes. It retards the movement of heat from the warmer side to the cold side. That's the direction the heat will always travel. If there is not much heat in the warmer place (inside the insulation, in the piping), and if there is no introduction of new heat into that space, it will drop to the outside, colder temperature. For certain. Putting more insulation in the floor removes a source of heat from above to the pipes below, unless I am misinterpreting what you are describing. It is my opinion that is counterproductive to keeping the pipes from freezing. Perhaps I do not understand the layout there.
Title: Re: 20x32 A frame cabin Central KY
Post by: MountainDon on December 08, 2010, 11:01:51 PM
Post by: MountainDon on December 08, 2010, 11:01:51 PM
On the chimney...
Removal of combustibles is good. But a piece of cement board or similar material, even solid brick, over combustibles is not recognized as proper heat protection. It may slow down the heat transfer but eventually with a fire burning long enough the same issues with wood charring will be encountered.
Note, NFPA rules do not permit fasteners through the heat shielding in the area directly behind the pipe. Fasteners and their standoffs should be off to the sides according to them.
But what you have there is much better than before. The air gaps are smaller than what NFPA calls for, but you have two of them. That may count for something. Do you have a means to measure the temperature behind the heat shields? Perhaps one of those indoor/outdoor types with the outside sensor on a thin cord could be used? I have measured the temperature behind the heat shield in our gazebo. It never goes above 100 degrees while the metal itself gets to be blistering hot.
Also what is inside that chimney box? Does it pass through the wall with the rest of the box on the outside? Insulated pipe in the box? Any combustibles is what I'm asking.
Title: Re: 20x32 A frame cabin Central KY
Post by: MountainDon on December 08, 2010, 11:15:29 PM
Post by: MountainDon on December 08, 2010, 11:15:29 PM
Quote from: Don_P on December 08, 2010, 10:48:56 PM
If you don't have one, smoke detectors are mighty cheap insurance.
Ours goes off when we toast bread. So we appreciate the quick "bayonet" twist lock mount.
We also have three fire extinguishers on hand, two 4-A:60-B:C and one 2-A:10-B:C dry chemical types
Title: Re: 20x32 A frame cabin Central KY
Post by: EaglesSJ on December 08, 2010, 11:57:19 PM
Post by: EaglesSJ on December 08, 2010, 11:57:19 PM
I have 4 smoke detectors one on either end of the house upstairs and down. We also have 2 big (2 ft tall, 6-7" diameter) fire extinguishers just in case. Inside the chimney box is just a piece of triple wall pipe that extends out the ceiling. Even with a scorching fire you could put your tongue on it if you wanted. even the box itself never gets about warm. I could crawl back in behind the knee wall and take a temperature I suppose. I do believe that it is much better than before though for sure. But after seeing how quick heat can take its toll on wood that is too close I dont want to fool around anymore.
Title: Re: 20x32 A frame cabin Central KY
Post by: ben2go on December 09, 2010, 11:46:28 AM
Post by: ben2go on December 09, 2010, 11:46:28 AM
Co2 detectors are great additions also.We have them and they have went off before.Too much opening of the stove door I guess.Opened the front door and a window across from the door and all was fine.Oh yeah, and opened the flue damper a little more.
Title: Re: 20x32 A frame cabin Central KY
Post by: bradyman on December 09, 2010, 12:11:38 PM
Post by: bradyman on December 09, 2010, 12:11:38 PM
I've seen you and your lady on jeepforum as well. I think it is very cool what you are doing. Living off grid is not for the faint of heart! For the pipes, I think the best solution is to install the piping up in the floor joist next to the subfloor. Then insulate below the pipes. This will create a pocket of warm air that the pipes will survive in. I doubt you will have much luck with anything else short of heat tape or heating the area under the home. If you install the pipes in the floor joist they shouldn't need any extra insulation. Just make sure to insulate below them and NOT above them.
Aluminum is a great conductor of heat. That is why most automobile radiators and heat sinks are made from aluminum. I would suggest using steel to protect the framing from the wood stove. I would be afraid that the aluminum would conduct the heat too much back to the framing. This may not be an issue with the extra air space you have, but it would be a concern of mine.
I hope I have been helpful. Good luck. Maybe I missed it but what are you doing for potable water, and for grey / black water disposal?
Title: Re: 20x32 A frame cabin Central KY
Post by: EaglesSJ on December 09, 2010, 06:05:01 PM
Post by: EaglesSJ on December 09, 2010, 06:05:01 PM
Grey water disposal flows into a underground gravel pit and there is no black water because we use a composting toilet.
Title: Re: 20x32 A frame cabin Central KY
Post by: speedfunk on December 09, 2010, 07:40:58 PM
Post by: speedfunk on December 09, 2010, 07:40:58 PM
My house when growing up is now un occupied and unheated. To keep water main from freeze we open the facet a little bit in a sink.
fwiw :D
fwiw :D
Title: Re: 20x32 A frame cabin Central KY
Post by: Don_P on December 09, 2010, 07:56:38 PM
Post by: Don_P on December 09, 2010, 07:56:38 PM
Sorry, all the pictures don't load for me most of the time. Judging from the rosin flow out of the wood, you are about to light :-\. This setup is not good. Can you slide over and go out where the window is?
Title: Re: 20x32 A frame cabin Central KY
Post by: EaglesSJ on December 09, 2010, 08:52:57 PM
Post by: EaglesSJ on December 09, 2010, 08:52:57 PM
Quote from: MountainDon on December 08, 2010, 10:52:34 PM
On the water pipe insulation....
What kind of insulation? The foam stuff made for pipes? I ask because wrapping some types of insulation with duct tape will crush and reduce the air spaces and it's the encapsulated air that provides the insulation.
Insulation is fine as far as it goes. It retards the movement of heat from the warmer side to the cold side. That's the direction the heat will always travel. If there is not much heat in the warmer place (inside the insulation, in the piping), and if there is no introduction of new heat into that space, it will drop to the outside, colder temperature. For certain. Putting more insulation in the floor removes a source of heat from above to the pipes below, unless I am misinterpreting what you are describing. It is my opinion that is counterproductive to keeping the pipes from freezing. Perhaps I do not understand the layout there.
foam pipe insulation wrapped with regular insulation on top of that. I put insulation in between all the floor joist and then on the bottom of the pipes so that all the pipes are now sandwiched between two layers of R19 and then I stapled all of that to the bottom of the floor with black plastic sheeting.
Title: Re: 20x32 A frame cabin Central KY
Post by: IronPatriotTN on December 12, 2010, 04:12:05 AM
Post by: IronPatriotTN on December 12, 2010, 04:12:05 AM
In the winter you might want to drop some tarps as skirting around the cabin. You go to keep the cold wind out away from any pipes.
Title: Re: 20x32 A frame cabin Central KY
Post by: EaglesSJ on December 12, 2010, 03:24:33 PM
Post by: EaglesSJ on December 12, 2010, 03:24:33 PM
I already done that. that was one of the first things on my agenda. I put it on the inside of the stacked wood and stapled it to. I guess my insulation sandwich worked out ok. We have a good amount of snow on the ground right now and its about 19 degrees and the water is flowing fine. Finally
Title: Re: 20x32 A frame cabin Central KY
Post by: OkieJohn2 on December 13, 2010, 10:12:15 AM
Post by: OkieJohn2 on December 13, 2010, 10:12:15 AM
This is not really a serious suggestion, but long ago it was not uncommon to build houses up high and use the space underneath for keeping livestock in the winter.
Title: Re: 20x32 A frame cabin Central KY
Post by: Johnbrakingground on January 17, 2011, 01:35:25 PM
Post by: Johnbrakingground on January 17, 2011, 01:35:25 PM
[cool] You guys did in a few months, what my wife and I have been talking about for 3 years. Congrats. You and your family have inspired me and my family to get this thing going. Living without a mortgage is our goal. I have been looking around for a couple years on someone that has built an A-frame. I like the simple design and the way it goes up fast. I can't beleive I ended up finding it in the forum where I spend most of my time. Great family and I'm sure your very proud of building it with your own two hands. Keep an eye out, we may be on this forum doing something similar very soon. Nice Job
Title: Re: 20x32 A frame cabin Central KY
Post by: considerations on January 17, 2011, 08:47:14 PM
Post by: considerations on January 17, 2011, 08:47:14 PM
Whew - good save on the pipes. Running water is such a huge convenience.
Title: Re: 20x32 A frame cabin Central KY
Post by: bayview on January 21, 2011, 05:26:32 PM
Post by: bayview on January 21, 2011, 05:26:32 PM
Seems you have a following on the teardrop trailer forum . . . About ½ way down the page.
http://www.mikenchell.com/forums/viewtopic.php?t=41013&postdays=0&postorder=asc&highlight=puffin&start=45 (http://www.mikenchell.com/forums/viewtopic.php?t=41013&postdays=0&postorder=asc&highlight=puffin&start=45)
/.
Title: Re: 20x32 A frame cabin Central KY
Post by: ben2go on January 21, 2011, 08:23:52 PM
Post by: ben2go on January 21, 2011, 08:23:52 PM
I am a member of that site and never even saw that thread till now.
Title: Re: 20x32 A frame cabin Central KY
Post by: EaglesSJ on January 22, 2011, 11:04:08 AM
Post by: EaglesSJ on January 22, 2011, 11:04:08 AM
I greatly appreciate you posting that link. I am glad that I could help somebody out and maybe a bit of inspiration to stop throwing so much money away to banks when you can live free and happy on a smaller scale with alot less worry (well the occasional water freeze or propane fill catches you off guard)
Also I am very intrigued by the mention of their wood basement as we were looking at building a basement under here this spring. We are just going to do the back half of the house so that the pipes dont freeze and it will give me a place to do my reloading and her scrapbooking as well as a entryway to the house that we dont mind getting dirty. Right now all of our funds are going towards building a fence for a couple horses. I will post pics when available. Right now were sitting under alot of snow so not doing much at all other than packing in wood for the stove.
Looks like solar will be coming also in spring due to the enlarged tax refund for all the energy efficient options that we went with while building. This is what we are most excited about! Not having to start the generator every couple days to charge the battery bank.
Title: Re: 20x32 A frame cabin Central KY
Post by: speedfunk on January 23, 2011, 02:47:04 PM
Post by: speedfunk on January 23, 2011, 02:47:04 PM
free and happy on a small scale...hell yeah...that is what its about. ;D
Title: Re: 20x32 A frame cabin Central KY
Post by: EaglesSJ on January 28, 2011, 10:34:05 AM
Post by: EaglesSJ on January 28, 2011, 10:34:05 AM
Nice winter shot

Title: Re: 20x32 A frame cabin Central KY
Post by: Redoverfarm on January 28, 2011, 10:40:26 AM
Post by: Redoverfarm on January 28, 2011, 10:40:26 AM
One nice thing about an A-frame is there's not a snow load to worry about. ;D Nice pic
Title: Re: 20x32 A frame cabin Central KY
Post by: dollarcounter on January 31, 2011, 11:05:56 AM
Post by: dollarcounter on January 31, 2011, 11:05:56 AM
That snow-covered exterior shot in the woods is beautiful. It would be really great to see some interior shots of the upper level if there've been any updates.
Title: Re: 20x32 A frame cabin Central KY
Post by: EaglesSJ on January 31, 2011, 11:10:34 AM
Post by: EaglesSJ on January 31, 2011, 11:10:34 AM
No updates yet, waiting on tax refund to come in. Buying solar and finishing the upstairs with that.
Title: Re: 20x32 A frame cabin Central KY
Post by: Sassy on January 31, 2011, 12:16:56 PM
Post by: Sassy on January 31, 2011, 12:16:56 PM
Looks beautiful - especially in that setting - amazing how quickly you built that! Looking forward to seeing the inside.
Title: Re: 20x32 A frame cabin Central KY
Post by: duncanshannon on February 01, 2011, 01:08:18 AM
Post by: duncanshannon on February 01, 2011, 01:08:18 AM
unbelievable [shocked] story! congrats on the build... inspiring for sure.
Title: Re: 20x32 A frame cabin Central KY
Post by: Jutt on February 03, 2011, 01:54:52 AM
Post by: Jutt on February 03, 2011, 01:54:52 AM
I just signed up to say great job Eagle. I love the house, the wooded lot, the dogs, the concept of off grid self sufficiency, great family you have there...plus my grandfather was a Kentuckian. Good job man, keep it up and thanks for taking the time to post all of the pics/info.
~Jutt
~Jutt
Title: Re: 20x32 A frame cabin Central KY
Post by: EaglesSJ on February 03, 2011, 10:29:58 AM
Post by: EaglesSJ on February 03, 2011, 10:29:58 AM
Thank you all for the kind comments. It is always great to know that your work paid off. I have really been blessed to be able to lead the lifestyle that I do. God had been good to me and for that I am thankful. It really is a beautiful little piece of land to call home. We went and got our horse a couple days ago. I will try to post pics of the fence and such later but here is a pic of Lindsay with our new baby "Grace". We got her and a great looking leather saddle and bridle for the low low price of $0. She is an 8 yr old Tennessee walking mare. Our new farrier is coming to day to trim up her feet as she as been neglected for sometime now in that department it seems.
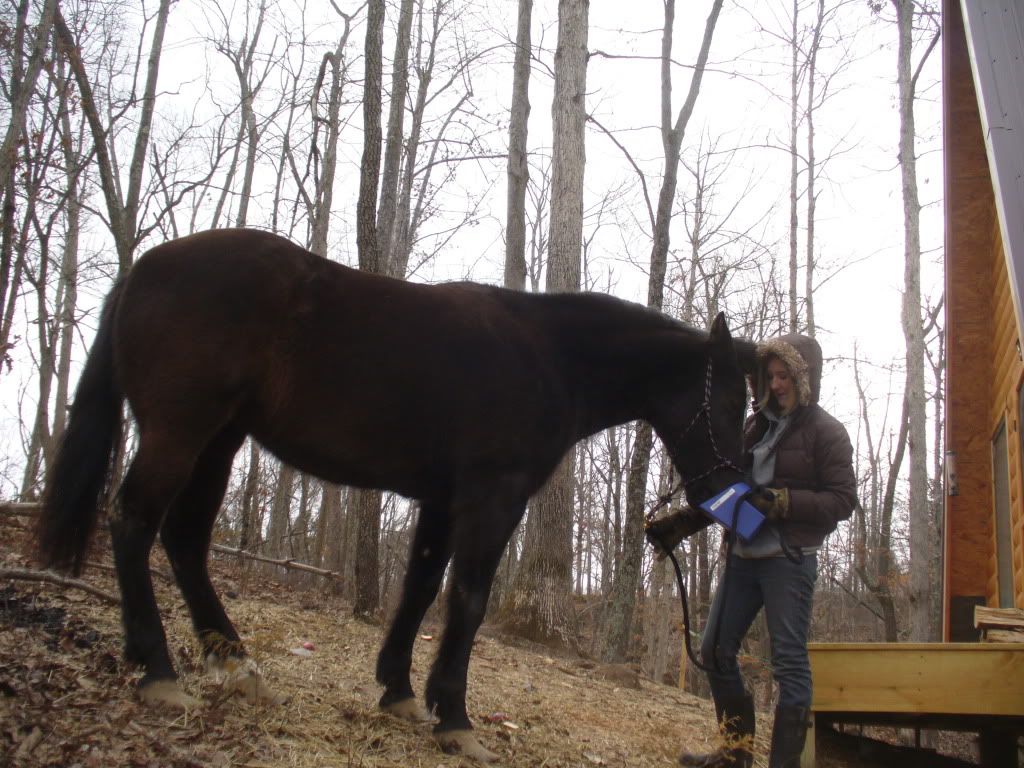
Title: Re: 20x32 A frame cabin Central KY
Post by: Sassy on February 03, 2011, 04:16:18 PM
Post by: Sassy on February 03, 2011, 04:16:18 PM
That's so great that you were able to get the mare and are enjoying your place. Have you ever read the book Hope Rising? It's about a couple who rescue horses & operate Crystal Peaks Youth Ranch in central Oregon. They take some of the worst cases of neglect & abuse - both horses & kids & God seems to do miracles when the kids meet the horses - not just for the kids but for the horses too.
Title: Re: 20x32 A frame cabin Central KY
Post by: EaglesSJ on February 11, 2011, 04:15:02 PM
Post by: EaglesSJ on February 11, 2011, 04:15:02 PM
Just got off the phone with Arizona wind and sun and ordered some goodies.
outback flexmax 80 mppt charge controller
http://www.solar-electric.com/oufl80sochco.html
3 kyocera 210 watt panels
http://www.solar-electric.com/kykd210waaop.html
and all the added goodies to go along with it. (wires, combiner box, lightning arrestor, etc)
This will give me 610 watts of power for now with the intention of adding another 3 panels in the very near future. I am using Mt. Dons method by upping the voltage way up since I have about a 200 ft run to make between the batteries and my house.
Title: Re: 20x32 A frame cabin Central KY
Post by: MountainDon on February 11, 2011, 06:46:34 PM
Post by: MountainDon on February 11, 2011, 06:46:34 PM
Great charge controller! You will never be sorry and that was a good price.
I don't recall and have not bothered to look back in the topic.... but curious I am...
Is your system based on 12 or 24 volts (batteries?)
I don't recall and have not bothered to look back in the topic.... but curious I am...
Is your system based on 12 or 24 volts (batteries?)
Title: Re: 20x32 A frame cabin Central KY
Post by: EaglesSJ on February 11, 2011, 11:52:05 PM
Post by: EaglesSJ on February 11, 2011, 11:52:05 PM
Currently a 12v system but I am going to rewire all my batteries to a 24v and purchase a new inverter. I am looking at the below listed inverter but havent decided for sure. I would like to stay around $1500 or less. I like the outback inverters as they look bullet proof. Also after reading about some of xantrex's latest reviews it seems that they are slacking in the quality dept a bit.
http://www.energybay.org/outback-vfx3524m-inv-3.5kw-24v-mobile-1
Any input from anyone would be much appreciated as this is a big purchase for us common folk :)
http://www.energybay.org/outback-vfx3524m-inv-3.5kw-24v-mobile-1
Any input from anyone would be much appreciated as this is a big purchase for us common folk :)
Title: Re: 20x32 A frame cabin Central KY
Post by: MountainDon on February 12, 2011, 12:37:09 AM
Post by: MountainDon on February 12, 2011, 12:37:09 AM
That is the very inverter we have!!! :) I really like it; am very glad I bought it.
It has a very workable search function. It is user adjustable for sensitivity. If you're not sure what "search" means, here's a brief explanation. When everything in the cabin is off the inverter is basically off. There is a very small power draw when in search, much much less than what there would be if the inverter was in idle. The inverter sends out a pulse. If there is nothing turned on to use power nothing happens. When something is turned on, the inverter senses that and turns itself on. The delay between turning on a light and the inverter activating is user programmable. The amount of power required to "trip" the search is also programmable, down to less than a watt. The search function can also be diabled if desired leaving the inverter in an idle situation.
Some things draw so little power I had to take steps to trick the inverter. For example our microwave draws so little power when not microwaving it will not trip the inverter on. I use an LED night light plugged into a strip that the microwave is connected to to provide enough load to make the inverter come on. Turn the strip off when done and the inverter turns off unless there is something else turned on. I hope that is clear; if not I can try again.
I also like it as it can supply enough power so we don't have to worry about microwaving something and making toast (or vacuuming, or...) all at the same time. You won't believe the number of times something like this would pop up when we lived in the RV and had only 1100 watts AC available.
It runs my skilsaw and my pancake P-C compressor. Not at the same time, but one at a time.
You will need the Outback Mate to program the inverter. The mate is very useful though as it can be used with the FM80 as well. I bought the Hub4 so everything is tied together, including the remote battery temperature sensor. Everything connects with cat5 cables.
The Outback inverters (and charge controllers) have a lower operating temperature than any other products I looked at. That was important to me as I mounted it outside. It does not make much noise but under load the fan may be bothersome if the inverter is inside. I mounted it on a rubber pad to isolate low frequency vibration that was coming through the wall. The bed is on the other side.
I absolutely love it. If you have any questions, ask me.
Title: Re: 20x32 A frame cabin Central KY
Post by: EaglesSJ on February 12, 2011, 09:10:05 AM
Post by: EaglesSJ on February 12, 2011, 09:10:05 AM
Thank you for the awesome description. I like the auto idle feature as that would be really nice when we go to sleep it would basically shut down however I am afraid that its usefulness would be of little value to us due to the fact that we have a regular electric fridge. I am moving all of our stuff outside and up the hill into the sun. We are going to build a small barn/shed and I will build an insulated room inside of it to house all of these items. Dont want my batteries getting too cold as I have read you will suffer alot of power loss from this. (require a larger battery bank in Ah for the same resulting power available.) Also I will be mounting our panels on the roof of said building so I plan of building the roof at the required 35 degree angle pitch and build the building with this part of the roof facing due south as instructed by arizona wind and sun. we are really excited to not have to visit the generator house for awhile!
If you dont mind me asking where do you get your inverter as prices seem to vary drastically from 1600-2300. I would like to make sure i pick it up at the cheapest price possible. Thanks for all the help MtDon. You have a great looking setup.
If you dont mind me asking where do you get your inverter as prices seem to vary drastically from 1600-2300. I would like to make sure i pick it up at the cheapest price possible. Thanks for all the help MtDon. You have a great looking setup.
Title: Re: 20x32 A frame cabin Central KY
Post by: MountainDon on February 12, 2011, 10:55:31 AM
Post by: MountainDon on February 12, 2011, 10:55:31 AM
I got our VFX3524M at Affordable Solar. Their warehouse is about 12 miles from home so I saved on freight. I also got very lucky and hit them at a time when they were having an overstock sale and one of those was included.
You are right cold weather reduces available capacity of the batteries. I purposely increased the number of batteries to cover that. That capacity comes back as the temperatures warm. Batteries also are longer lived when kept cool/cold.
As power is taken out and as batteries are recharged there is some heat generated by the electro chemical action. A well insulated box can preserve that and keep the batteries warmer than otherwise. I didn't bother as our wintertime use is maybe every other weekend, not constant like your situation is.
Title: Re: 20x32 A frame cabin Central KY
Post by: MountainDon on February 14, 2011, 10:39:09 PM
Post by: MountainDon on February 14, 2011, 10:39:09 PM
I just had a thought. :o Perhaps you are aware, if so great. Those panels, when connected in series, are capable of producing a lethal shot of power. So be careful when connecting them and handling the downstream wiring. For that reason it is good to have a DC breaker or disconnect at the modules and then another just before the charge controller. That also goes for grounding everything properly (PV module frames, mounts, etc.)
It varies from person to person, but most healthy people can handle DC voltages up to 48-50 volts. That's not a guarantee, just a ball park figure. Exercise more care when handling that stuff than when working under the hood of a vehicle.
It varies from person to person, but most healthy people can handle DC voltages up to 48-50 volts. That's not a guarantee, just a ball park figure. Exercise more care when handling that stuff than when working under the hood of a vehicle.
Title: Re: 20x32 A frame cabin Central KY
Post by: alexkgore on February 14, 2011, 11:45:18 PM
Post by: alexkgore on February 14, 2011, 11:45:18 PM
Does anyone know of good solar dealers in Colorado?
Title: Re: 20x32 A frame cabin Central KY
Post by: EaglesSJ on February 15, 2011, 10:01:08 PM
Post by: EaglesSJ on February 15, 2011, 10:01:08 PM
Quote from: MountainDon on February 14, 2011, 10:39:09 PM
I just had a thought. :o Perhaps you are aware, if so great. Those panels, when connected in series, are capable of producing a lethal shot of power. So be careful when connecting them and handling the downstream wiring. For that reason it is good to have a DC breaker or disconnect at the modules and then another just before the charge controller. That also goes for grounding everything properly (PV module frames, mounts, etc.)
It varies from person to person, but most healthy people can handle DC voltages up to 48-50 volts. That's not a guarantee, just a ball park figure. Exercise more care when handling that stuff than when working under the hood of a vehicle.
Did not know that so thank you! But after deciding to move all my batteries up to the shed that the PV panels will be on the roof of I am just going to wire them parallel so I get more charging amps. Anyways thank you for the heads up I didnt realize dc current could harm you (working under hood of car analogy)
Anyways I came home today to a big load of lumber from my local supplier so we got straight to work in anticipation of the equipment arriving later this week. we worked by the headlights of my jeep. Building will be a 16x10 shed with 2 8 ft overhangs on either side for dry storage of hay and such for the horses.
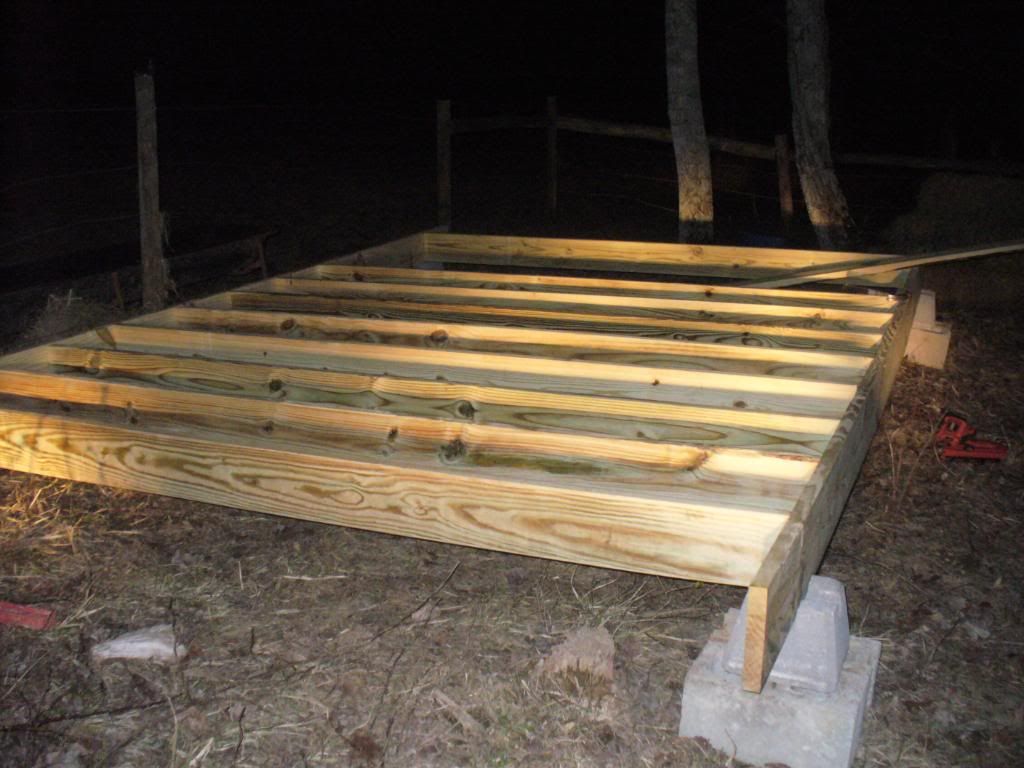
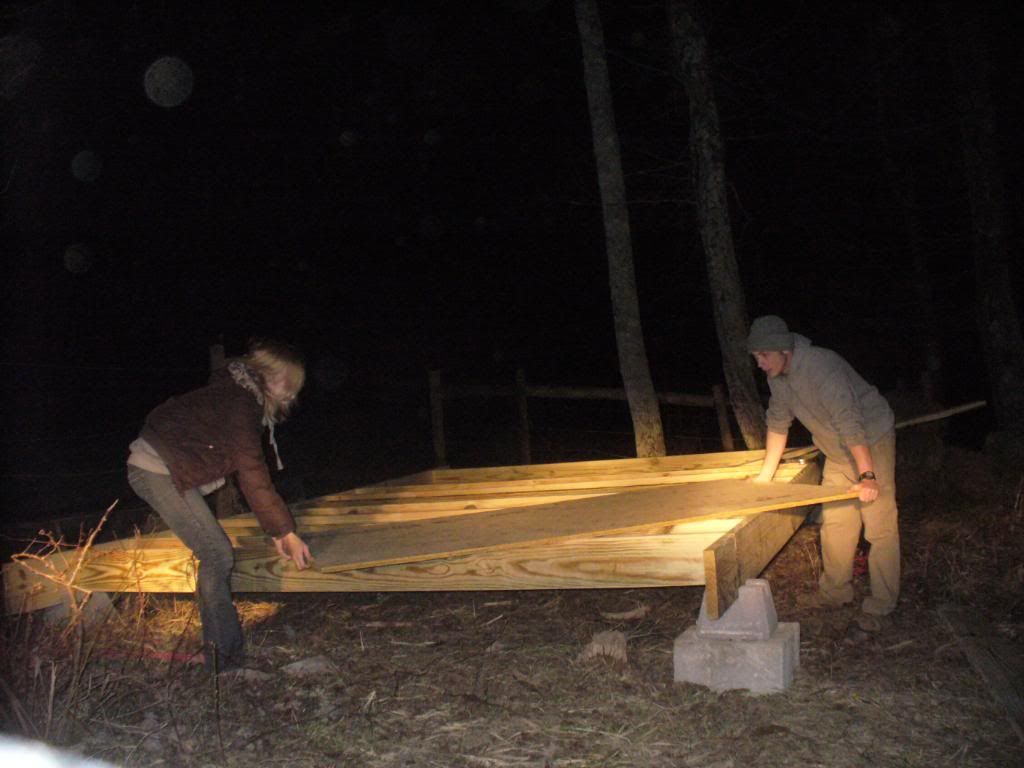
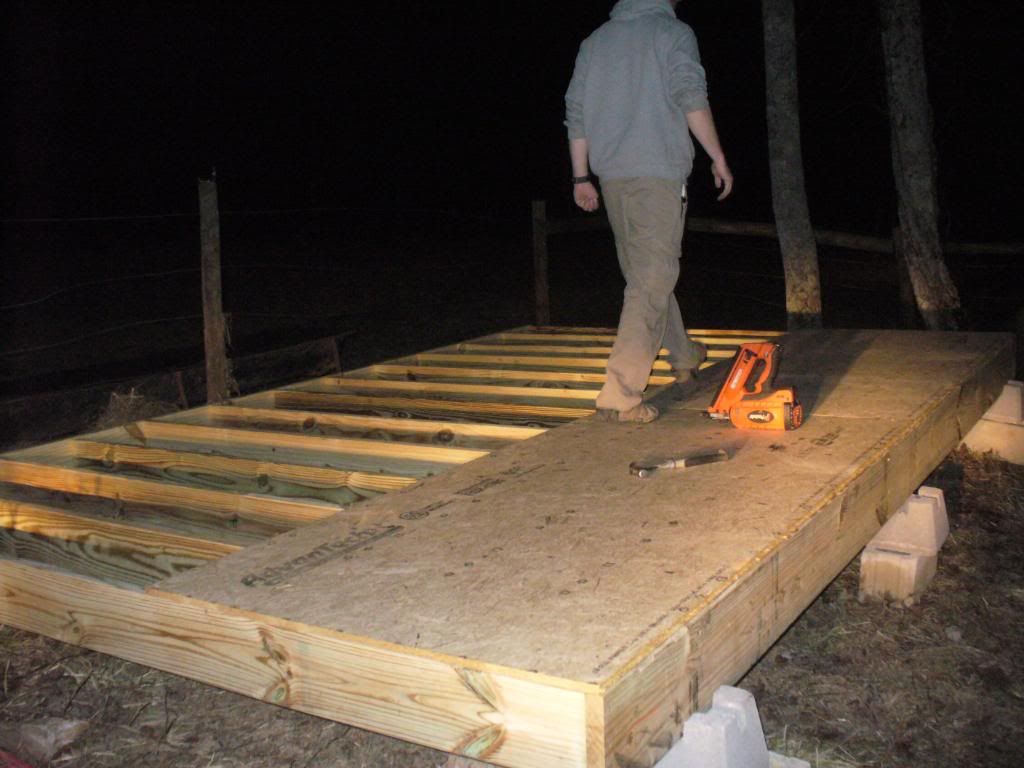
also here are a couple random pics of Colton building his space ship that he designed and built all on his own. I only helped start a couple of nails as he got tired.
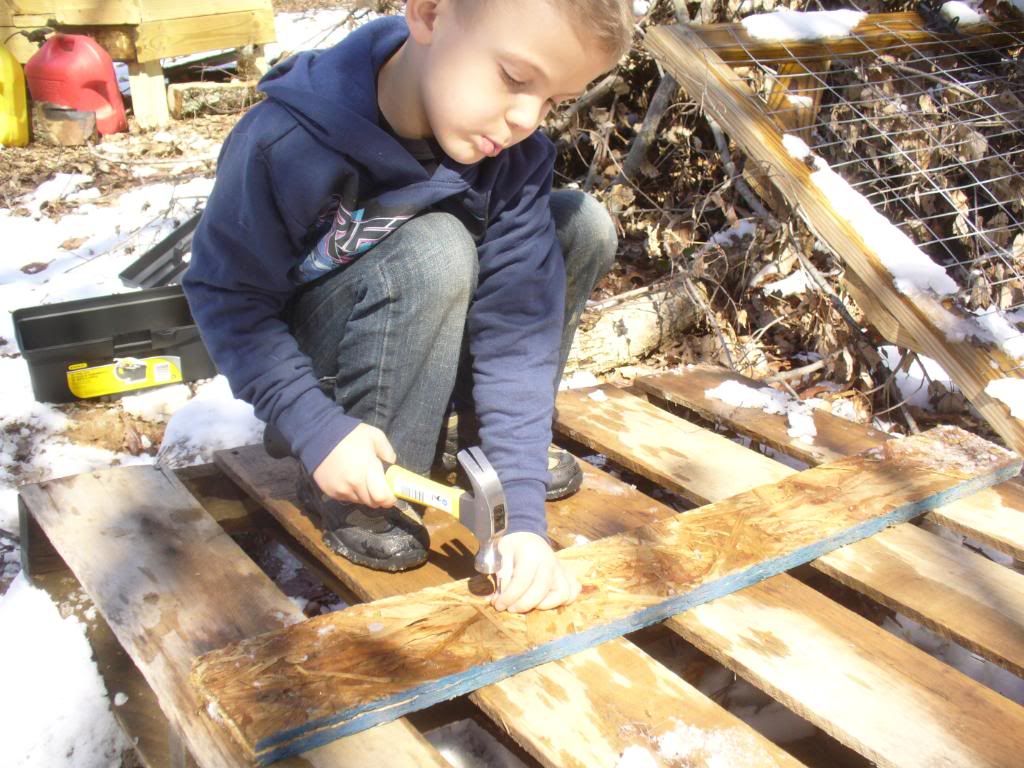
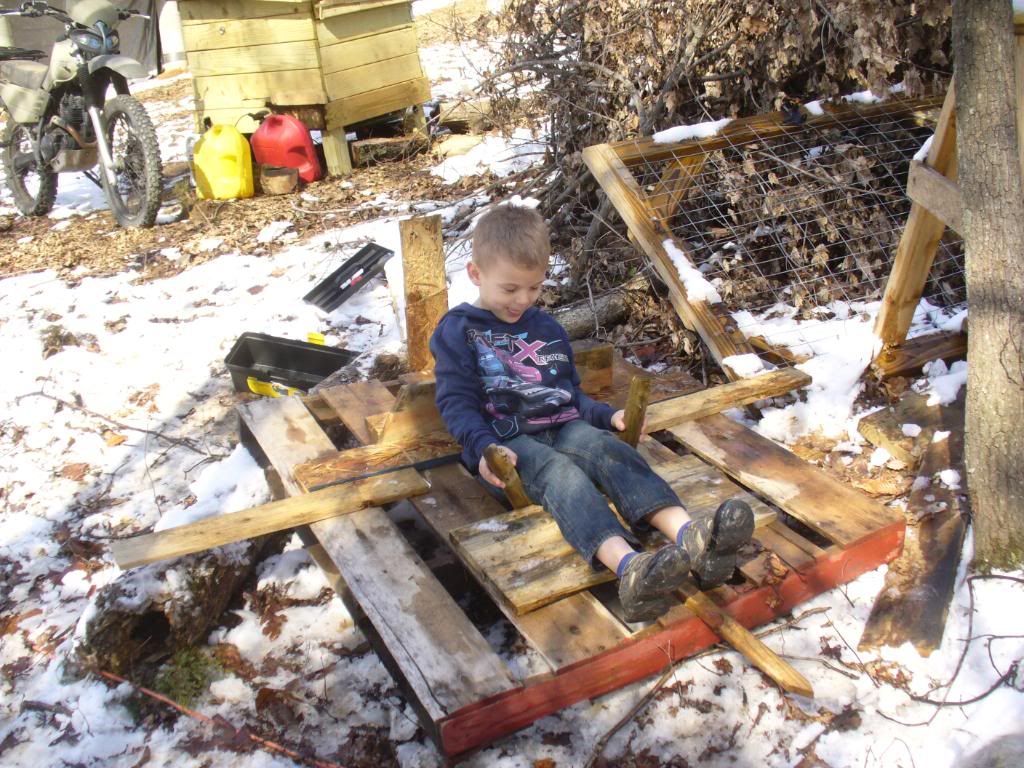
Title: Re: 20x32 A frame cabin Central KY
Post by: EaglesSJ on February 15, 2011, 10:32:16 PM
Post by: EaglesSJ on February 15, 2011, 10:32:16 PM
I would also like to add before anyone says anything. The concrete support block in the middle isnt touching the beam. I know this. We are shimming all of the blocks to get them perfectly level tomorrow. Just wanted to get help setting the floor joist while Lindsay was home. Anyways hopefully I will have up four walls tomorrow. More to come....
Title: Re: 20x32 A frame cabin Central KY
Post by: astidham on February 15, 2011, 10:42:08 PM
Post by: astidham on February 15, 2011, 10:42:08 PM
I love Colton's space ship, very good build!
Title: Re: 20x32 A frame cabin Central KY
Post by: EaglesSJ on February 15, 2011, 10:43:54 PM
Post by: EaglesSJ on February 15, 2011, 10:43:54 PM
Quote from: astidham on February 15, 2011, 10:42:08 PM
I love Colton's space ship, very good build!
He even holds extra nails in his teeth like a pro carpenter!
Title: Re: 20x32 A frame cabin Central KY
Post by: MountainDon on February 15, 2011, 11:54:34 PM
Post by: MountainDon on February 15, 2011, 11:54:34 PM
Quote from: EaglesSJ on February 15, 2011, 10:01:08 PM
... I am just going to wire them parallel so I get more charging amps.
That will not really make any real difference in the end. The PV system will be still pumping the same total watts into the batteries. The total capacity of the batteries, measured in total amp-hours, is the same no matter how the batteries are connected, all parallel, all serial, or a mix.
While it is good practice to have a charge rate that puts enough amps into the batteries to stir them up (to prevent stratification) by causing greater bubbling, that can also be accomplished with an equalization charge every so often.
Title: Re: 20x32 A frame cabin Central KY
Post by: MountainDon on February 16, 2011, 10:06:09 AM
Post by: MountainDon on February 16, 2011, 10:06:09 AM
Okay. Sometimes I'm slow to catch on... Now I realize I am confused.
So it woiuld seem there is less advantage to wiring the PV modules in series if the batteries are now in close proximity to the PV modules. There still may be some net gain on very cloudy days when the modules performance is very low.
Where is the inverter going to be located, at the cabin or at the batteries? Is there still about 200 feet of wire involved? And what size of wire?
QuoteI am using Mt. Dons method by upping the voltage way up since I have about a 200 ft run to make between the batteries and my house.
Quote...after deciding to move all my batteries up to the shed that the PV panels will be on the roof of...
So it woiuld seem there is less advantage to wiring the PV modules in series if the batteries are now in close proximity to the PV modules. There still may be some net gain on very cloudy days when the modules performance is very low.
Where is the inverter going to be located, at the cabin or at the batteries? Is there still about 200 feet of wire involved? And what size of wire?
Title: Re: 20x32 A frame cabin Central KY
Post by: EaglesSJ on February 16, 2011, 10:50:36 PM
Post by: EaglesSJ on February 16, 2011, 10:50:36 PM
Quote from: MountainDon on February 16, 2011, 10:06:09 AM
Okay. Sometimes I'm slow to catch on... Now I realize I am confused.QuoteI am using Mt. Dons method by upping the voltage way up since I have about a 200 ft run to make between the batteries and my house.Quote...after deciding to move all my batteries up to the shed that the PV panels will be on the roof of...
So it woiuld seem there is less advantage to wiring the PV modules in series if the batteries are now in close proximity to the PV modules. There still may be some net gain on very cloudy days when the modules performance is very low.
Where is the inverter going to be located, at the cabin or at the batteries? Is there still about 200 feet of wire involved? And what size of wire?
The inverter and all other power related equipment will be at the shed with the panels. I will then run ac power to the cabin via underground cable (8 gauge stranded copper wire in conduit) But the biggest run of dc wire will be from the room of the shed inside to the rest of the equipment.
Title: Re: 20x32 A frame cabin Central KY
Post by: MountainDon on February 16, 2011, 11:27:46 PM
Post by: MountainDon on February 16, 2011, 11:27:46 PM
FYI, 8 ga at 12.5 amps is good to 185 feet with 3% voltage drop; 10 amps for 230 feet.
Title: Re: 20x32 A frame cabin Central KY
Post by: EaglesSJ on February 17, 2011, 07:49:19 PM
Post by: EaglesSJ on February 17, 2011, 07:49:19 PM
Hey Don Aten Solar accidentally sent me the regular grid tie vfx3524 inverter instead of the the 3524M model. Will this cause any problems?
Title: Re: 20x32 A frame cabin Central KY
Post by: MountainDon on February 17, 2011, 08:30:27 PM
Post by: MountainDon on February 17, 2011, 08:30:27 PM
It should not. Depending... that 's the legal disclaimer
The "M", for Mobile, inverters have an integrated 30 amp AC transfer switch which is NEC required for AC input neutral/ground switching for shore cord or generator hook-up. Mobile applications like RV's and boats have the option for connecting to the grid as well as using AC from a generator or supplying AC power from the batteries. The M's are limited to 30 amp AC input. The non M's can accept 60 amps SC input I believe. That was not a factor for our installation. My generator puts out less than 30 amps maximum.
Just refer to the installation manual and follow the procedure for the standard off grid set up.
I chose the M model because I got a deal on it; saved $300. No other reason.
Title: Re: 20x32 A frame cabin Central KY
Post by: EaglesSJ on February 17, 2011, 08:39:18 PM
Post by: EaglesSJ on February 17, 2011, 08:39:18 PM
I got mine for $1680 and the power mate for $215. Alot cheaper than most places I checked. It shipped today and should be here monday. The panels come via yellow freight on wednesday. Hopefully I can stop being lazy and have the shed done by then. Bought all the wire and switches and lighting for it today. Worked a few hours, something came up that required my attention for most of the day but I still made progress. Hopefully I will do more tomorrow.
About the 8 ga wire. Do you think that is enough or should I drop to 6 or even 4? The highest load we pull is about 18 amps. And even this is a very rare occasion.
About the 8 ga wire. Do you think that is enough or should I drop to 6 or even 4? The highest load we pull is about 18 amps. And even this is a very rare occasion.
Title: Re: 20x32 A frame cabin Central KY
Post by: EaglesSJ on February 17, 2011, 08:43:08 PM
Post by: EaglesSJ on February 17, 2011, 08:43:08 PM
Here are pics of todays work.
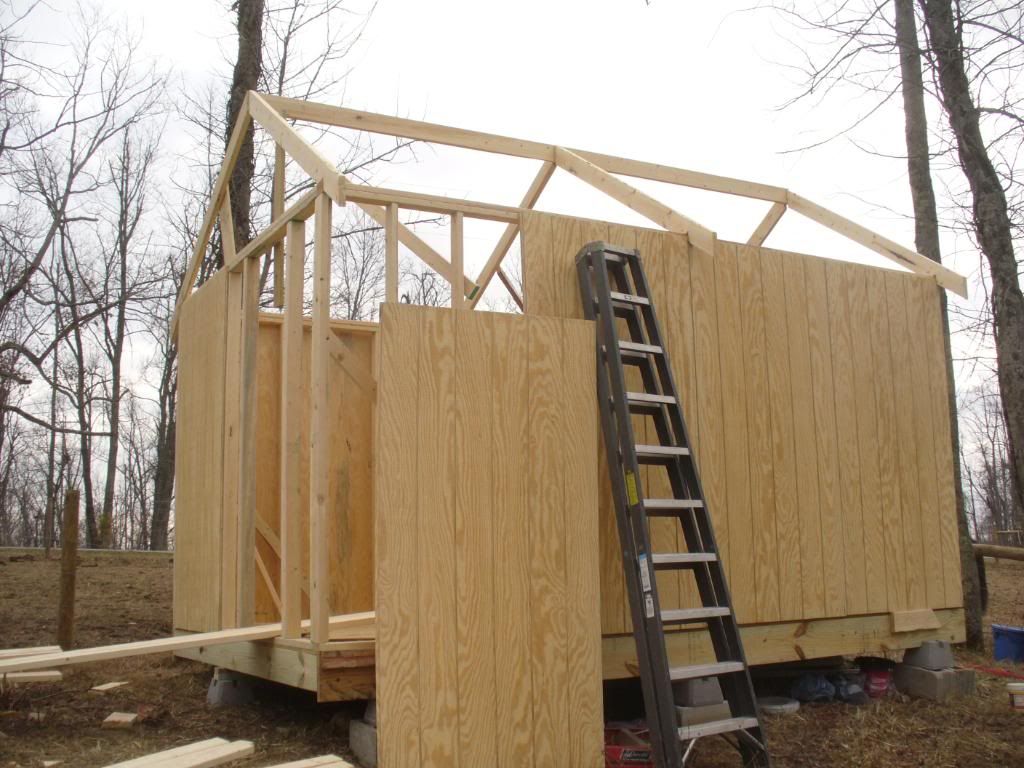
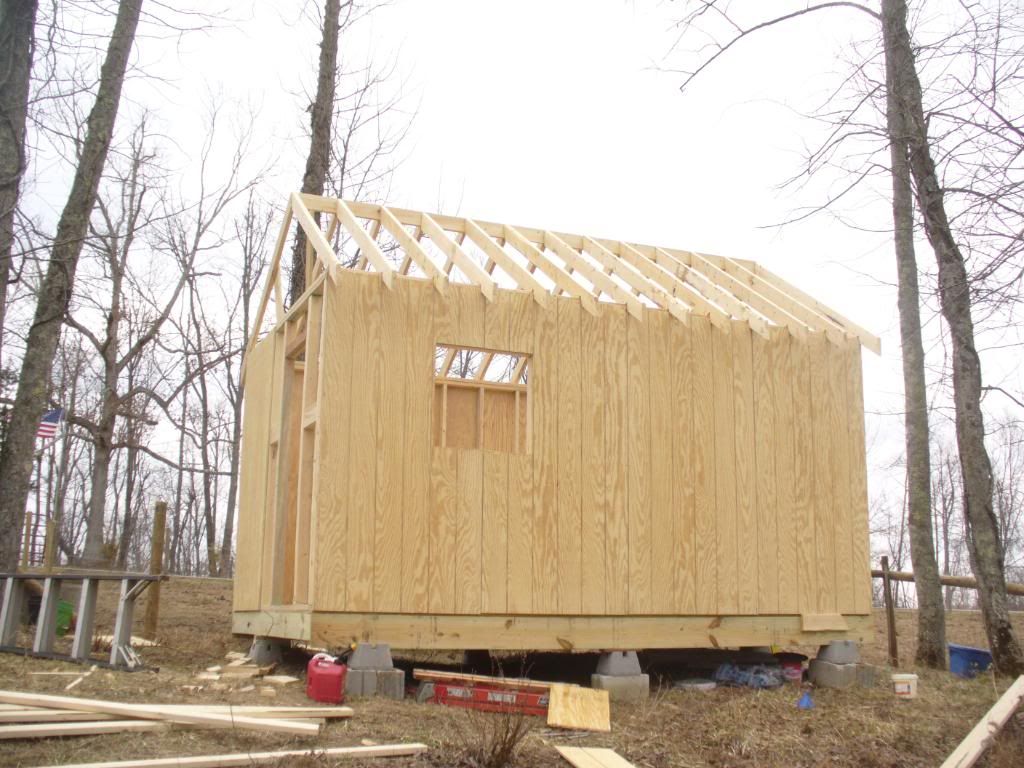

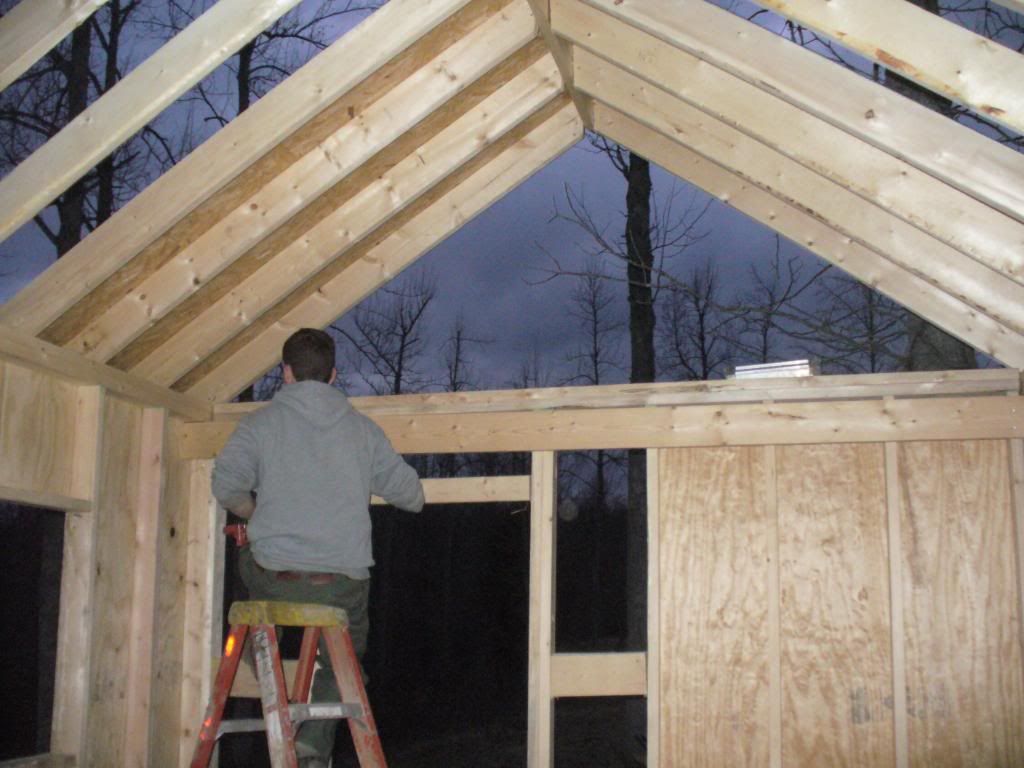
The new horse on the right. His name is Chip and he is Appaloosa/quarter.
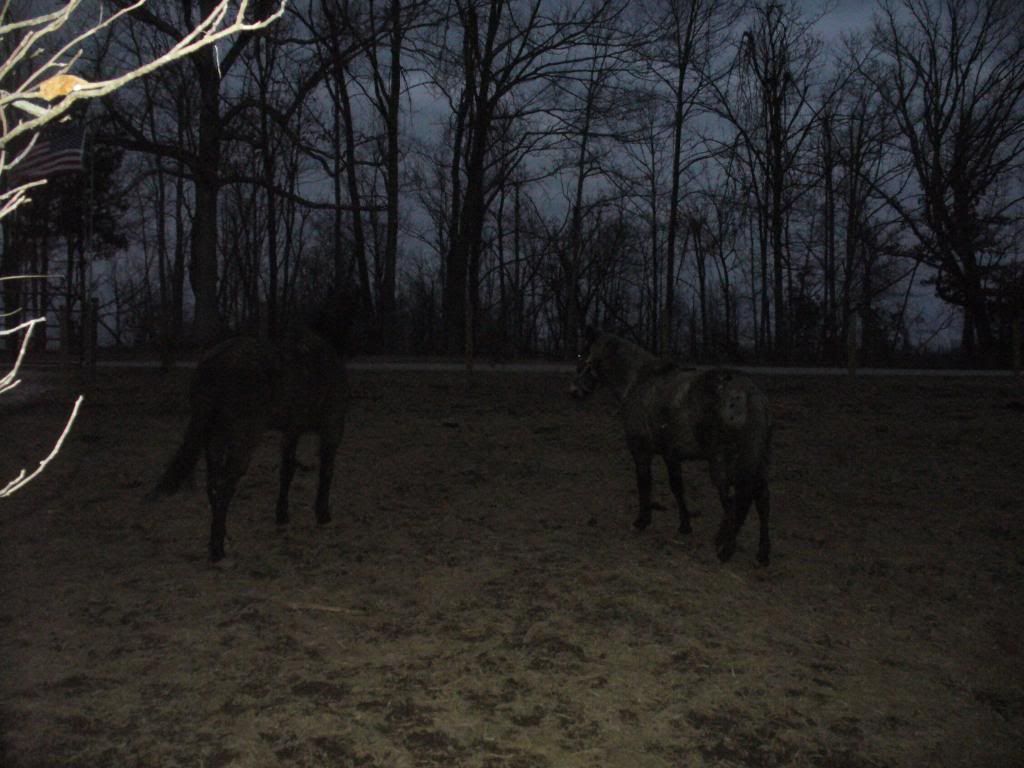
And here are a few from a few days ago.

The new horse on the right. His name is Chip and he is Appaloosa/quarter.
And here are a few from a few days ago.
Title: Re: 20x32 A frame cabin Central KY
Post by: MountainDon on February 17, 2011, 09:09:23 PM
Post by: MountainDon on February 17, 2011, 09:09:23 PM
Most power calculations are done using the figure of 5% maximum allowable voltage drop. Five percent drop means a 120 volt input would be 114 volts, still good for most applications. Being conservative, I prefer 3% as a maximum, or less in lower voltage circuits. But that's just me.
I don't know your exact cable run distance, so here are some numbers to look at. The chart body numbers are maximum distance in feet, rounded to the nearest 5 (copper wire)
3% drop 5% drop
gauge 15 amps 20 amps 15 amps 20 amps
8 155 115 255 195
6 245 185 400 300
4 385 290 645 485
If your power draw is consistently under the maximum you can get away with smaller wires. If the maximum draws are for starting motors, even though of short duration, I'd go towards the larger wires. Motors don't like to be shy on power when starting; can shorten life.
If you have more questions feel free to ask.
Title: Re: 20x32 A frame cabin Central KY
Post by: EaglesSJ on February 18, 2011, 08:31:22 PM
Post by: EaglesSJ on February 18, 2011, 08:31:22 PM
After your chart I decided to upgrade. I measured the exact distance and it is 231 feet from the inverter to the breaker box at the cabin. I went to lowes to exchange my wiring and found out that a spool of 4 gauge wire (what I wanted to do) was 460 bucks!!! Yikes. So I went with 6 gauge wire. You think that will be enough? The manual says 6 awg is the largest wire the inverter will accept on the ac output anyways.
Title: Re: 20x32 A frame cabin Central KY
Post by: MountainDon on February 18, 2011, 08:39:55 PM
Post by: MountainDon on February 18, 2011, 08:39:55 PM
Yes, copper is expensive
231 feet, 6 gauge, 120 VAC, copper: 30 amps = 5.66% drop
20 amps = 3.77%
15 amps = 2.83%
10 amps = 1.89%
That 6 gauge should be fine.
231 feet, 6 gauge, 120 VAC, copper: 30 amps = 5.66% drop
20 amps = 3.77%
15 amps = 2.83%
10 amps = 1.89%
That 6 gauge should be fine.
Title: Re: 20x32 A frame cabin Central KY
Post by: EaglesSJ on February 18, 2011, 11:36:30 PM
Post by: EaglesSJ on February 18, 2011, 11:36:30 PM
Is there a way to network my outback charge controller and my inverter through one power mate other than buying the $150 hub4? Can I use a regular router or no?
Title: Re: 20x32 A frame cabin Central KY
Post by: MountainDon on February 19, 2011, 11:26:29 AM
Post by: MountainDon on February 19, 2011, 11:26:29 AM
I never tried a standard router so I don't know. Without a hub only one device can be connected. The outback Hub is powered by the Cat5 connection.
Did you buy one or two battery remote temperature sensors? With a hub you can use one, connected to the inverter as I recall, and the charge controller will read it through the hub. That way the temp regulator is used for both charge controller and generator charging.
I have two temp sensors, one on each the charge controller and the inverter. That is because when we are not there I de-power the inverter, pull the breaker, so there is nothing electrical active (AC) in the cabin. But doing that turns off the feed through from the inverter to the hub. That's when the temp sensor plugged into the charge controller keeps working.
Title: Re: 20x32 A frame cabin Central KY
Post by: bluestarguy on February 21, 2011, 01:33:14 AM
Post by: bluestarguy on February 21, 2011, 01:33:14 AM
There now I can see the progress on the cabin, Too! Keep up the good work. Thanks Bruce
Title: Re: 20x32 A frame cabin Central KY
Post by: ajbremer on February 21, 2011, 05:59:13 AM
Post by: ajbremer on February 21, 2011, 05:59:13 AM
Thank you for all of your hard work that you not only put into your place but also put into your threads and pics on this site. I took an hour this morning and read about 1/2 of all of it but went forward and seen all the pictures. I'm pretty amazed at how fast it all went for you and very impressed that you got all dried in and looking good for under 10k? I might be wrong about that amount but I remember reading that in there somewhere. In case I'm wrong, about how much did it cost you to get dried-in?
I'm going to be starting on my 14x24 Little House (plans from here) and what you did has inspired me even more.
By the way, everyone needs to forgive your Aunt. People make mistakes, people change, and if they don't - oh well. This is in a book somewhere: "Be not judges of others, and you will not be judged: do not give punishment to others, and you will not get punishment yourselves: make others free, and you will be made free:"
Title: Re: 20x32 A frame cabin Central KY
Post by: EaglesSJ on February 21, 2011, 08:02:43 PM
Post by: EaglesSJ on February 21, 2011, 08:02:43 PM
All my parts came in and I am wiring up the battery bank for a 24v system. Does this look ok? The second row of batterys is actually below the first on a second shelf.
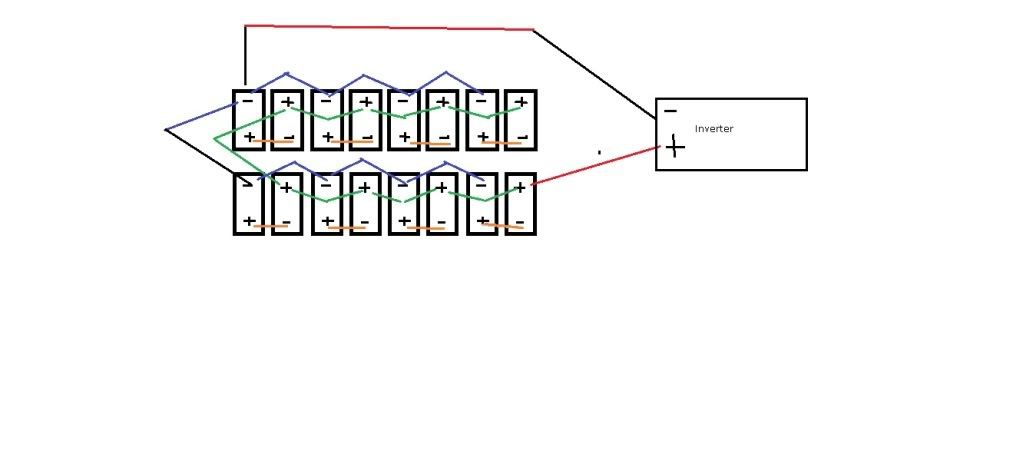
Title: Re: 20x32 A frame cabin Central KY
Post by: MountainDon on February 21, 2011, 09:50:34 PM
Post by: MountainDon on February 21, 2011, 09:50:34 PM
That will work.
My personal preference would be to connect the series pairs that make 24 volts, to copper buss bars and then feed the inverter off those. That makes it easy to remove one or two batteries if the need ever arises, as in a cell failure.
Or...
Parallel strings with cables are best connected with the positive to inverter connection at one end of the parallel strings and the negative at the other end. The way you have it drawn the negative connects to the middle of the string. I've redrawn ...
In a straight line this is what I mean...

That makes a terrifically long negative cable though. Splitting and bending it around to fit two rows, two shelves...
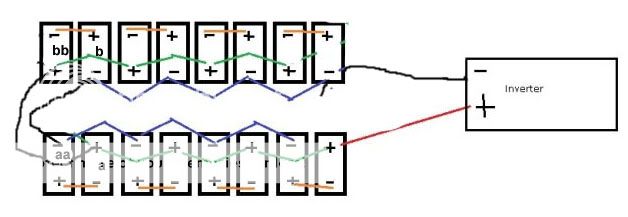
My personal preference would be to connect the series pairs that make 24 volts, to copper buss bars and then feed the inverter off those. That makes it easy to remove one or two batteries if the need ever arises, as in a cell failure.
Or...
Parallel strings with cables are best connected with the positive to inverter connection at one end of the parallel strings and the negative at the other end. The way you have it drawn the negative connects to the middle of the string. I've redrawn ...
In a straight line this is what I mean...
That makes a terrifically long negative cable though. Splitting and bending it around to fit two rows, two shelves...
Title: Re: 20x32 A frame cabin Central KY
Post by: EaglesSJ on February 22, 2011, 01:12:03 AM
Post by: EaglesSJ on February 22, 2011, 01:12:03 AM
Sorry for the late reply. Just got in from wiring all of it. Funny you should say wire it all to a buss bar and have the inverter feed off of that because its exactly what I done. Anyways here is the progress for tonight. Going to pick up panels tomorrow morning and then on with the rest of the project. If you could describe or post a pic of how to wire up the panels, combiner box, and dc breakers I would really appreciate it. Thanks again!
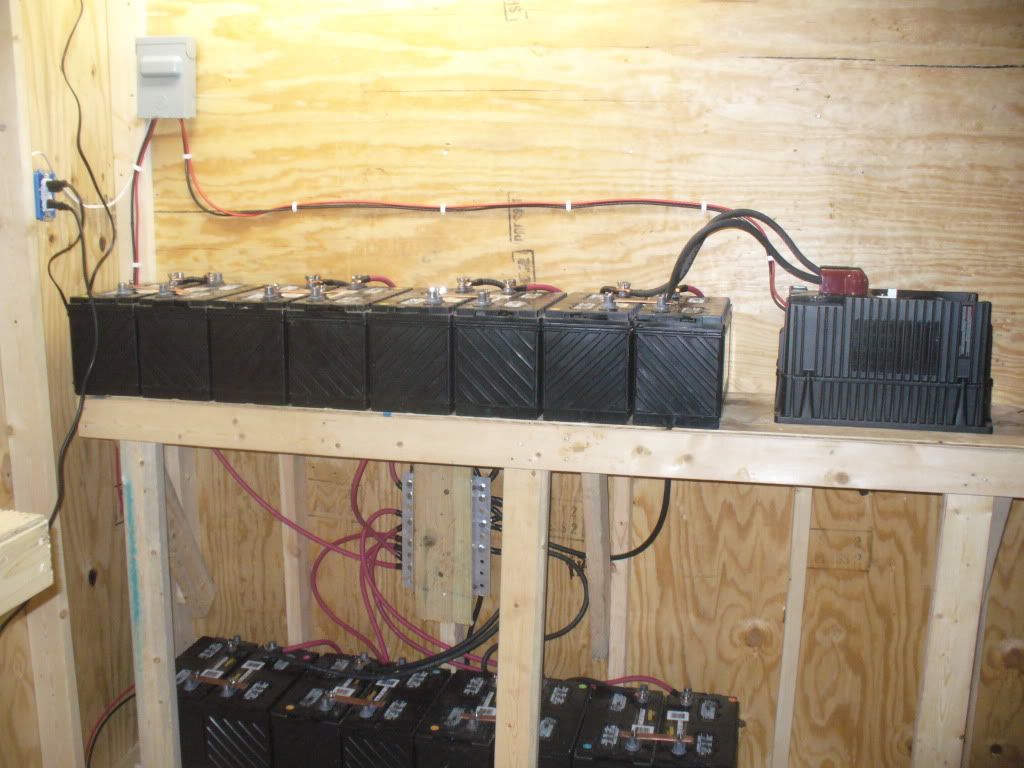
Title: Re: 20x32 A frame cabin Central KY
Post by: EaglesSJ on February 22, 2011, 01:13:37 AM
Post by: EaglesSJ on February 22, 2011, 01:13:37 AM
I would also like to add that the inverter power cables are temporary as my 4/0 cables 5 feet in length wont arrive until wednesday so for now I much do with those short smaller ones.
Title: Re: 20x32 A frame cabin Central KY
Post by: MountainDon on February 22, 2011, 10:48:16 AM
Post by: MountainDon on February 22, 2011, 10:48:16 AM
Is there going to be a fuse or a breaker in the positive wire from batteries to the inverter?
I used a large Airpax breaker from solarseller.com
http://countryplans.com/smf/index.php?topic=2335.msg96238#msg96238 (http://countryplans.com/smf/index.php?topic=2335.msg96238#msg96238)
Note that breakers usually should be mounted in the vertical position, not horizontal.
Here are some links to diagrams of how my system is wired, the first my hand drawn and the second one a computer generated diagram by tickhill
http://countryplans.com/smf/index.php?topic=6059.msg119820#msg119820 (http://countryplans.com/smf/index.php?topic=6059.msg119820#msg119820)
http://countryplans.com/smf/index.php?topic=6059.msg120194#msg120194 (http://countryplans.com/smf/index.php?topic=6059.msg120194#msg120194)
and a photo of the not quite completed, charge controller with breakers.
http://countryplans.com/smf/index.php?topic=2335.msg96237#msg96237 (http://countryplans.com/smf/index.php?topic=2335.msg96237#msg96237)
I just had to wire the outgoing breaker and add the ground wire.
Hope that helps.
Title: Re: 20x32 A frame cabin Central KY
Post by: rniles on February 22, 2011, 05:44:53 PM
Post by: rniles on February 22, 2011, 05:44:53 PM
EaglesSJ: I just finished reading your thread - You and your family are an inspiration! Wonderful job to you all!
Title: Re: 20x32 A frame cabin Central KY
Post by: EaglesSJ on February 24, 2011, 05:24:19 PM
Post by: EaglesSJ on February 24, 2011, 05:24:19 PM
Ok so here is the deal, I have a gvfx 3524 outback inverter/charger and a coleman 5000w generator. I cut the end off of an extension cord as directed by arizona wind and sun and ran the ac hot neutral and ground to the inputs on the inverter and then plugged it into my gen set and started it up. I have a solid yellow light on the ac input of my inverter but no charging is taking place. any help would be much appreciated.
Title: Re: 20x32 A frame cabin Central KY
Post by: MountainDon on February 24, 2011, 06:32:45 PM
Post by: MountainDon on February 24, 2011, 06:32:45 PM
It is possible to turn off the battery charger in the inverter programming. I think the setting is for Charger: Auto, On or Off or something like that.
If the batteries were very discharged it might not kick in. In that case charge with another charger first.
There is a delay built in and programmable. I have mine set to wait a couple minutes in warm weather and 10 minutes in cold weather. After the inverter senses generator input, the time delay counts down before it will begin to use the generator power.
It is possible the inverter does not like your generators output. The easiest way I know to check that is by connecting a generator like one of the Honda, Yamaha or other brand inverter/generators to the inverter input. They produce a pure sine wave AC. If the generator output is being passed through to the house wiring but it won't charge the batteries this could be the problem. The Mate will indicate where the house power is coming from.
Do you access to a good digital voltmeter to watch the output of the generator? How about a frequency meter? The Kill-A-Watt meter works as long as the measured load is within the meters limits.
Title: Re: 20x32 A frame cabin Central KY
Post by: EaglesSJ on February 26, 2011, 08:01:51 PM
Post by: EaglesSJ on February 26, 2011, 08:01:51 PM
Outback tech support said that this particular grid tie model will not work with 99% of generators and so I am trying to exchange it for the mobile model which will work with basically any generator.
Title: Re: 20x32 A frame cabin Central KY
Post by: MountainDon on February 26, 2011, 08:24:19 PM
Post by: MountainDon on February 26, 2011, 08:24:19 PM
Hopefully you won't have too much trouble doing the exchange, since it was the vendor's error, right?
Have to remember that for the future.
Have to remember that for the future.
Title: Re: 20x32 A frame cabin Central KY
Post by: EaglesSJ on February 27, 2011, 12:57:19 AM
Post by: EaglesSJ on February 27, 2011, 12:57:19 AM
Hopefully not, still trying to work out the details. Been occupied with starting our first garden and havent thought too much more about it. Borrowed a 24v battery charger from my uncle and I have it feeding from my old 12v inverter which feeds from the 12v alternator on the diesel generator. having a 24v alternator built as we speak.
Title: Re: 20x32 A frame cabin Central KY
Post by: professor on February 27, 2011, 08:47:30 PM
Post by: professor on February 27, 2011, 08:47:30 PM
Congratualations. Quite an accomplishment, family, & endeavor. Beautiful looking lot & elevation.
I too live in central KY. Yeah, winter's been wet & wild for around here.
I too am a US Air Force vet of some years past 1970-1974. Thank you for serving. Really enjoy the continuing story. It's a delight to follow your project. Thanks for sharing.
Believe I know you (your Dad actually) after I saw a picture of him. Probably live within 5 miles of your cabin. Will keep your name confidential. Will see your Dad & confirm that it's you. Considering something similar off-grid in next couple of years.
Contact me if I can be an extra body to help. Best wishes to entire family.
Title: Re: 20x32 A frame cabin Central KY
Post by: EaglesSJ on February 27, 2011, 10:06:34 PM
Post by: EaglesSJ on February 27, 2011, 10:06:34 PM
What a small world it is!
Without further ado here are some pics of here are some more pics of the current progress. One of me and one of her. As you will see she is very excited with the panels.
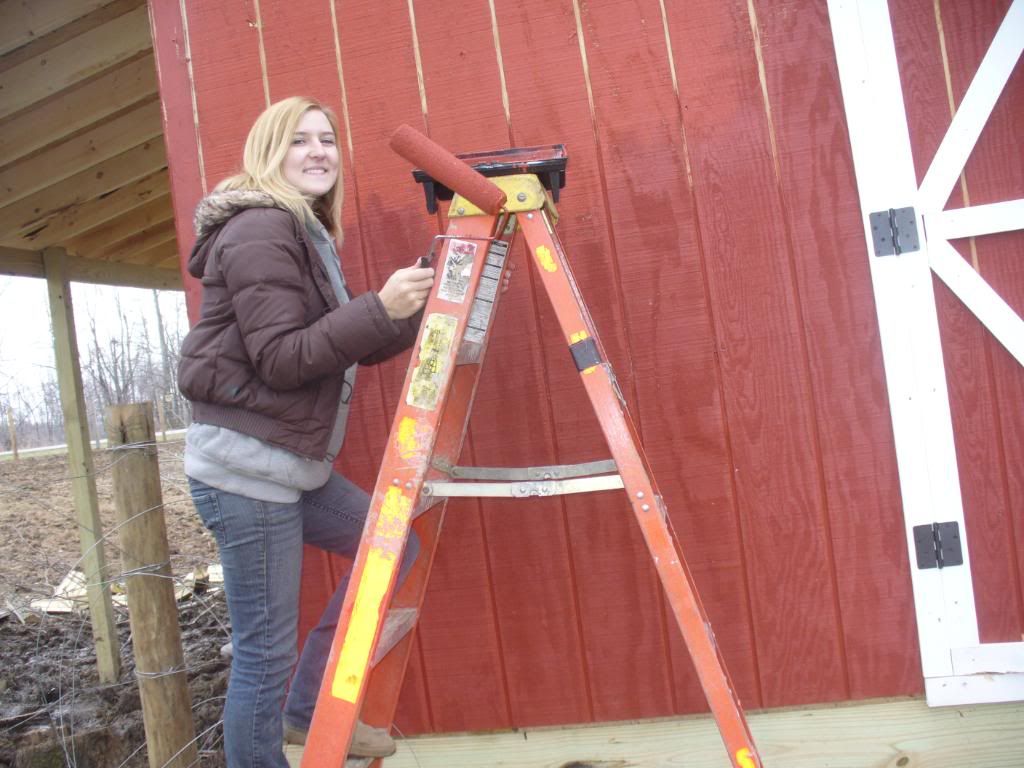
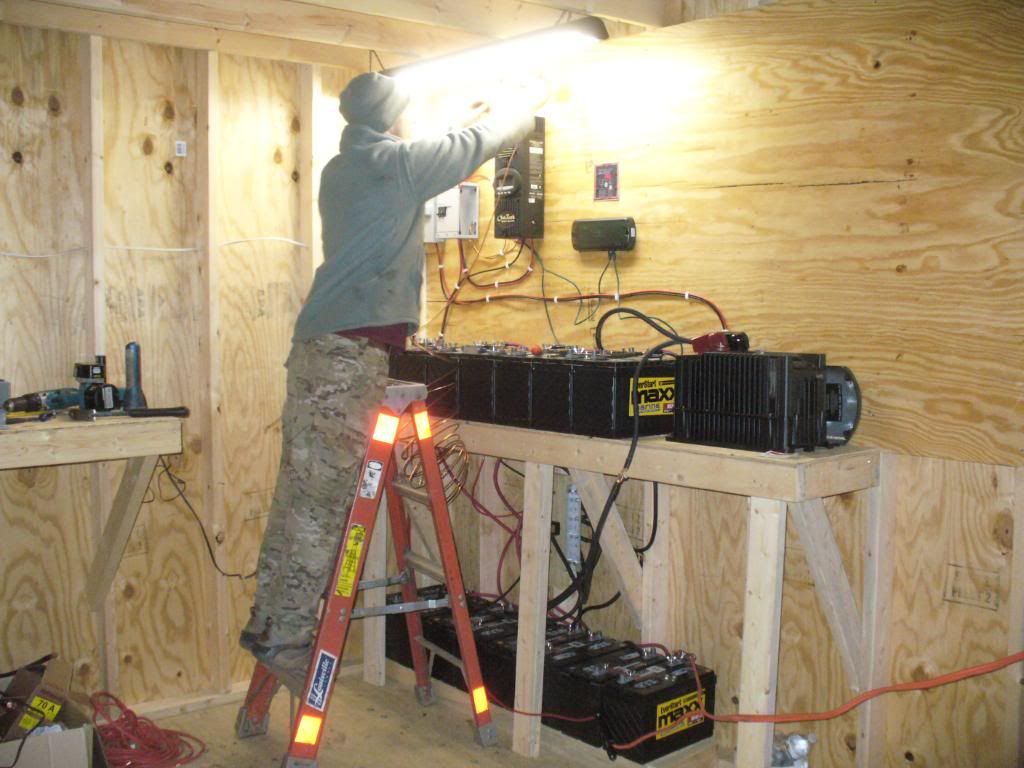
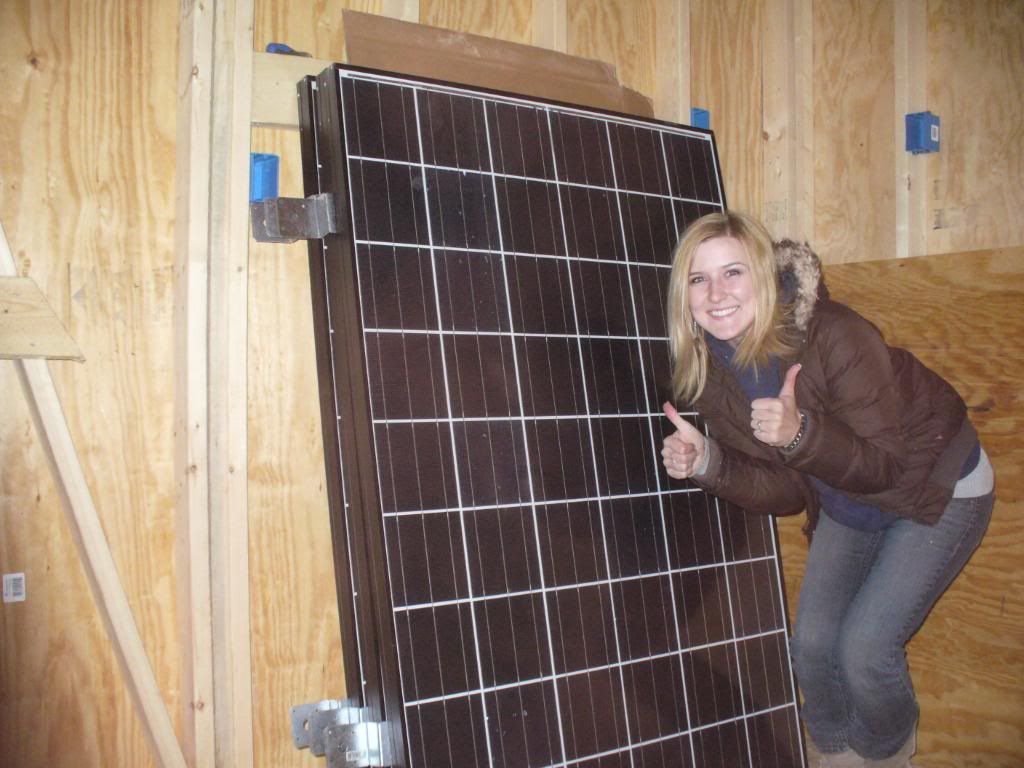
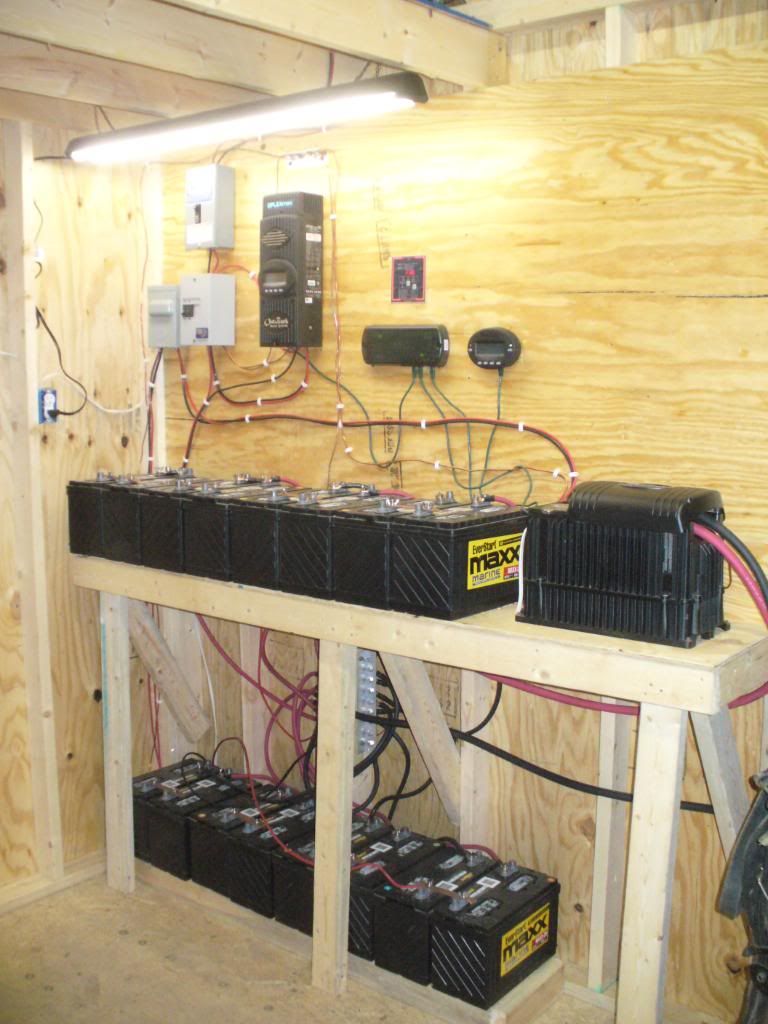
More random shots of the interior to show our small horse gear setup and my reloading setup. Soon in the opposing corner Lindsay will have a scrapbooking area the size of my reloading area. Fair is fair I suppose :)
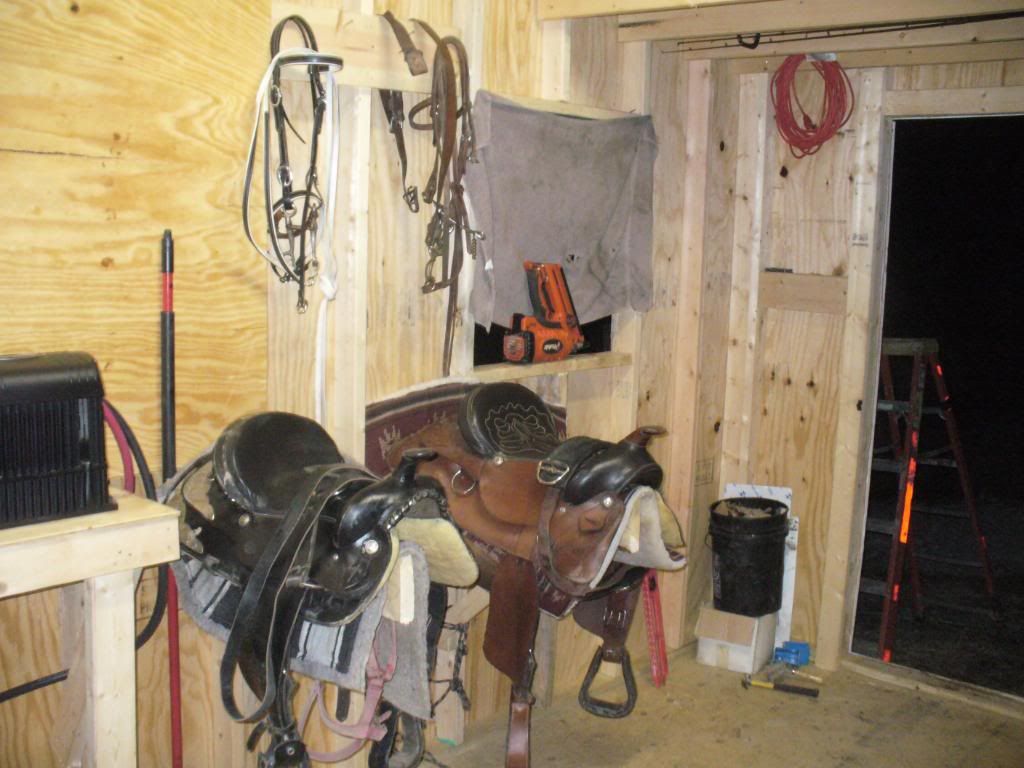
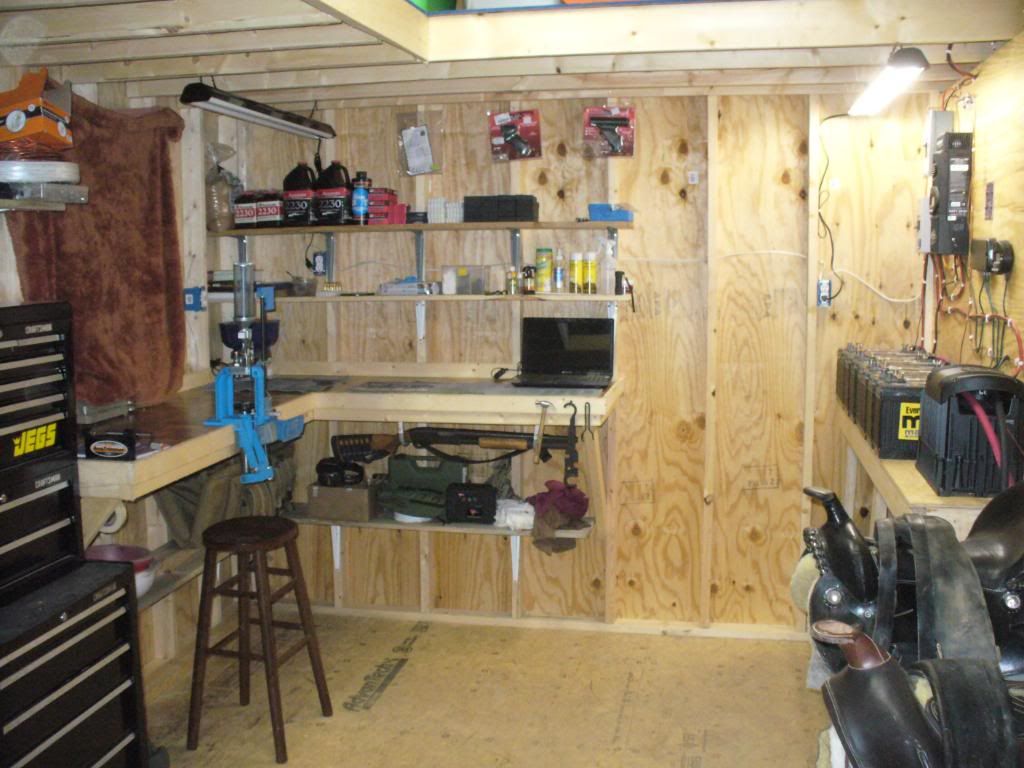
And as for the hardest worker of all, he stacked 2 ricks of wood all by his lonesome (well I packed a couple of the really large pieces) so for a hard days work we took him out for a new Lego set. We get there and to our surprise there is a cabin set. He was ecstatic. I guess I would be too if I just broke over $600 worth of legos lol.
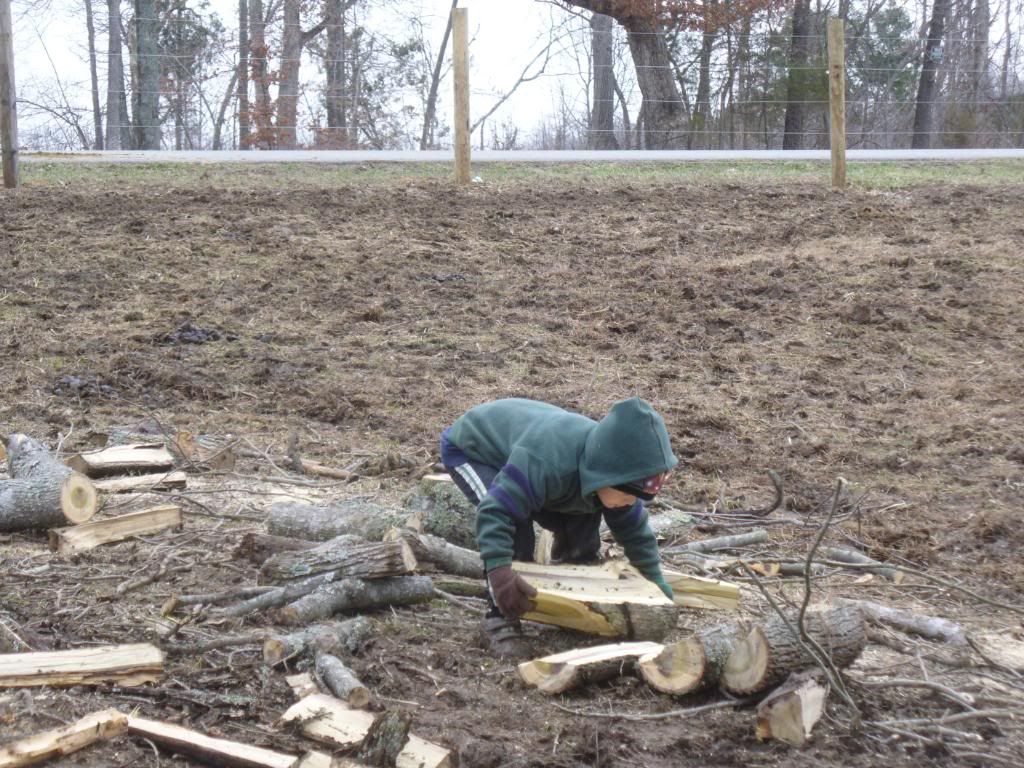
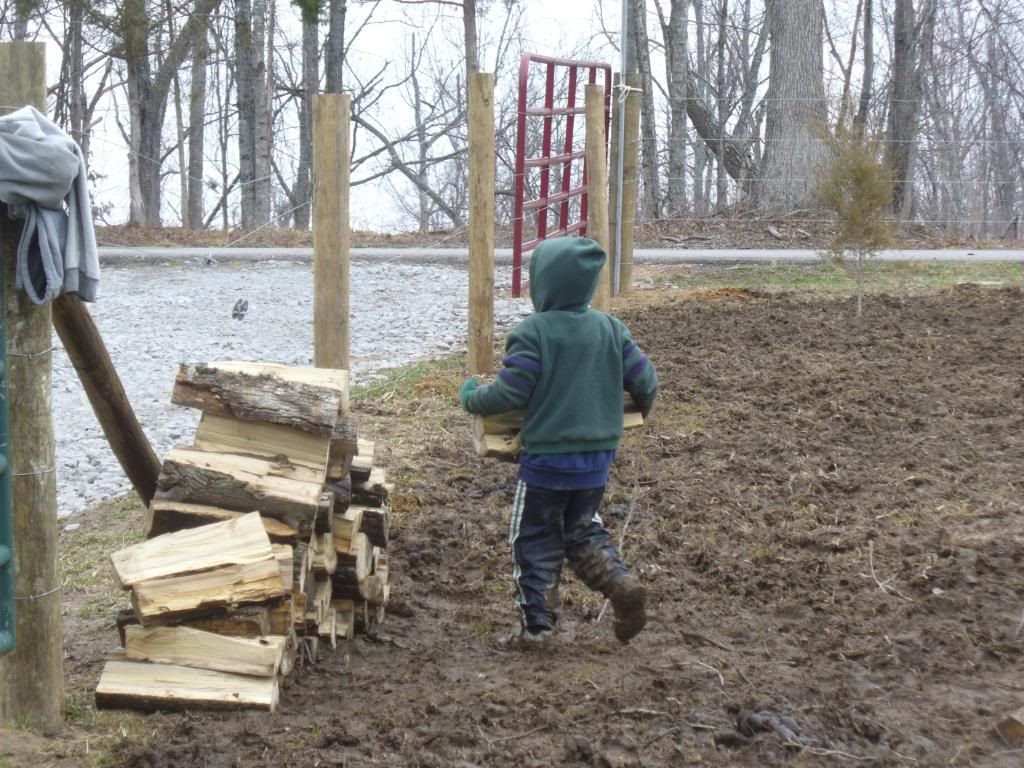
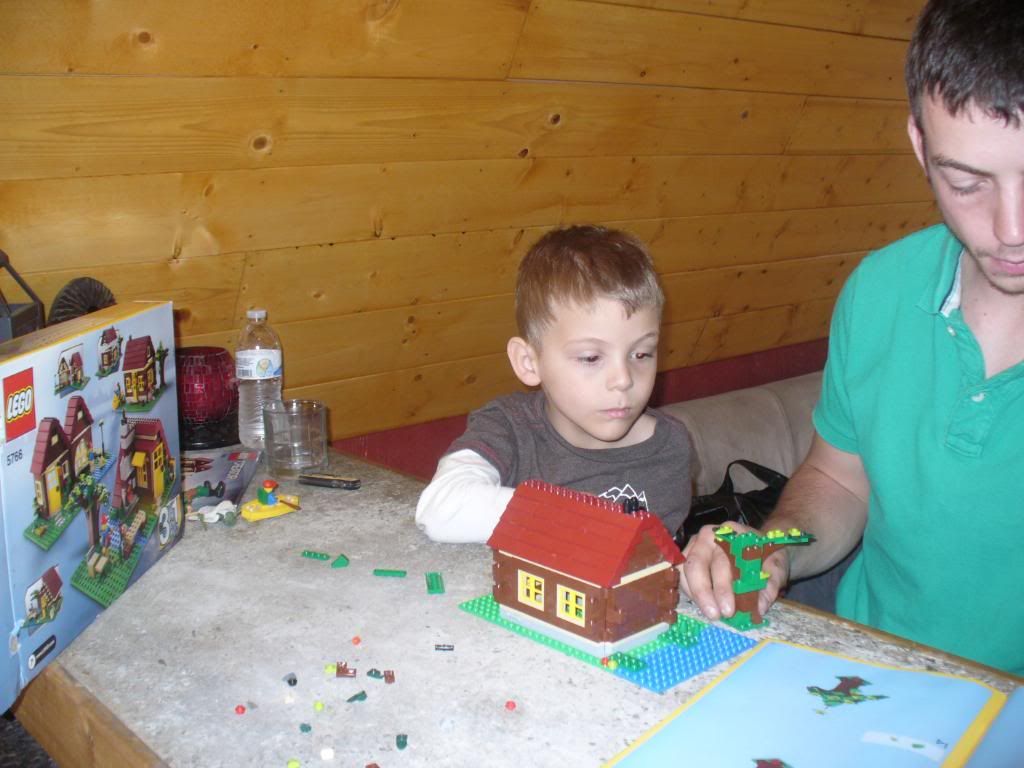
Without further ado here are some pics of here are some more pics of the current progress. One of me and one of her. As you will see she is very excited with the panels.
More random shots of the interior to show our small horse gear setup and my reloading setup. Soon in the opposing corner Lindsay will have a scrapbooking area the size of my reloading area. Fair is fair I suppose :)
And as for the hardest worker of all, he stacked 2 ricks of wood all by his lonesome (well I packed a couple of the really large pieces) so for a hard days work we took him out for a new Lego set. We get there and to our surprise there is a cabin set. He was ecstatic. I guess I would be too if I just broke over $600 worth of legos lol.
Title: Re: 20x32 A frame cabin Central KY
Post by: MountainDon on February 27, 2011, 10:37:01 PM
Post by: MountainDon on February 27, 2011, 10:37:01 PM
Shane, I know I mentioned it once or twice someplace on here and I meant to mention a comment or two back. d* Your electronics should not be located above the flooded wet cell batteries. :( Two issues. One: there are relays in the charge controller. They may not be sealed. There could be a danger of hydrogen being in the wrong place at the wrong time. Same with the breakers/disconnects. Two: flooded batteries under charge not only produce gases but may produce acid fumes or spatter that are unkind to electronic and electrical equipment. The open stud bay on the left hand wall, second out from the corner, would be a much better location.
Wish I had acted on my thought when it occurred to me.
It would also be a good idea (safety) to enclose the batteries before something or someone causes an accidental short. If done well with a H2 vent from a designed in high point that could help with the issues I mentioned above.
Wish I had acted on my thought when it occurred to me.
It would also be a good idea (safety) to enclose the batteries before something or someone causes an accidental short. If done well with a H2 vent from a designed in high point that could help with the issues I mentioned above.
Title: Re: 20x32 A frame cabin Central KY
Post by: EaglesSJ on February 27, 2011, 10:59:51 PM
Post by: EaglesSJ on February 27, 2011, 10:59:51 PM
It is my intention to enclose the batterys via plywood box of sorts and put a small computer fan venting directly outside.
I wish I could have heeded your warning about amperage more closely before I melted the handle on my 3/8" drive craftsman ratchet :D
I wish I could have heeded your warning about amperage more closely before I melted the handle on my 3/8" drive craftsman ratchet :D
Title: Re: 20x32 A frame cabin Central KY
Post by: MountainDon on February 27, 2011, 11:05:07 PM
Post by: MountainDon on February 27, 2011, 11:05:07 PM
It could have been worse it would seem. Two 12 volt batteries in series is enough to do simple emergency welding on the trail if one has some welding sticks, jumper cables and a dark glass. Three in series is better, but one doesn't always have the luxury of that many batteries or friends at hand.
Title: Re: 20x32 A frame cabin Central KY
Post by: astidham on February 27, 2011, 11:05:30 PM
Post by: astidham on February 27, 2011, 11:05:30 PM
Nice work on your shop Eagles!
looks like your son earned those legos.
looks like your son earned those legos.
Title: Re: 20x32 A frame cabin Central KY
Post by: Shawn B on February 27, 2011, 11:22:11 PM
Post by: Shawn B on February 27, 2011, 11:22:11 PM
Nice reloading shed and setup. You might want to heat the place a little to keep moisture out of your powder and guns rust free. Solar set up looks good too. Do you plan on installing the Matte in the cabin someday?
Title: Re: 20x32 A frame cabin Central KY
Post by: ben2go on February 28, 2011, 10:18:13 AM
Post by: ben2go on February 28, 2011, 10:18:13 AM
Power to the people.
Title: Re: 20x32 A frame cabin Central KY
Post by: EaglesSJ on March 04, 2011, 02:54:17 PM
Post by: EaglesSJ on March 04, 2011, 02:54:17 PM
Guns arent stored at that location, I have a much more secure setup for them. I just have that one 870 there just in case. The past few days I have been spreading pitch on the roof and doing some more fencing to give our horses more room to roam. Got a 1 3/4 or so acre lot fenced off now instead of the small 100'x100' lot that they were in the past 3 weeks. They were thrilled to be in a bigger area. They ran and ran and bucked and had a good ol time! Anyways here are some more pics of the shed/mini barn and the horses and such.

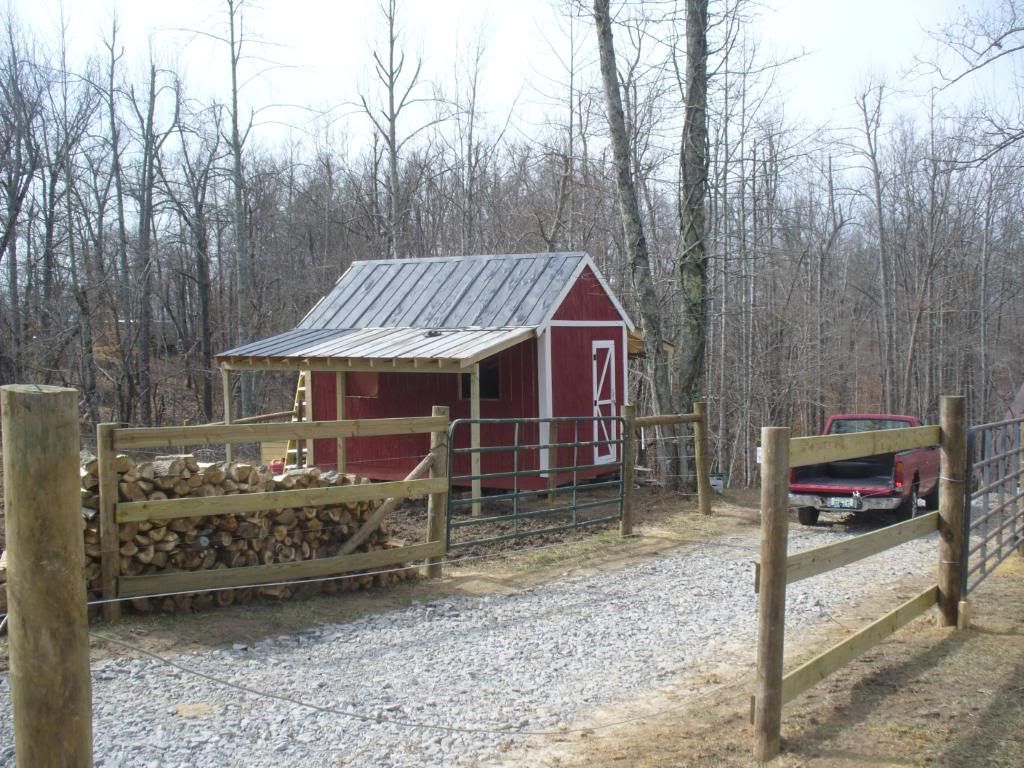

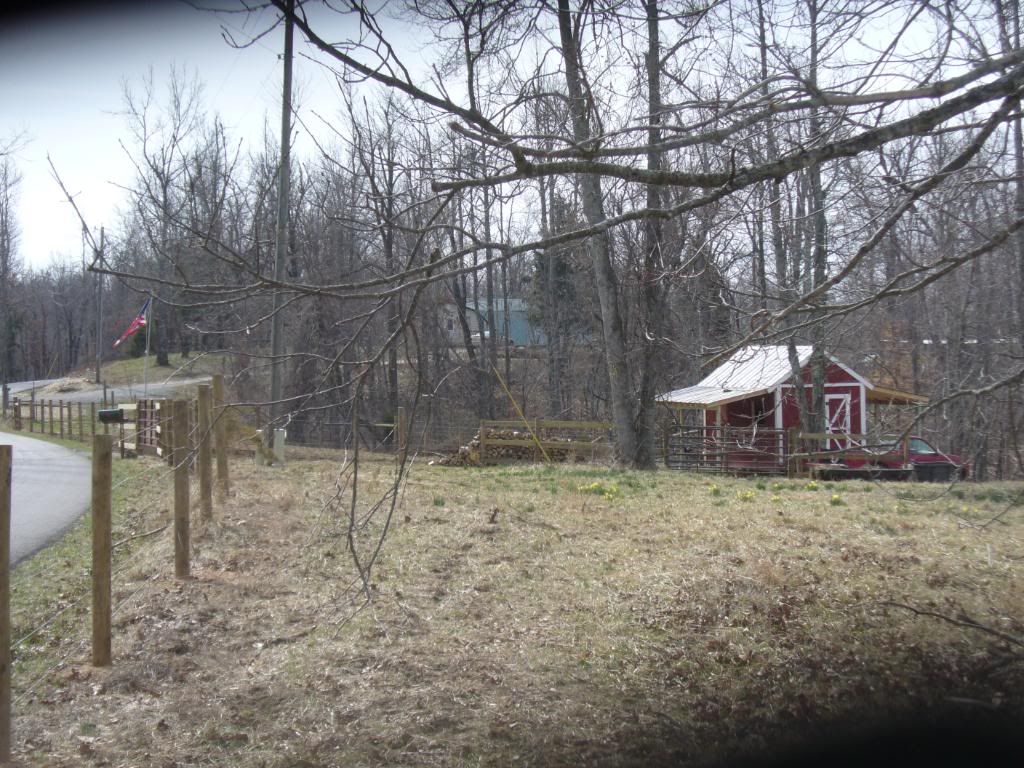
Title: Re: 20x32 A frame cabin Central KY
Post by: astidham on March 04, 2011, 05:58:04 PM
Post by: astidham on March 04, 2011, 05:58:04 PM
Looks Great !!!
where is your cabin in contrast to the Barn?
where is your cabin in contrast to the Barn?
Title: Re: 20x32 A frame cabin Central KY
Post by: EaglesSJ on March 04, 2011, 09:27:14 PM
Post by: EaglesSJ on March 04, 2011, 09:27:14 PM
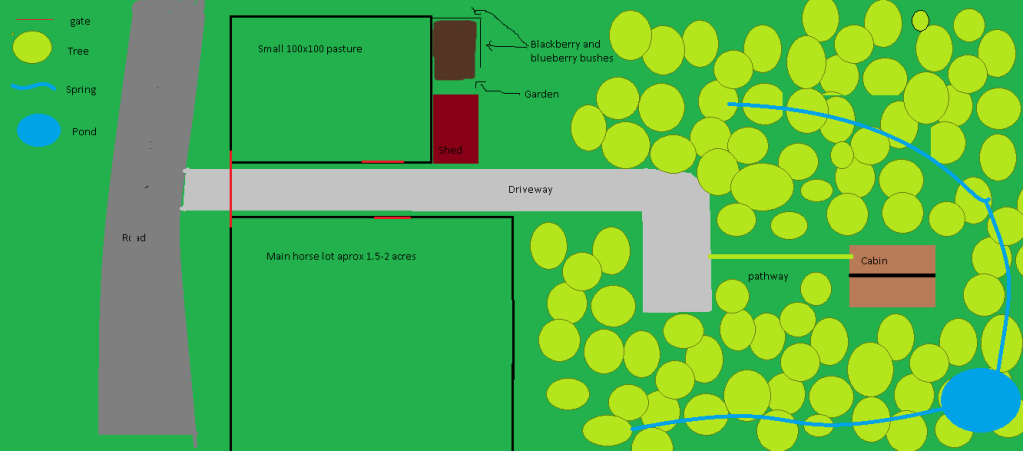
Title: Re: 20x32 A frame cabin Central KY
Post by: Sassy on March 04, 2011, 09:54:56 PM
Post by: Sassy on March 04, 2011, 09:54:56 PM
Really looks Kentuckyfied! Nice :) Pretty horses - amazing how they like it when they get a little more room - even our cows run & jump around.
Title: Re: 20x32 A frame cabin Central KY
Post by: astidham on March 05, 2011, 12:43:02 AM
Post by: astidham on March 05, 2011, 12:43:02 AM
That's a good setup.
my cabin setup is similar, the cabin from the front gate is ~260 feet.
my cabin setup is similar, the cabin from the front gate is ~260 feet.
Title: Re: 20x32 A frame cabin Central KY
Post by: Barry Broome on March 05, 2011, 07:01:13 AM
Post by: Barry Broome on March 05, 2011, 07:01:13 AM
Very nice place. I've enjoyed following this thread. You guys are hard workers!!!
Title: Re: 20x32 A frame cabin Central KY
Post by: EaglesSJ on March 08, 2011, 12:26:49 AM
Post by: EaglesSJ on March 08, 2011, 12:26:49 AM
Got the new inverter today! Charged my 24v 1000ah battery bank from 68% to full in just 2.5 hrs! Much better than the 9-10 hrs it was taking with the alternator set up. I have nothing but good things to say about aten solar. They have amazing customer service and outstanding prices on all equipment. Very friendly people who were very helpful through all of this. Now I just need to get a breaker for the inverter cable and Ill be set!
Also started building Colton's tree house yesterday so pics of that will follow shortly.
Also started building Colton's tree house yesterday so pics of that will follow shortly.
Title: Re: 20x32 A frame cabin Central KY
Post by: MountainDon on March 08, 2011, 12:31:23 AM
Post by: MountainDon on March 08, 2011, 12:31:23 AM
Check solarseller.com
http://www.solarseller.com/ (http://www.solarseller.com/)
section 45
http://www.solarseller.com/ (http://www.solarseller.com/)
section 45
Title: Re: 20x32 A frame cabin Central KY
Post by: EaglesSJ on March 10, 2011, 06:43:20 PM
Post by: EaglesSJ on March 10, 2011, 06:43:20 PM
Colton and I working on his tree house.
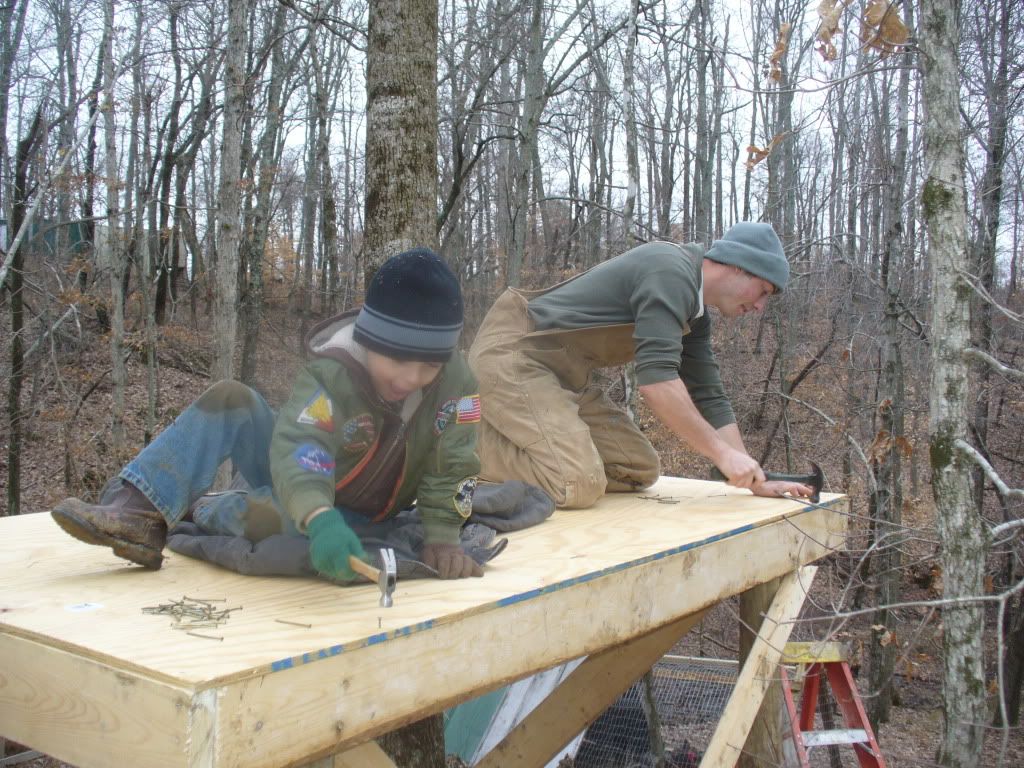
Also here is a pic of the panel rack that I came up with after much debate. A home fabbed metal rack and pole that could support this many panels was gonna run me about 500 in materials plus alot of labor. This treated lumber rack came out to about $90 and a couple hours work. I still have to add some x-bracing on all four sides but it was supposed to be very sunny tomorrow and I was anxious to see what they would do! I have each panel bolted to the 2x6 plates in all four corners. I am not satisfied with it though and Im looking for more ways to secure them.
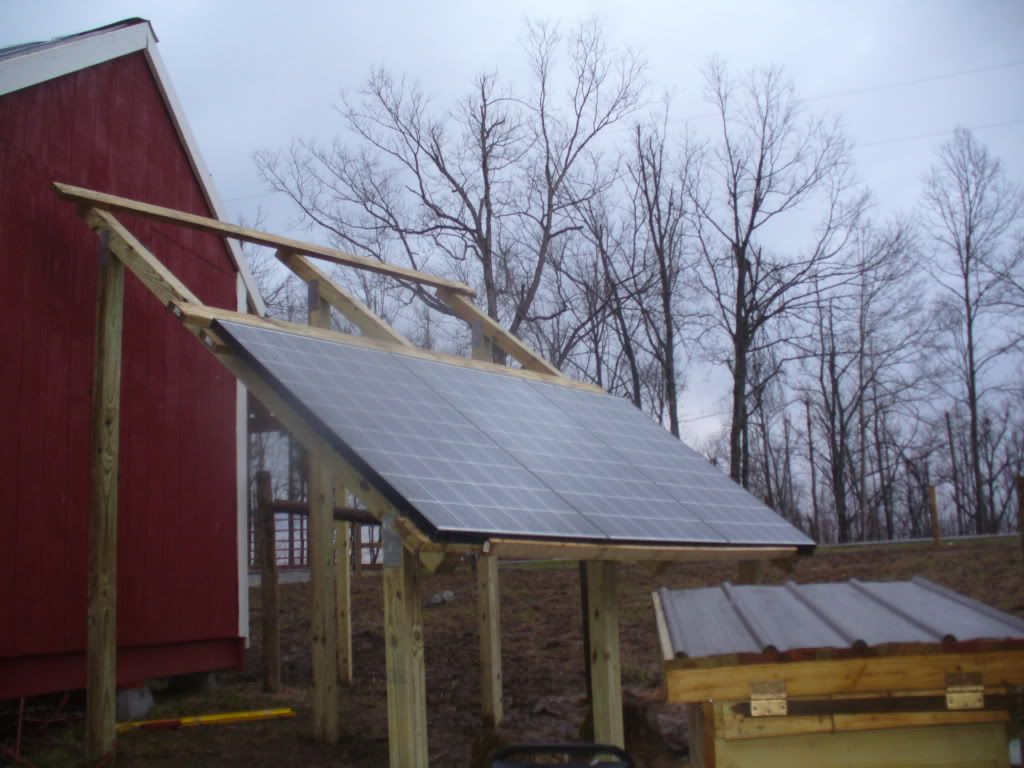
Also here is a pic of the panel rack that I came up with after much debate. A home fabbed metal rack and pole that could support this many panels was gonna run me about 500 in materials plus alot of labor. This treated lumber rack came out to about $90 and a couple hours work. I still have to add some x-bracing on all four sides but it was supposed to be very sunny tomorrow and I was anxious to see what they would do! I have each panel bolted to the 2x6 plates in all four corners. I am not satisfied with it though and Im looking for more ways to secure them.
Title: Re: 20x32 A frame cabin Central KY
Post by: Turkeyhunter on March 10, 2011, 10:29:49 PM
Post by: Turkeyhunter on March 10, 2011, 10:29:49 PM
i read all they pages of this build tonight---congrats on cabin and farm........such a great place for your son to grow up.........A++++++++ on the build---
Title: Re: 20x32 A frame cabin Central KY
Post by: OkieJohn2 on March 13, 2011, 01:38:01 PM
Post by: OkieJohn2 on March 13, 2011, 01:38:01 PM
Just curious about your melted Craftsman 3/8 inch ratchet, does the lifetime warranty cover that, always worth a try.
Title: Re: 20x32 A frame cabin Central KY
Post by: EaglesSJ on March 14, 2011, 07:41:22 PM
Post by: EaglesSJ on March 14, 2011, 07:41:22 PM
Im sure it will be covered. I have replaced several tools with them in the past with no problems.
Title: Re: 20x32 A frame cabin Central KY
Post by: freezengirl on March 15, 2011, 09:24:24 AM
Post by: freezengirl on March 15, 2011, 09:24:24 AM
I just read through all of the comments and pictures of your project, very impressive. I couldn't help but think that with the drive, determination and work ethic you and your wife have shown and the obvious love in your family that you are rich in all the ways that count. I hope you your wife and young Colton continue to be blessed.
Title: Re: 20x32 A frame cabin Central KY
Post by: EaglesSJ on March 24, 2011, 10:25:53 AM
Post by: EaglesSJ on March 24, 2011, 10:25:53 AM
Just ordered 3 more panels today. That should put us up to a 1260w array. We use about 2-4kw depending on the day so hopefully this will be all we need. That puts us having about $10,700 in our system.
Title: Re: 20x32 A frame cabin Central KY
Post by: umtallguy on March 24, 2011, 10:30:50 PM
Post by: umtallguy on March 24, 2011, 10:30:50 PM
how much did the house end up costing?
Title: Re: 20x32 A frame cabin Central KY
Post by: EaglesSJ on March 25, 2011, 09:36:43 AM
Post by: EaglesSJ on March 25, 2011, 09:36:43 AM
Quote from: umtallguy on March 24, 2011, 10:30:50 PM
how much did the house end up costing?
Around $25k
Title: Re: 20x32 A frame cabin Central KY
Post by: EaglesSJ on March 31, 2011, 05:53:04 PM
Post by: EaglesSJ on March 31, 2011, 05:53:04 PM
Installed the last 3 panels today. Here are the pics. We now have a 1260 watt system.
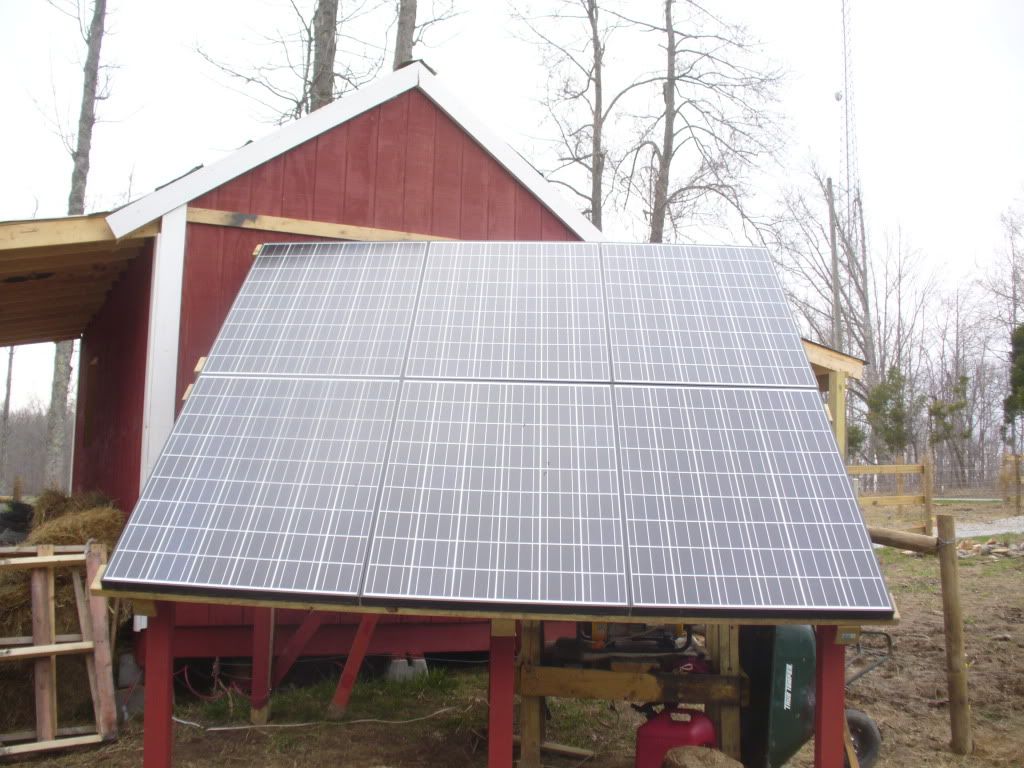
And a pic from the upper corner of our property looking down at the panels and the shed and garden.
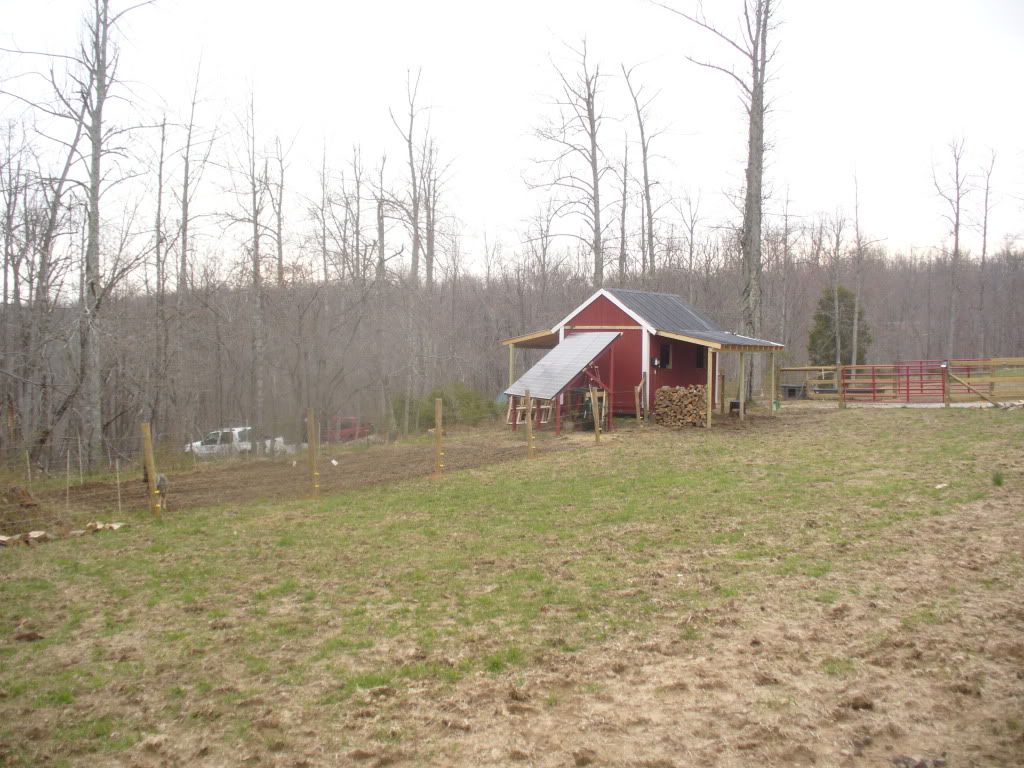
And a pic from the upper corner of our property looking down at the panels and the shed and garden.
Title: Re: 20x32 A frame cabin Central KY
Post by: bayview on March 31, 2011, 07:26:00 PM
Post by: bayview on March 31, 2011, 07:26:00 PM
Looking good! [cool]
/.
Title: Re: 20x32 A frame cabin Central KY
Post by: OlJarhead on April 11, 2011, 08:54:09 AM
Post by: OlJarhead on April 11, 2011, 08:54:09 AM
Awesome!
Title: Re: 20x32 A frame cabin Central KY
Post by: Zona on April 13, 2011, 04:54:57 PM
Post by: Zona on April 13, 2011, 04:54:57 PM
Any plans to plant more trees along the property line/ along the road? I think that would ad a nice touch, as well as a bit more privacy.
Title: Re: 20x32 A frame cabin Central KY
Post by: grandmasplayhouse on April 14, 2011, 05:26:22 PM
Post by: grandmasplayhouse on April 14, 2011, 05:26:22 PM
Just read your story. Lovely family and lucky little boy! It's nice to see people with such good work ethics.
Title: Re: 20x32 A frame cabin Central KY
Post by: EaglesSJ on April 14, 2011, 06:38:59 PM
Post by: EaglesSJ on April 14, 2011, 06:38:59 PM
Quote from: Zona on April 13, 2011, 04:54:57 PM
Any plans to plant more trees along the property line/ along the road? I think that would ad a nice touch, as well as a bit more privacy.
Were gonna buy a 100 plant bundle of white pines and go to work :)
Title: Re: 20x32 A frame cabin Central KY
Post by: rhelm on May 13, 2011, 10:01:08 AM
Post by: rhelm on May 13, 2011, 10:01:08 AM
Just wanted to say that I loved following your progress on this board. It has been very inspiring. Thanks for sharing your story!
One question though, did karma ever catch up to your aunt? ;)
One question though, did karma ever catch up to your aunt? ;)
Title: Re: 20x32 A frame cabin Central KY
Post by: EaglesSJ on May 31, 2011, 12:33:05 PM
Post by: EaglesSJ on May 31, 2011, 12:33:05 PM
Not to my knowledge. She is still scamming folks! d*
Title: Re: 20x32 A frame cabin Central KY
Post by: EaglesSJ on June 14, 2011, 10:36:20 PM
Post by: EaglesSJ on June 14, 2011, 10:36:20 PM
After quite a long pause due to working in our garden and various other spring time projects we decided that it was time to get to work on finishing out the cabin so we started to work upstairs. Below are the progress pics. Coltons room is done and we are just deciding on what flooring to put in our room and then finish with the trim.
We put drywall in his room so that he could paint it whatever color he wanted and make it more "kiddy" I just finished building his loft style bed tonight and he couldnt be happier. We are all very excited to not be sleeping in an open insulation environment anymore. Just had to recoup some funds after the solar project (which is working flawlessly by the way!)
Anyways without further ado, here are the pics.
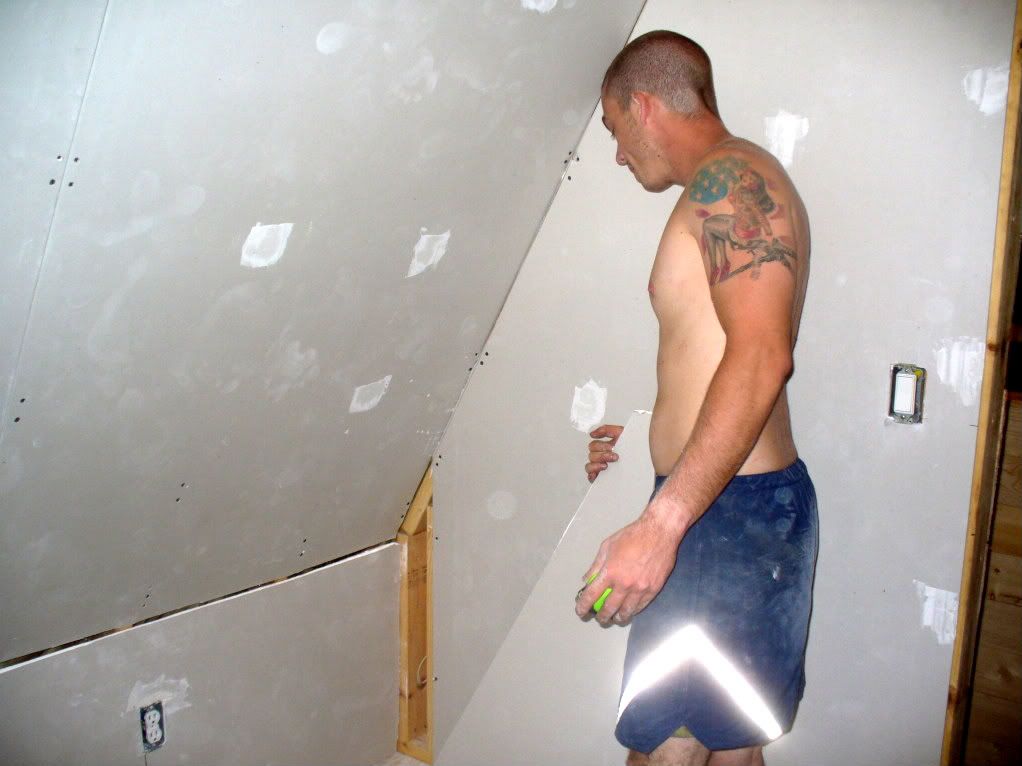

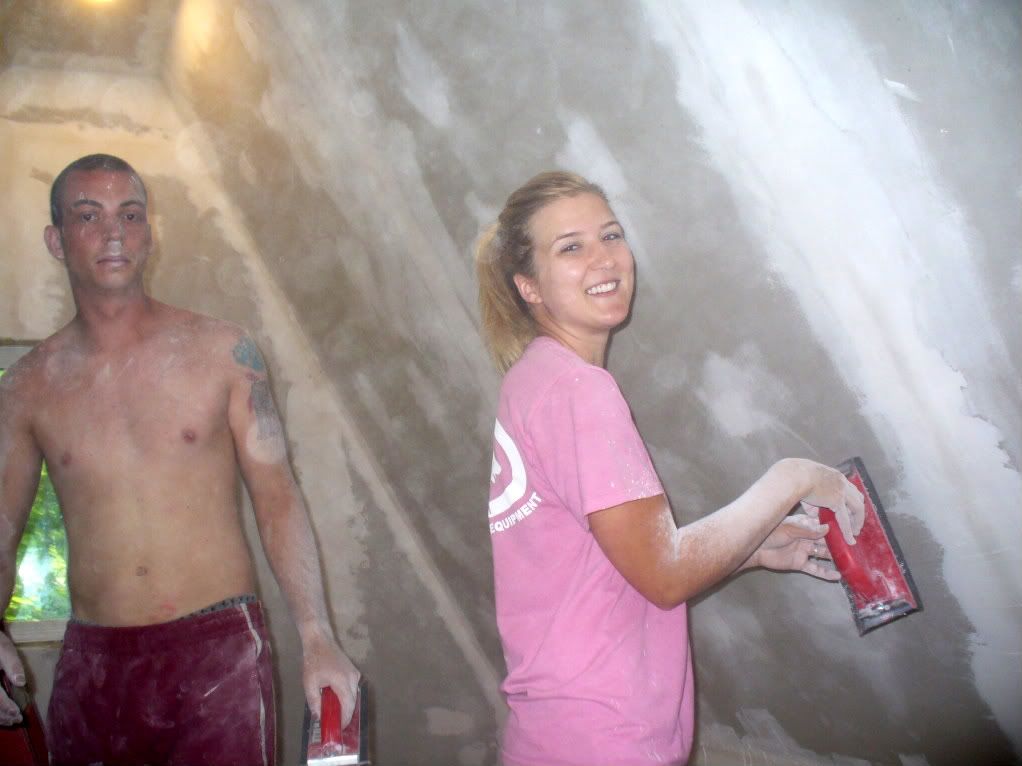
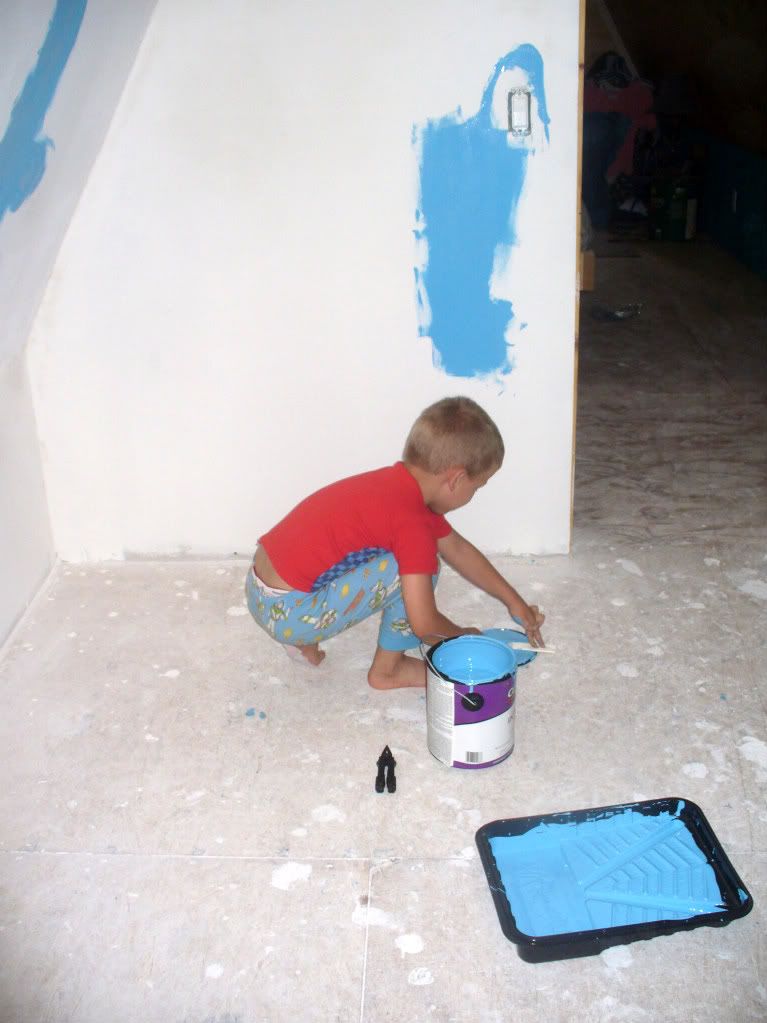
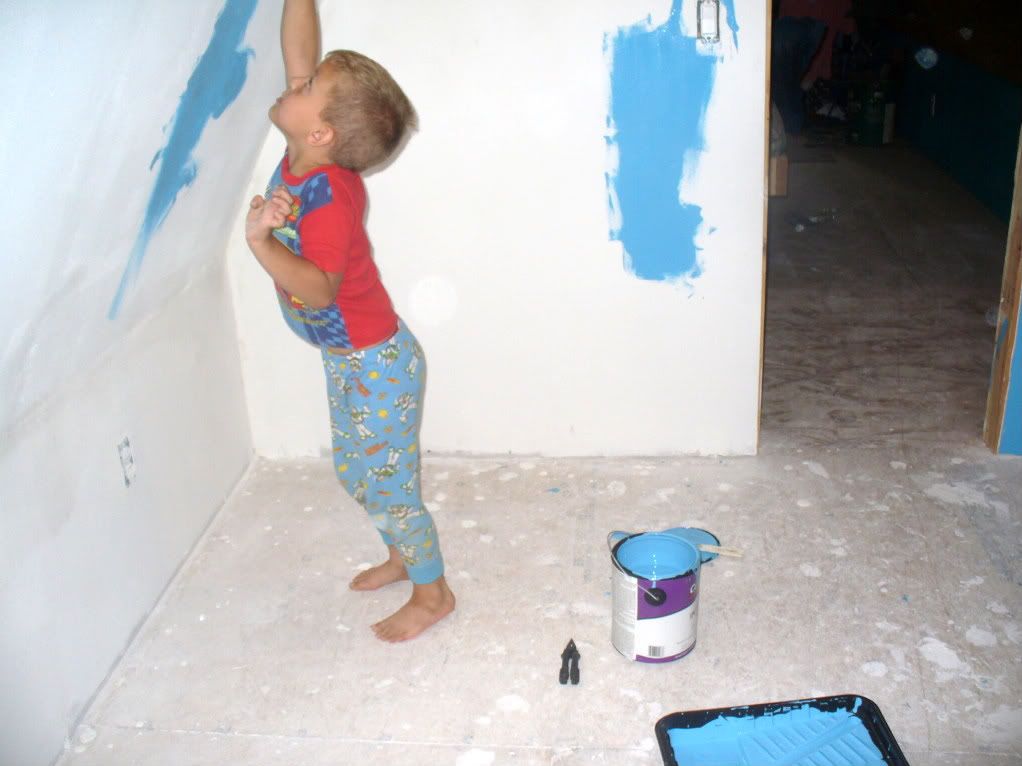
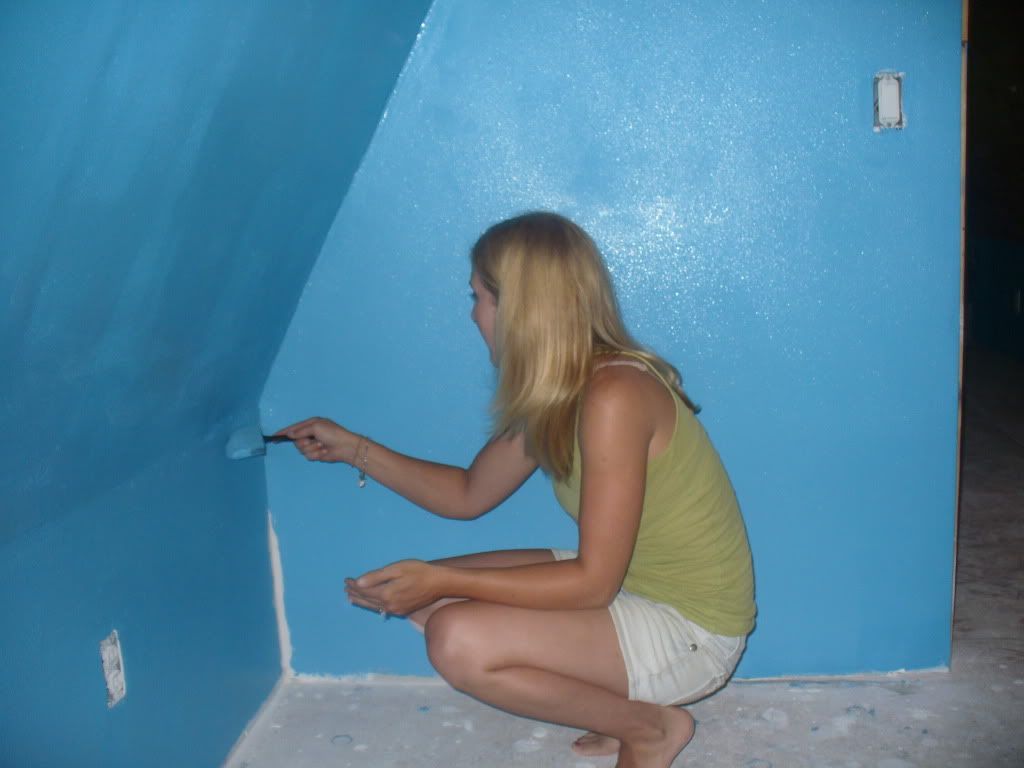
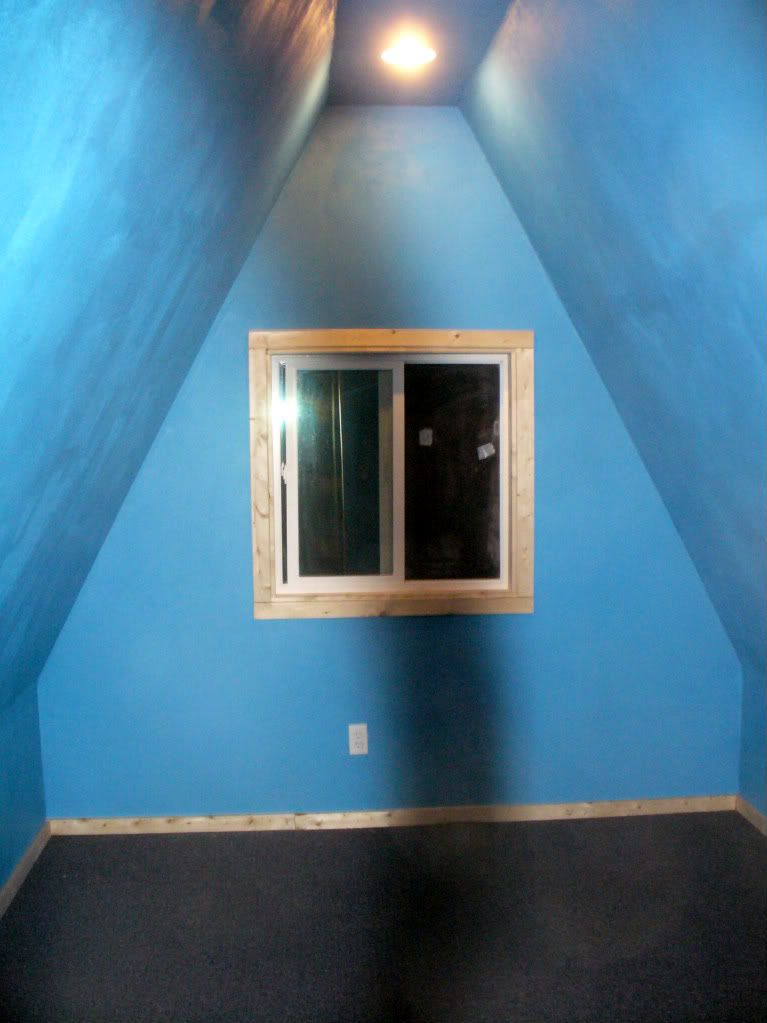
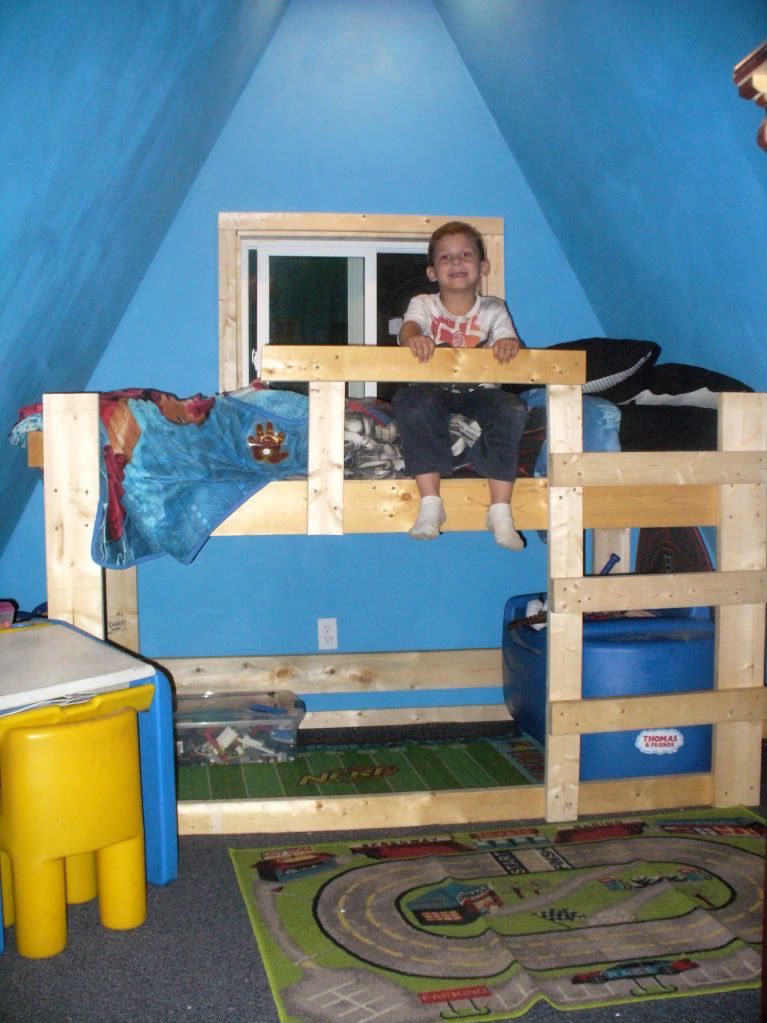
Our room still in progress. My dad came over for a few hours over 2 days to help put the boards up. Lindsay went to North Carolina to visit her family and I wanted to surprise her when she returned. (That was my true motivation for finally starting the upstairs) She was thrilled to see something other than R19 and made it back just in time to help stain. We did alot lighter stain upstairs to enlarge the room a bit. The pics make everything seem so small but it is rather roomy in person as it is a 10x16 room 10x20 if you include the stair landing.
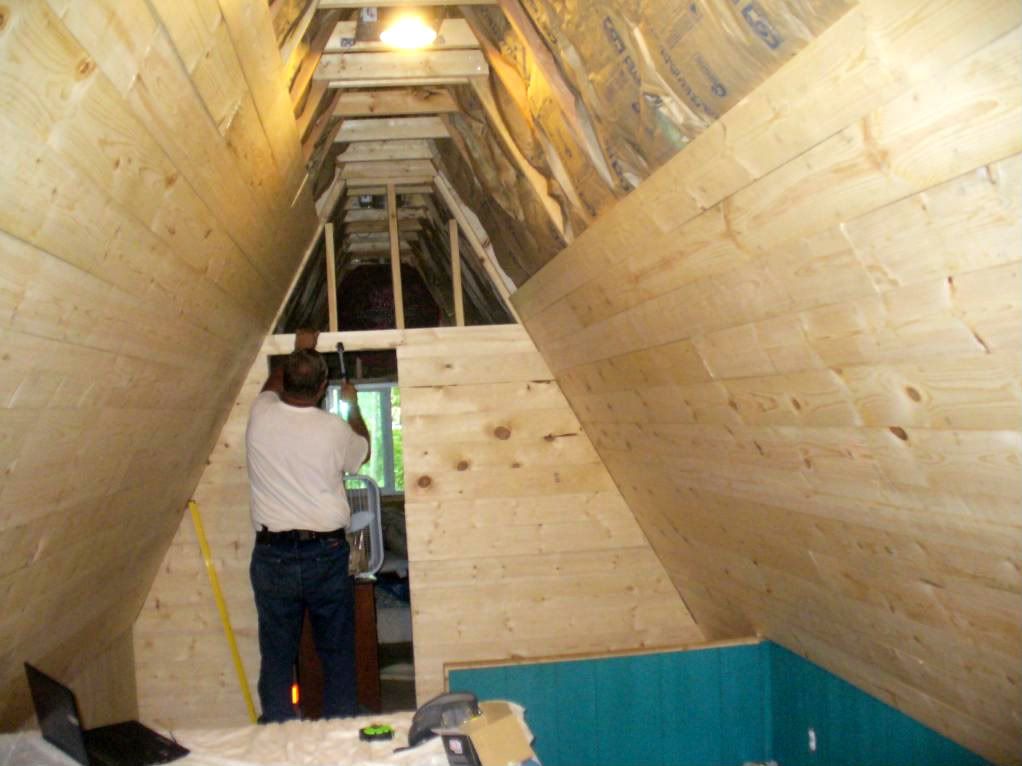
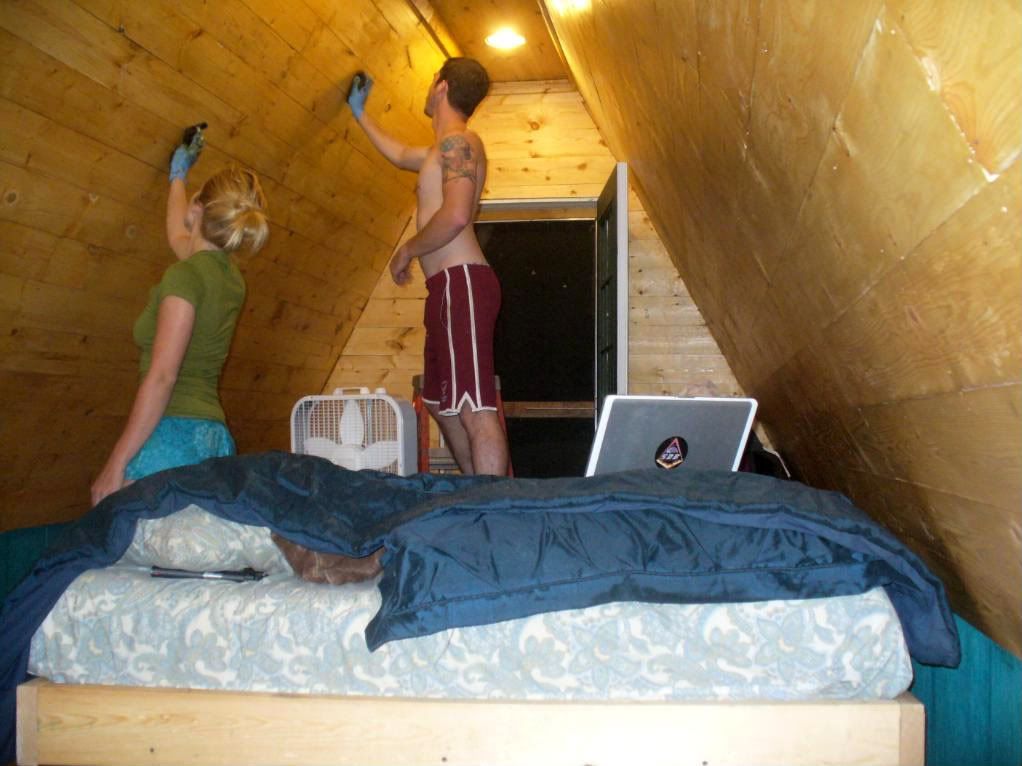
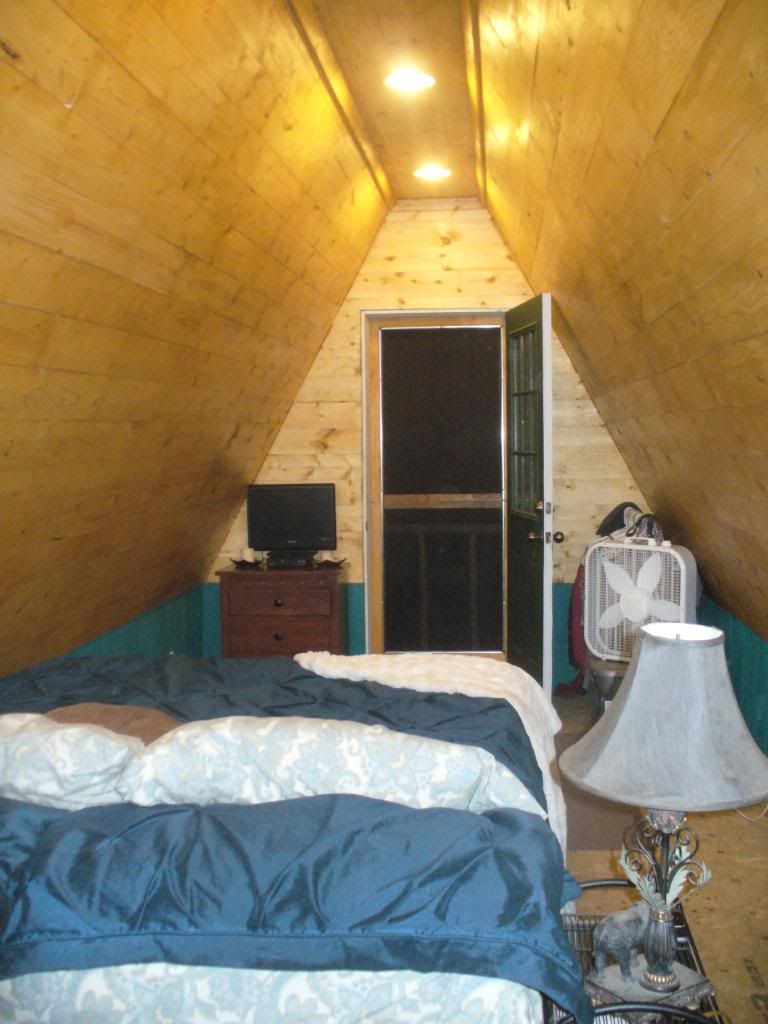
After all of that work we decided to take a day off and went to a nearby lake with my sister and a couple friends.


We put drywall in his room so that he could paint it whatever color he wanted and make it more "kiddy" I just finished building his loft style bed tonight and he couldnt be happier. We are all very excited to not be sleeping in an open insulation environment anymore. Just had to recoup some funds after the solar project (which is working flawlessly by the way!)
Anyways without further ado, here are the pics.
Our room still in progress. My dad came over for a few hours over 2 days to help put the boards up. Lindsay went to North Carolina to visit her family and I wanted to surprise her when she returned. (That was my true motivation for finally starting the upstairs) She was thrilled to see something other than R19 and made it back just in time to help stain. We did alot lighter stain upstairs to enlarge the room a bit. The pics make everything seem so small but it is rather roomy in person as it is a 10x16 room 10x20 if you include the stair landing.
After all of that work we decided to take a day off and went to a nearby lake with my sister and a couple friends.
Title: Re: 20x32 A frame cabin Central KY
Post by: Redoverfarm on June 15, 2011, 05:37:17 AM
Post by: Redoverfarm on June 15, 2011, 05:37:17 AM
Nice progress. It's getting closer to completion which is always a good feeling.
Title: Re: 20x32 A frame cabin Central KY
Post by: mogie01 on June 15, 2011, 09:38:05 AM
Post by: mogie01 on June 15, 2011, 09:38:05 AM
Great job guys!!
Title: Re: 20x32 A frame cabin Central KY
Post by: rhelm on June 15, 2011, 09:41:28 AM
Post by: rhelm on June 15, 2011, 09:41:28 AM
I'll second that, great job!
Got pics of the garden?
Got pics of the garden?
Title: Re: 20x32 A frame cabin Central KY
Post by: EaglesSJ on June 15, 2011, 05:33:06 PM
Post by: EaglesSJ on June 15, 2011, 05:33:06 PM
Here are a few more pics, a couple of the garden after the rain today as well as our composting facility the new flower bed in front of the cabin, the new path to the cabin (idea borrowed from Mt. Don) and an old watering tank that Lindsay painted and turned into a big flower pot.
We want to spice up the area around the driveway. Maybe a line of dwarf fruit trees down either side or something. Any landscaping ideas for us? Either around the cabin or anywhere?
Anyways here and the pics.
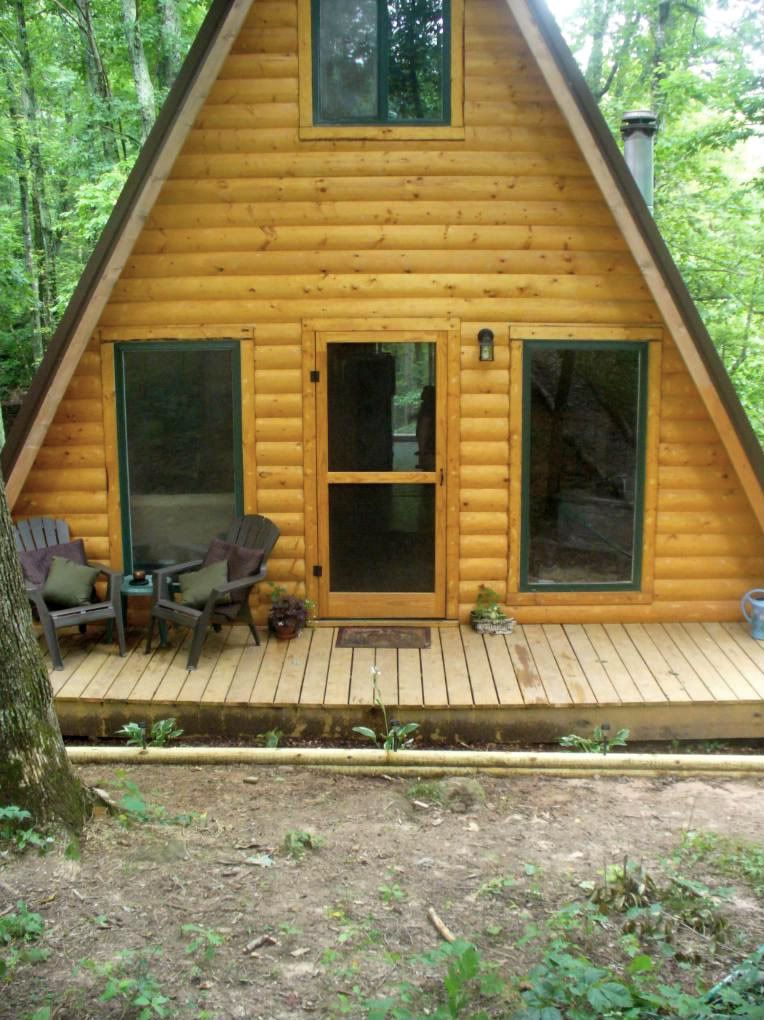
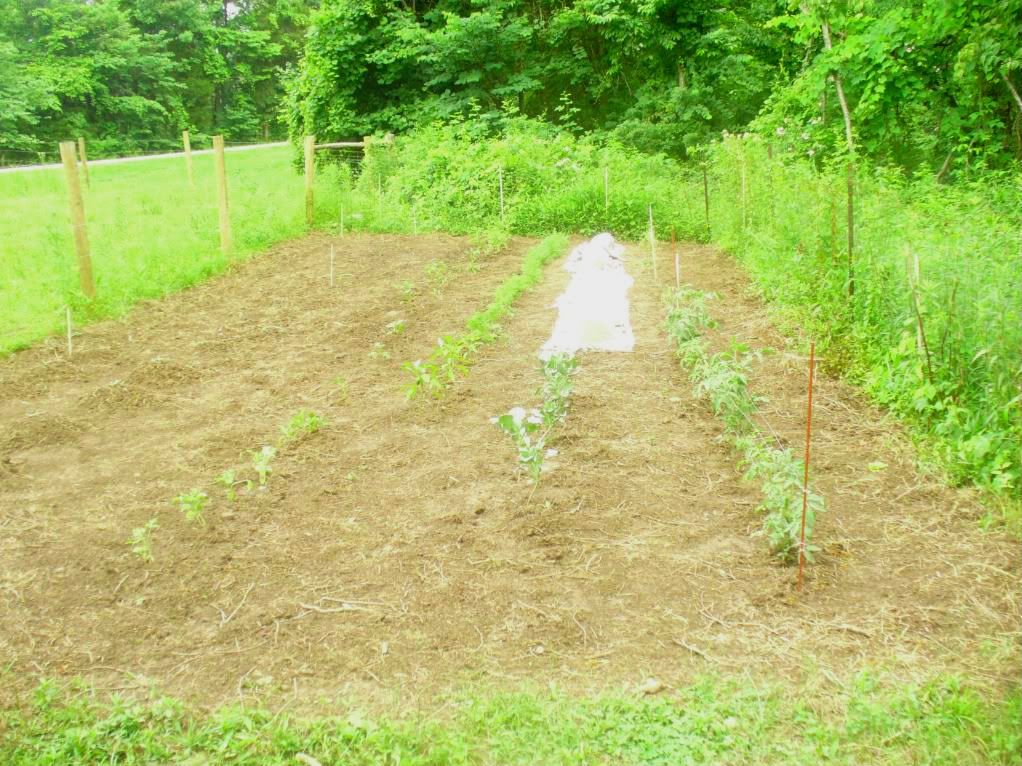

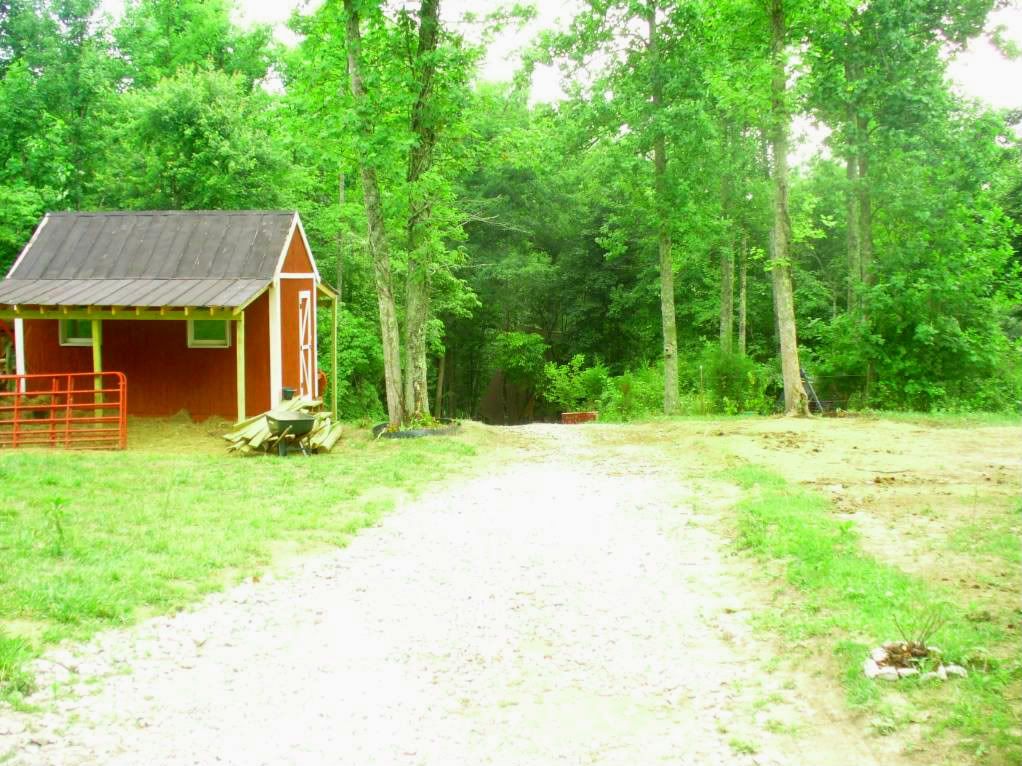

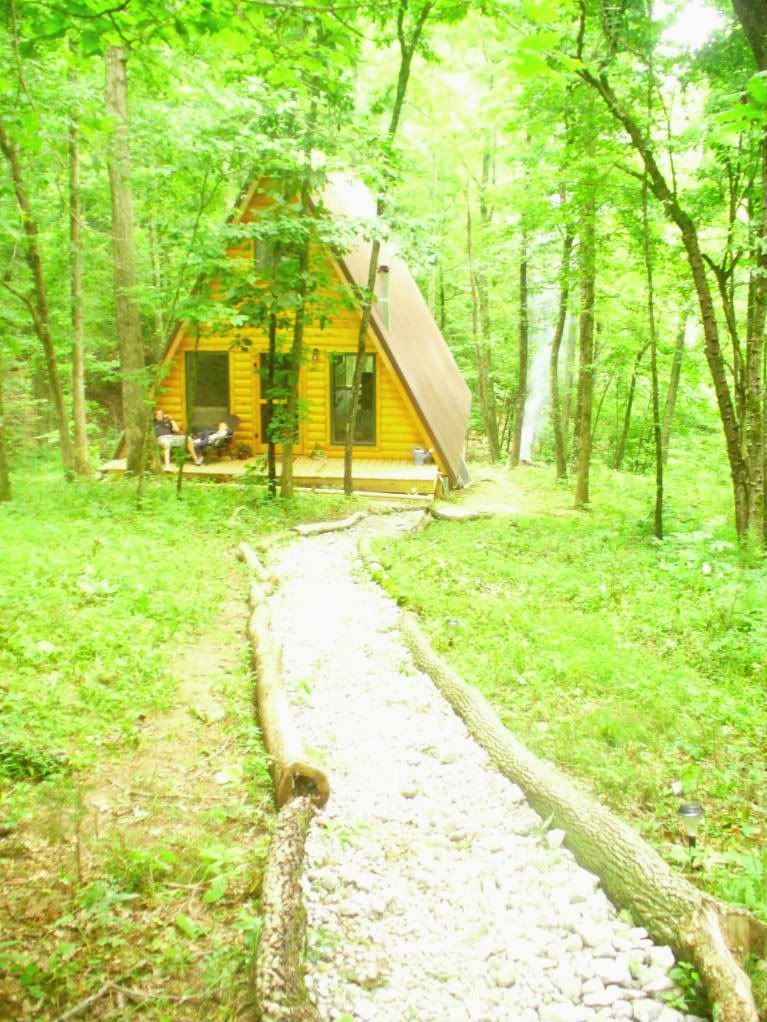
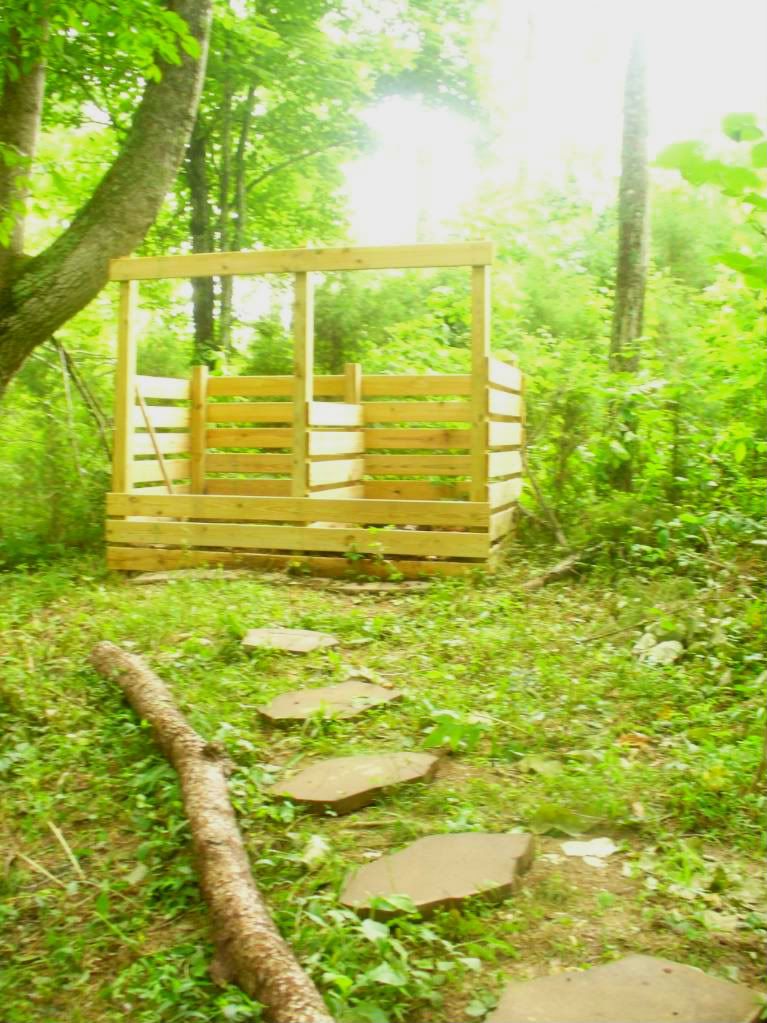
We want to spice up the area around the driveway. Maybe a line of dwarf fruit trees down either side or something. Any landscaping ideas for us? Either around the cabin or anywhere?
Anyways here and the pics.
Title: Re: 20x32 A frame cabin Central KY
Post by: Redoverfarm on June 15, 2011, 05:36:24 PM
Post by: Redoverfarm on June 15, 2011, 05:36:24 PM
Looks like you are settling into your new home in comfort. When you plant your trees allow room away from your walkway. Once they branch out you might be crawling out under the limbs.
Title: Re: 20x32 A frame cabin Central KY
Post by: EaglesSJ on June 15, 2011, 10:34:53 PM
Post by: EaglesSJ on June 15, 2011, 10:34:53 PM
We are also trying to think about what to do for the stairs. Lindsay wants to just paint them but I know that wont last and I really want to stain them but we cant because 3 middle treads are osb topped. There is also the option of carpeting them as a continuance from upstairs but we are really unsure about that as well.
Any ideas? I dont mind tearing them out and starting over fresh but the flooring is flush against the stairs and not under them so that is something to consider as well. Here is an older picture to refresh your memory as to what I am talking about.
Any ideas? I dont mind tearing them out and starting over fresh but the flooring is flush against the stairs and not under them so that is something to consider as well. Here is an older picture to refresh your memory as to what I am talking about.
Title: Re: 20x32 A frame cabin Central KY
Post by: phalynx on June 15, 2011, 10:59:36 PM
Post by: phalynx on June 15, 2011, 10:59:36 PM
Think about getting some cheap, thin, engineered flooring and put it on it. It would all match, you can trim the edges and stain the wood.
Title: Re: 20x32 A frame cabin Central KY
Post by: MountainDon on June 17, 2011, 07:16:05 PM
Post by: MountainDon on June 17, 2011, 07:16:05 PM
Q: stocking feet going up and down? If so, I do not like slippery stair treads. For painted or varnished wood treads there are anti skid tapes available. I've used some. Not the most pleasing aesthetically, but they do help assist in preventing slips and falls.
Here's one from a Google for anti skid stair tread
http://www.antisliptapeshop.com/Category/Anti-Slip-Tape/138?gclid=CPTX292VvqkCFRRigwodFDUKew
Here's one from a Google for anti skid stair tread
http://www.antisliptapeshop.com/Category/Anti-Slip-Tape/138?gclid=CPTX292VvqkCFRRigwodFDUKew
Title: Re: 20x32 A frame cabin Central KY
Post by: IronPatriotTN on June 19, 2011, 12:02:08 AM
Post by: IronPatriotTN on June 19, 2011, 12:02:08 AM
Great update pics. The homestead is looking more and more complete and functional.
Sanding that drywall did not look like a fun day. But the room really turned out nice. Bet the boy had fun with that paint.
Good luck with the remaining projects.
~IPTN
Sanding that drywall did not look like a fun day. But the room really turned out nice. Bet the boy had fun with that paint.
Good luck with the remaining projects.
~IPTN
Title: Re: 20x32 A frame cabin Central KY
Post by: OkieJohn2 on June 19, 2011, 10:26:50 AM
Post by: OkieJohn2 on June 19, 2011, 10:26:50 AM
My number 1 suggestion would be to lurk at your nearest big box store and hope to run into the DIY network Yard Crashers guy. Fat chance of that happening, but it would sure be cool to see what they could do with a really BIG yard like yours.
As far as buying plants, there are a lot of mail order sources worth checking out, but I suggest you take a look at the Garden Watchdog before dealing with any company
http://davesgarden.com/products/gwd/ (http://davesgarden.com/products/gwd/)
Your best bang for the buck is buying very small sizes, with perennials they are called plugs with woody plants they may be called whips(basically a stick with roots). Smaller plants seem to adapt a lot quicker and in a year or two you can't tell the difference between sizes. Dr. Carl Whitcomb of OSU did a study and tried various sizes of several trees, and in 3-5 years you couldn't tell the difference between cheaper whips and much more expensive balled and burlapped specimens.
Have you considered a fire pit near your front deck, Hot dogs and S'mores at sunset. Have you considered grapes on the fence along side the driveway, yep, your bigger critters might find them tasty, but you might also get some grapes. I wonder if you get enough sun along the walkway to have an herb garden closer to the house.
Title: Re: 20x32 A frame cabin Central KY
Post by: MushCreek on June 19, 2011, 02:29:40 PM
Post by: MushCreek on June 19, 2011, 02:29:40 PM
The best thing to do for landscaping is to go native, IMHO. Check to see what's growing well in your area, and get more of it, or plants that like similar conditions. One of the great things about living out in the boonies is not having to have the manicured lawn and trimmed bushes. I like dual-purpose plants, if I can get them. Blueberries run wild on our property, so if I get a yen for a hedge, it will be a hedge of blueberries! Other cultivated plants naturalize well, such as azaleas. Think about daffodils, too. You can buy them in bulk, and once established, they will bloom for years. I put in 500 at my mother's place along the pond, and what a show they put on every spring!
Title: Re: 20x32 A frame cabin Central KY
Post by: EaglesSJ on July 03, 2011, 11:14:26 PM
Post by: EaglesSJ on July 03, 2011, 11:14:26 PM
Ok so with temperatures here hitting about 98 degrees and 90% humidity I decided enough was enough and went and bought a 15100 btu window a/c unit and mounted it through the wall upstairs. It is keeping the 2 small bedrooms upstairs as cold as a meat locker however the downstairs is not getting very cool even with a fan blowing the air down the stairway.
My question before I go cutting a bunch of holes is. Would adding open floor vents like used in central heat and air systems where they would simply be used to allow hot air to enter upstairs and cold air to fall downstairs help to keep the place cooler? If not what can be done to help keep the place cool on these ridiculously hot and humid days. Keep in mind that the house is 960 sq ft however the walls are angled in so that reduces the space that needs cooling dramatically and it has 6 inch walls which have more insulation than a normal house, it is in the woods so it is shaded, and I only have 3 doors and 3 windows. All of which are double pane energy efficient type.
Another unit downstairs really is a last resort as I dont have the power nor the space to add another unit. Im running the generator a few hours a day just to keep this giant thing going :)
Title: Re: 20x32 A frame cabin Central KY
Post by: Texas Tornado on July 04, 2011, 10:39:17 AM
Post by: Texas Tornado on July 04, 2011, 10:39:17 AM
Ceiling fans would help move the air...
Title: Re: 20x32 A frame cabin Central KY
Post by: EaglesSJ on September 02, 2011, 08:00:56 PM
Post by: EaglesSJ on September 02, 2011, 08:00:56 PM
Got a pond dug today. Its about 100x60 and 15 feet deep. Took about 5-6 hours for the pond and about the same for the gun range and all the other little extra things that he did (cleaning out a fence and some old log roads ect.) Next comes a dock. Also got my gun range expanded and will be adding steel targets soon. Here are pics of the progress thus far. You can also see my granny and pa out there helping me pick up dead tree limbs. All in all it was a very good day!
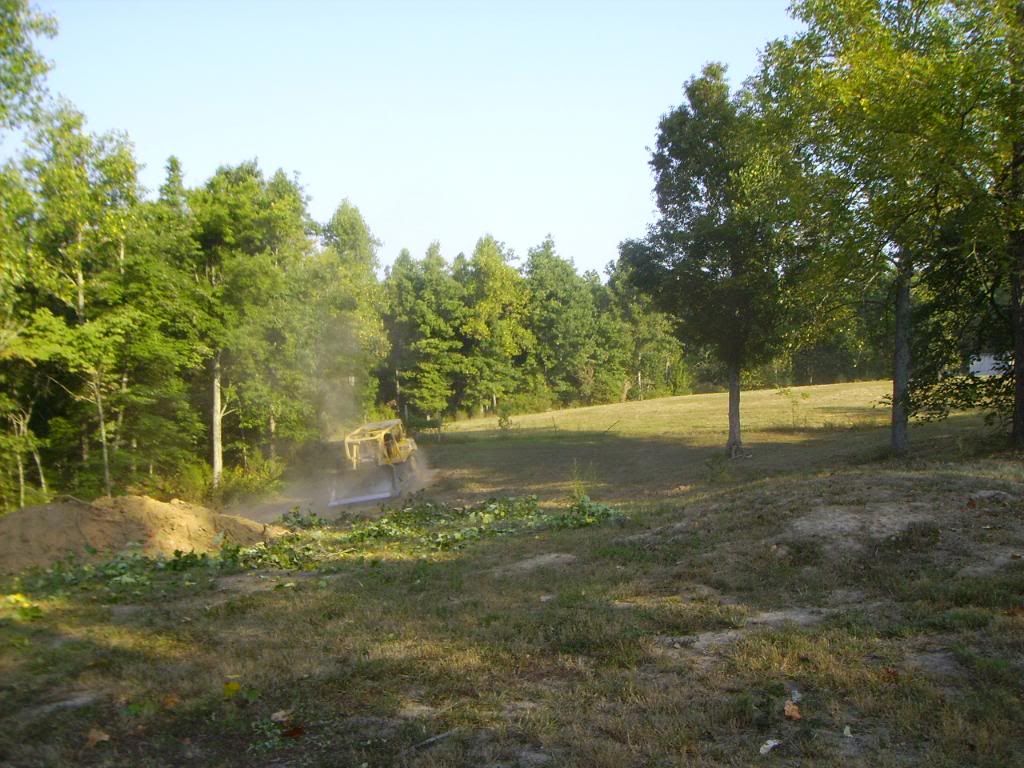

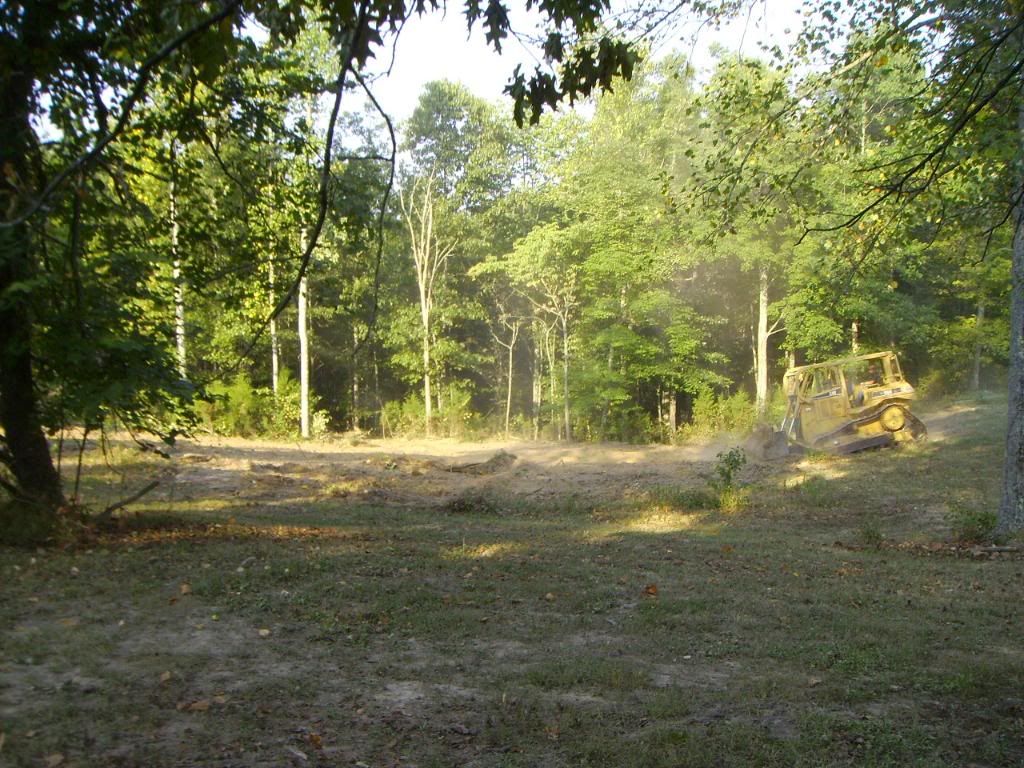
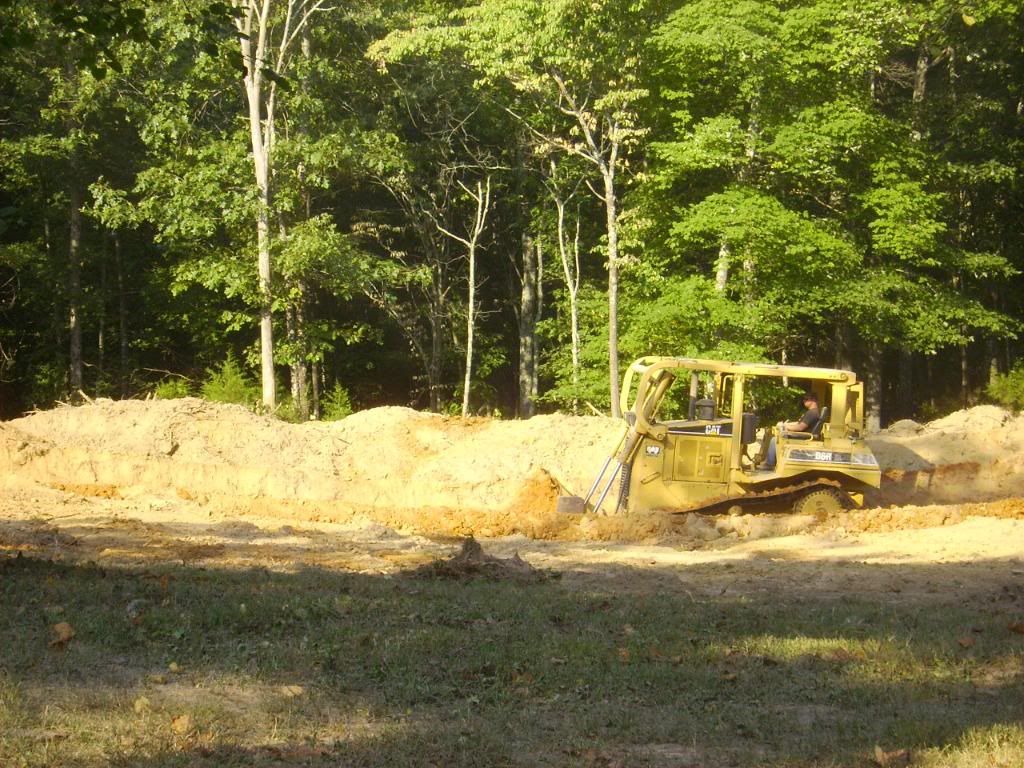
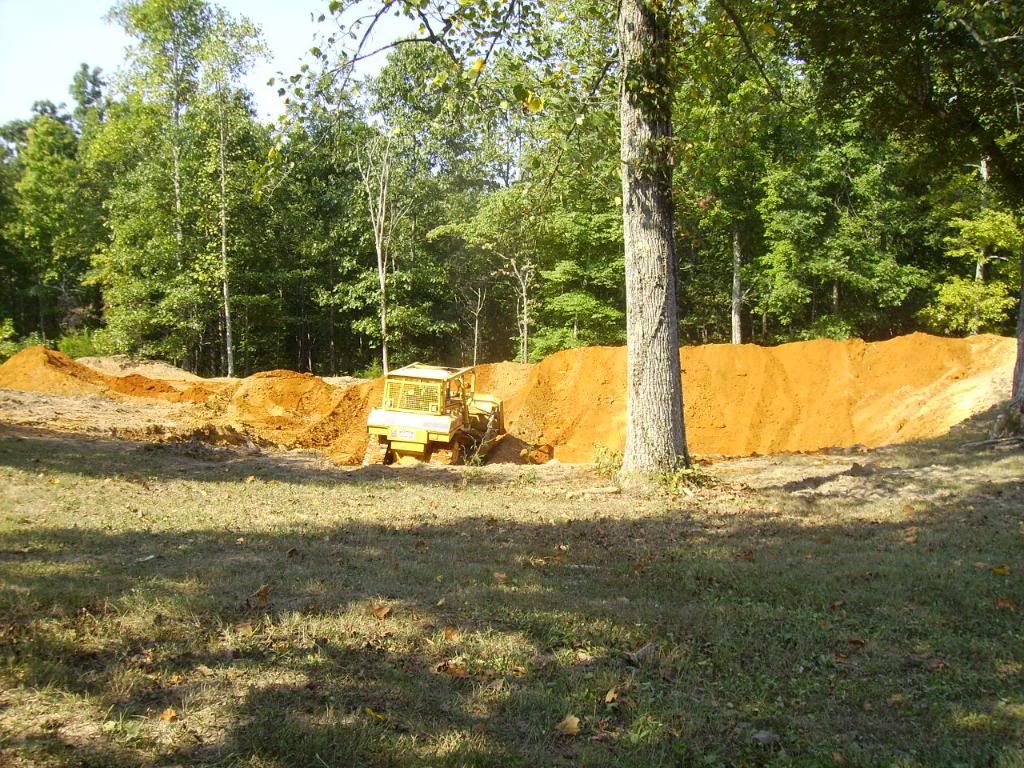
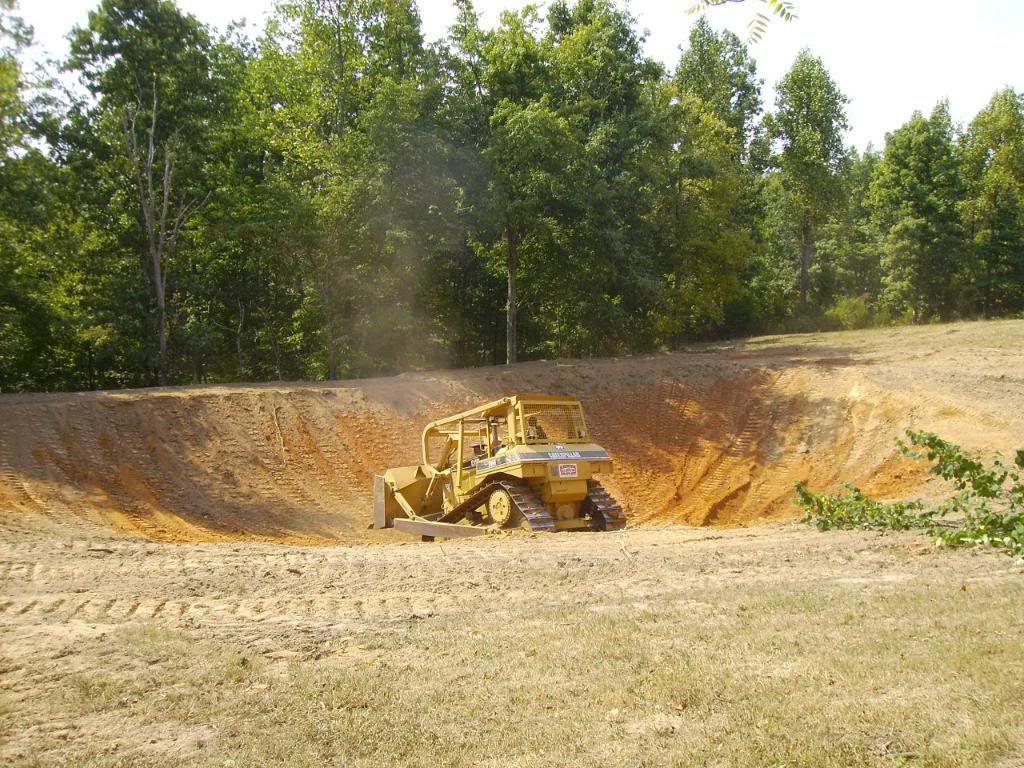

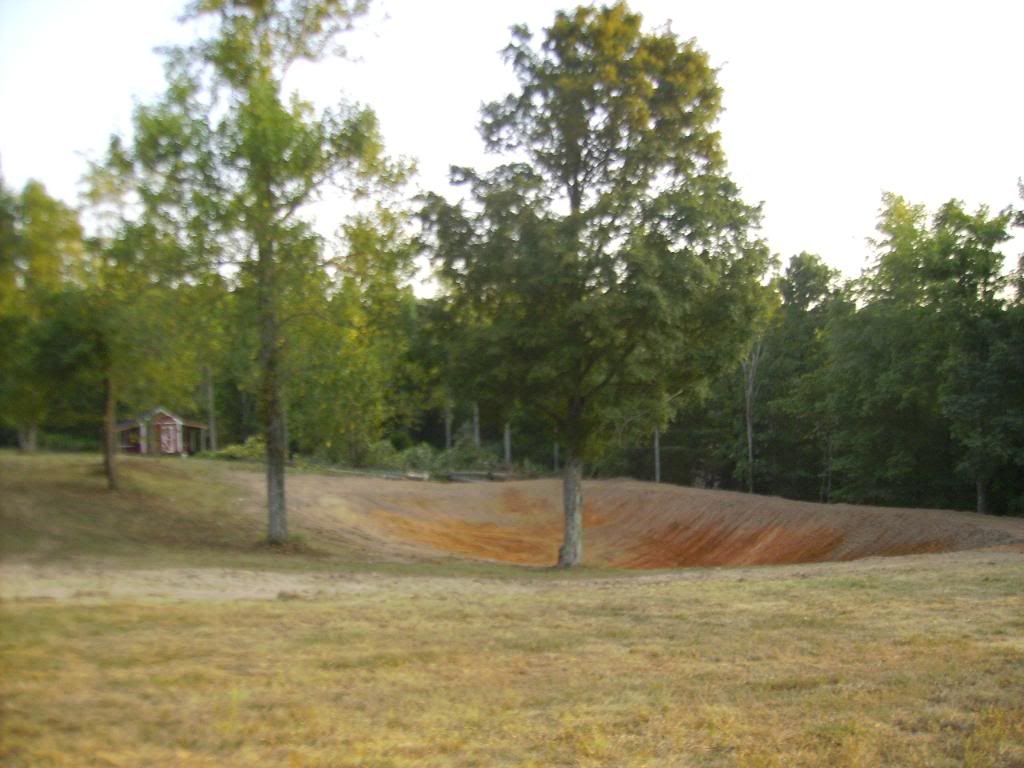
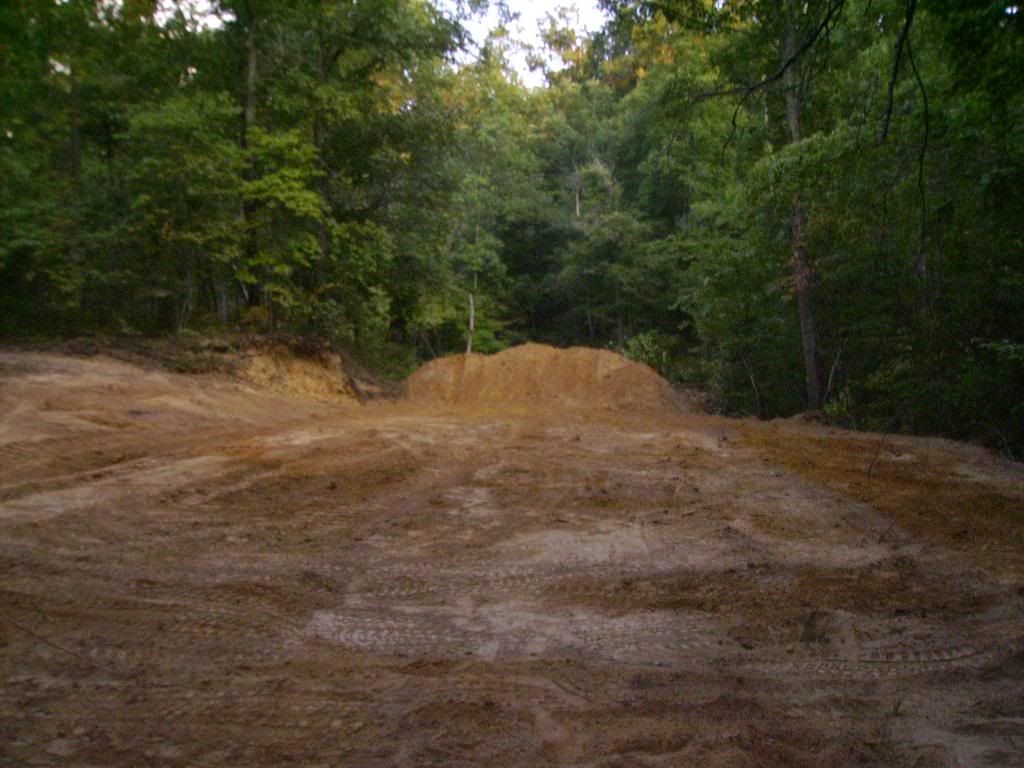
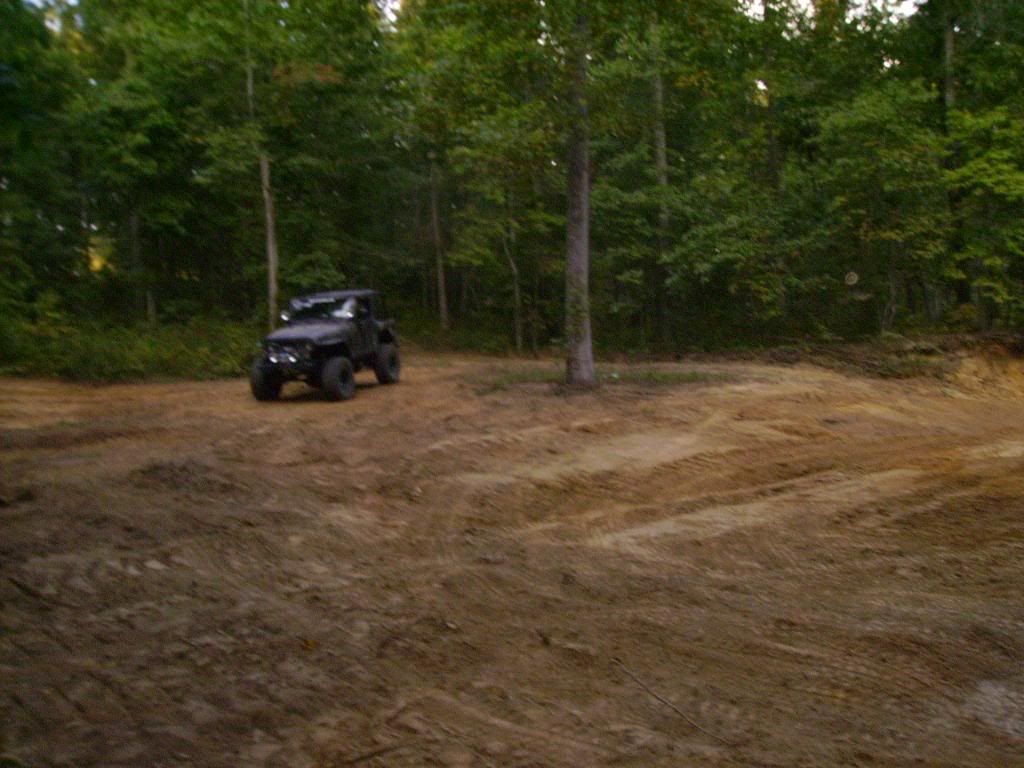
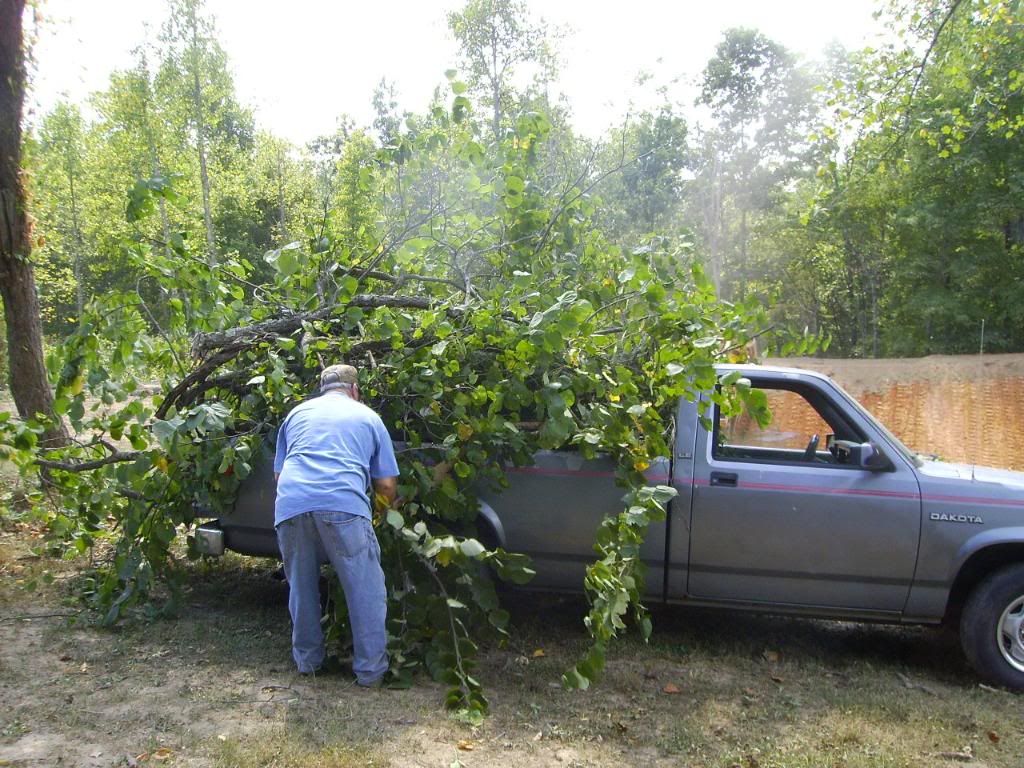
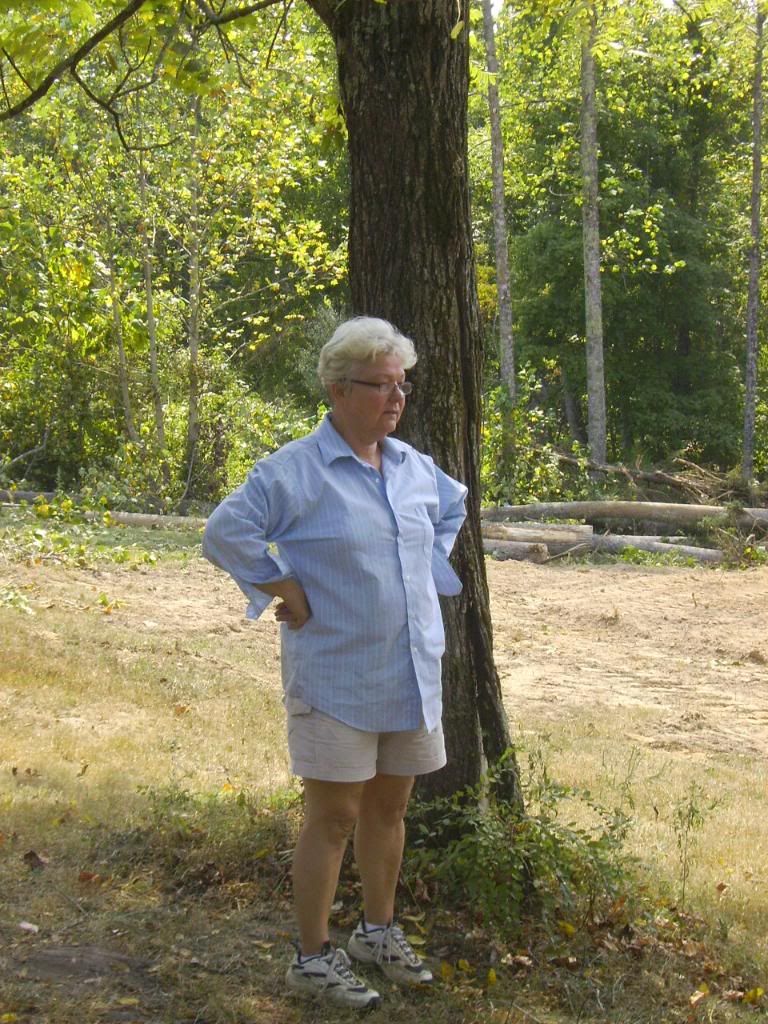
Title: Re: 20x32 A frame cabin Central KY
Post by: Rob_O on September 02, 2011, 09:22:46 PM
Post by: Rob_O on September 02, 2011, 09:22:46 PM
Granny and Pa are real troopers. It was ugly hot out there today, hit 101 here in Louisville and I'm sure it wasn't much better down there
Title: Re: 20x32 A frame cabin Central KY
Post by: Don_P on September 03, 2011, 07:12:51 AM
Post by: Don_P on September 03, 2011, 07:12:51 AM
That's some nice looking poplars in the pile, any plans? They saw or hew nicely.
Title: Re: 20x32 A frame cabin Central KY
Post by: Sassy on September 03, 2011, 02:15:25 PM
Post by: Sassy on September 03, 2011, 02:15:25 PM
Wow, that is a nice pond! Doesn't look like you have many rocks... our ground is mostly rocks - and to think I once was worried that Glenn would give all our rocks away ::)
That was pretty fast digging!
That was pretty fast digging!
Title: Re: 20x32 A frame cabin Central KY
Post by: EaglesSJ on September 04, 2011, 07:46:23 PM
Post by: EaglesSJ on September 04, 2011, 07:46:23 PM
Quote from: Don_P on September 03, 2011, 07:12:51 AM
That's some nice looking poplars in the pile, any plans? They saw or hew nicely.
no plans, was just gonna cut them up for firewood. cant really think of anything i would want to do with them. i dont have a way to transport them to the local saw mill. If I cant do it with a chainsaw it probably wont get done :) I have been wanting to try my hand at making one of those wood bear statues. Maybe Ill give that a shot?
Title: Re: 20x32 A frame cabin Central KY
Post by: Don_P on September 04, 2011, 09:27:08 PM
Post by: Don_P on September 04, 2011, 09:27:08 PM
Could be fun, careful with nose work. Rip a groove right up the middle of the back to let it check there and relieve most of the drying stress. You can also saw as if bucking for firewood but stop at the same depth all along the log, then pop off those pieces with an axe to leave a flat surface. Do it once and you have the makings of a bench. Do it 2 times and you have a cabin log. Do it 4 times and you have a beam.
Title: Re: 20x32 A frame cabin Central KY
Post by: ben2go on September 05, 2011, 12:59:55 PM
Post by: ben2go on September 05, 2011, 12:59:55 PM
Quote from: EaglesSJ on September 04, 2011, 07:46:23 PM
no plans, was just gonna cut them up for firewood. cant really think of anything i would want to do with them. i dont have a way to transport them to the local saw mill. If I cant do it with a chainsaw it probably wont get done :) I have been wanting to try my hand at making one of those wood bear statues. Maybe Ill give that a shot?
Got a local mobile saw mill?Most guys are fairly cheap.I know the guy near me can always beat the box store lumber prices and he comes out and does it.
Title: Re: 20x32 A frame cabin Central KY
Post by: EaglesSJ on September 08, 2011, 06:33:34 PM
Post by: EaglesSJ on September 08, 2011, 06:33:34 PM
Working on a new project now and I thought I would post some pictures. Installing a small septic system and a high efficiency flusher. After a few days of my son having diarrhea I realized that my days with the composting toilet were coming to a close. I will post more pics of the septic system itself after I complete the drain field and such. For now here are a few.
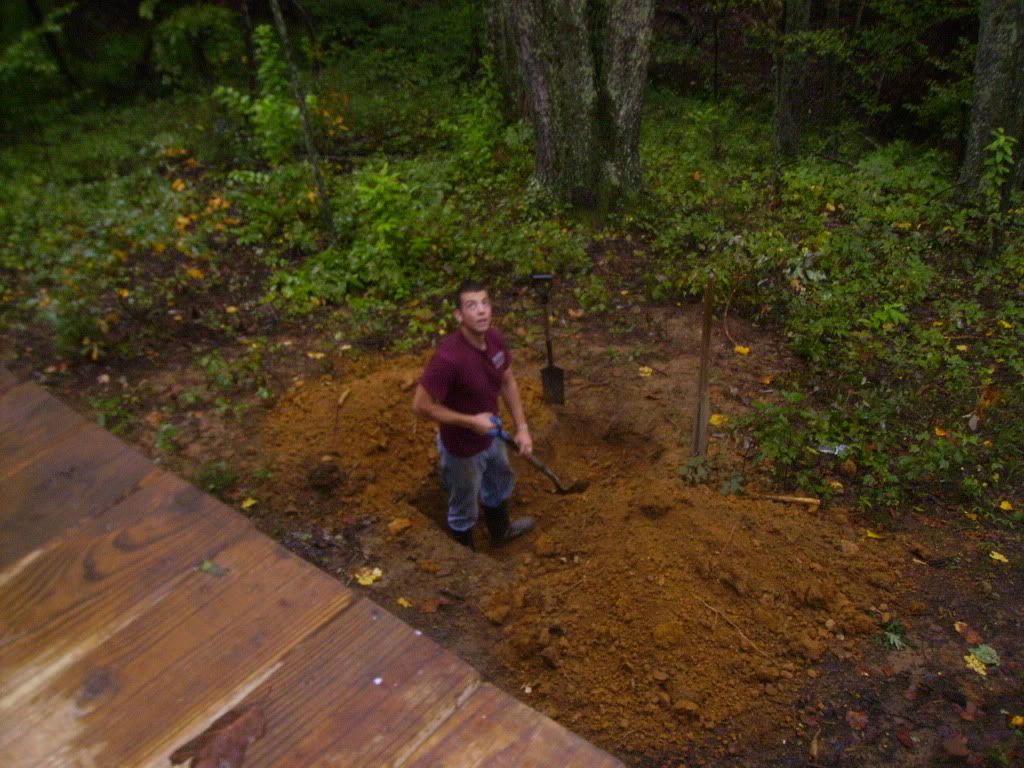
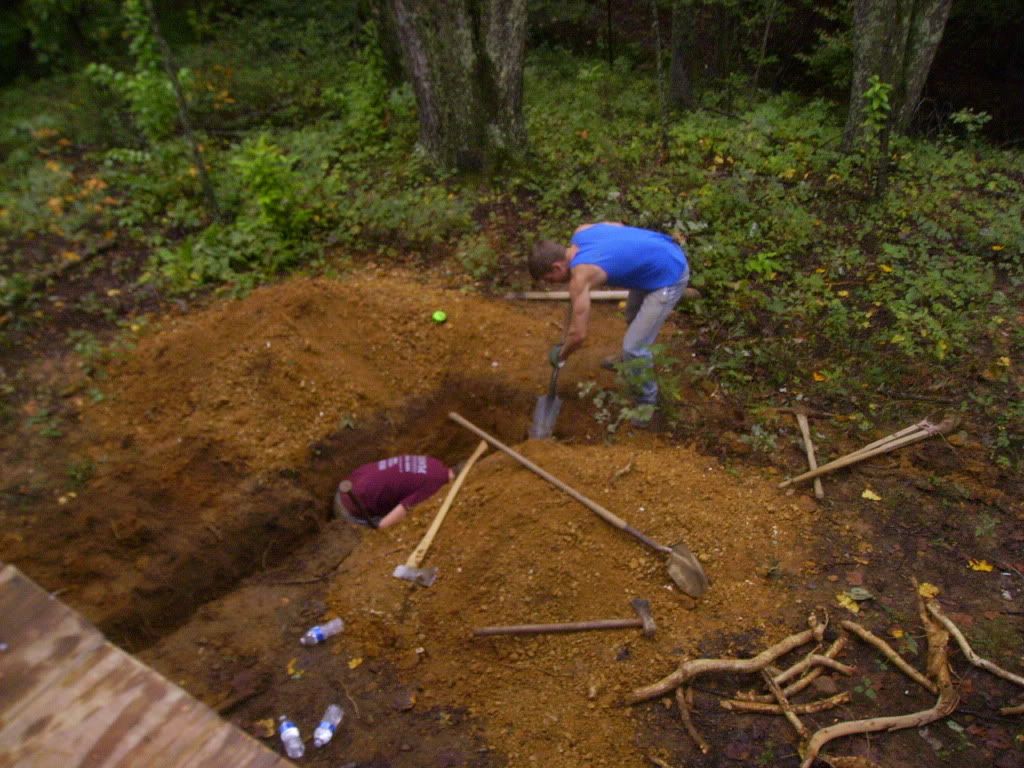
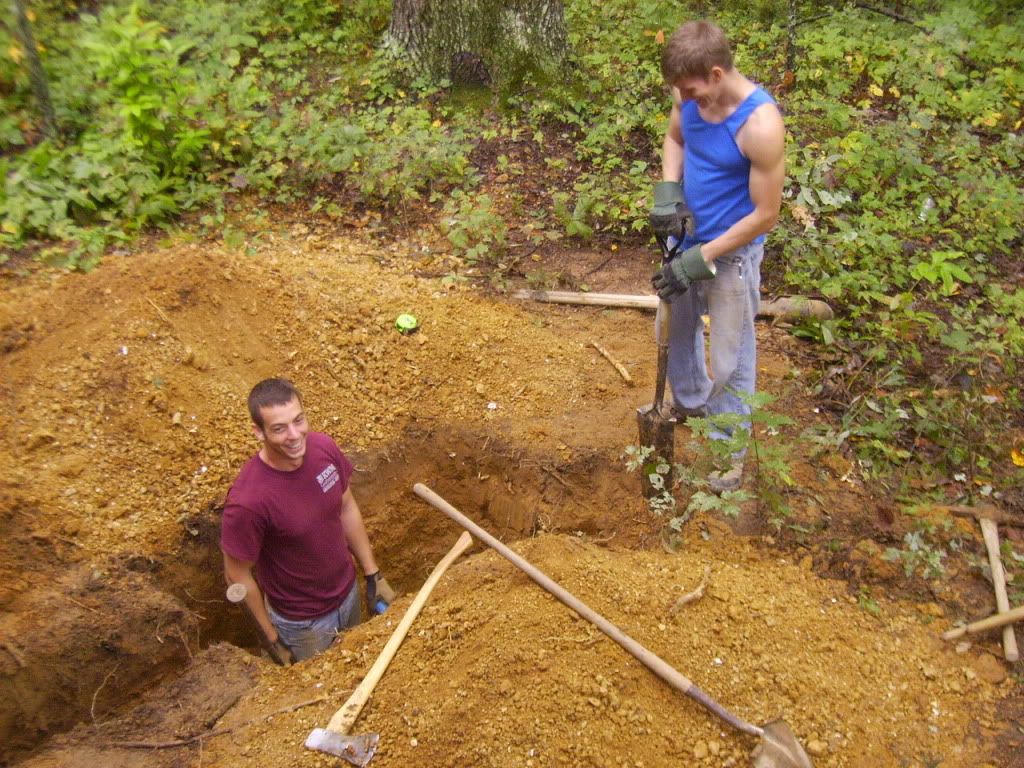
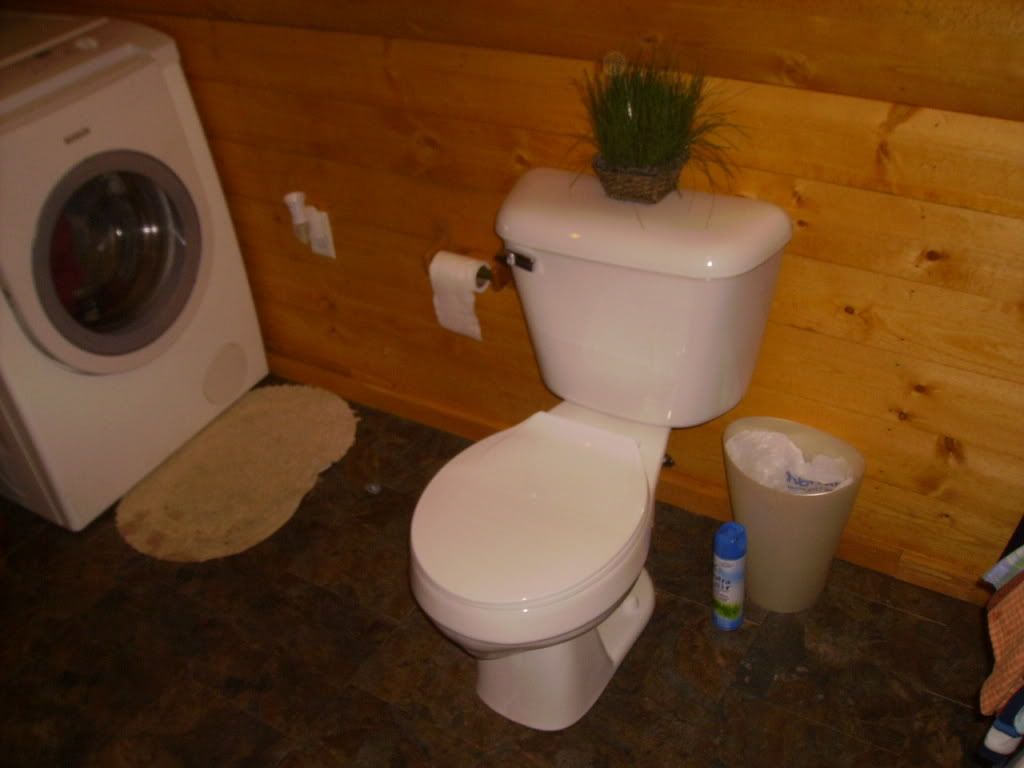
Title: Re: 20x32 A frame cabin Central KY
Post by: nathan.principe on September 08, 2011, 08:02:00 PM
Post by: nathan.principe on September 08, 2011, 08:02:00 PM
I will be watching this close! Ive been dreading installing mine and Im getting to that point. Are you getting it permitted?
Title: Re: 20x32 A frame cabin Central KY
Post by: EaglesSJ on September 08, 2011, 09:22:57 PM
Post by: EaglesSJ on September 08, 2011, 09:22:57 PM
No permits required. When I talked to the inspectors when I first started building they told me I didnt need any permits as long as I didnt plan on hooking up to public water or electric. They said they look at me just like they do the Amish. Im sure if I was unsafe with it and emptied it into a local river or something that might be a different ballgame.
They did say that if I ever hooked up to those I would have to bring everything up to code but I dont ever plan on doing that so it doesnt really matter. I am building it every bit as good as the septic systems that worked just fine years ago. To be honest I never understood the whole code thing anyways as the deer and coons never ask anywhere where they can dump their waste at. Most commonly by the river they are drinking out of. Always find it strange the things people come up with to make money.
Ill post more pics tomorrow if it isnt raining and I actually get to do some work. Except for the digging it is going in really fast.
Title: Re: 20x32 A frame cabin Central KY
Post by: nathan.principe on September 08, 2011, 10:30:25 PM
Post by: nathan.principe on September 08, 2011, 10:30:25 PM
Awesome that would be great. Things Im interested in will be what you are using for a tank ( or tanks), how large the drain field, and of coarse costs ;D
Title: Re: 20x32 A frame cabin Central KY
Post by: EaglesSJ on September 08, 2011, 11:15:18 PM
Post by: EaglesSJ on September 08, 2011, 11:15:18 PM
Nathan if you dont want to wait for pics the link listed below is the exact system that I am building. We are running our black water only into this system and already have a gray water system set up. This will significantly decrease the load on the tank/drain field. My friends family has been using a system almost identical to this with the exception that they have a single 100 gallon tank versus 2 55 gallon tanks for over 20 years and have never had to pump it once. From the research I have gathered the key is to not run your bathroom sink/shower/kitchen water into the septic system as all of the chemicals kill the bacteria that digest your poo and turn it to liquid to be drained out easily in your gravel field.
As for cost. I spent 241 today buying all the pvc and the toilet. I also spent 7 each on the 2 55 gallon drums. I still need about $40 worth of gravel for the drain field. So Basically about $300 from start to finish. That is if you dig it all yourself which is quite a job considering that lower drum has to be 5 ft deep :(
http://www.wikihow.com/Construct-a-Small-Septic-System
Title: Re: 20x32 A frame cabin Central KY
Post by: texasgun on September 09, 2011, 09:08:00 AM
Post by: texasgun on September 09, 2011, 09:08:00 AM
Did you consider panels if you look at my system that i did myself I used them and it was alot easier than gravel and might be cheaper depending on delivery charges
Title: Re: 20x32 A frame cabin Central KY
Post by: Alan Gage on September 09, 2011, 11:20:01 AM
Post by: Alan Gage on September 09, 2011, 11:20:01 AM
QuoteI am building it every bit as good as the septic systems that worked just fine years ago. To be honest I never understood the whole code thing anyways as the deer and coons never ask anywhere where they can dump their waste at. Most commonly by the river they are drinking out of. Always find it strange the things people come up with to make money.
People create a lot more waste in a confined area than racoons do. What isn't a problem for one person out living in the woods turns into a big mess of contaminated ground water when more people start moving in. It used to make sense to dump sewage directly into the rivers in NYC and they're still trying to get all that straightened out.
If people built them the way they were supposed to codes wouldn't be necessary, but too many people don't (won't). When I removed my old septic tank I found there was no leach field and that the tanks dumped 10 feet away from where my shallow well was sunk.
Alan
Title: Re: 20x32 A frame cabin Central KY
Post by: nathan.principe on September 09, 2011, 12:22:18 PM
Post by: nathan.principe on September 09, 2011, 12:22:18 PM
EaglesSJ, I am familiar with that link, I accually started to construct one myself early on in the project. The barrels I came across did not have the detachable lid, rather I had to cut it off and reattach it. When I buried the barrels they crumbled under the weight of the soil, of coarse the reassemble joint was the weak point. If I try this method again( if the inspector lets me, doubtful) I would of coarse use the proper barrels and prob back fill with gravel around the barrels as opposed to soil. Can wait to see yours!
Title: Re: 20x32 A frame cabin Central KY
Post by: MountainDon on September 09, 2011, 01:08:29 PM
Post by: MountainDon on September 09, 2011, 01:08:29 PM
Barrels buried in the ground: It seems to me that if the ordinary barrel is empty and buried it will collapse sooner or later irregardless of what the fill is. It may take longer in some soil types. It might be better to dig a pit and construct a tank from concrete blocks with reinforcing steel in the cores.
Title: Re: 20x32 A frame cabin Central KY
Post by: EaglesSJ on September 09, 2011, 01:23:38 PM
Post by: EaglesSJ on September 09, 2011, 01:23:38 PM
Quote from: nathan.principe on September 09, 2011, 12:22:18 PM
EaglesSJ, I am familiar with that link, I accually started to construct one myself early on in the project. The barrels I came across did not have the detachable lid, rather I had to cut it off and reattach it. When I buried the barrels they crumbled under the weight of the soil, of coarse the reassemble joint was the weak point. If I try this method again( if the inspector lets me, doubtful) I would of coarse use the proper barrels and prob back fill with gravel around the barrels as opposed to soil. Can wait to see yours!
Not sure why you had to cut the tops off the barrels. Mine dont have detachable lids either. Neither do the ones in that link I posted. All you have to do is install a cleanout up top. I should be posting pics of the completed project later today assuming it doesnt start raining. Im in right now eating lunch.
Title: Re: 20x32 A frame cabin Central KY
Post by: EaglesSJ on September 09, 2011, 01:33:32 PM
Post by: EaglesSJ on September 09, 2011, 01:33:32 PM
Quote from: Alan Gage on September 09, 2011, 11:20:01 AM
People create a lot more waste in a confined area than racoons do. What isn't a problem for one person out living in the woods turns into a big mess of contaminated ground water when more people start moving in. It used to make sense to dump sewage directly into the rivers in NYC and they're still trying to get all that straightened out.
If people built them the way they were supposed to codes wouldn't be necessary, but too many people don't (won't). When I removed my old septic tank I found there was no leach field and that the tanks dumped 10 feet away from where my shallow well was sunk.
Alan
I understand that it is a good idea to have some sort or standard to help protect the environment. However it is carried overboard to the point it infringes on the freedoms of humans. Examples being stair treads having to be a certain height, outlets having to be spaced so far apart, etc. If I want to build a house with only 1 outlet in the whole place or 14" risers on my stairs I should be able to.
Im not going to go off on a Patrick Henry speech or anything but our government and its rules are sucking the life and last red cent out of people because you cant do anything without checking to make sure it is ok with someone first. People have lost sight of what it is to be human. We used to drank from rivers and streams and poop in a hole in the ground after eating wild meat. Our immune system is worth more than people give it credit for.
Now that I went way off topic I will jump back on topic and ask a question. Would it be better to use straw or gravel for my leach field? I have seen alot about both. Straw is much much easier to get down in the woods. Anyone care to chime in?
Title: Re: 20x32 A frame cabin Central KY
Post by: OlJarhead on September 09, 2011, 01:46:12 PM
Post by: OlJarhead on September 09, 2011, 01:46:12 PM
Quote from: EaglesSJ on September 09, 2011, 01:33:32 PM
Im not going to go off on a Patrick Henry speech or anything but our government and its rules are sucking the life and last red cent out of people because you cant do anything without checking to make sure it is ok with someone first. People have lost sight of what it is to be human. We used to drank from rivers and streams and poop in a hole in the ground after eating wild meat. Our immune system is worth more than people give it credit for.
Now that I went way off topic I will jump back on topic and ask a question. Would it be better to use straw or gravel for my leach field? I have seen alot about both. Straw is much much easier to get down in the woods. Anyone care to chime in?
"They who can give up essential liberty to obtain a little temporary safety, deserve neither liberty nor safety." Ben Franklin.
Amen brother! It seems to me (perhaps I am biased) that those of us who've served in the military (specially veterans) believe this more strongly then most others. I could be biased though ;)
Anyway, I'm with you all the way on this one and might add this: we have laws against harming one another or infringing on their rights and this really is all we need. If someone does something stupid and it hurts others they ought to be prosecuted for it. If on the other hand they do not harm others then what business is it of others to tell them what they can or cannot do in a FREE country?
Life, Liberty and Property!
Title: Re: 20x32 A frame cabin Central KY
Post by: Squirl on September 09, 2011, 01:50:57 PM
Post by: Squirl on September 09, 2011, 01:50:57 PM
I haven't commented yet on your build. I have been exceptionally jealous at the progress and the quality that you have accomplished. Your photos are great too.
Ok, now to my other point. My main concern with burying barrels is not with just the weight of the soil on the sides, but on the top. They have very little strength. All codes require septic tanks that can stand an X amount of weight per foot from individuals or vehicles traveling over the spot where they are underground. This could lead to a serious injury. Also with plastic it tends to float during storms and can stress the pipe joints. Steel rusts, I can cut through the steel on a 55 gallon drum with metal shears. I would be concerned with longevity and possibility of collapse.
Concrete is pretty cheap, just heavy to work with. You can build a tank concrete and rebar liner to the size of or larger than two 55 gallon drums with 10-15 bags for $50-$60. You may even be able to build it around the 55 gallon drum. Concrete is the only type of tank approved without special conditions under our code for a reason.
Title: Re: 20x32 A frame cabin Central KY
Post by: Squirl on September 09, 2011, 02:06:29 PM
Post by: Squirl on September 09, 2011, 02:06:29 PM
Quote from: EaglesSJ on September 09, 2011, 01:33:32 PM
We used to drank from rivers and streams and poop in a hole in the ground after eating wild meat. Our immune system is worth more than people give it credit for.
True. I'm not going to disagree whether people should have the right to do this either. But thankfully people got more knowledge. Life expectancy when everyone used to do these things was much, much shorter. Deer and coons also do the same thing, are extremely disease and parasite ridden and have a life expectancy of 3-5 years. I always am reminded of an exchange between my father and grandfather. Neither ever liked going to the doctor. My father had an ear infection and was arguing with my grandfather about going to the doctor. My father got angry and in protest of going to the doctor said "yeah, well what did you used to do in the old days?" My grandfather looked at him and stated, "We went deaf." There are no guarantees in life, but I like increasing the odds in my favor.
Title: Re: 20x32 A frame cabin Central KY
Post by: EaglesSJ on September 09, 2011, 02:18:27 PM
Post by: EaglesSJ on September 09, 2011, 02:18:27 PM
Quote from: Squirl on September 09, 2011, 01:50:57 PM
I haven't commented yet on your build. I have been exceptionally jealous at the progress and the quality that you have accomplished. Your photos are great too.
Ok, now to my other point. My main concern with burying barrels is not with just the weight of the soil on the sides, but on the top. They have very little strength. All codes require septic tanks that can stand an X amount of weight per foot from individuals or vehicles traveling over the spot where they are underground. This could lead to a serious injury. Also with plastic it tends to float during storms and can stress the pipe joints. Steel rusts, I can cut through the steel on a 55 gallon drum with metal shears. I would be concerned with longevity and possibility of collapse.
Concrete is pretty cheap, just heavy to work with. You can build a tank concrete and rebar liner to the size of or larger than two 55 gallon drums with 10-15 bags for $50-$60. You may even be able to build it around the 55 gallon drum. Concrete is the only type of tank approved without special conditions under our code for a reason.
First point you addressed was the weight of dirt on top of the drums collapsing under the load. I weigh 174 lbs and I have literally jumped up and down on top of these things while working on them and the dont really do anything. The sides cant collapse because they are filled with liquid unless you think that the ground will exert enough pressure to make them implode. Not saying that they wont ever do it Im just saying that I have personally witness others in my area use this sort of system flawlessly.
Second point was that plastic floats. A 55 gallon barrel filled within 7 inches of the top with liquid sewage is not going to float under any circumstances. Not to mention the weight of that dirt on top of it that you were talking about earlier.
Third point, steel rust. Not one single item on this system other than the stainless steel screws used to hold the flanges to the barrel is made of metal. Everything is either PVC or plastic. So not sure why it matters that steel drums rust.
Now as for the concrete septic tanks. Most new tank installs around here are of the 500 gallon variety and are made of fiberglass. I have seen concrete used on larger homes or where you want to be able to drive over it but that is not the case with me. As a matter of fact we will be building a deck over our tank and such by this time next year. I hope I didnt come off as rude, I was just trying to convey my message that there is more than one way to skin a cat. If I had of had the $3000 to get a nice concrete tank and lateral lines installed I would have but I didnt. For $300 I think this will suit us just fine. It has obviously worked for alot of people in the past.
Title: Re: 20x32 A frame cabin Central KY
Post by: Alan Gage on September 09, 2011, 02:49:54 PM
Post by: Alan Gage on September 09, 2011, 02:49:54 PM
Quote from: EaglesSJ on September 09, 2011, 01:33:32 PM
I understand that it is a good idea to have some sort or standard to help protect the environment. However it is carried overboard to the point it infringes on the freedoms of humans. Examples being stair treads having to be a certain height, outlets having to be spaced so far apart, etc. If I want to build a house with only 1 outlet in the whole place or 14" risers on my stairs I should be able to.
Im not going to go off on a Patrick Henry speech or anything but our government and its rules are sucking the life and last red cent out of people because you cant do anything without checking to make sure it is ok with someone first. People have lost sight of what it is to be human. We used to drank from rivers and streams and poop in a hole in the ground after eating wild meat. Our immune system is worth more than people give it credit for.
I agree with everything you say in principle but people are flawed and as soon as money and power come into the picture too many can think of only that. In my mind codes aren't for someone building a cabin in the woods but rather for the developers putting up thousands of houses to sell at a profit. Thankfully in your case they seem to be letting things slide but I can see where it would be a tough line to draw.
Anyway, my reason for this second post was to say that in my first post I didn't mean to question the way you were doing anything. Just stating my opinion that while I'd be very frustrated if I had to follow a bunch of codes and spend big $$$ on permits I can certainly see why they exist. Sounds ridiculous in some places. Thankfully around here things are still pretty relaxed and people use common sense (mostly).
Alan
Title: Re: 20x32 A frame cabin Central KY
Post by: Squirl on September 09, 2011, 03:10:06 PM
Post by: Squirl on September 09, 2011, 03:10:06 PM
I don't think I explained myself as well. I don't want to give you the impression that I think it won't work, I just wanted to pass along some of what I had learned and my personal concerns.
For the plastic flotation issue, I have never seen any float. All the building inspectors in my county and the septic engineer I hired would not approve a fiberglass or plastic tank without soil testing, because they had seen them float. Not lift out to the ground float, but an inch or two which was enough to damage the pipe joints in and out and the system to fail. I don't know what kind of soil you have or your groundwater table, or how it performs in a rainstorm. There is usually this warning by manufactures when you go to buy the tanks. I would have greatly preferred one of these, because I could have installed it at my leisure with my front end loader, unlike a concrete tank.
Although water is not compressible, it is displaceable, specifically into the inlet and outlet holes at the top. I would not consider it of much structural value. to either the walls collapsing or the top. There will be an air gap between the top and the water anyway. I certainly can't say you are wrong about the strength of their tops. I have used them as a stand and jumped on them too.
I read the conversation of using drums with removable tops and didn't know if you were going with steel or plastic. I didn't see and pictures of the drums. It is a moot point.
I certainly didn't want to imply that you should go out and spend $3000 on a full fledged septic system. I like your idea of the split black water/grey water system. I assume you would need a smaller sized field. I was trying to suggest a thin round concrete slab just large enough to put the drum over with a little lip on the outside with a 2-3 inch concrete wall formed around and a small 3-4 in. concrete top with rebar would take care of the collapse issue that others have raised and the floatation issue I was warned about. Sort of like building your own smaller concrete enclosure and using the drum as the water tight tank inside. It wouldn't cost very much. Off the top of my head probably $60. It would require extra effort, but judging from what I've seen, you aren't one to shy away from hard work.
I will try to leave a more detailed messages going forward. I apologize.
Title: Re: 20x32 A frame cabin Central KY
Post by: Squirl on September 09, 2011, 03:31:09 PM
Post by: Squirl on September 09, 2011, 03:31:09 PM
More than one way to skin a cat is one of my favorite expressions.
Mortared salvage bricks, field stones, or block. Soil-cement. Rammed earth with rebar. Sand bag construction. Just trying to throw out ideas on reinforcing the sidewalls or top if you want them.
Mortared salvage bricks, field stones, or block. Soil-cement. Rammed earth with rebar. Sand bag construction. Just trying to throw out ideas on reinforcing the sidewalls or top if you want them.
Title: Re: 20x32 A frame cabin Central KY
Post by: EaglesSJ on September 09, 2011, 05:57:12 PM
Post by: EaglesSJ on September 09, 2011, 05:57:12 PM
Ok here are a few more pics. All that is left now is to fill with gravel then landscape fabric and then dirt. If the tanks get crushed by the dirt wouldnt the puny little corrugated pipe get crushed as well?


Title: Re: 20x32 A frame cabin Central KY
Post by: EaglesSJ on September 09, 2011, 10:35:44 PM
Post by: EaglesSJ on September 09, 2011, 10:35:44 PM
Quote from: Squirl on September 09, 2011, 03:10:06 PM
I don't think I explained myself as well. I don't want to give you the impression that I think it won't work, I just wanted to pass along some of what I had learned and my personal concerns.
For the plastic flotation issue, I have never seen any float. All the building inspectors in my county and the septic engineer I hired would not approve a fiberglass or plastic tank without soil testing, because they had seen them float. Not lift out to the ground float, but an inch or two which was enough to damage the pipe joints in and out and the system to fail. I don't know what kind of soil you have or your groundwater table, or how it performs in a rainstorm. There is usually this warning by manufactures when you go to buy the tanks. I would have greatly preferred one of these, because I could have installed it at my leisure with my front end loader, unlike a concrete tank.
Although water is not compressible, it is displaceable, specifically into the inlet and outlet holes at the top. I would not consider it of much structural value. to either the walls collapsing or the top. There will be an air gap between the top and the water anyway. I certainly can't say you are wrong about the strength of their tops. I have used them as a stand and jumped on them too.
I read the conversation of using drums with removable tops and didn't know if you were going with steel or plastic. I didn't see and pictures of the drums. It is a moot point.
I certainly didn't want to imply that you should go out and spend $3000 on a full fledged septic system. I like your idea of the split black water/grey water system. I assume you would need a smaller sized field. I was trying to suggest a thin round concrete slab just large enough to put the drum over with a little lip on the outside with a 2-3 inch concrete wall formed around and a small 3-4 in. concrete top with rebar would take care of the collapse issue that others have raised and the floatation issue I was warned about. Sort of like building your own smaller concrete enclosure and using the drum as the water tight tank inside. It wouldn't cost very much. Off the top of my head probably $60. It would require extra effort, but judging from what I've seen, you aren't one to shy away from hard work.
I will try to leave a more detailed messages going forward. I apologize.
No need for an apology I am just ill mannered sometimes in what I say without even realizing it. I have been tossing around the idea of concrete reinforced top and sides. If nothing else I will do some sort of steel welded framework or something. You are right about the hard work aspect. I dont like to toot my own horn but I feel like people today dont work like people used to. Men used to be men. Strong and full of testosterone. Nowadays they are worried they might get a tear in their Abercrombie jeans. And how could a man use a shovel in flip flops. Im kinda like Merle Haggard... leather boots are still in style for manly footwear. I guess where I live, even a square can have a ball :)
Title: Re: 20x32 A frame cabin Central KY
Post by: EaglesSJ on September 09, 2011, 10:43:34 PM
Post by: EaglesSJ on September 09, 2011, 10:43:34 PM
I also wanted to add that my field is only 17 feet long and 4 feet wide 2.5 ft deep. I opted to make it a little shorter because the soil down here is ridiculously sandy and after pouring out 30 gallons in that trench last night and watching it dissipate in a matter of minutes I decided that a full 20 wasnt necessary. Not to mention we are only going to be putting about 20-25 gallons a day through this system at most. Thats quite a bit shy of the hundreds that go through a typical tank and drain field.
I will update a few months from now with the results of my labor. Next project is a water storage expansion from 330 gallons to 1000 gallons and then underpinning the house followed by doubling the solar equipment. Also we just found out that Lindsay my wife is pregnant so we will be adding a master bedroom onto the right side of the house. Plan on doing a 16x16 with a vaulted ceiling with exposed wood beams and lots of windows as well as a patio door opening up to a wrap around deck.
I will update a few months from now with the results of my labor. Next project is a water storage expansion from 330 gallons to 1000 gallons and then underpinning the house followed by doubling the solar equipment. Also we just found out that Lindsay my wife is pregnant so we will be adding a master bedroom onto the right side of the house. Plan on doing a 16x16 with a vaulted ceiling with exposed wood beams and lots of windows as well as a patio door opening up to a wrap around deck.
Title: Re: 20x32 A frame cabin Central KY
Post by: diyfrank on September 10, 2011, 02:45:16 AM
Post by: diyfrank on September 10, 2011, 02:45:16 AM
Ive looked into this septic system a little before and I'm interested to see how it works out for you. A couple thoughts on the above concerns on plastic barrels. Concrete can float when empty so I think the same thing applies to the plastic, keep them full. The side pressure could be a problem but backfilling with gravel would lessen the side pressure. Your soil is free draining and that will help both the side pressure and floating concerns. Another thought is timbers around the sides vertical such as old rail road ties and a cross brace would be strong, easy /cheap. I'm planning the same set up on my project.
Title: Re: 20x32 A frame cabin Central KY
Post by: stricsm on September 10, 2011, 06:46:51 AM
Post by: stricsm on September 10, 2011, 06:46:51 AM
Congrats on the baby. Can't wait to see your addition (the master suite and baby).
FWIW our septic is home-built albeit out of concrete poured in place. It is small and we share it with the cabin next door. It has been there for 10+ years. I wish I could say I built it but it was one of the previous owners projects. I've seen systems like yours before. There are often used at hunting cabins and they will work. If you run into trouble later, it is not like you can't fix it. The best lessons in life are by doing and sometimes redoing.
Regards,
Mark
Title: Re: 20x32 A frame cabin Central KY
Post by: EaglesSJ on September 10, 2011, 10:08:26 AM
Post by: EaglesSJ on September 10, 2011, 10:08:26 AM
Here is kinda what we are looking at doing. Only difference is that room would be swapped sides. MSpaint error on my part.

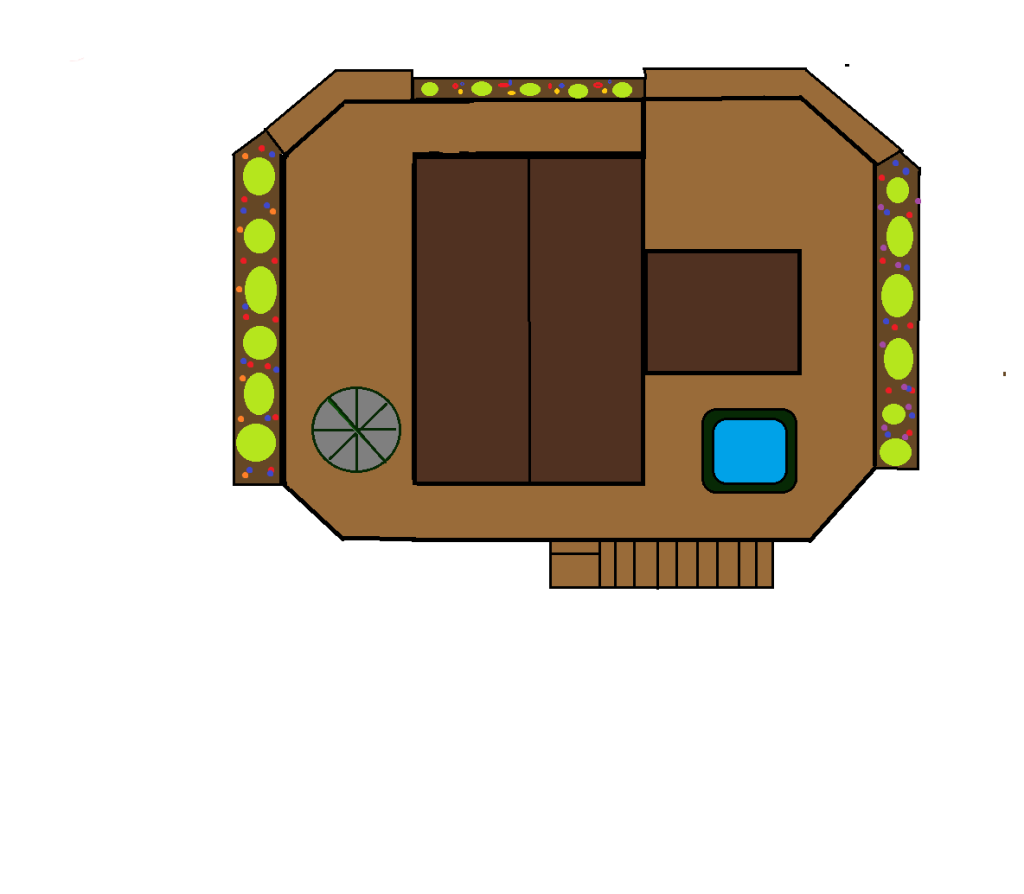
Title: Re: 20x32 A frame cabin Central KY
Post by: Sassy on September 10, 2011, 12:11:36 PM
Post by: Sassy on September 10, 2011, 12:11:36 PM
Congratulations on the pending new family member!
Your plans for the bedroom & deck look wonderful! Will make your home truly an oasis :)
Your plans for the bedroom & deck look wonderful! Will make your home truly an oasis :)
Title: Re: 20x32 A frame cabin Central KY
Post by: nathan.principe on September 10, 2011, 12:50:32 PM
Post by: nathan.principe on September 10, 2011, 12:50:32 PM
Congrats on the soon to be new addition! A new journey awaits you! To answer your question about removing the lid, I assumed in the picture that the barrel he used in fact had a removable lid ( I guess the white rim threw me). I installed the toielt flange with stainless bolts, nuts and washers, so you can imagine my need to remove the lid. Im guessing now that the smarter thing would have been to drill small pilot holes and attach with stainless screws, is that what you did? I guess as long as you dint over tighten there would be no issue with that?
Title: Re: 20x32 A frame cabin Central KY
Post by: EaglesSJ on September 10, 2011, 01:04:45 PM
Post by: EaglesSJ on September 10, 2011, 01:04:45 PM
I cut a hole in barrel then coated the back side of the flange with a thick bead of silicone. I stuck the flange over the hole and then used self tapping screws to tighten it to the barrel. I stripped 1 screw from over tightening so I just put another about 3/4" from it.
Title: Re: 20x32 A frame cabin Central KY
Post by: EaglesSJ on September 10, 2011, 04:14:34 PM
Post by: EaglesSJ on September 10, 2011, 04:14:34 PM
Also with a 4 inch flange if you wanted to you could probably wiggle your hand inside to hold a nut if thats what you wanted to use. Just be extra careful not to drop your tool inside.
Title: Re: 20x32 A frame cabin Central KY
Post by: ben2go on September 10, 2011, 07:57:35 PM
Post by: ben2go on September 10, 2011, 07:57:35 PM
Things are looking good around there.Congrats on the future family member.
I know of a lot of people in coal mine villages around south eastern KY that use that same system.They usually have the waste pumped every spring when the ground is soft and easy to dig.If you do have issues,I have seen a decent solution.The one that I liked was stacked rock and mortar like a free standing rock wall.Rebar was laid in horizontally every 16 inches,as the walls were build.The top used a mesh like a stucko job.They laid the stucko mesh across the top as tight as possible.Then they run a thin layer of mortar over it allowing some dry time so it wouldn't crack.Then they went back and laid rebar across the top of the mortar and run 2 inches of concrete over that.They left an opening for clean out which was closed in with a steel man hole cover.They worked slow to keep the weight from caving in the top in.After every thing set up for about a week,it was covered with about 6 inches of dirt.Oh,they used cut down PVC pipe laid in the end walls for the in/out flows.The tank was 6 feet wide over all,6 feet tall standing on the floor,and 8 feet long.I'm not sure how many gallons it was, but it looked like it held as much or more than all three of my 1000 gallon tanks.
I know of a lot of people in coal mine villages around south eastern KY that use that same system.They usually have the waste pumped every spring when the ground is soft and easy to dig.If you do have issues,I have seen a decent solution.The one that I liked was stacked rock and mortar like a free standing rock wall.Rebar was laid in horizontally every 16 inches,as the walls were build.The top used a mesh like a stucko job.They laid the stucko mesh across the top as tight as possible.Then they run a thin layer of mortar over it allowing some dry time so it wouldn't crack.Then they went back and laid rebar across the top of the mortar and run 2 inches of concrete over that.They left an opening for clean out which was closed in with a steel man hole cover.They worked slow to keep the weight from caving in the top in.After every thing set up for about a week,it was covered with about 6 inches of dirt.Oh,they used cut down PVC pipe laid in the end walls for the in/out flows.The tank was 6 feet wide over all,6 feet tall standing on the floor,and 8 feet long.I'm not sure how many gallons it was, but it looked like it held as much or more than all three of my 1000 gallon tanks.
Title: Re: 20x32 A frame cabin Central KY
Post by: EaglesSJ on September 10, 2011, 09:03:59 PM
Post by: EaglesSJ on September 10, 2011, 09:03:59 PM
why would they have to wait until the ground is soft where they can dig? No clean out tube extending out of the ground like on my system? a 6x6x8 is one heck of a upgrade for sure!
Title: Re: 20x32 A frame cabin Central KY
Post by: ben2go on September 10, 2011, 09:55:38 PM
Post by: ben2go on September 10, 2011, 09:55:38 PM
Quote from: EaglesSJ on September 10, 2011, 09:03:59 PM
why would they have to wait until the ground is soft where they can dig? No clean out tube extending out of the ground like on my system? a 6x6x8 is one heck of a upgrade for sure!
The clean out is buried.They do all of it through the man hole.All of mine are buried at all three of my houses.The ground is hard pack and rocky in that area of KY.When it's wet,it loosens up,and it's a little easier to dig by shovel.
Here is one of my houses(in SC) buried septic tank.It has two drain fields, 6 feet deep by 4 feet wide.It has 6 inch preforrated and corrogated tubing, wrapped in fiber mesh,then back filled with crush run, to about a foot from the surface.On top of the gravel is landscape fabric and a foot of top soil.Here is just the tank and door.This one was formed up and poured in place in 1953 or 1954.My grandfather did it and the system still meets our strict local codes for septic systems.
We had to dig it up to have the main line scoped.All the drains in the house are galvanized steel from when the house was built in 1954.A section of main line had collapsed so I got the chore of replacing it.The rest of the house plumbing is copper.
I dug this up in about 20 minutes.I used the pointed red handled shovel to break ground and the wood handle shovel to clean off the top of the septic tank.

Here it is open.Looks like an open casket in this pic.The tank itself is 6 inches thick and reinforced with rebar.

After the water was pumped down there was only 6 inches of sludge in the bottom.It has been 5 years since it was last cleaned out.This tank get's cleaned out ever 10 years and has never been more than 2 foot deep with sludge.This tank is 6 feet deep.I am 5'8" and I can stand up in it.The tank was cleaned and washed out for inspection.We made sure to get the roof of the tank.LOL

Title: Re: 20x32 A frame cabin Central KY
Post by: EaglesSJ on November 05, 2011, 03:46:59 PM
Post by: EaglesSJ on November 05, 2011, 03:46:59 PM
We redone the stove platform using paving stones from lowes and regular grout. Looks much nicer and cleans alot easier after about 4 coats of sealer. I also have completed part of my gun range. I currently have a 25 yard pistol with knockdowns a 50 yard rifle/pistol with steel silhouettes and paper target stands and a 150 yard rifle with silhouettes and gongs. Moving targets are in the near future as well as more steel. Pics are from last weekend when a friend from work and my sister came out to shoot. The black AR is hers. The desert themed is mine.
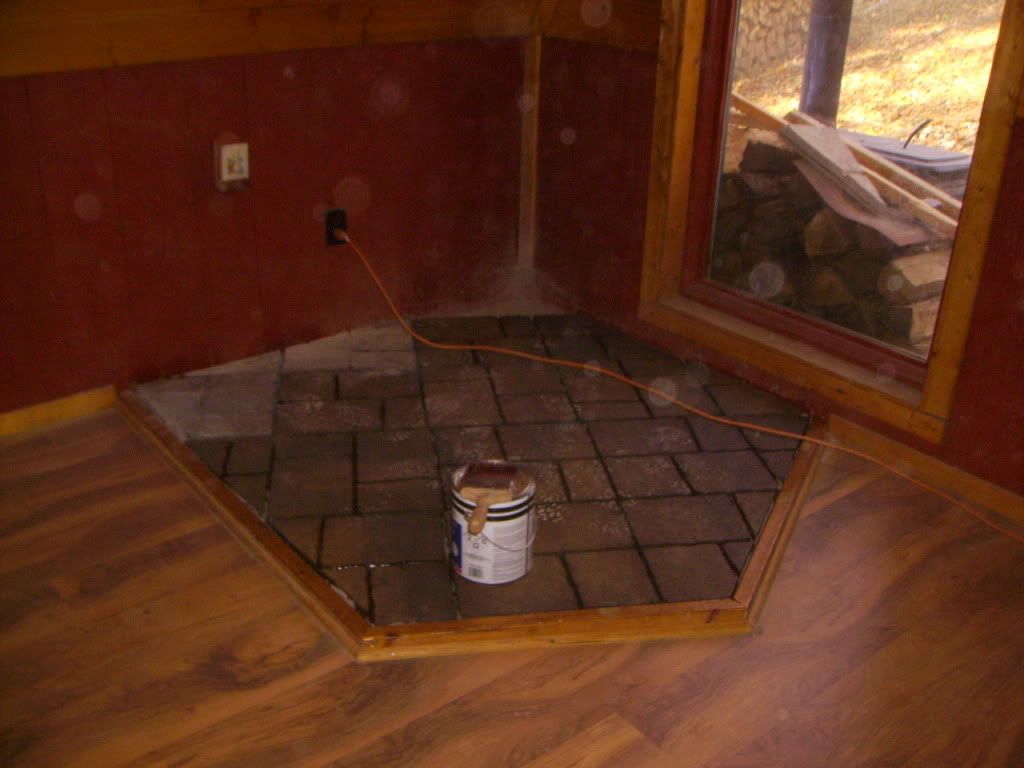
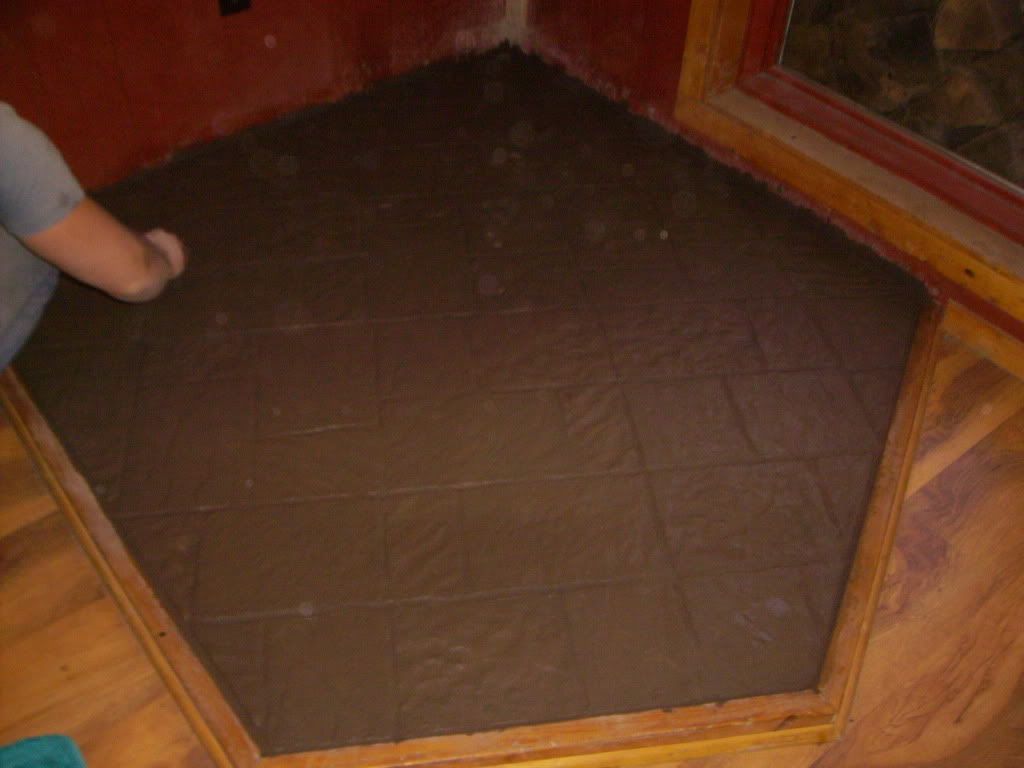
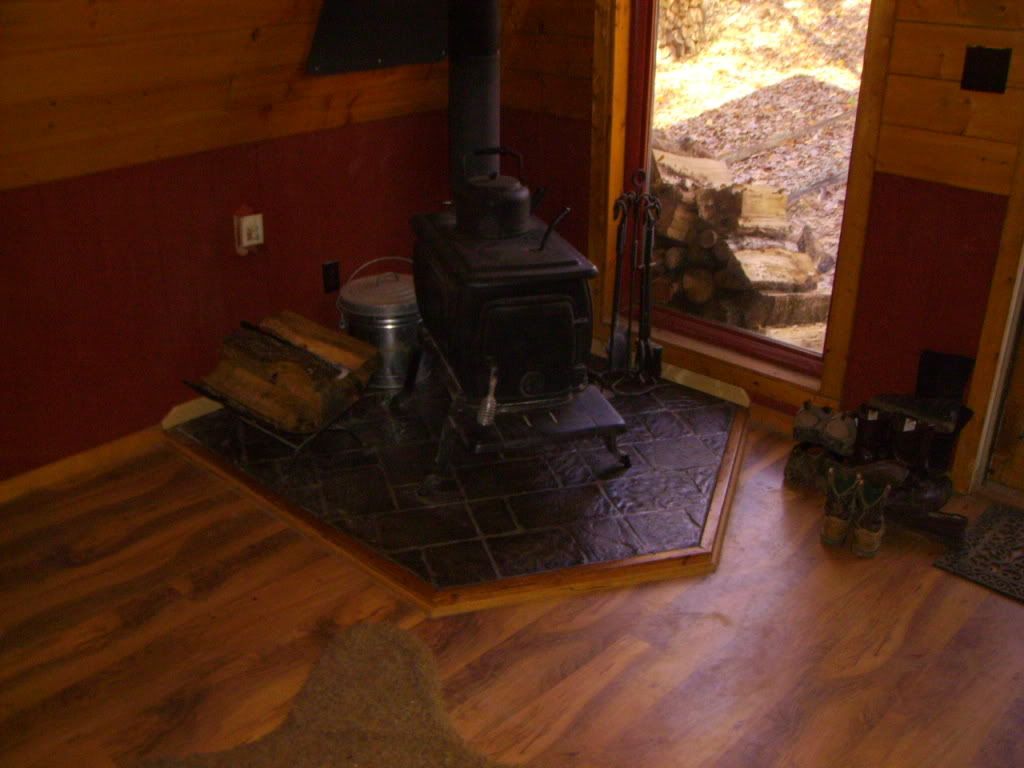
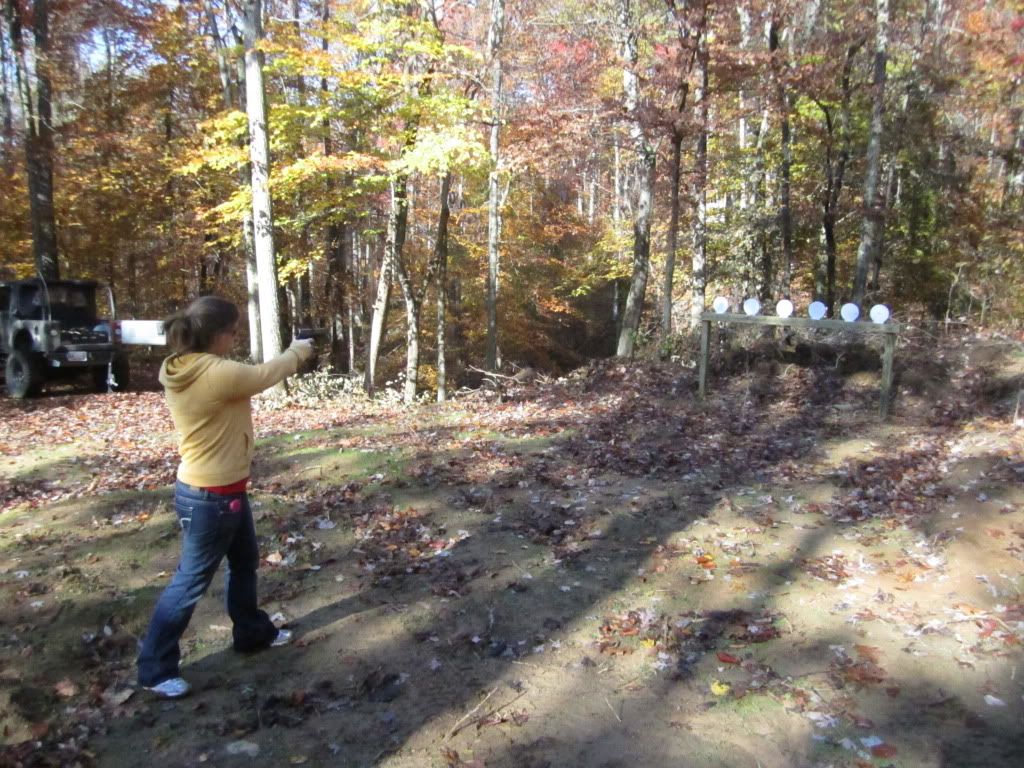


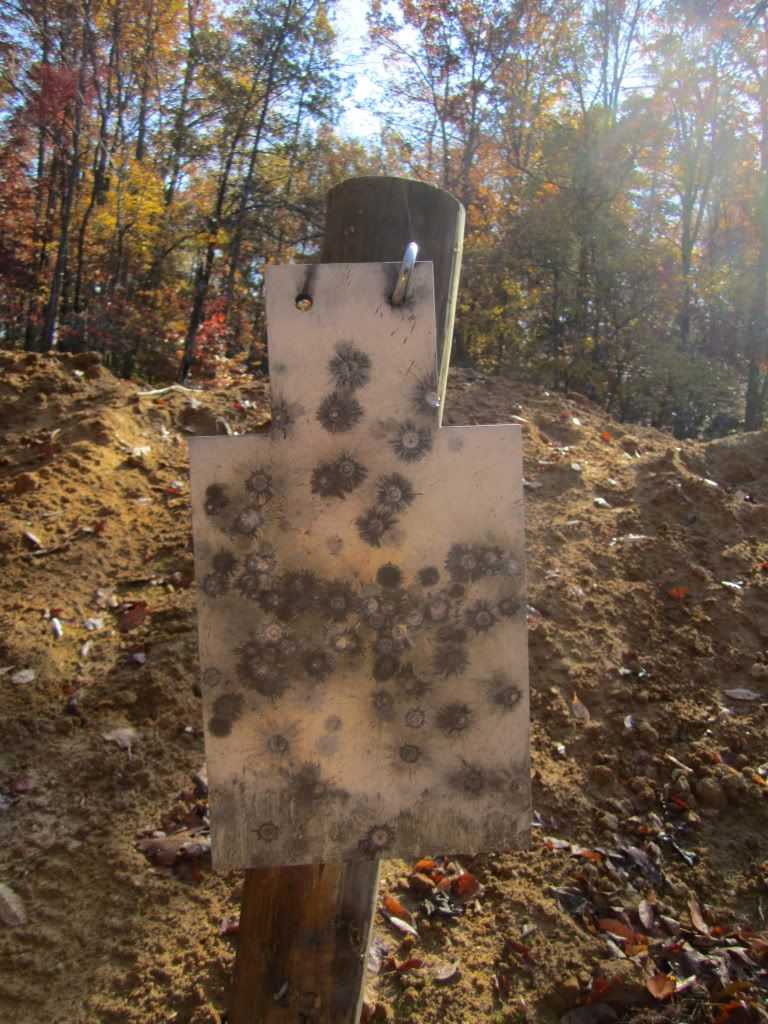
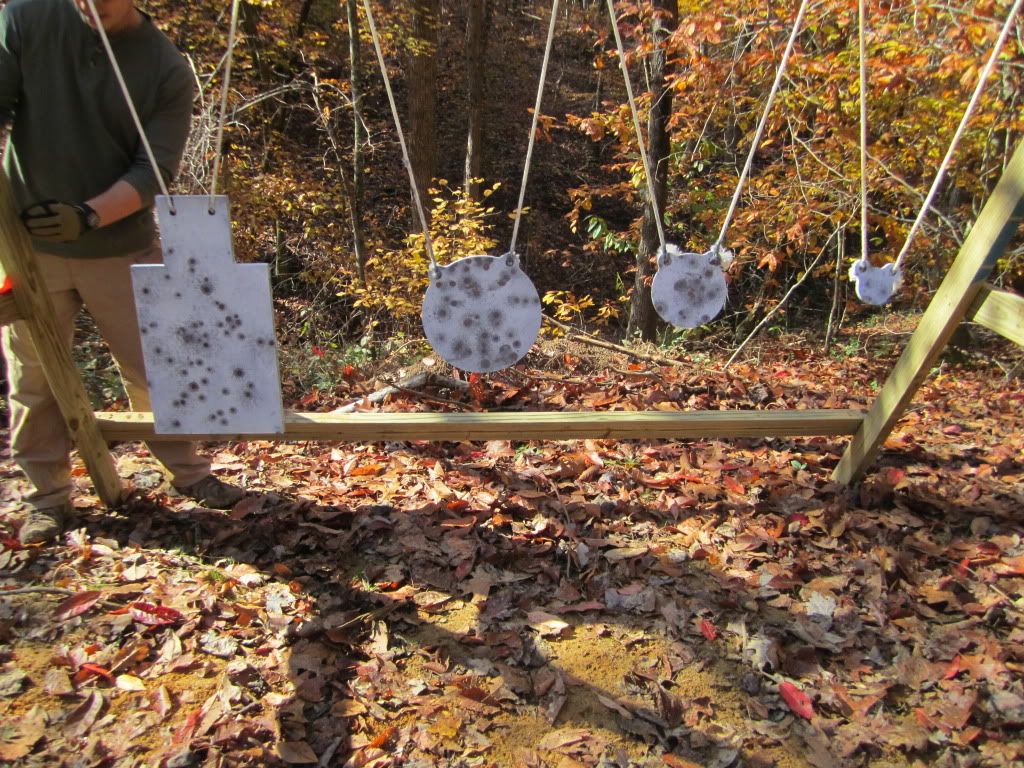
Practicing shooting behind cover.

Practicing shooting behind cover.
Title: Re: 20x32 A frame cabin Central KY
Post by: duncanshannon on November 05, 2011, 03:52:47 PM
Post by: duncanshannon on November 05, 2011, 03:52:47 PM
nice looking flooring!
Title: Re: 20x32 A frame cabin Central KY
Post by: CjAl on November 05, 2011, 07:20:42 PM
Post by: CjAl on November 05, 2011, 07:20:42 PM
I read this whole thread last night, good stuff. Off grid, jeeps, guns and blonds. Your a man after my own heart!
Hows that septic working out for you?
Hows that septic working out for you?
Title: Re: 20x32 A frame cabin Central KY
Post by: EaglesSJ on November 05, 2011, 07:30:15 PM
Post by: EaglesSJ on November 05, 2011, 07:30:15 PM
septic is working out great. It only has to endure about 10-15 flushes a day so 15-20 gallons tops. Really not that much to have to fool with. I have been checking it out through the pump out hole though. Looks as good as 110 gallons of human waste can look :D
Title: Re: 20x32 A frame cabin Central KY
Post by: CjAl on November 05, 2011, 07:45:07 PM
Post by: CjAl on November 05, 2011, 07:45:07 PM
Good deal. Now lets go jeepin!

Title: Re: 20x32 A frame cabin Central KY
Post by: EaglesSJ on November 05, 2011, 08:01:34 PM
Post by: EaglesSJ on November 05, 2011, 08:01:34 PM
you on jeepforum? if so im under the same username there
Title: Re: 20x32 A frame cabin Central KY
Post by: CjAl on November 05, 2011, 08:05:49 PM
Post by: CjAl on November 05, 2011, 08:05:49 PM
I have an account, Same name. Havent been on it in a while. Just been working and cut out all other activities trying to bank some cash for the upcoming house build. I was in the middle of a rebuild on my cj7 and decided to stop, put it back together and sell off my parts untill the cabin is done
Title: Re: 20x32 A frame cabin Central KY
Post by: schiada on November 06, 2011, 11:09:15 AM
Post by: schiada on November 06, 2011, 11:09:15 AM
You need something like this to go with your cabin?

Title: Re: 20x32 A frame cabin Central KY
Post by: ben2go on November 06, 2011, 11:30:20 AM
Post by: ben2go on November 06, 2011, 11:30:20 AM
What is that.It's not a Jeep.It's got IFS and no sings of 4x4 or AWD.
Title: Re: 20x32 A frame cabin Central KY
Post by: Rob_O on November 06, 2011, 12:44:02 PM
Post by: Rob_O on November 06, 2011, 12:44:02 PM
I believe that's a MUTT
Title: Re: 20x32 A frame cabin Central KY
Post by: schiada on November 06, 2011, 01:00:30 PM
Post by: schiada on November 06, 2011, 01:00:30 PM
Ding,ding,ding, Rod!
She is a 1960 M151, with full 4 x4 and IFS and IRS.
She is armed with twin Browning's 30cal now 7.62 semi/auto.
She is a 1960 M151, with full 4 x4 and IFS and IRS.
She is armed with twin Browning's 30cal now 7.62 semi/auto.
Title: Re: 20x32 A frame cabin Central KY
Post by: EaglesSJ on November 07, 2011, 09:07:54 PM
Post by: EaglesSJ on November 07, 2011, 09:07:54 PM
Getting into a planning stage on our addition so I done a fast mspaint rendition of what were kinda going for as the drawing didnt really set a solid image in my head. We will be replacing the 2 windows and doors featured in the addition with a bay window similar to the one pictured. (it was just easier to do a quick photoshop without it.)
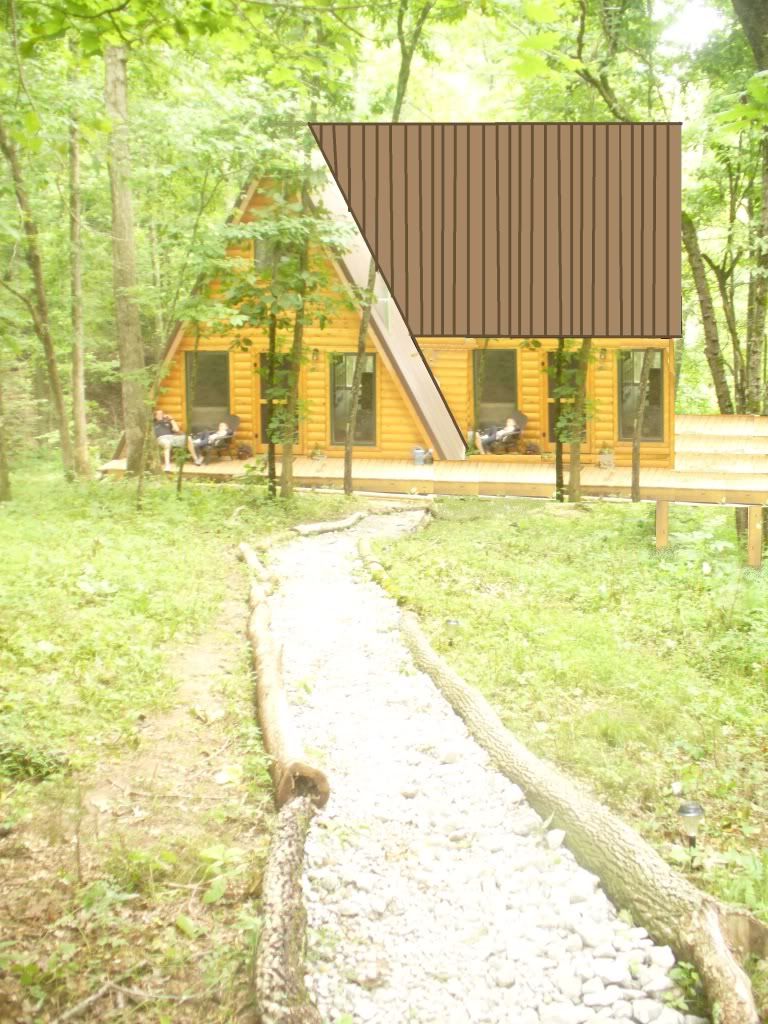

Title: Re: 20x32 A frame cabin Central KY
Post by: CjAl on November 07, 2011, 09:18:14 PM
Post by: CjAl on November 07, 2011, 09:18:14 PM
Looks good. Then when the third kid.comes you can put a wing out the other side. Lol
my brother had a large A frame in northern WI that had a wing like that on both sides and it ended up being a monster of a house
my brother had a large A frame in northern WI that had a wing like that on both sides and it ended up being a monster of a house
Title: Re: 20x32 A frame cabin Central KY
Post by: hillsvillehermit on November 10, 2011, 08:56:16 AM
Post by: hillsvillehermit on November 10, 2011, 08:56:16 AM
Just trying to visualize your floorplan in my head - the overall size of your building is 20x36, 20x32 for the interior plus the 4 foot deck/porch on the rear, correct? I love the layout of your place, think I am going to do a very similar floorplan except traditional style w/balloon framing instead of an A-frame.
Title: Re: 20x32 A frame cabin Central KY
Post by: EaglesSJ on November 11, 2011, 05:48:31 AM
Post by: EaglesSJ on November 11, 2011, 05:48:31 AM
Quote from: hillsvillehermit on November 10, 2011, 08:56:16 AM
Just trying to visualize your floorplan in my head - the overall size of your building is 20x36, 20x32 for the interior plus the 4 foot deck/porch on the rear, correct? I love the layout of your place, think I am going to do a very similar floorplan except traditional style w/balloon framing instead of an A-frame.
That is correct.
Title: Re: 20x32 A frame cabin Central KY
Post by: EaglesSJ on November 12, 2011, 04:37:08 PM
Post by: EaglesSJ on November 12, 2011, 04:37:08 PM
I tried my hand at chainsaw carving for the first time today as we wanted a bear for our cabin but didnt want to shell out the $200-$400 for one as we are saving for underpinning the cabin and the addition. So after about 2.5 hrs I had this done. I dont think it is all that bad for a first timer. We also painted the fly rafters and such to protect them and give the cabin a more finished look.

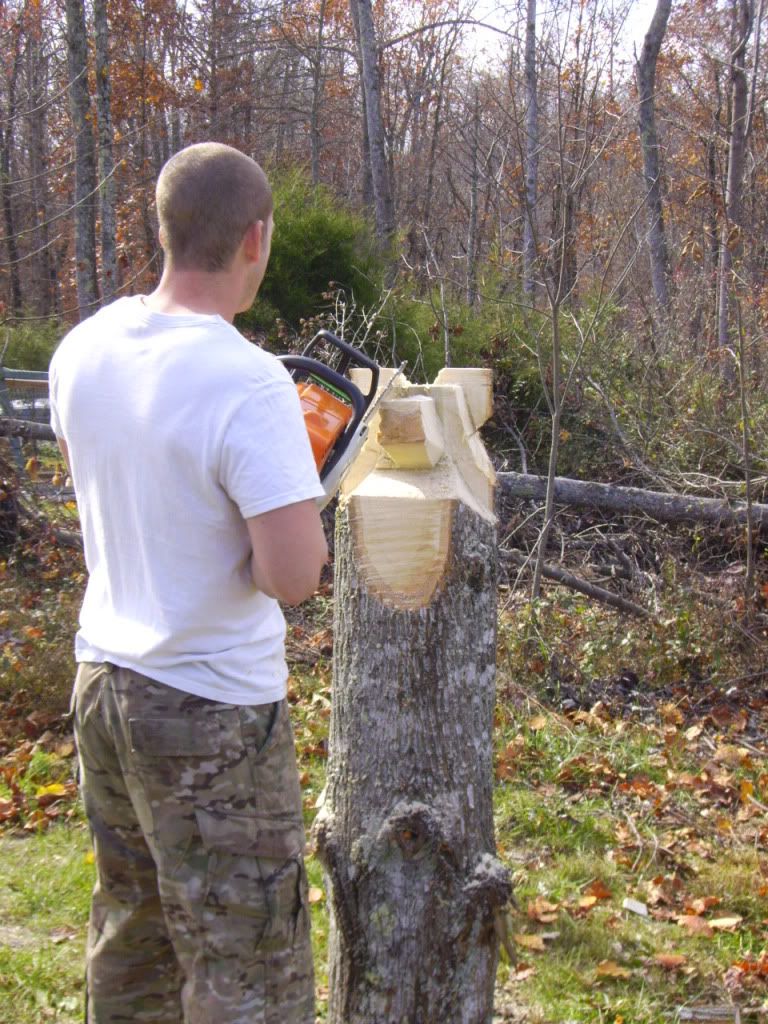


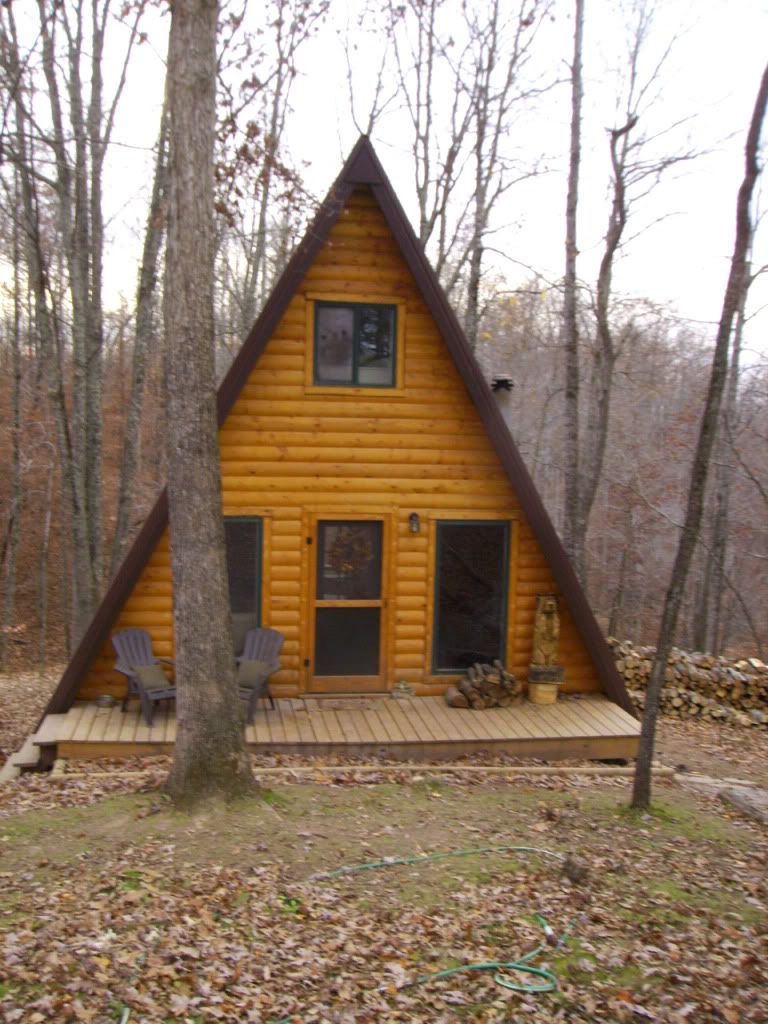
Title: Re: 20x32 A frame cabin Central KY
Post by: Redoverfarm on November 12, 2011, 04:44:57 PM
Post by: Redoverfarm on November 12, 2011, 04:44:57 PM
Nice work for the first time. Now you can be the one selling them for that price. ;D
Title: Re: 20x32 A frame cabin Central KY
Post by: UK4X4 on November 12, 2011, 04:52:07 PM
Post by: UK4X4 on November 12, 2011, 04:52:07 PM
For those of you worried about the complete lack of safety gear
he's wearing the latest in military invisible protective gear- ::)
Pretty cool bear - I like it - another reason to get a good chainsaw !
Bet your boy loves it !
he's wearing the latest in military invisible protective gear- ::)
Pretty cool bear - I like it - another reason to get a good chainsaw !
Bet your boy loves it !
Title: Re: 20x32 A frame cabin Central KY
Post by: ChuckinVa on November 12, 2011, 07:49:34 PM
Post by: ChuckinVa on November 12, 2011, 07:49:34 PM
I have heard that the key to carving a bear is to just remove everything from the tree that doesn't look like a bear. There in lies my problem. I always end up removing the bear parts and leaving everything that doesn't look like a bear....
Title: Re: 20x32 A frame cabin Central KY
Post by: lecoq on November 13, 2011, 08:19:22 PM
Post by: lecoq on November 13, 2011, 08:19:22 PM
Looking awesome! How much do you have into it now if you don't mind me asking?
Title: Re: 20x32 A frame cabin Central KY
Post by: EaglesSJ on November 13, 2011, 08:52:33 PM
Post by: EaglesSJ on November 13, 2011, 08:52:33 PM
Quote from: lecoq on November 13, 2011, 08:19:22 PM
Looking awesome! How much do you have into it now if you don't mind me asking?
Were hovering in the low 30's. We are looking at about 7-10k for the addition. Still not bad to have 40k in a 3 bed 2 bath solar powered cabin. We have been extremely blessed.
Title: Re: 20x32 A frame cabin Central KY
Post by: CjAl on November 13, 2011, 11:04:49 PM
Post by: CjAl on November 13, 2011, 11:04:49 PM
did you get the underside buttoned up for winter this year? did you get your pipes to stop freezing last winter?
Title: Re: 20x32 A frame cabin Central KY
Post by: EaglesSJ on November 14, 2011, 05:57:28 AM
Post by: EaglesSJ on November 14, 2011, 05:57:28 AM
Quote from: CjAl on November 13, 2011, 11:04:49 PM
did you get the underside buttoned up for winter this year? did you get your pipes to stop freezing last winter?
not yet. hoping to this weekend when im off work.
Title: Re: 20x32 A frame cabin Central KY
Post by: MountainDon on November 14, 2011, 03:12:39 PM
Post by: MountainDon on November 14, 2011, 03:12:39 PM
There are bars and chains that are made special for carving.
Bailey's Online (http://www.baileysonline.com)
Bailey's Online (http://www.baileysonline.com)
Title: Re: 20x32 A frame cabin Central KY
Post by: astidham on November 14, 2011, 07:27:48 PM
Post by: astidham on November 14, 2011, 07:27:48 PM
good work on the bear!!!
Title: Re: 20x32 A frame cabin Central KY
Post by: EaglesSJ on November 16, 2011, 08:01:51 PM
Post by: EaglesSJ on November 16, 2011, 08:01:51 PM
We are breaking ground on the addition this weekend. Ill post pics as they come available
Title: Re: 20x32 A frame cabin Central KY
Post by: ben2go on November 16, 2011, 11:34:47 PM
Post by: ben2go on November 16, 2011, 11:34:47 PM
That's great news.Look forward to the build. [cool]
Title: Re: 20x32 A frame cabin Central KY
Post by: ajbremer on November 17, 2011, 06:04:47 AM
Post by: ajbremer on November 17, 2011, 06:04:47 AM
It'll be great to see the pics of the addition your adding. You sure are one hard working dude and an inspiration sir - thank you for posting.
Title: Re: 20x32 A frame cabin Central KY
Post by: EaglesSJ on November 17, 2011, 06:14:57 PM
Post by: EaglesSJ on November 17, 2011, 06:14:57 PM
Im still undecided if I should do a 16x16 or a 16x20. What are you guys thoughts. In these pics a 16x20 seems really big especially considering how tall our ceiling will be. and you also have to consider that the room will be much bigger up top because it will extend all the way back to the current roof line.
here are a couple pics of 16x20 bedrooms. Just seems really big and luxurious. Not to mention tough to heat and cool.... and build


here are a couple pics of 16x20 bedrooms. Just seems really big and luxurious. Not to mention tough to heat and cool.... and build
Title: Re: 20x32 A frame cabin Central KY
Post by: Redoverfarm on November 17, 2011, 07:57:50 PM
Post by: Redoverfarm on November 17, 2011, 07:57:50 PM
I wouldn't go much by pictures. Wide angle lenses and the like when done profesionally. I added a 16 X 18 onto mine and no way is representative of a portion of the pictures depicted. Maybe you can gauge it with your cabin demensions to get a better idea of the size. Or lay it out somewhere to give you an idea of the workable space. Maybe you mentioned/or not what the layout will be on the mainfloor and loft.
Title: Re: 20x32 A frame cabin Central KY
Post by: EaglesSJ on November 18, 2011, 07:20:40 PM
Post by: EaglesSJ on November 18, 2011, 07:20:40 PM
Our living room is a 16x16.5 we decided to do a 16x20. Its gonna cost less than $1000 for the extra 4 ft and while we may not NEED it now we would probably wish we had it later. So it will be 16 ft out from the house and 20 ft wide in line with the house. If that makes sense :)
Title: Re: 20x32 A frame cabin Central KY
Post by: EaglesSJ on November 18, 2011, 07:23:10 PM
Post by: EaglesSJ on November 18, 2011, 07:23:10 PM
Quote from: ajbremer on November 17, 2011, 06:04:47 AM
It'll be great to see the pics of the addition your adding. You sure are one hard working dude and an inspiration sir - thank you for posting.
Thanks for the words of encouragement. I am kind of dreading working in the colder temps. Hitting a cold thumb with a hammer hurts 10 times as bad as a warm one d*
Title: Re: 20x32 A frame cabin Central KY
Post by: EaglesSJ on November 20, 2011, 05:41:33 PM
Post by: EaglesSJ on November 20, 2011, 05:41:33 PM
Its been a rainy cruddy weekend but I managed to get the holes dug for the piers, the concrete footers poured, roofing and the side of the house cut off to expose the main beam that I will be tying into, and all the materials to get the subfloor finished bought. Hopefully more progress can be made through the week. I was hoping to get a floor done this weekend. The good news is that the pond is rapidly filling up since I put 600 lbs of bentonite clay in the bottom of it.
Title: Re: 20x32 A frame cabin Central KY
Post by: EaglesSJ on November 26, 2011, 02:42:46 PM
Post by: EaglesSJ on November 26, 2011, 02:42:46 PM
Here is the progress made so far over about 4 days worth of work. Im hoping to start setting rafters in next week. I am on the night shift at work now so I have to stay on the same sleep schedule. Most of my days havent started til late in the afternoon then I build til about 2am.

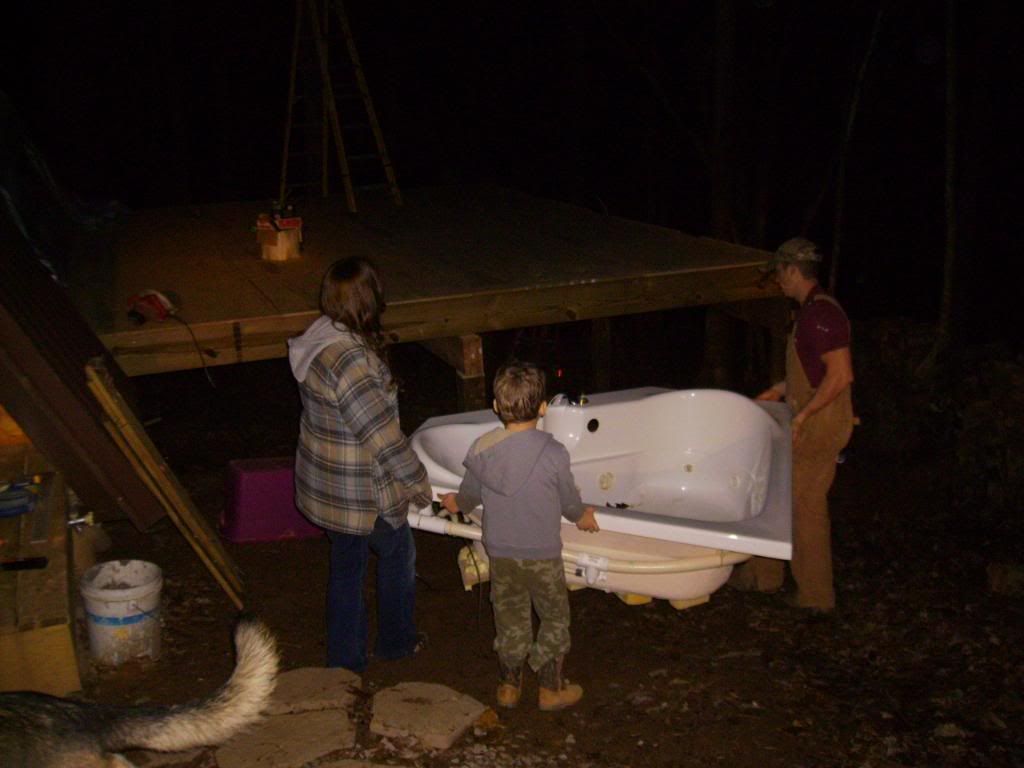
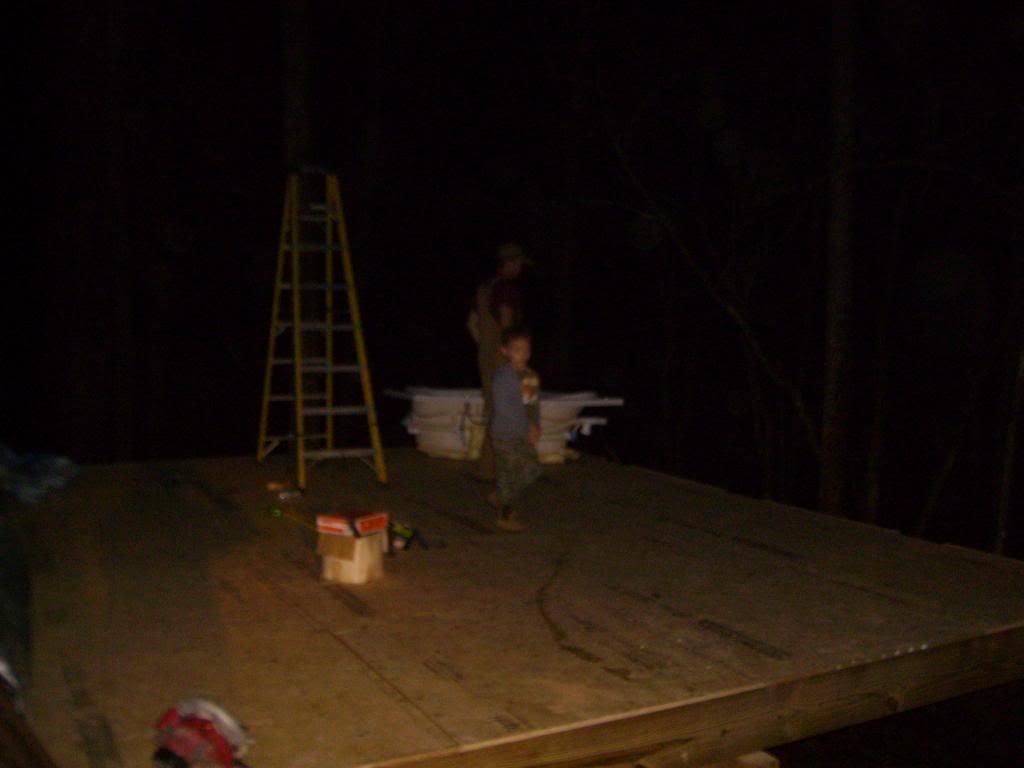
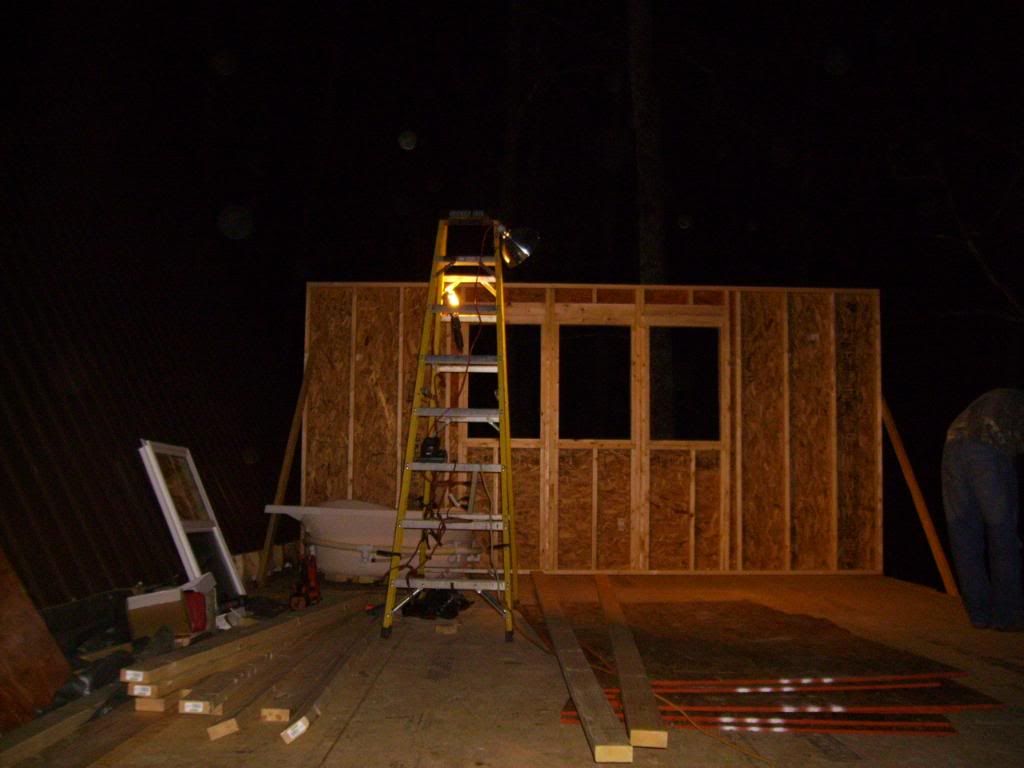

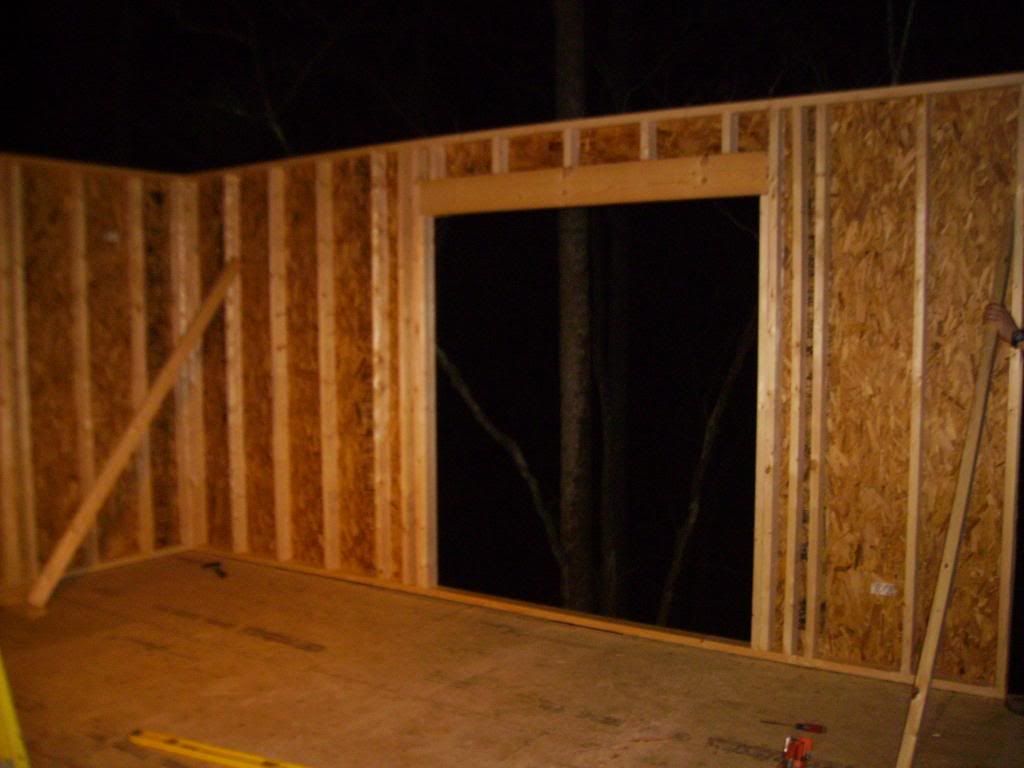
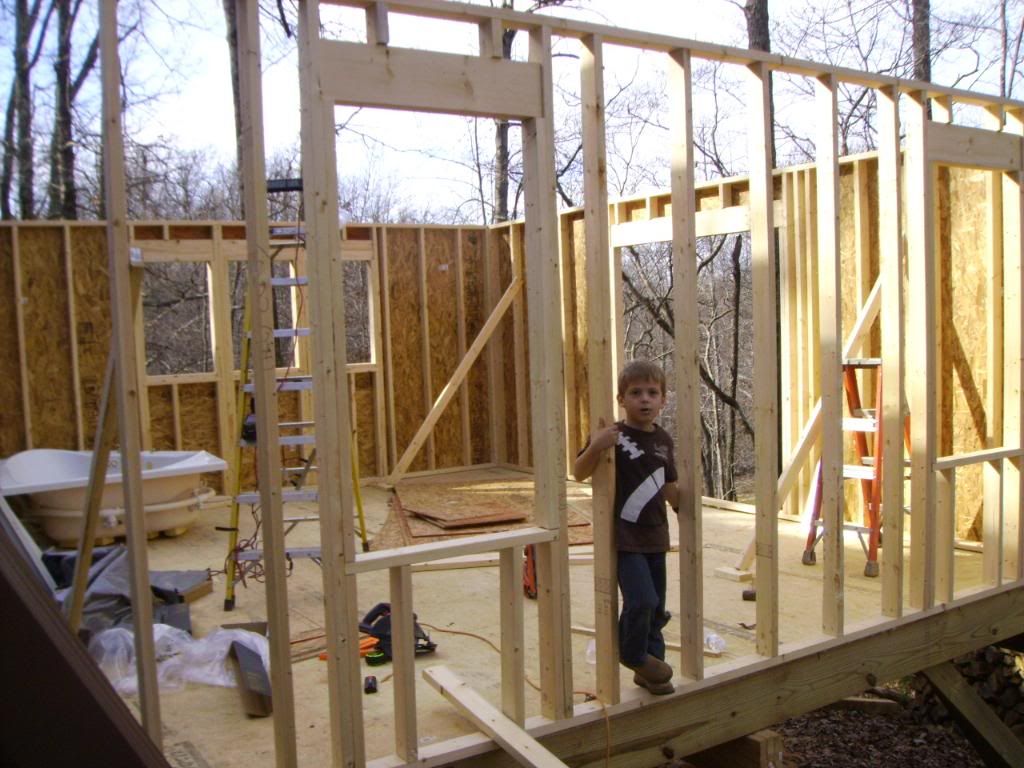
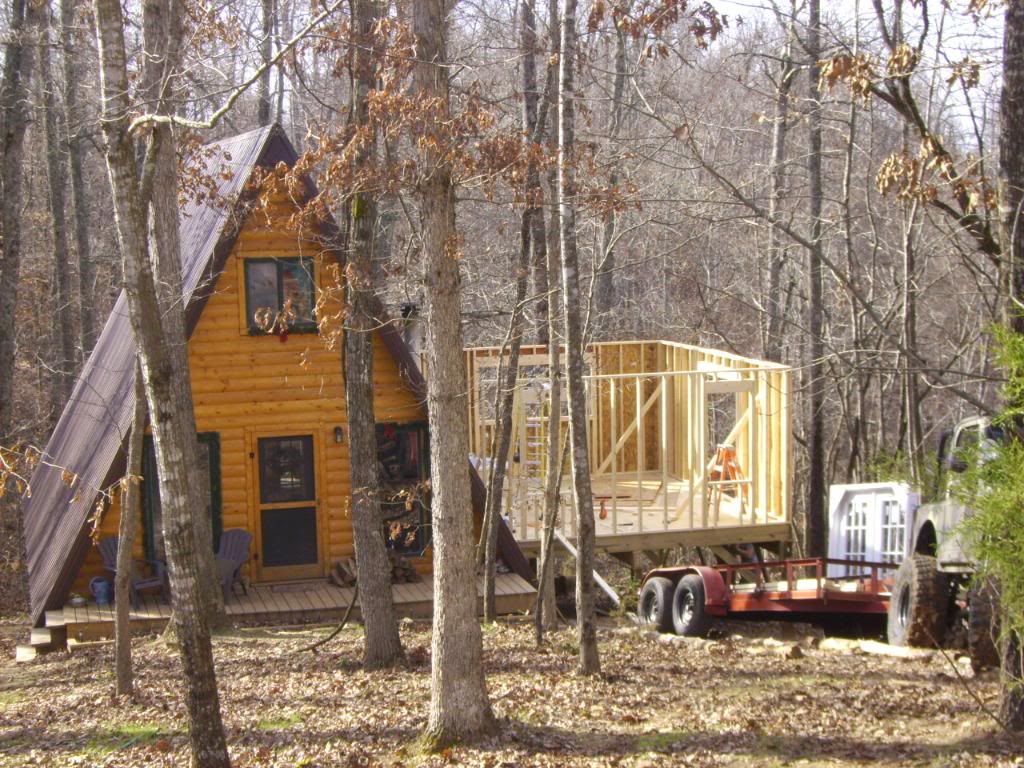
Title: Re: 20x32 A frame cabin Central KY
Post by: eclipse on November 26, 2011, 03:10:49 PM
Post by: eclipse on November 26, 2011, 03:10:49 PM
Long time lurker, but first time posting to the forum.
I have been reading your thread for sometime now and have read it all. You and your family are very motivational. Best of luck to all of your family/home additions.
I have been reading your thread for sometime now and have read it all. You and your family are very motivational. Best of luck to all of your family/home additions.
Title: Re: 20x32 A frame cabin Central KY
Post by: astidham on November 27, 2011, 11:52:59 AM
Post by: astidham on November 27, 2011, 11:52:59 AM
you don't waste any time when you make up your mind...
good progress, I cant wait to see the finished product, and knowing you I wont have to wait long.
good progress, I cant wait to see the finished product, and knowing you I wont have to wait long.
Title: Re: 20x32 A frame cabin Central KY
Post by: EaglesSJ on November 27, 2011, 04:52:29 PM
Post by: EaglesSJ on November 27, 2011, 04:52:29 PM
Updated for todays work. Finished tying in the wall to the house. Tyveked it and installed our windows. Came inside completely soaked but the work got done and thats the important part. If all goes as planned rafter will be going on tuesday.
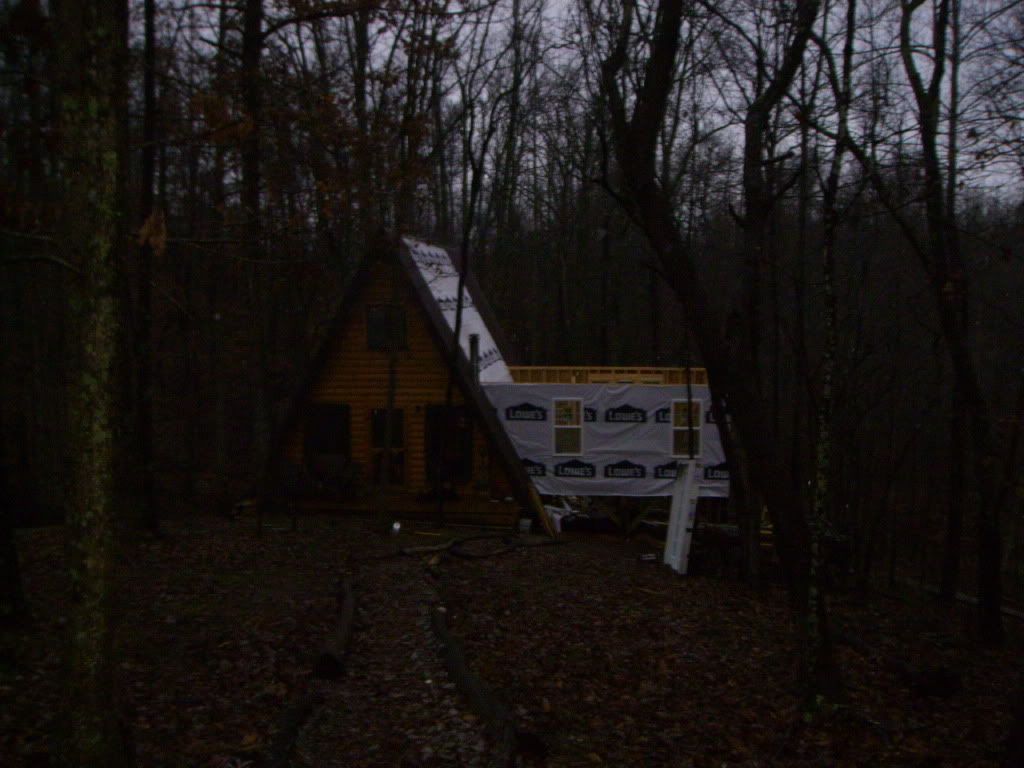
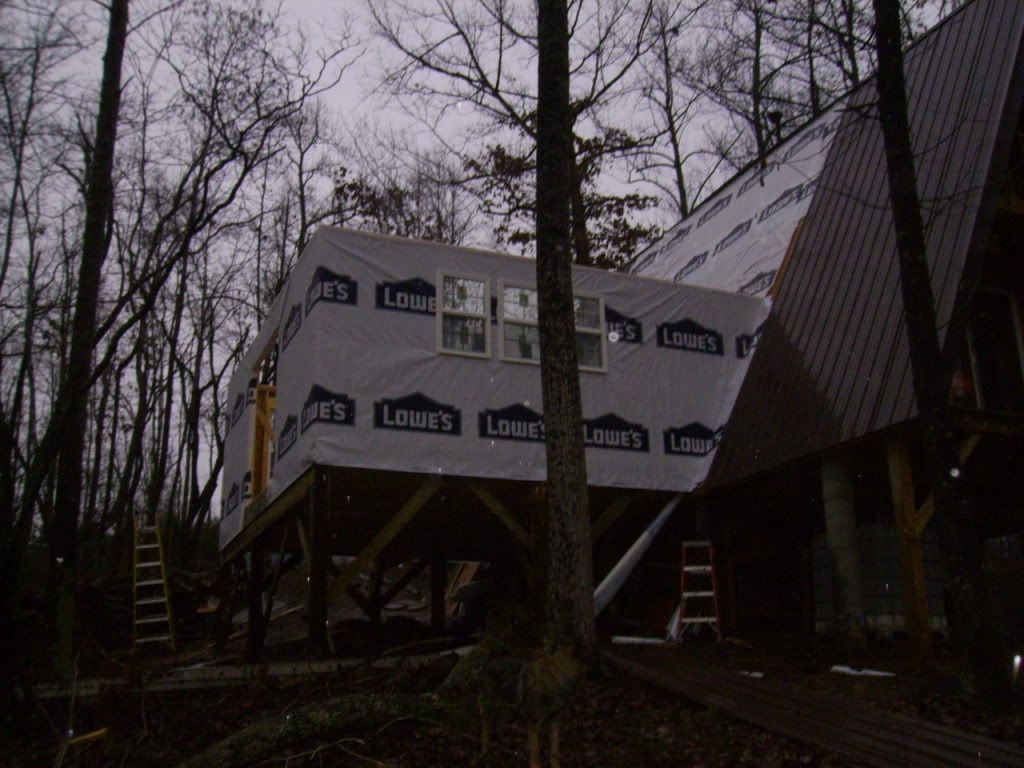

Title: Re: 20x32 A frame cabin Central KY
Post by: OlJarhead on November 27, 2011, 07:56:05 PM
Post by: OlJarhead on November 27, 2011, 07:56:05 PM
[cool] Keep it up! Pretty darn awesome progress!
Title: Re: 20x32 A frame cabin Central KY
Post by: EaglesSJ on December 01, 2011, 05:48:14 PM
Post by: EaglesSJ on December 01, 2011, 05:48:14 PM
Here is the accomplished work from the past couple days (well nights really)
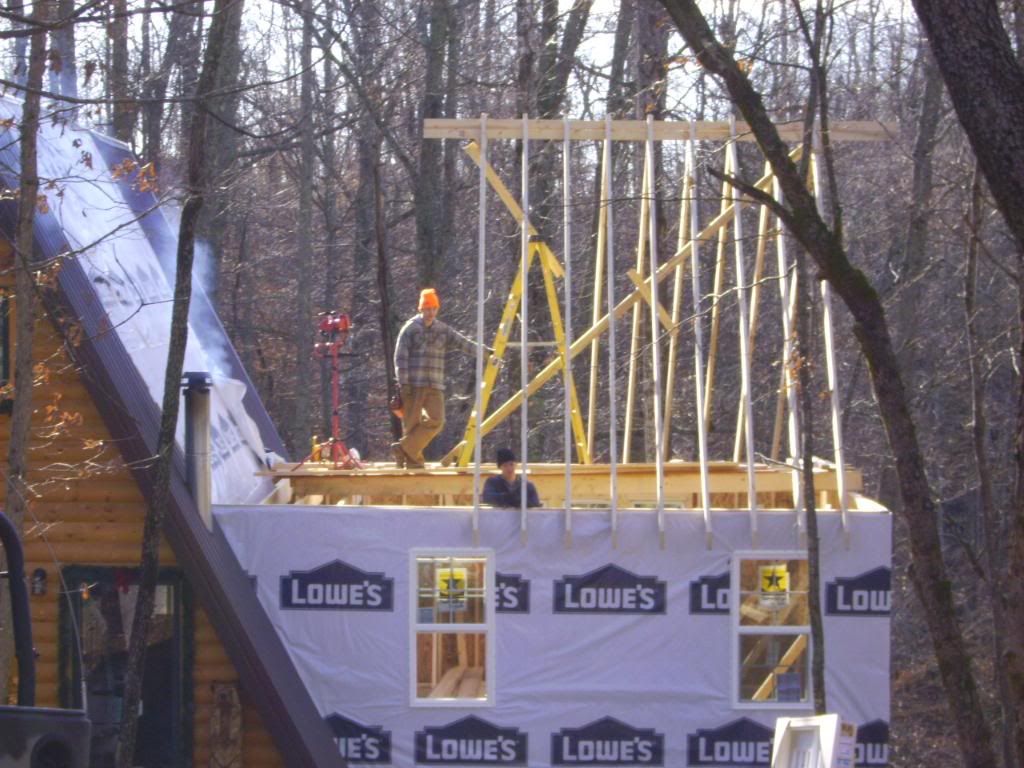

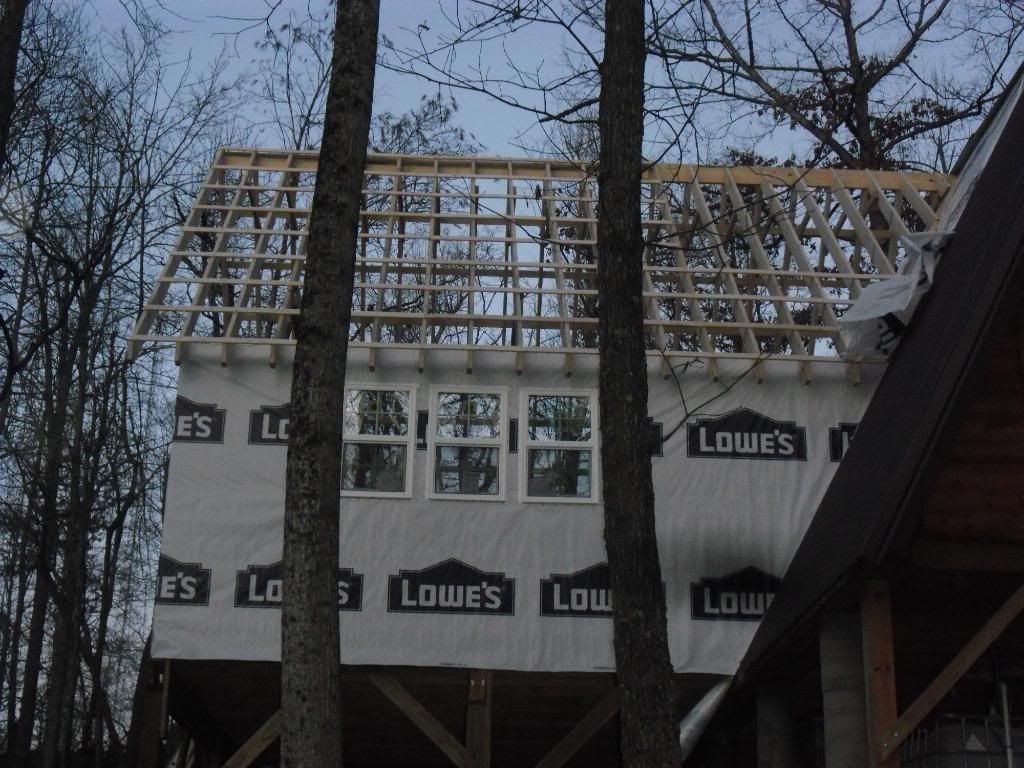

This one is taken from the bottom of the soon to be french doors opening looking into the room. I like the beams and vaulted ceiling
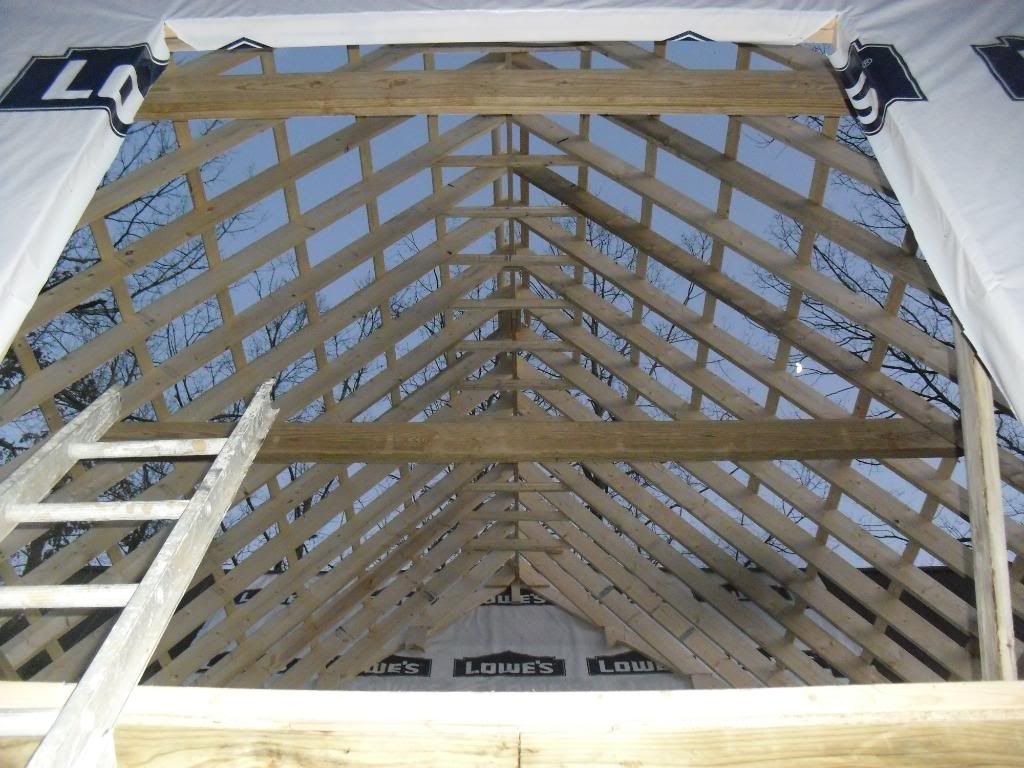
This one is taken from the bottom of the soon to be french doors opening looking into the room. I like the beams and vaulted ceiling
Title: Re: 20x32 A frame cabin Central KY
Post by: mgramann on December 01, 2011, 05:57:56 PM
Post by: mgramann on December 01, 2011, 05:57:56 PM
Awesome work! I must thank you for introducing me to this site! I followed you here from jeepforum :)
Title: Re: 20x32 A frame cabin Central KY
Post by: astidham on December 01, 2011, 06:45:47 PM
Post by: astidham on December 01, 2011, 06:45:47 PM
good progress, looks great!
Title: Re: 20x32 A frame cabin Central KY
Post by: ben2go on December 01, 2011, 11:32:42 PM
Post by: ben2go on December 01, 2011, 11:32:42 PM
What will you do with the chimney?I thought they had to be 2ft above the highest part of the house.Seems like the right winds would blow smoke back into the house if a window or door was open.
Title: Re: 20x32 A frame cabin Central KY
Post by: EaglesSJ on December 02, 2011, 12:00:48 AM
Post by: EaglesSJ on December 02, 2011, 12:00:48 AM
Were going to add another 3 ft section of chimney pipe to it. Mainly just to help it draw better. Also when you are burning a fire correctly there should be no smoke. The only time our stove smokes is when it is first lit. After it gets up to temperature it does not produce any smoke.
Title: Re: 20x32 A frame cabin Central KY
Post by: MountainDon on December 02, 2011, 12:25:52 AM
Post by: MountainDon on December 02, 2011, 12:25:52 AM
Recommended chimney to building clearances...
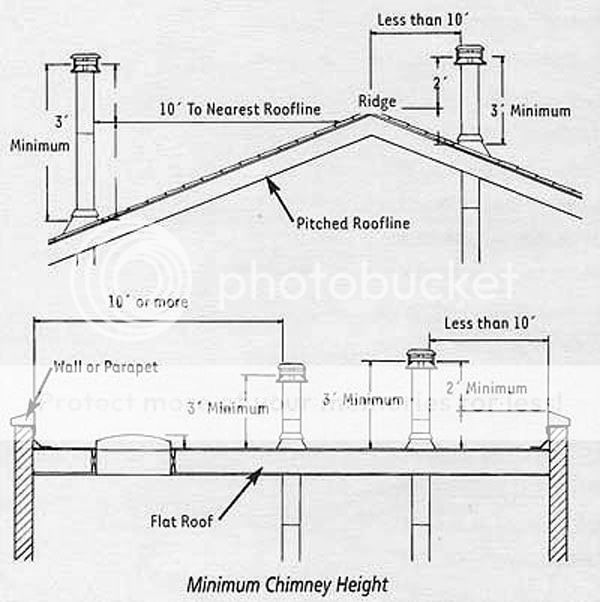
Even though there may be no visible smoke if there is fire in the stove there is exhaust, the products of combustion. There may be no visible smoke but as long as there is fire there is smoke or emissions, not all of which is healthy to breath.
Even though there may be no visible smoke if there is fire in the stove there is exhaust, the products of combustion. There may be no visible smoke but as long as there is fire there is smoke or emissions, not all of which is healthy to breath.
Title: Re: 20x32 A frame cabin Central KY
Post by: EaglesSJ on December 02, 2011, 12:34:25 AM
Post by: EaglesSJ on December 02, 2011, 12:34:25 AM
Quote from: MtnDon on December 02, 2011, 12:25:52 AM
Recommended chimney to building clearances...
Even though there may be no visible smoke if there is fire in the stove there is exhaust, the products of combustion. There may be no visible smoke but as long as there is fire there is smoke or emissions, not all of which is healthy to breath.
There are definitely emissions no doubt about it. Lots of carbon monoxide and Wood also produces Oxides of Nitrogen (NOx) and Volatile Organic Compounds (VOCs) as it burns. All of which are hard on human lungs. I was simply stating that there was no "visible smoke" from a properly burning fire as smoke is burned as fuel in a hot stove. As for the clearances. We havent had any issue with the wind not carrying the emissions away from the house. If you are looking at the front of the house the wind comes from the back right corner. Before the addition it carried it all away very fast. Now that we have the extra structure to block the wind we werent sure what it would do. I was aware that chimneys have to be above the ridge line. Its just that doing that on our a frame would require alot of tethering and would look pretty silly.
Title: Re: 20x32 A frame cabin Central KY
Post by: EaglesSJ on December 03, 2011, 05:36:53 PM
Post by: EaglesSJ on December 03, 2011, 05:36:53 PM
Got quoted $1000 for labor only for installing the metal roof on the cabin and new addition. Basically everything needed to make it watertight again. Couple that in with about $650 for materials and thats the roof. I am wondering what to install over the purlins to prevent sweating. The roofer suggested tar paper but it seems to me that would eventually want to start "caving in" I would think something like rigid foam would be better. Any ideas?
Title: Re: 20x32 A frame cabin Central KY
Post by: CjAl on December 03, 2011, 06:55:03 PM
Post by: CjAl on December 03, 2011, 06:55:03 PM
actually the chimny doesnt need to be above the ridge line. it needs to be 2' above the point that is 10' away from the roof measured horizontally. but on your house that looks to be above the ridge and with the price of that double wall chimney it adds up fast. when i put the stove in my house in WI i ended up not doing it up to code. one side the house was a low one story and the other side was a tall two story. the chimny came out.of the lowest part of the one story. to get it legal it would have been like 16+ feet tall and have two sets of bracing. one to the low roof and one 90 degrees off to the tall roof. i opted for two sections of four feet and one brace.saved about 500 buck and was much more solid. even with the second brace it was real wobbly up that high and with five joints.
personally i would sheet that roof and not use the purlins. my uncles cabin is built like that and the roof is now filled solid with wasps. the house has 2000 sq foot of covered porch and you cant use any of it
personally i would sheet that roof and not use the purlins. my uncles cabin is built like that and the roof is now filled solid with wasps. the house has 2000 sq foot of covered porch and you cant use any of it
Title: Re: 20x32 A frame cabin Central KY
Post by: MountainDon on December 03, 2011, 07:42:16 PM
Post by: MountainDon on December 03, 2011, 07:42:16 PM
I am a firm believer in sheathing a roof with 7/16 or 5/8 OSB and then applying a weather resistant barrier (roofing felt or synthetic) and then the metal over that.
1. Purlins add no rigidity to the roof structure. Strong winds can still move the roof structure. Sheathing makes the roof structure very stiff; adds strength to the roof much the way a sheathed wall is much more rigid that a wall with diagonal let in 1x4's. http://countryplans.com/smf/index.php?topic=11289.msg144882#msg144882
2. Not all metal roofing panels are rated as structural panels. IF they are rated for structural use they could be used over purlins. That still leaves....
3. The problem of what to do about condensation issues. Roofing felt can work; how do you install it horizontally and still be able to move about on the roof to secure the metal panels?
Maybe it's just my conservative nature but those are my concerns.
Maybe with the roof attached to another at right angles, that will help with roof stiffness. Still have the condensation issues though.
Is that going to be an open cathedral inside? How to insulate?
Title: Re: 20x32 A frame cabin Central KY
Post by: EaglesSJ on December 03, 2011, 07:49:29 PM
Post by: EaglesSJ on December 03, 2011, 07:49:29 PM
And I appreciate your valuable input. I dont mean to come across as arrogant or a know it all. I just try to make the best decision I can given the money on hand and what info I have available at the time. I knew that the OSB would be stronger but I had no Idea that it would THAT much stronger. Those are some impressive numbers you posted.
Title: Re: 20x32 A frame cabin Central KY
Post by: EaglesSJ on December 03, 2011, 07:51:08 PM
Post by: EaglesSJ on December 03, 2011, 07:51:08 PM
Quote from: MtnDon on December 03, 2011, 07:42:16 PM
Is that going to be an open cathedral inside? How to insulate?
It will be an open ceiling however I will be installing insulation in between the rafters and covering them with 1x6 pine just as I have done inside the current cabin.
Title: Re: 20x32 A frame cabin Central KY
Post by: PorkChopsMmm on December 07, 2011, 12:29:31 PM
Post by: PorkChopsMmm on December 07, 2011, 12:29:31 PM
I remember seeing your plan on adding a second bathroom -- will you be tying into your other septic system? How will you handle the gray water? I ask as someone who has an off-grid cabin with 1 bathroom, with a composting toilet, and gray water.
Great job on planning on the addition early on. We built our cabin and only now am I thinking a few years down the line on an addition. I have nightmares about how to run the electrical, plumbing, and cutting in the walls.
Great job on planning on the addition early on. We built our cabin and only now am I thinking a few years down the line on an addition. I have nightmares about how to run the electrical, plumbing, and cutting in the walls.
Title: Re: 20x32 A frame cabin Central KY
Post by: EaglesSJ on December 07, 2011, 05:23:11 PM
Post by: EaglesSJ on December 07, 2011, 05:23:11 PM
we scrapped the second bathroom idea. the only thing we are putting in now is a corner jacuzzi
Title: Re: 20x32 A frame cabin Central KY
Post by: PorkChopsMmm on December 07, 2011, 05:39:10 PM
Post by: PorkChopsMmm on December 07, 2011, 05:39:10 PM
Thanks for the quick reply. I can see how eliminating the second bathroom should make it easier.
I may have missed it from a previous post of yours... but how are you handling the gray water? We plan on planting some fruit trees in the Spring.
I may have missed it from a previous post of yours... but how are you handling the gray water? We plan on planting some fruit trees in the Spring.
Title: Re: 20x32 A frame cabin Central KY
Post by: EaglesSJ on December 08, 2011, 08:40:04 AM
Post by: EaglesSJ on December 08, 2011, 08:40:04 AM
Gray water just runs out down the hill about 75 ft from the cabin. The soil is extremely sandy here so when I say it runs out. I mean it almost immediately soaks into the ground when it exits the pipe.
Title: Re: 20x32 A frame cabin Central KY
Post by: MWAndrus on December 09, 2011, 08:09:25 PM
Post by: MWAndrus on December 09, 2011, 08:09:25 PM
Hows that work in the winter time? We were thinking about running our grey water into a mulch trench to water a few trees, but I was worried it might freeze up in the winter time.
Title: Re: 20x32 A frame cabin Central KY
Post by: EaglesSJ on December 09, 2011, 08:52:13 PM
Post by: EaglesSJ on December 09, 2011, 08:52:13 PM
works fine. No trouble here and it got down in the single digits last year.
Title: Re: 20x32 A frame cabin Central KY
Post by: PorkChopsMmm on December 09, 2011, 08:55:56 PM
Post by: PorkChopsMmm on December 09, 2011, 08:55:56 PM
MW, here is a book that explains how to install it -- Greywater Oasis
http://www.amazon.com/New-Create-Oasis-Greywater-Choosing/dp/0964343398/ref=sr_1_1?ie=UTF8&qid=1323481959&sr=8-1 (http://www.amazon.com/New-Create-Oasis-Greywater-Choosing/dp/0964343398/ref=sr_1_1?ie=UTF8&qid=1323481959&sr=8-1)
We are building in zone 5 and with a mulch trench, and the termination of the pipe underground, it should flow just fine and not cause a freezing problem if your ground can absorb water. The book goes over this a lot more in depth. The water coming out of your house is probably well above freezing and should aid in the absorption.
Title: Re: 20x32 A frame cabin Central KY
Post by: CjAl on December 09, 2011, 09:11:37 PM
Post by: CjAl on December 09, 2011, 09:11:37 PM
my farmhouse in WI drained greywater right out into the yard. pipe ran underground for twenty feet then drained right out onto a slope. never had a problem and the last winter there was -20 for the better part of january
Title: Re: 20x32 A frame cabin Central KY
Post by: Sassy on December 10, 2011, 01:01:45 AM
Post by: Sassy on December 10, 2011, 01:01:45 AM
We heard Brad Lancaster speak last Spring - excellent info - we bought his book (he's written 2 or 3 on greywater oasis). I skimmed through the book a couple weeks ago.
Title: Re: 20x32 A frame cabin Central KY
Post by: EaglesSJ on December 10, 2011, 01:35:52 AM
Post by: EaglesSJ on December 10, 2011, 01:35:52 AM
Yesterdays progress. Got the back half of the roof completed. Done it first since it was the toughest because of the height off the ground in the back. Gonna finish up the roof today and install the french doors. I HATE the steep roofs.
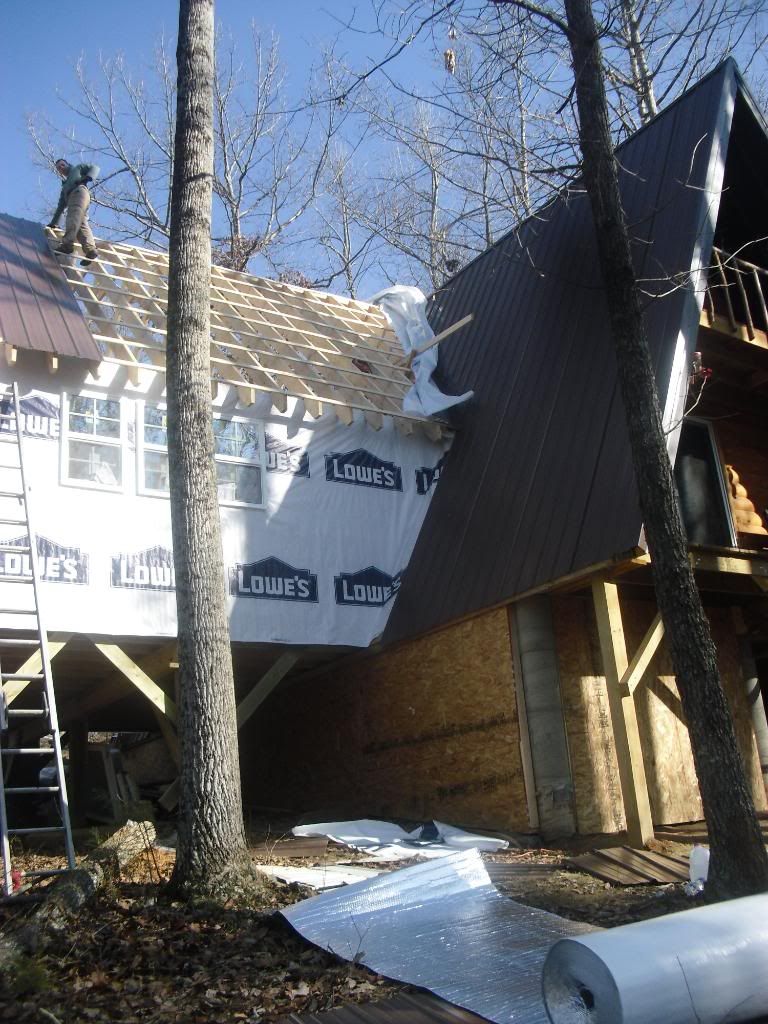
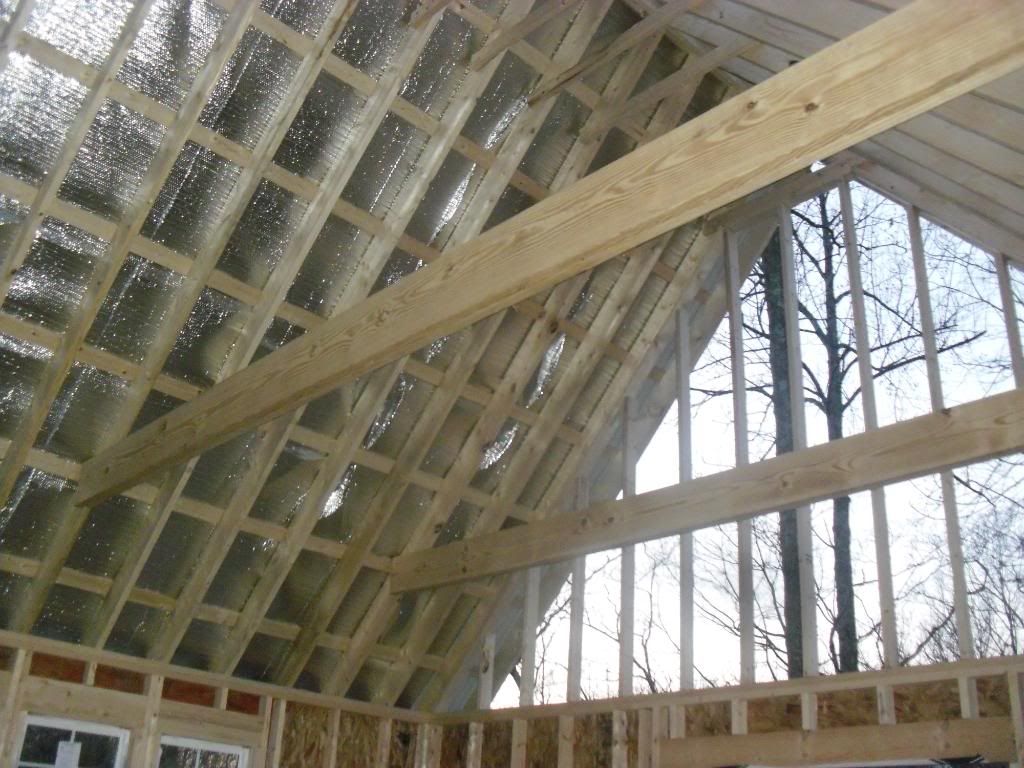
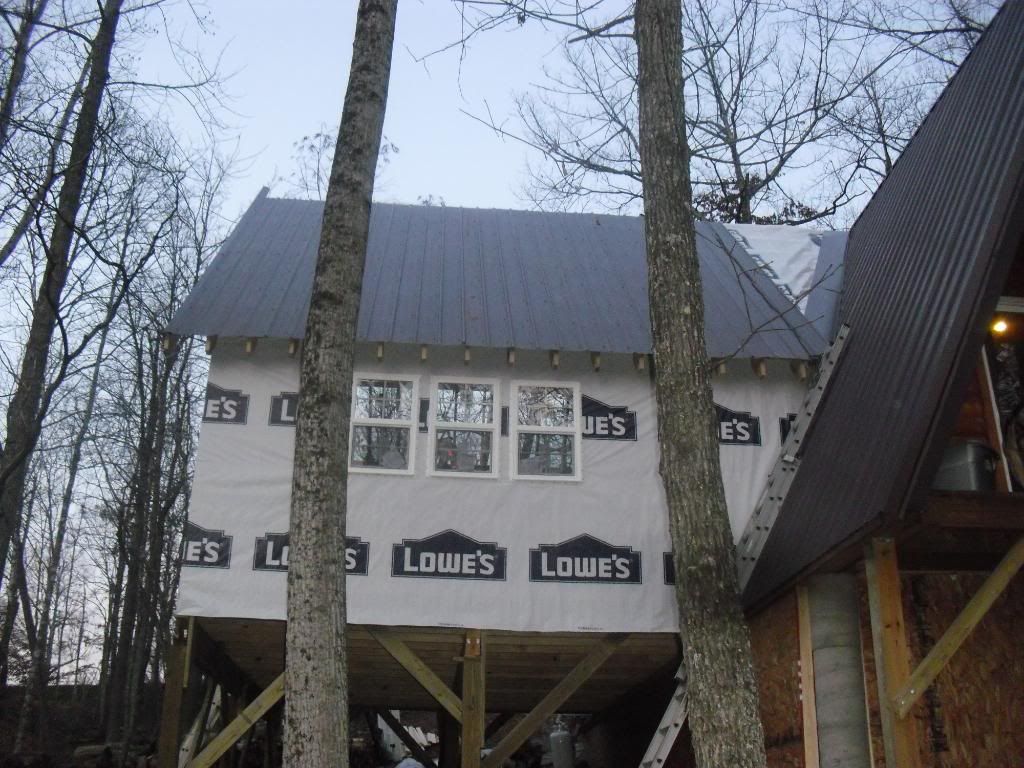
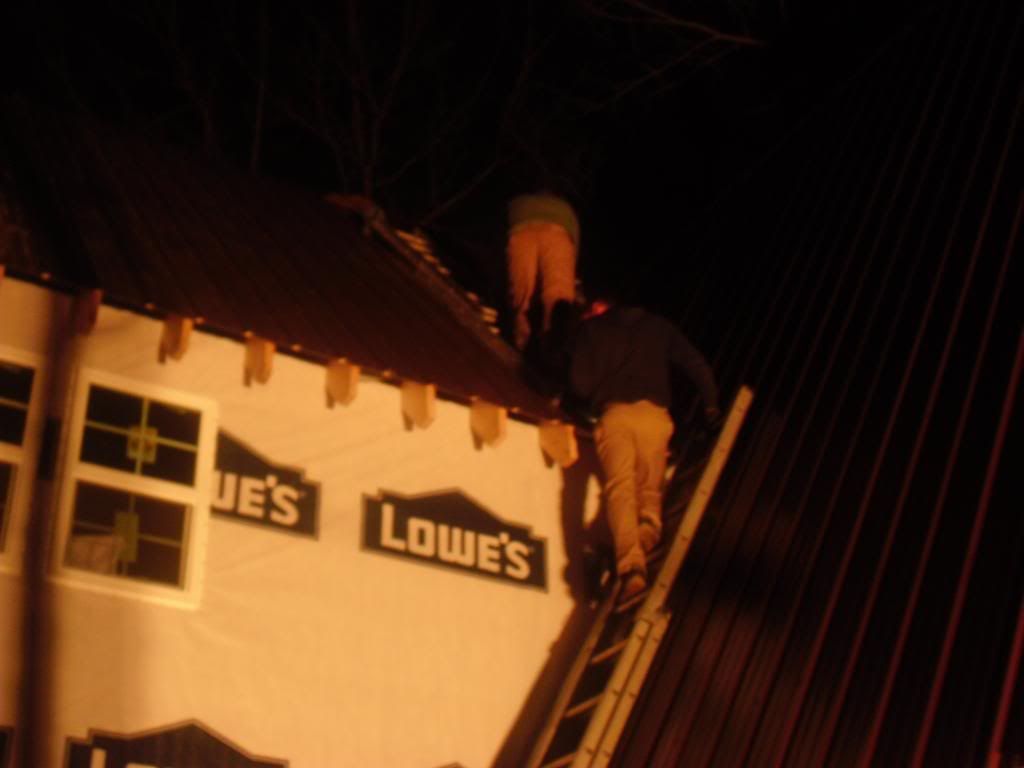
Title: Re: 20x32 A frame cabin Central KY
Post by: UK4X4 on December 10, 2011, 12:18:24 PM
Post by: UK4X4 on December 10, 2011, 12:18:24 PM
You put real wood up faster than I'm drawing mine !
Title: Re: 20x32 A frame cabin Central KY
Post by: Texas Tornado on December 10, 2011, 08:18:06 PM
Post by: Texas Tornado on December 10, 2011, 08:18:06 PM
??? No plywood on the roof?
Title: Re: 20x32 A frame cabin Central KY
Post by: EaglesSJ on December 10, 2011, 10:10:20 PM
Post by: EaglesSJ on December 10, 2011, 10:10:20 PM
Quote from: Texas Tornado on December 10, 2011, 08:18:06 PM
??? No plywood on the roof?
They are called purlins and they have been used for roofs for hundreds of years. Especially in cabins. As a matter of fact other 2 cabins on my road both use them and they have been there for 50+ years.
Title: Re: 20x32 A frame cabin Central KY
Post by: EaglesSJ on December 10, 2011, 10:32:14 PM
Post by: EaglesSJ on December 10, 2011, 10:32:14 PM
Todays work. Finished the roof, also put in the french doors but that was after dark so pics didnt turn out. Also done the underpinning a couple days ago. Still have to paint it and install the lattice over it but we wont have frozen pipes and thats the key. Ill get a full on shot of the house tomorrow in the daylight
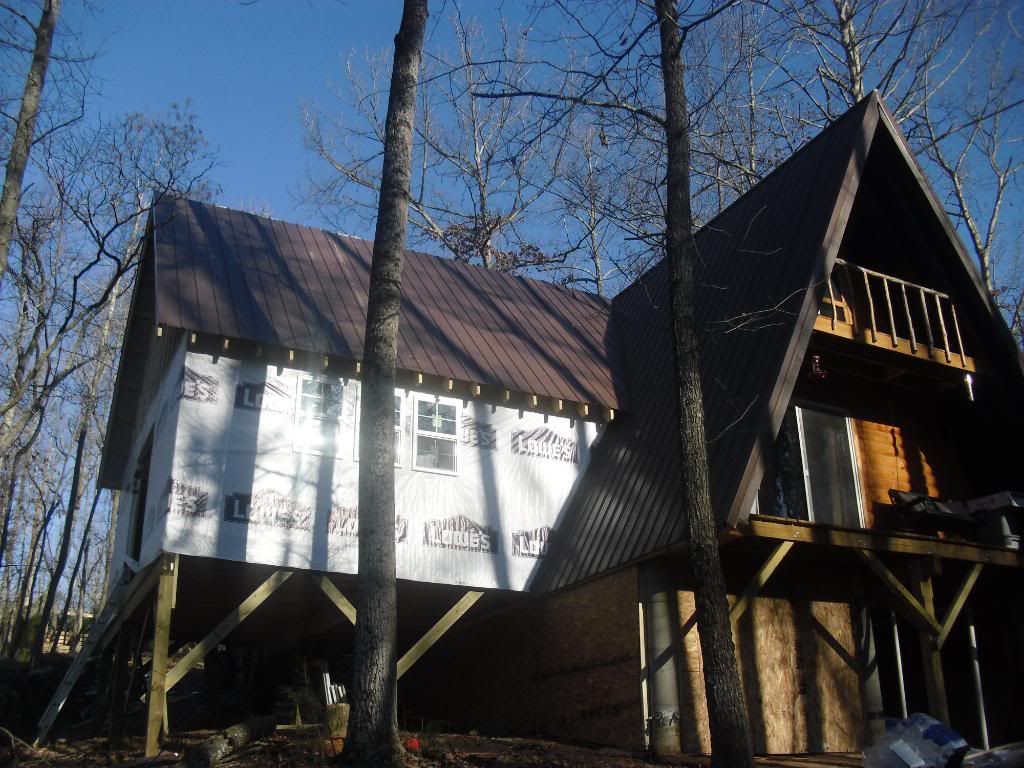
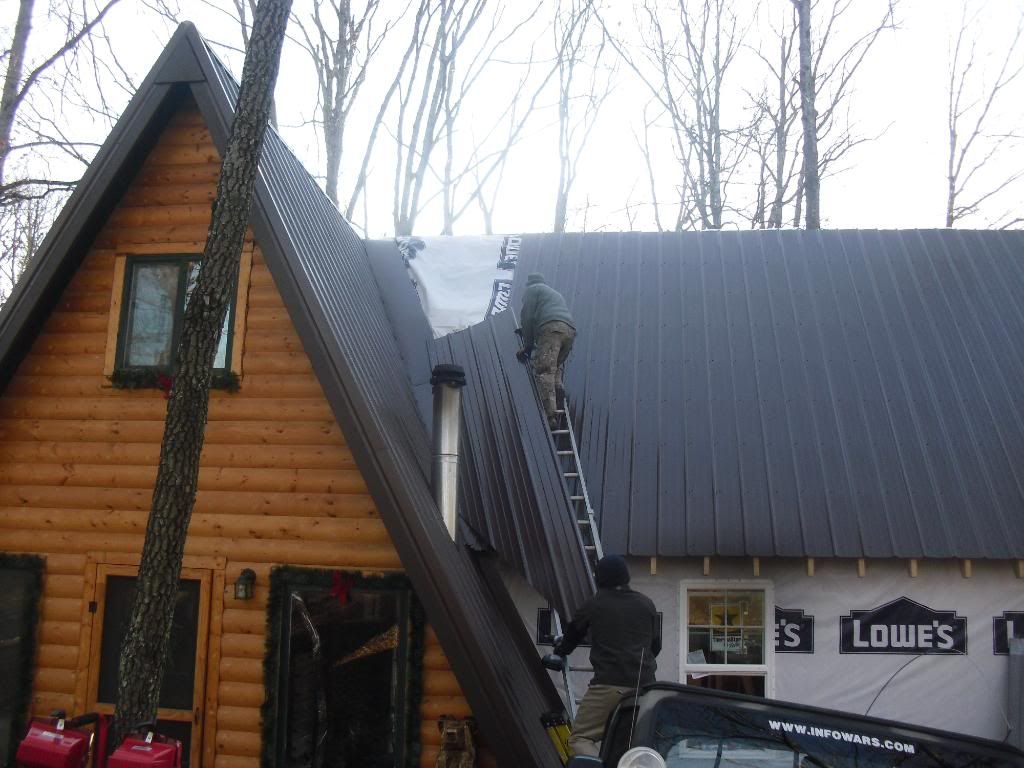
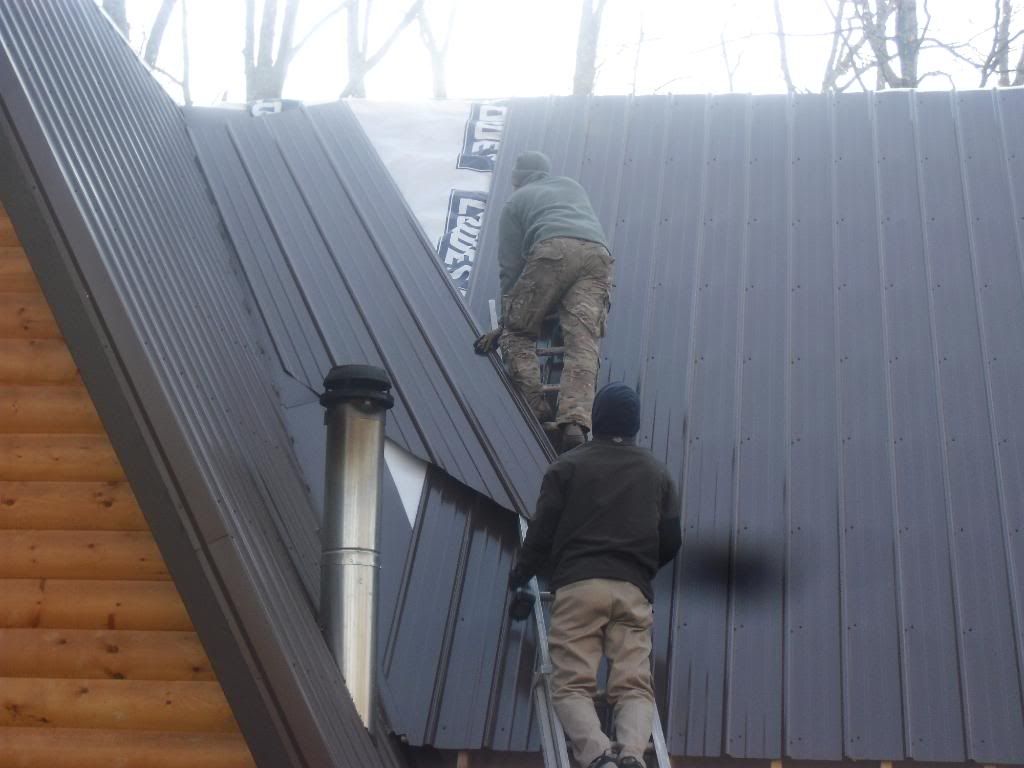
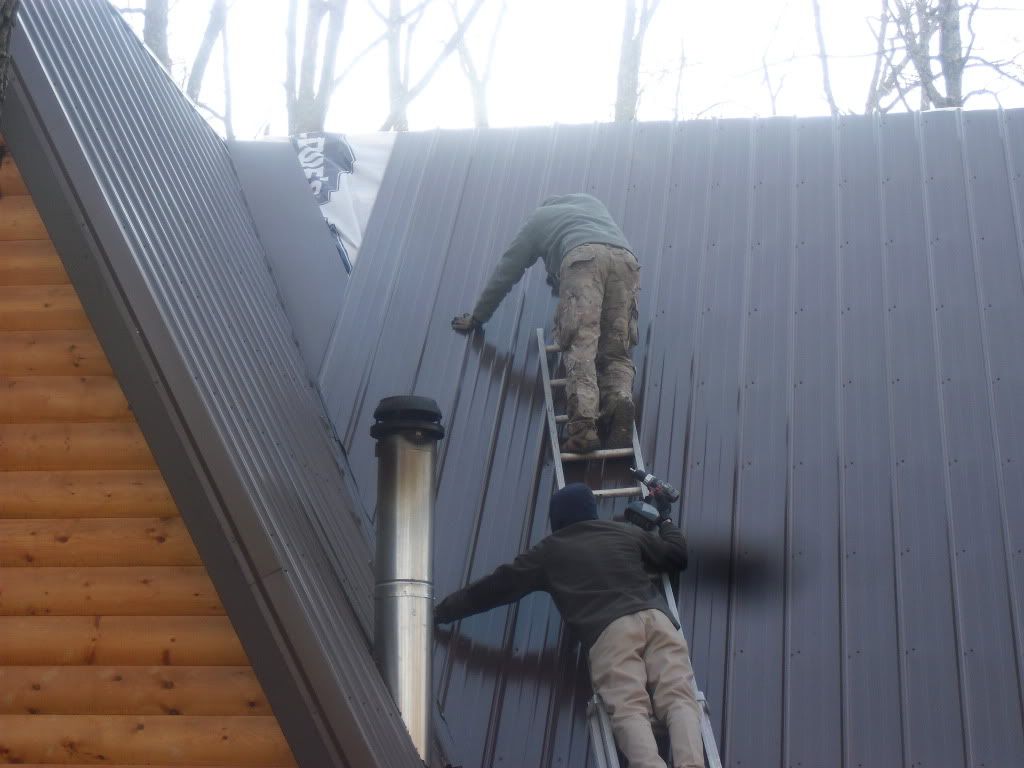
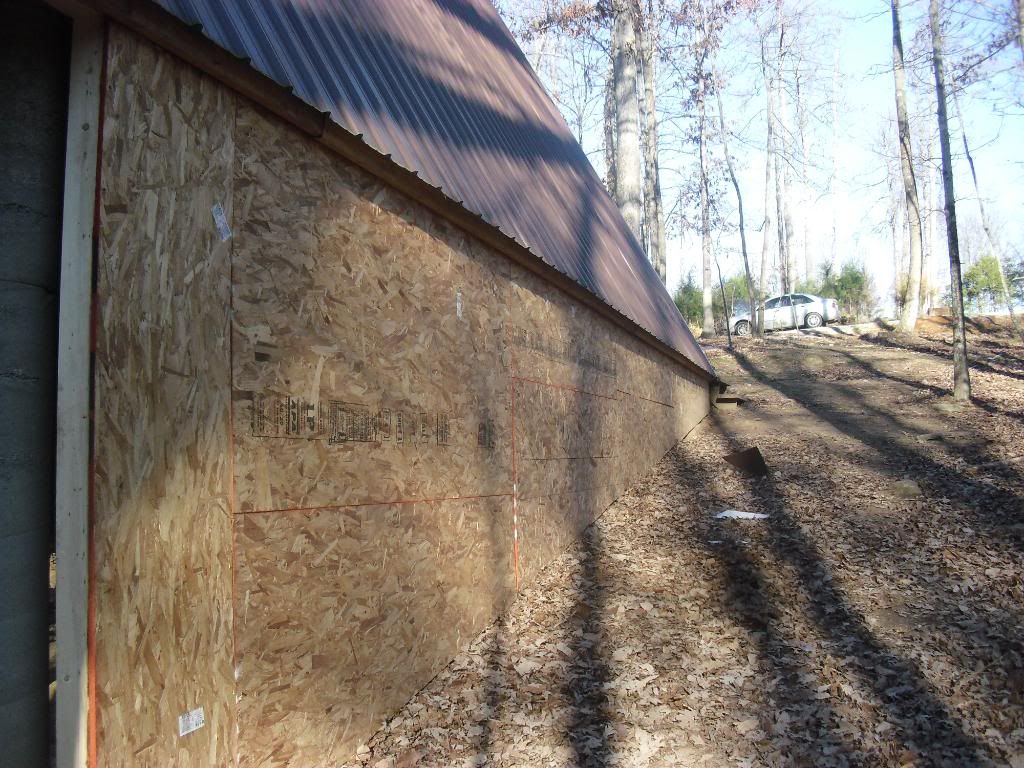
Title: Re: 20x32 A frame cabin Central KY
Post by: astidham on December 10, 2011, 10:51:59 PM
Post by: astidham on December 10, 2011, 10:51:59 PM
the roof and addition looks incredible...
Title: Re: 20x32 A frame cabin Central KY
Post by: EaglesSJ on December 11, 2011, 05:09:01 PM
Post by: EaglesSJ on December 11, 2011, 05:09:01 PM
Updated pics of the roof and the beginnings of a deck. The deck is 12 ft out the front and 6 ft out the side.
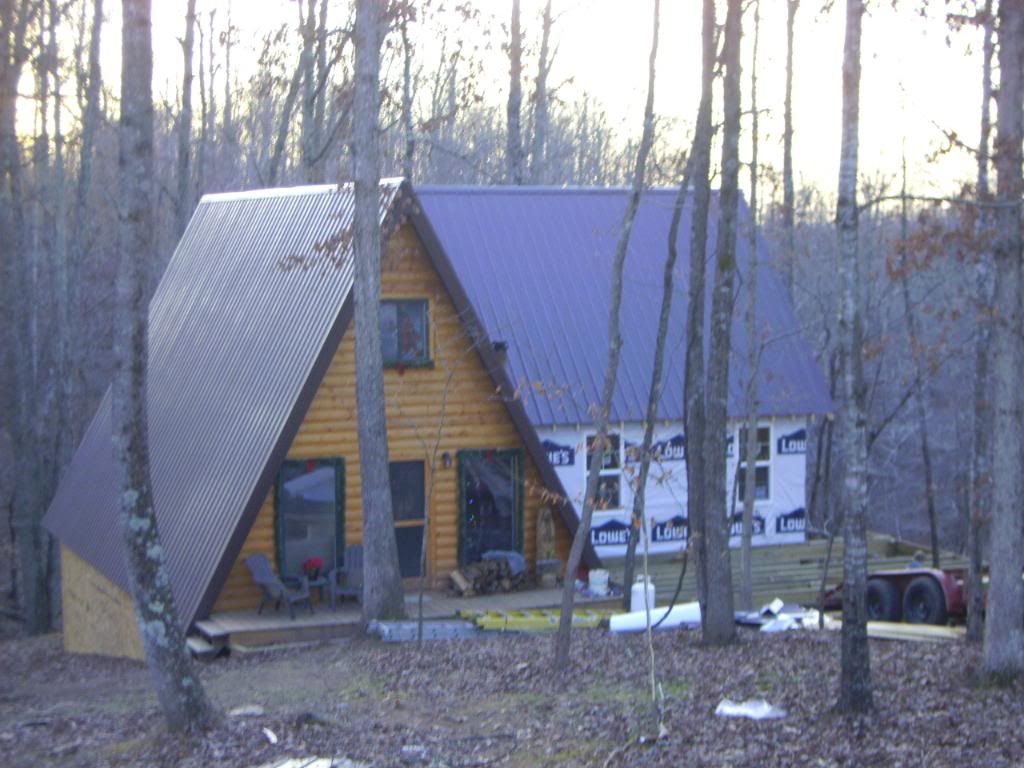
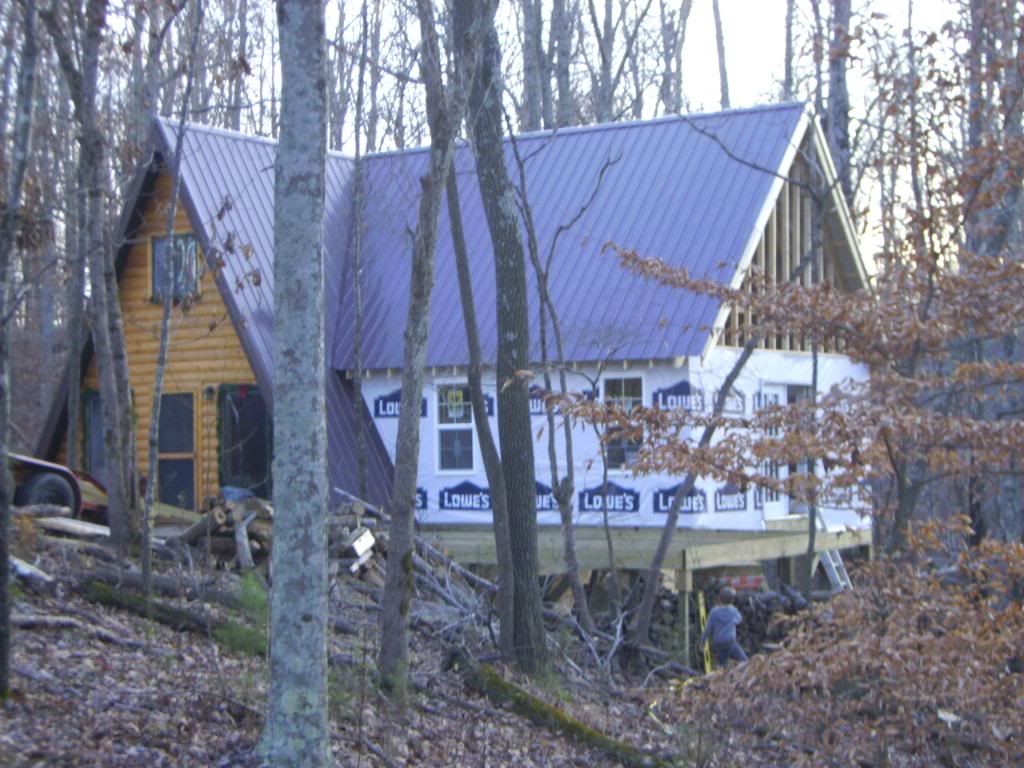
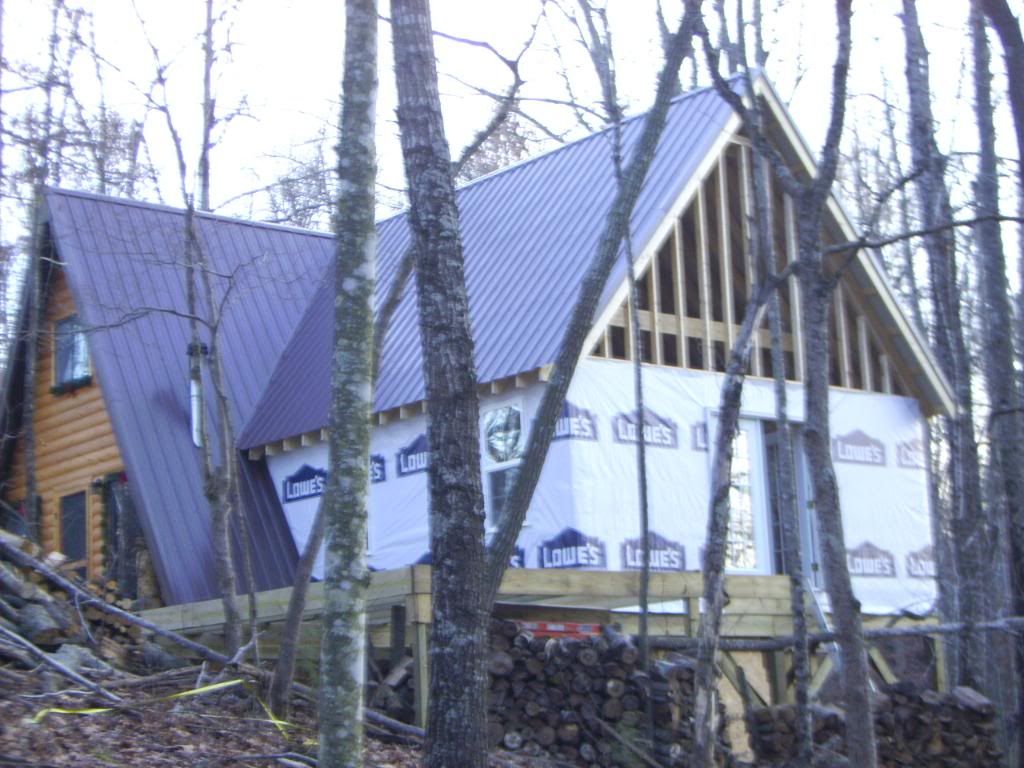
Title: Re: 20x32 A frame cabin Central KY
Post by: CjAl on December 11, 2011, 07:53:18 PM
Post by: CjAl on December 11, 2011, 07:53:18 PM
your little cabin is turning out to be quite the house
Title: Re: 20x32 A frame cabin Central KY
Post by: tommytebco on December 12, 2011, 08:23:20 AM
Post by: tommytebco on December 12, 2011, 08:23:20 AM
I nominate EaglesSJ as president of the "GIT-ER-DONE" Club.
Good, fast job!! Like someone said, you get it built faster than most of us get a sketch made.
Good, fast job!! Like someone said, you get it built faster than most of us get a sketch made.
Title: Re: 20x32 A frame cabin Central KY
Post by: willomiller on December 12, 2011, 08:31:36 PM
Post by: willomiller on December 12, 2011, 08:31:36 PM
Got my vote!! Write a book about your journey also.
Title: Re: 20x32 A frame cabin Central KY
Post by: Sassy on December 13, 2011, 05:42:25 AM
Post by: Sassy on December 13, 2011, 05:42:25 AM
That's lookin nice! I'll vote for Eagle...
Title: Re: 20x32 A frame cabin Central KY
Post by: mogie01 on December 13, 2011, 07:46:21 AM
Post by: mogie01 on December 13, 2011, 07:46:21 AM
Your place is looking fantastic!! Is the deck going to wrap around to the french doors? [cool]
Title: Re: 20x32 A frame cabin Central KY
Post by: EaglesSJ on December 13, 2011, 07:54:12 AM
Post by: EaglesSJ on December 13, 2011, 07:54:12 AM
yeah its gonna wrap all the way around. I actually finished the front of the deck last night before I went in to work. (i work night shift) Im about to go upstairs and catch a nap and then come down and finish the side deck in front of the french doors and put osb and tyvek on the end wall.
Title: Re: 20x32 A frame cabin Central KY
Post by: EaglesSJ on December 13, 2011, 06:17:46 PM
Post by: EaglesSJ on December 13, 2011, 06:17:46 PM
I finished screwing down the deck tonight. I still lack 3 boards having it all done but that will come next trip to town. I also started working on the gutter boards and soffit.


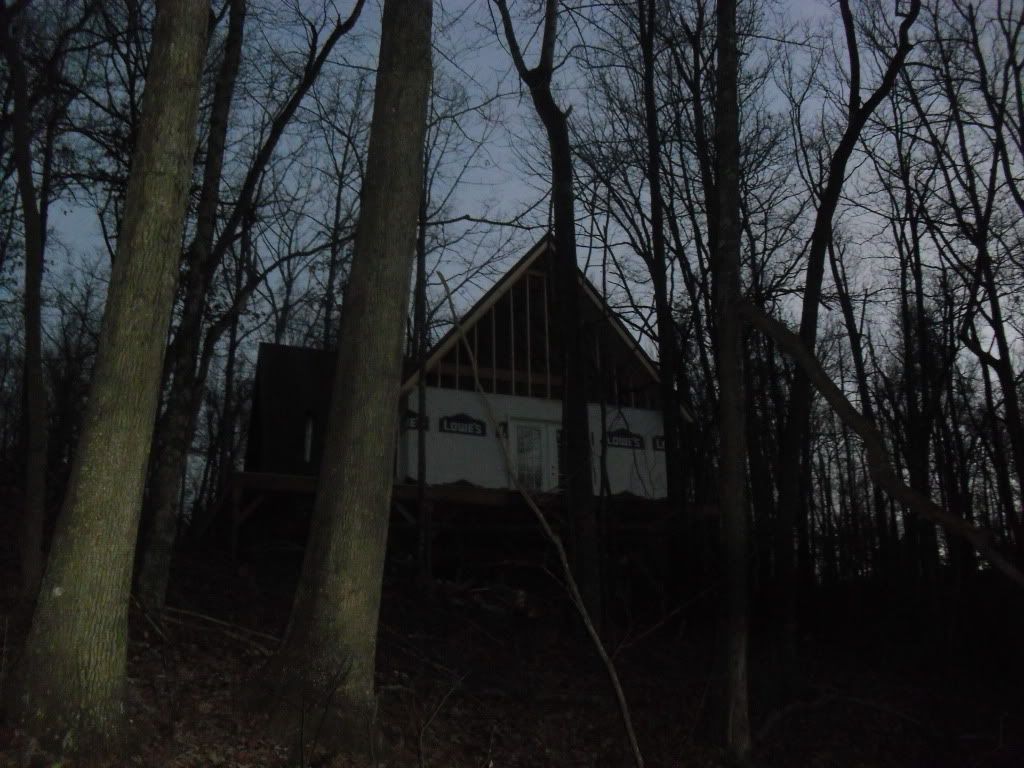
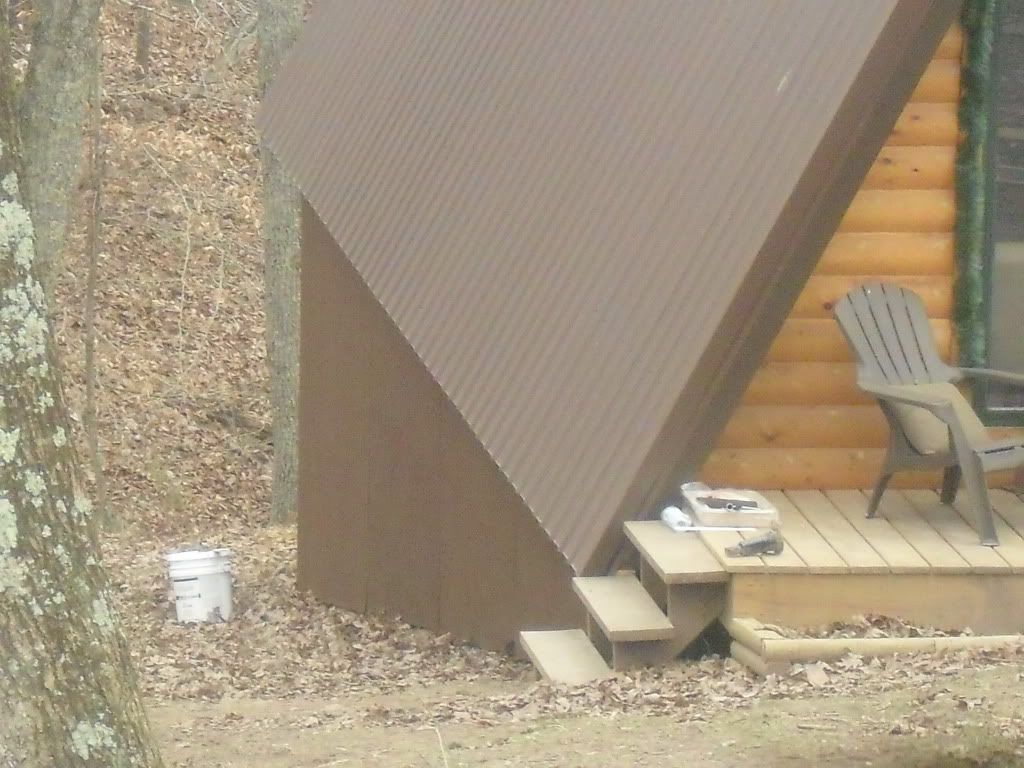
Title: Re: 20x32 A frame cabin Central KY
Post by: CjAl on December 13, 2011, 06:24:13 PM
Post by: CjAl on December 13, 2011, 06:24:13 PM
hows your solar setup working out? is it providing enough power for you?
Title: Re: 20x32 A frame cabin Central KY
Post by: Rensmif on December 13, 2011, 06:50:26 PM
Post by: Rensmif on December 13, 2011, 06:50:26 PM
Quote from: EaglesSJ on December 10, 2011, 10:32:14 PM
Todays work. Finished the roof, also put in the french doors but that was after dark so pics didnt turn out. Also done the underpinning a couple days ago. Still have to paint it and install the lattice over it but we wont have frozen pipes and thats the key. Ill get a full on shot of the house tomorrow in the daylight
I am brand new here and try to read and study a lot more than post and question. I am really inspired by your progress on this home, I do however have some questions/concerns.
In reading other threads on footings and foundations, I am unsure of the long term stability of your concrete piers being so much taller than they they deep, I also am not sure if I spotted "proper" metal connectors for the floor to foundation, and in these pics, it looks as if your are running untreated boards flush to natural ground, I thought this would invite termites into the structure.
As I said I am new here and just trying to learn the proper and safe way.
Title: Re: 20x32 A frame cabin Central KY
Post by: EaglesSJ on December 13, 2011, 08:32:02 PM
Post by: EaglesSJ on December 13, 2011, 08:32:02 PM
Quote from: CjAl on December 13, 2011, 06:24:13 PM
hows your solar setup working out? is it providing enough power for you?
Not during the winter it isnt. We have to run the generator on cloudy days. In the summer its more than enough though
Title: Re: 20x32 A frame cabin Central KY
Post by: CjAl on December 13, 2011, 09:01:14 PM
Post by: CjAl on December 13, 2011, 09:01:14 PM
is it higher use or just not getting as much sun? I imagine with an expanding family and bigger house your use will go up. are you planning on more panels? how many do you have now I forget?
Title: Re: 20x32 A frame cabin Central KY
Post by: EaglesSJ on December 13, 2011, 09:07:28 PM
Post by: EaglesSJ on December 13, 2011, 09:07:28 PM
Quote from: Rensmif on December 13, 2011, 06:50:26 PM
I am brand new here and try to read and study a lot more than post and question. I am really inspired by your progress on this home, I do however have some questions/concerns.
In reading other threads on footings and foundations, I am unsure of the long term stability of your concrete piers being so much taller than they they deep, I also am not sure if I spotted "proper" metal connectors for the floor to foundation, and in these pics, it looks as if your are running untreated boards flush to natural ground, I thought this would invite termites into the structure.
As I said I am new here and just trying to learn the proper and safe way.
The proper way to brace the piers would have been to put an x bracing cable between the tallest piers. Probably the tallest 6 out of the 15. The others are in the ground as much or more than they are out of the ground. I chose to just add some 6x6 post diagonally braced in the rear of the house as I didnt feel like setting concrete anchors and stretching cable along with no longer being able to use the underside of my house for storage.
As for the underpinning. There are treated boards that are in direct contact with the ground. Only the vertical studs and OSB are untreated. Now Im sure that this may not last for 20 years or maybe not even 10 years but it did however keep our pipes from freezing and I already had the OSB left over from when we built the house so for a couple hundred bucks and a few hrs work i will use it until it fails me. I am constantly under the house and if I see the first sign of termites trust me when I say Ill be all over it. We had termites at our last house and they ate through the concrete block basement walls so I think unless you get your home treated for termites the possibility of having them is there regardless of construction material.
Most if not all of what I do is based on practicality not on building codes. I just try to build with common sense, speed, and accuracy. Im not always right but I always make it work d*
Title: Re: 20x32 A frame cabin Central KY
Post by: EaglesSJ on December 13, 2011, 09:09:00 PM
Post by: EaglesSJ on December 13, 2011, 09:09:00 PM
Quote from: CjAl on December 13, 2011, 09:01:14 PM
is it higher use or just not getting as much sun? I imagine with an expanding family and bigger house your use will go up. are you planning on more panels? how many do you have now I forget?
Were only getting about 3 hrs of sun vs 8 or so. We currently have 6 210 watt kyocera. Were planning on doubling this at tax time.
Title: Re: 20x32 A frame cabin Central KY
Post by: CjAl on December 13, 2011, 09:13:58 PM
Post by: CjAl on December 13, 2011, 09:13:58 PM
wow, that will be a huge array.
if you have extra in the summer and short in the winter maybe realigning the panels for more optimal winter horizons would help. can't do much about not enough sun though except mabey add a wind turbine but that's a whole nother set of issues.
if you have extra in the summer and short in the winter maybe realigning the panels for more optimal winter horizons would help. can't do much about not enough sun though except mabey add a wind turbine but that's a whole nother set of issues.
Title: Re: 20x32 A frame cabin Central KY
Post by: MountainDon on December 13, 2011, 09:40:36 PM
Post by: MountainDon on December 13, 2011, 09:40:36 PM
Quote from: Rensmif on December 13, 2011, 06:50:26 PM
....I am unsure of the long term stability of your concrete piers being so much taller than they they deep, ...
Rensmif and other readers. One thing to keep in mind while reading the forum topics is that the forum owner and management team does not necessarily endorse or guarantee the methods of construction used in the owner builder projects. Some projects are built in areas that had little to no enforcement of nationally recognized building codes. Other projects are in areas that are subject to incredibly detailed and rigidly enforced codes and inspections.
Typically an area with code requirements and inspections will be using a version of the IRC (http://countryplans.com/smf/index.php?topic=10500.0). There is much good information there. It does take some reading, but is a great tool. Also typically pier foundation will not meet code requirements without an engineer signing off on the design. There are foundations in the IRC that do not require the use of an engineer in many cases. Types of soil do vary a lot from place to place. Some locations are next to impossible to build on in an economical manner. Give me an email or PM if you desire, or start a topic on your own so we don't hijack this thread too much.
Title: Re: 20x32 A frame cabin Central KY
Post by: EaglesSJ on December 14, 2011, 01:37:56 AM
Post by: EaglesSJ on December 14, 2011, 01:37:56 AM
Quote from: MtnDon on December 13, 2011, 09:40:36 PM
Rensmif and other readers. One thing to keep in mind while reading the forum topics is that the forum owner and management team does not necessarily endorse or guarantee the methods of construction used in the owner builder projects. Some projects are built in areas that had little to no enforcement of nationally recognized building codes. Other projects are in areas that are subject to incredibly detailed and rigidly enforced codes and inspections.
Typically an area with code requirements and inspections will be using a version of the IRC (http://countryplans.com/smf/index.php?topic=10500.0). There is much good information there. It does take some reading, but is a great tool. Also typically pier foundation will not meet code requirements without an engineer signing off on the design. There are foundations in the IRC that do not require the use of an engineer in many cases. Types of soil do vary a lot from place to place. Some locations are next to impossible to build on in an economical manner. Give me an email or PM if you desire, or start a topic on your own so we don't hijack this thread too much.
I dont mind a hijack. This thread is as good as any to discuss it in.
Title: Re: 20x32 A frame cabin Central KY
Post by: Bob S. on December 14, 2011, 09:01:56 PM
Post by: Bob S. on December 14, 2011, 09:01:56 PM
I think your project is great just the way you've built it. From what I've seen with your work ethic, if a termite shows its ugly face it will be dealt in short order.
I do think that you relize that some things might need redone in the future, but am sure you will take care of them as need be.
The only issues I see that you might need to address in a more thougtful manner are your stove heat shield and stove-pipe height. These are both things that can not be dealt with after a problem arises. If the pipe is ugly so be it.
Title: Re: 20x32 A frame cabin Central KY
Post by: Buckeye on December 16, 2011, 01:44:31 PM
Post by: Buckeye on December 16, 2011, 01:44:31 PM
Eagles,
I was curious about your on demand hot water setup. What model are you using and are you happy with it? I'm currently getting ready to build a design very similar to your original a-frame and wife says hot water is a MUST.
Thanks- Buckeye
I was curious about your on demand hot water setup. What model are you using and are you happy with it? I'm currently getting ready to build a design very similar to your original a-frame and wife says hot water is a MUST.
Thanks- Buckeye
Title: Re: 20x32 A frame cabin Central KY
Post by: metolent on December 16, 2011, 03:22:51 PM
Post by: metolent on December 16, 2011, 03:22:51 PM
awesome progress... and most of this done at night? amazing. [cool]
I feel like I'm ready for hibernation as soon as the sun goes down ... sun? what was I thinking - I feel like i'm ready for hibernation as soon as the clouds aren't quite as bright.
I feel like I'm ready for hibernation as soon as the sun goes down ... sun? what was I thinking - I feel like i'm ready for hibernation as soon as the clouds aren't quite as bright.
Title: Re: 20x32 A frame cabin Central KY
Post by: EaglesSJ on December 16, 2011, 03:23:16 PM
Post by: EaglesSJ on December 16, 2011, 03:23:16 PM
This is the one we have and it works great.
http://www.amazon.com/Eccotemp-FVI-12-LP-Capacity-Propane-Tankless/dp/B002Y0K6AI
http://www.amazon.com/Eccotemp-FVI-12-LP-Capacity-Propane-Tankless/dp/B002Y0K6AI
Title: Re: 20x32 A frame cabin Central KY
Post by: duncanshannon on December 17, 2011, 09:37:07 AM
Post by: duncanshannon on December 17, 2011, 09:37:07 AM
inspiring progress! do you sleep much?!
Title: Re: 20x32 A frame cabin Central KY
Post by: OlJarhead on December 17, 2011, 10:26:44 AM
Post by: OlJarhead on December 17, 2011, 10:26:44 AM
Great progress! You're a driven man! Simply inspiring!
Title: Re: 20x32 A frame cabin Central KY
Post by: OlJarhead on December 17, 2011, 10:30:21 AM
Post by: OlJarhead on December 17, 2011, 10:30:21 AM
Quotehttp://www.amazon.com/Eccotemp-FVI-12-LP-Capacity-Propane-Tankless/dp/B002Y0K6AI
I'm liking the price on this one compared to the Bosh I had budgeted but all of them are killing me on water pressure. 40psi?
I've got maybe 15-18psi from my gravity cistern.
But I think I have a way around that (I'll have to expand in my own post).....
Anyway, thanks for posting this link and sorry for the hijack!
Title: Re: 20x32 A frame cabin Central KY
Post by: EaglesSJ on December 17, 2011, 03:18:43 PM
Post by: EaglesSJ on December 17, 2011, 03:18:43 PM
40 is on the high side. My well pump stays at about 28-30
Title: Re: 20x32 A frame cabin Central KY
Post by: Sassy on December 18, 2011, 12:17:39 AM
Post by: Sassy on December 18, 2011, 12:17:39 AM
We have 32-34 psi from our storage tank - from the top of the mtn down to where the Bosch X125 propane heater is located outside the cabin is an 80ft drop. Glenn said that he put in 3/4" propane pipe line but the last approx 8 ft was 1/2" & it hasn't seemed to matter.
I don't like the water too hot or too cold so depending on the weather outside I sometimes have problems regulating it to my exact specifications ::) And it takes 30-60 sec in the winter for the water to get warm in our master bath because that is across the cabin approx 50 ft away.
It's probably not that great in saving water but we don't have the big water tank & don't have to keep the pilot light lit, it's instant on. Ours is around 8 y/o & has never failed in any way. Glenn put in pex for the interior water lines.
Title: Re: 20x32 A frame cabin Central KY
Post by: mtman on December 18, 2011, 05:21:47 AM
Post by: mtman on December 18, 2011, 05:21:47 AM
Quote from: duncanshannon on December 17, 2011, 09:37:07 AM
inspiring progress! do you sleep much?!
Dang, he builds things faster than I can read about it! :)
Really looking good EaglesSJ
Title: Re: 20x32 A frame cabin Central KY
Post by: EaglesSJ on December 19, 2011, 04:56:51 AM
Post by: EaglesSJ on December 19, 2011, 04:56:51 AM
We are considering finishing the two opposing walls with windows in drywall instead of pine, and then finishing the wall with the french doors and the opposing wall as well as the ceiling with pine but were unsure how it will look. Also thinking of finishing all 4 lower walls with drywall and then the upper end wall and the ceiling with pine. If someone could provide pictures of other cabins that used a drywall/wood interior I would greatly appreciate it.
Title: Re: 20x32 A frame cabin Central KY
Post by: mogie01 on December 19, 2011, 08:03:07 AM
Post by: mogie01 on December 19, 2011, 08:03:07 AM
You might want to check out this video that one of the builders did. The used drywall on the walls and T&G on the ceiling, it looks amazing.
http://www.youtube.com/watch?v=hmQ5Q5E5bnU
http://www.youtube.com/watch?v=hmQ5Q5E5bnU
Title: Re: 20x32 A frame cabin Central KY
Post by: EaglesSJ on December 23, 2011, 01:27:21 AM
Post by: EaglesSJ on December 23, 2011, 01:27:21 AM
Havent made an update in awhile so I thought I would post up some pics. First of the new addition as we got it insulated and wired up. Its now warm and full of light. I also got the hole cut in the living room leading into the bedroom but didnt take a pic for some reason. After Colton accidentally threw a stick of firewood a little too far while ricking it and cracked the front window I decided it was time to build a firewood rack. 1 pic is included of that.
Then I decided to take a day off and go deer hunting since the freezer was empty and with the price of beef these days it is just a lot more feasible (and more manly) to go out and get my own meat. So I done just that. A friend of mine from the Airforce was up from florida visiting and had never been hunting so it made for the perfect excuse. Spent several hours scouting tracks and tracing down trails until I finally took a big doe. I was very thankful for the delicious meal she provided the next day and the many more to come.
Had a doc appt today today where we got to see the little baby girl and check to make sure she is developing as she should be. We are very cautious about only getting the ultrasounds done when needed because of the studies linking brain damage to ultrasounds. It supposedly disrupts the cell reproduction and tissue formation with the ultrasonic waves.
Last but not at all least as it took me two days to complete, I tore out our old steps and rebuilt some with ALOT more function. It took lots of pondering and a few puffs of captain black through my ol pipe but I am very satisfied with the outcome. Lots of storage space and a nice little picture nook. Anyways without further ado I give you the pictures.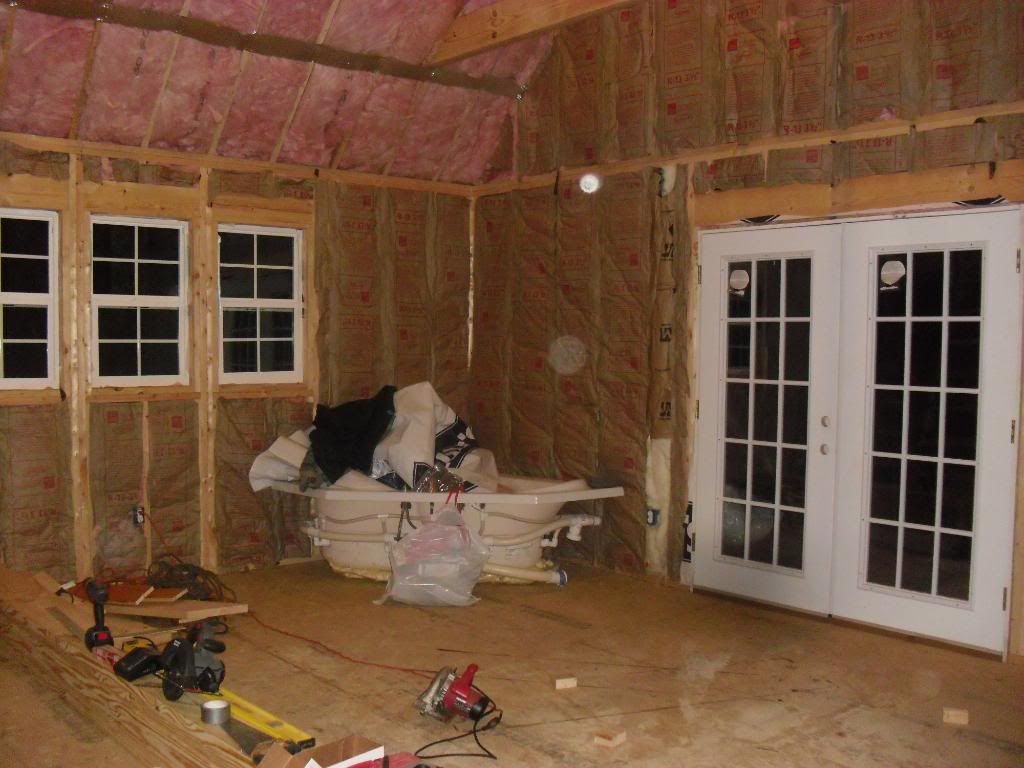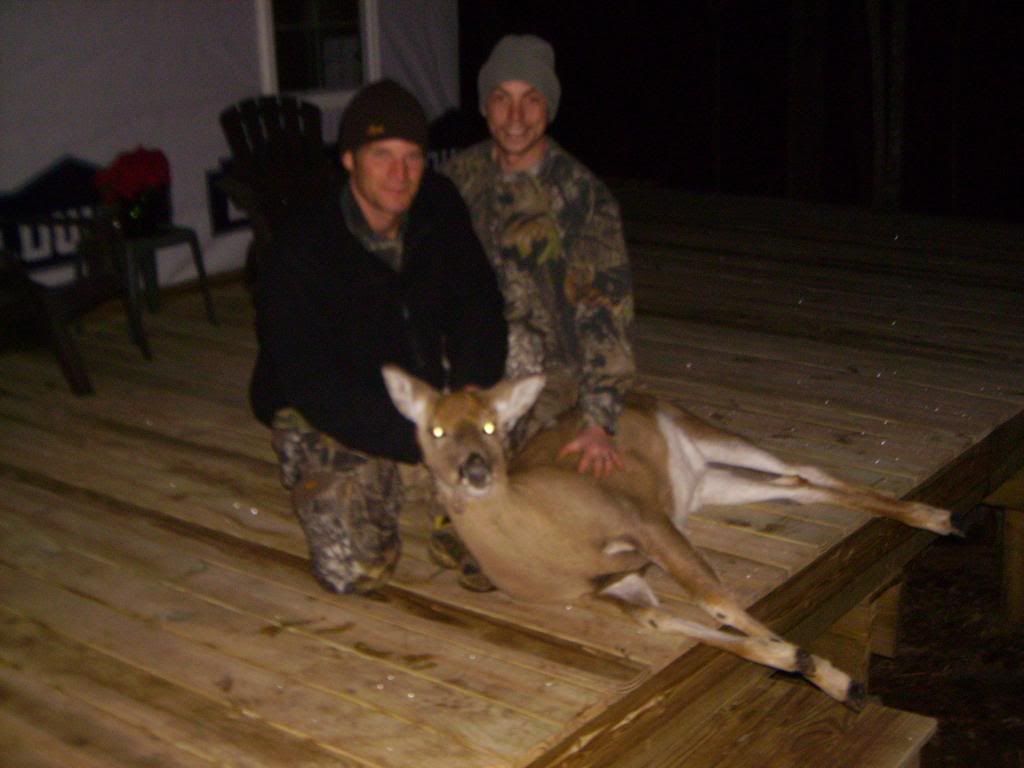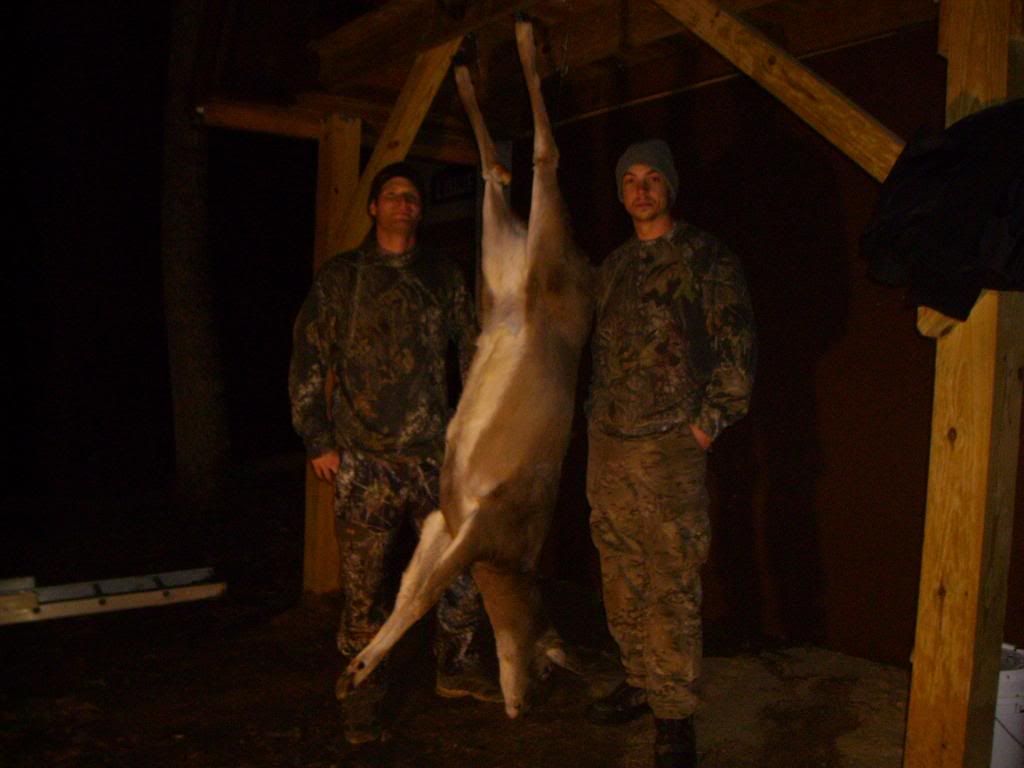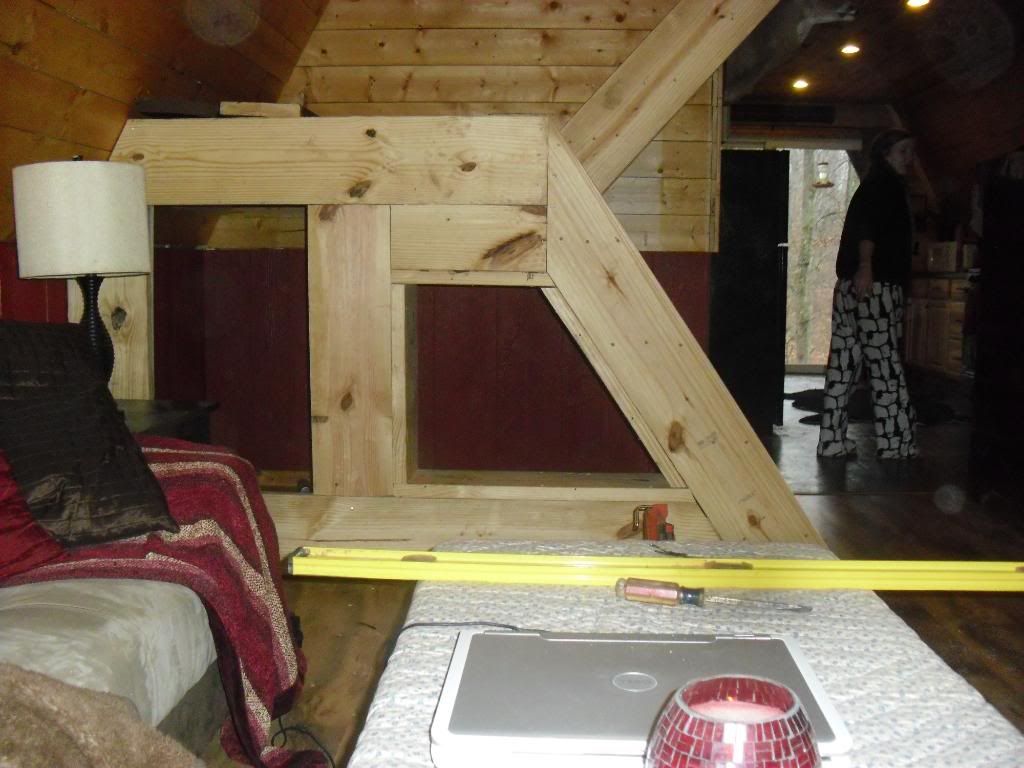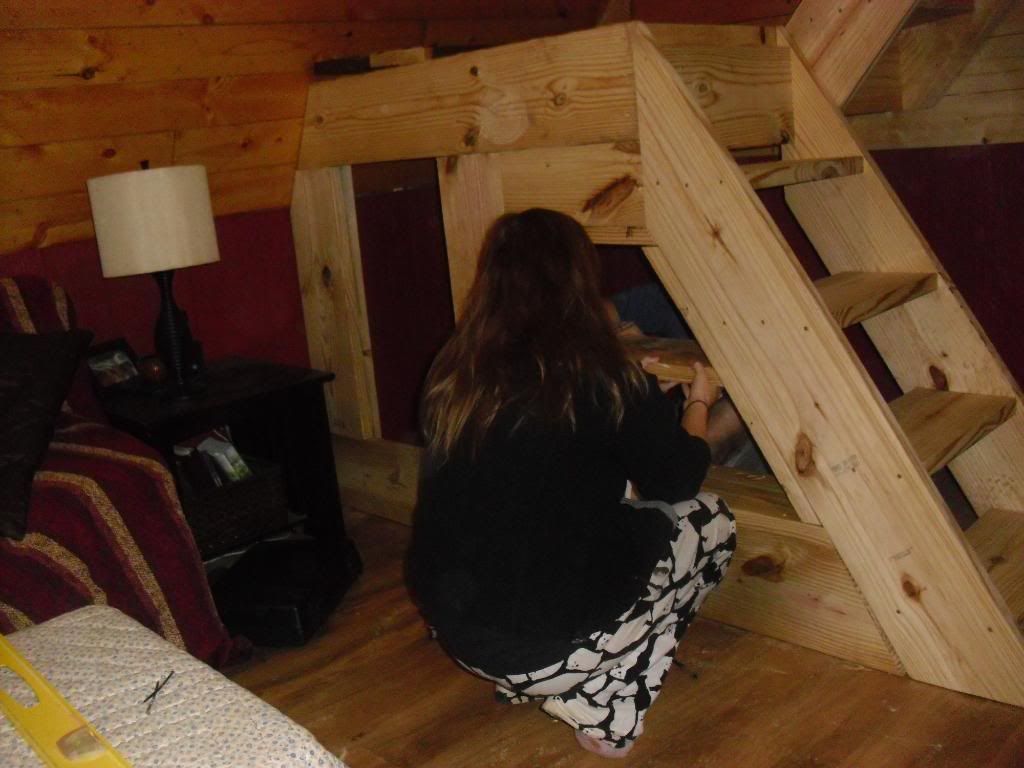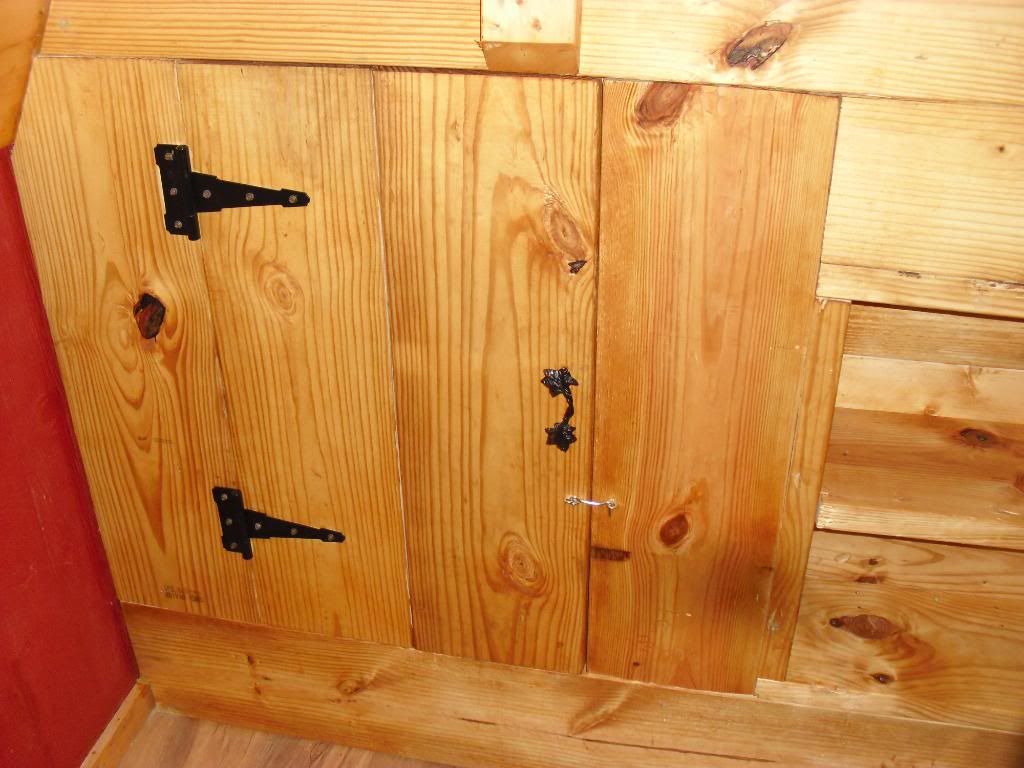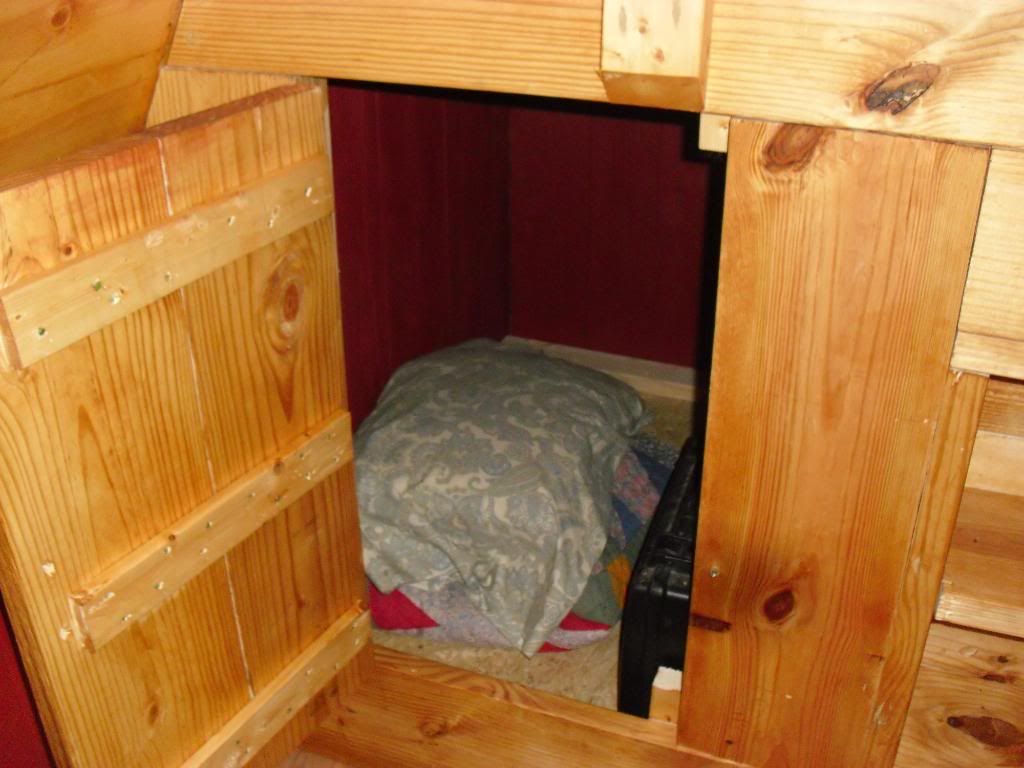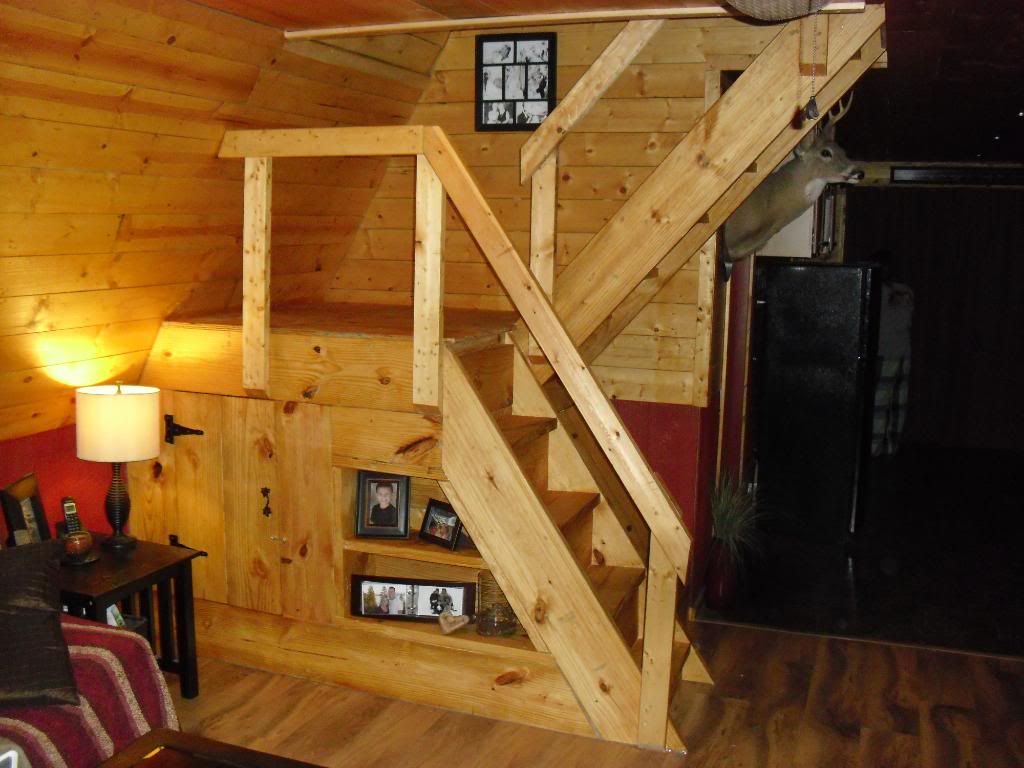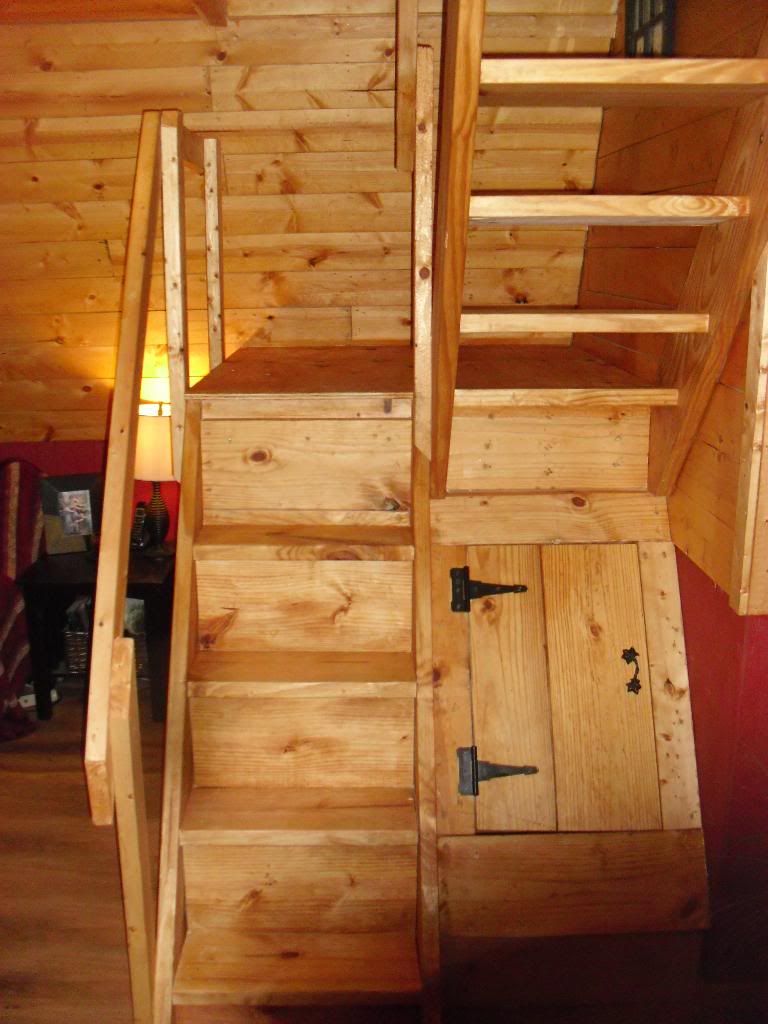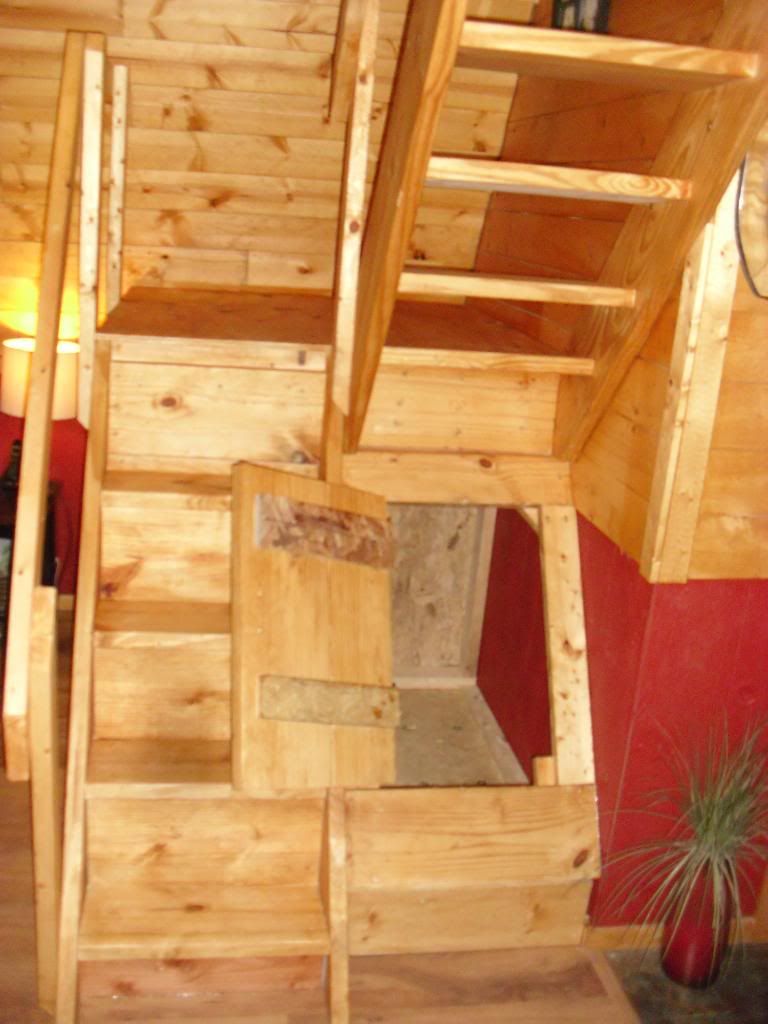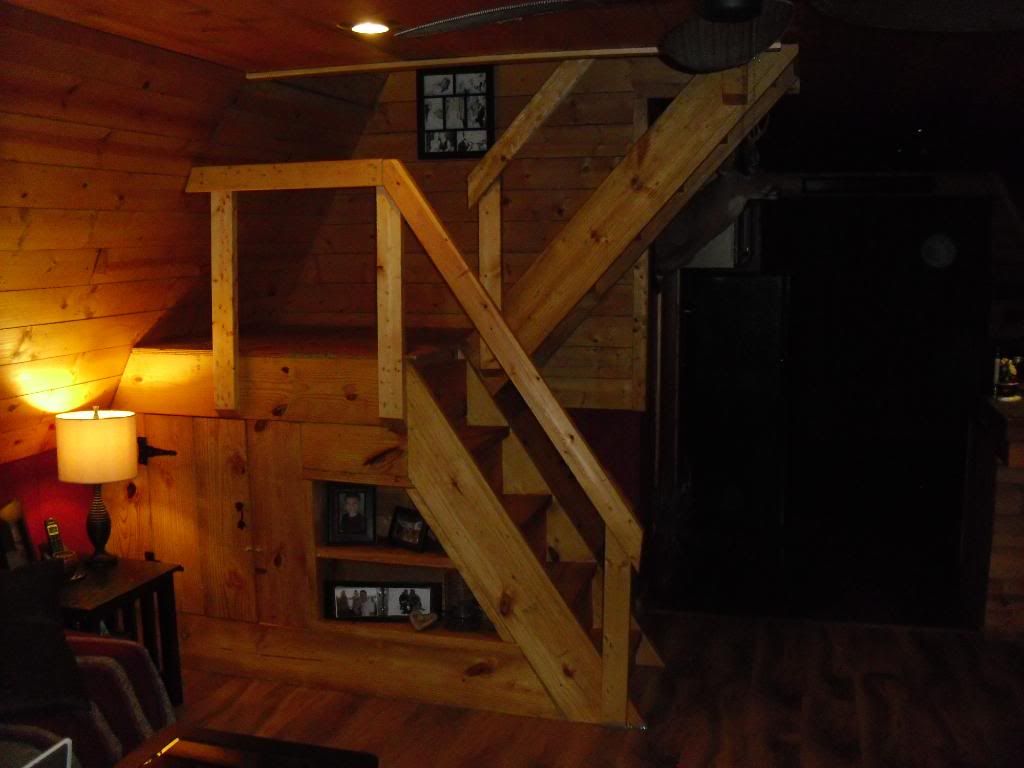
Title: Re: 20x32 A frame cabin Central KY
Post by: Texas Tornado on December 23, 2011, 05:11:14 AM
Post by: Texas Tornado on December 23, 2011, 05:11:14 AM
Wow!!! I do like those stairs! Congrats on that sweet baby ;D [cool]
Title: Re: 20x32 A frame cabin Central KY
Post by: Don_P on December 23, 2011, 07:15:45 AM
Post by: Don_P on December 23, 2011, 07:15:45 AM
Closest pic I can find. I think drywall and wood looks fine and opens up other possibilities.
This drywall will be painted with a mural that will have a hickory tree with the horses under it. It was a favorite hangout of theirs before it fell.
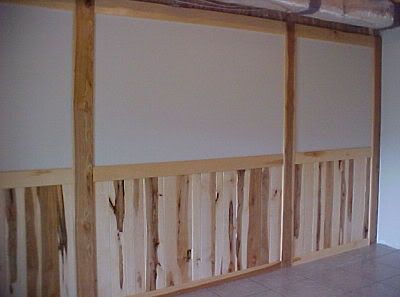
I've used cattle panels to make infill in similar rails, I think it would take goat panel to meet code now. The "wire" on those is ~1/4" and welded, it takes rustoleum well. With the panel cut a little big, I took a 1/4" drill bit and made holes for the panel's wires to fit into in the woodwork of the 2x rails.
This drywall will be painted with a mural that will have a hickory tree with the horses under it. It was a favorite hangout of theirs before it fell.
I've used cattle panels to make infill in similar rails, I think it would take goat panel to meet code now. The "wire" on those is ~1/4" and welded, it takes rustoleum well. With the panel cut a little big, I took a 1/4" drill bit and made holes for the panel's wires to fit into in the woodwork of the 2x rails.
Title: Re: 20x32 A frame cabin Central KY
Post by: Sassy on December 23, 2011, 11:11:13 AM
Post by: Sassy on December 23, 2011, 11:11:13 AM
I have to say "wow" too! You've done such a wonderful job on your cabin! And congratulation on your baby girl - really good ultrasound pics.
Every Thursday I volunteer at a crises pregnancy center & do ultrasounds on the young women who go there. It is so neat to be able to see these young women when I show them their babies - they are amazed & in awe. Most aren't married, don't have any money, maybe aren't even w/the father of the baby anymore & are reaching out for help.
I would say that 90% of them decide to keep their babies or adopt them out rather than have an abortion. We give them spiritual support, parenting classes, refer them to doctors, agencies that can help them & different organizations/churches are always donating baby clothes, supplies etc. The fabric of our society is breaking apart & hopefully we can help.
Sorry to hijack your thread d* Saw those precious ultrasounds & had to comment.
Think I've said it before, your son's name Colton, is the same as our grandson's. I had never heard it until then.
Really enjoy your thread & progress! Your cabin looks very warm & inviting :)
Title: Re: 20x32 A frame cabin Central KY
Post by: Redoverfarm on December 23, 2011, 03:35:27 PM
Post by: Redoverfarm on December 23, 2011, 03:35:27 PM
Quote from: EaglesSJ on December 19, 2011, 04:56:51 AM
We are considering finishing the two opposing walls with windows in drywall instead of pine, and then finishing the wall with the french doors and the opposing wall as well as the ceiling with pine but were unsure how it will look. Also thinking of finishing all 4 lower walls with drywall and then the upper end wall and the ceiling with pine. If someone could provide pictures of other cabins that used a drywall/wood interior I would greatly appreciate it.
For a more finished look I would probably use the T&G on the lower 1/3 of the wall followed by chair rail and then drywall the upper 2/3 and follow by the T&G on the ceiling. Sort of like wainscoating.
Title: Re: 20x32 A frame cabin Central KY
Post by: astidham on December 27, 2011, 05:53:02 PM
Post by: astidham on December 27, 2011, 05:53:02 PM
The stairs look awesome!!
Congrats on the new addition to the family.
Congrats on the new addition to the family.
Title: Re: 20x32 A frame cabin Central KY
Post by: EaglesSJ on December 31, 2011, 08:13:36 PM
Post by: EaglesSJ on December 31, 2011, 08:13:36 PM
Here are pics of the past week or so. Progress has been very slow as I had a couple guys I was in the military with visiting the past couple weeks, and didnt want to work the whole time they were here. Need to sand and then paint. The green colored drywall in the corner is mildew resistant since thats where the jacuzzi will be.
I will have pine trim going up all corners and around all windows and doors as well as all the way across where the upper and lower wall meets above the french doors. The loft area and ceiling will be covered with pine. Not sure if I want to build a bookshelf or a small closet in the area I have cut out in the drywall yet. If I do a shelf I will have to build some type of closet upstairs in the loft. Any ideas will be much appreciated.
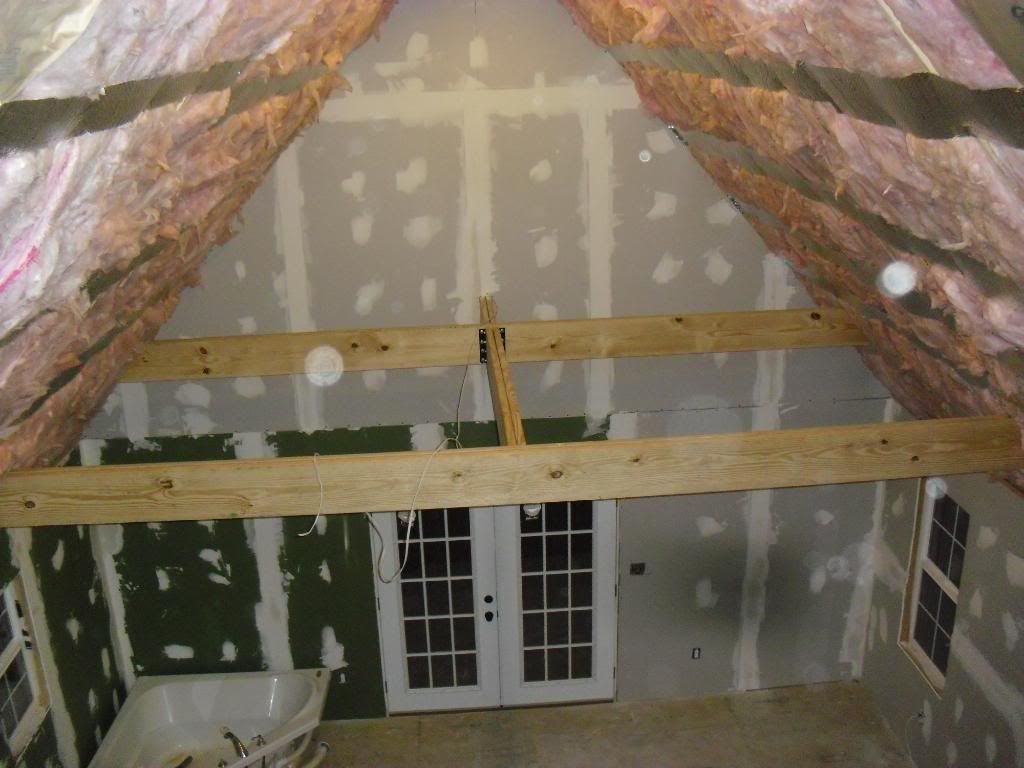
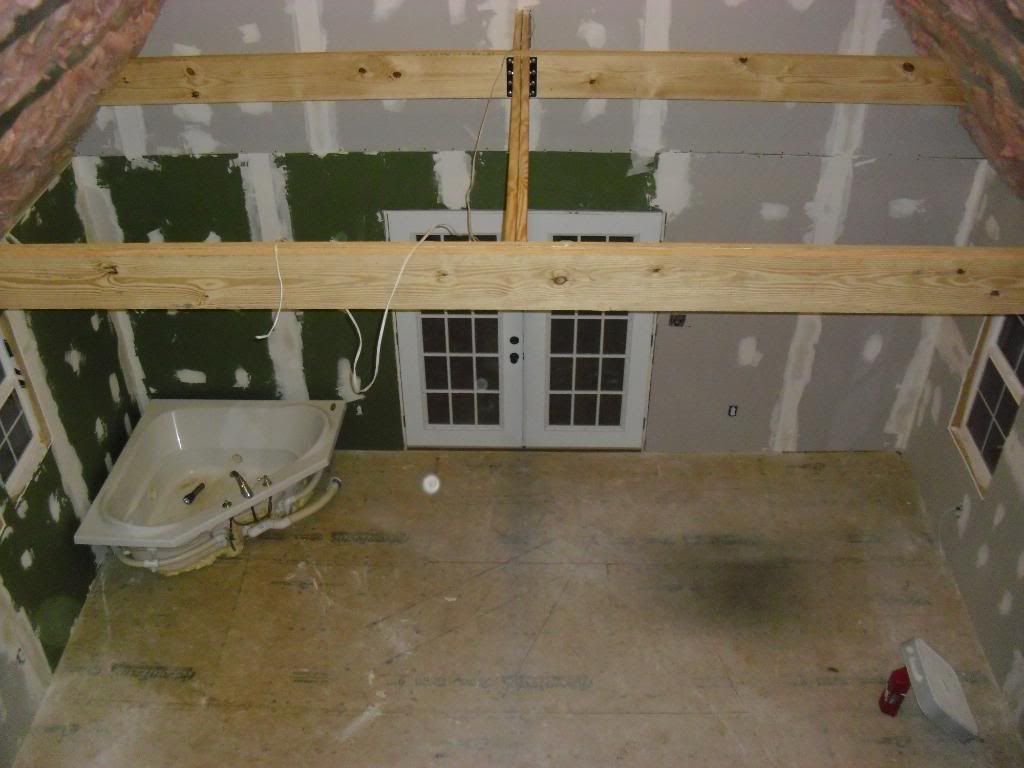
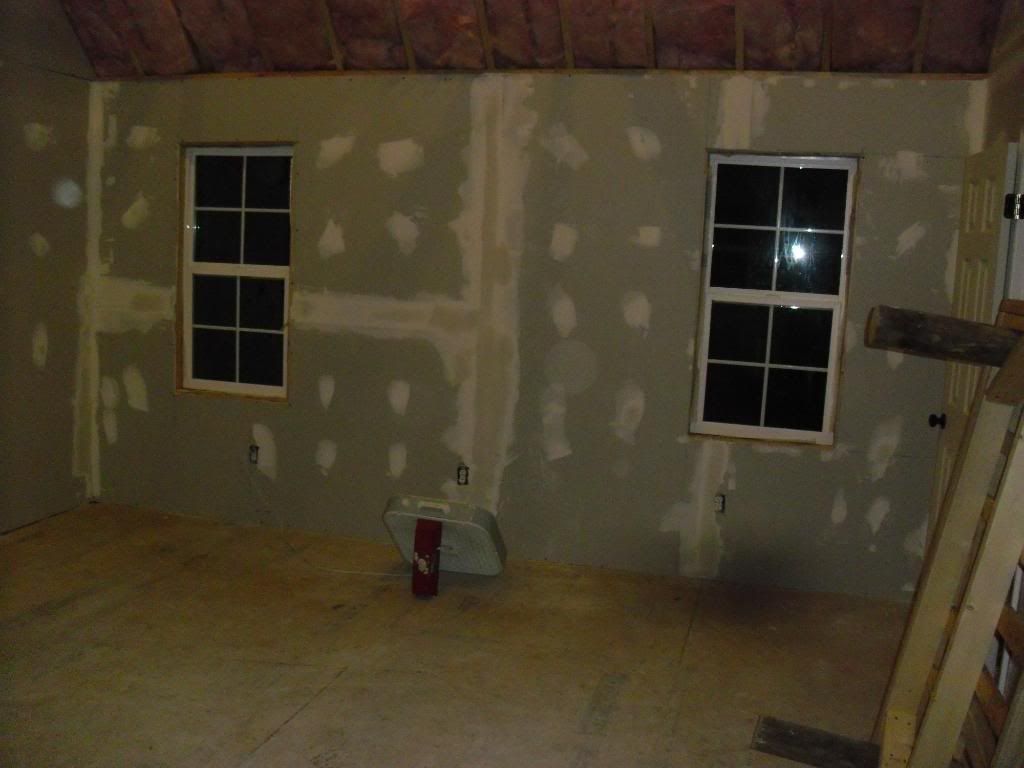
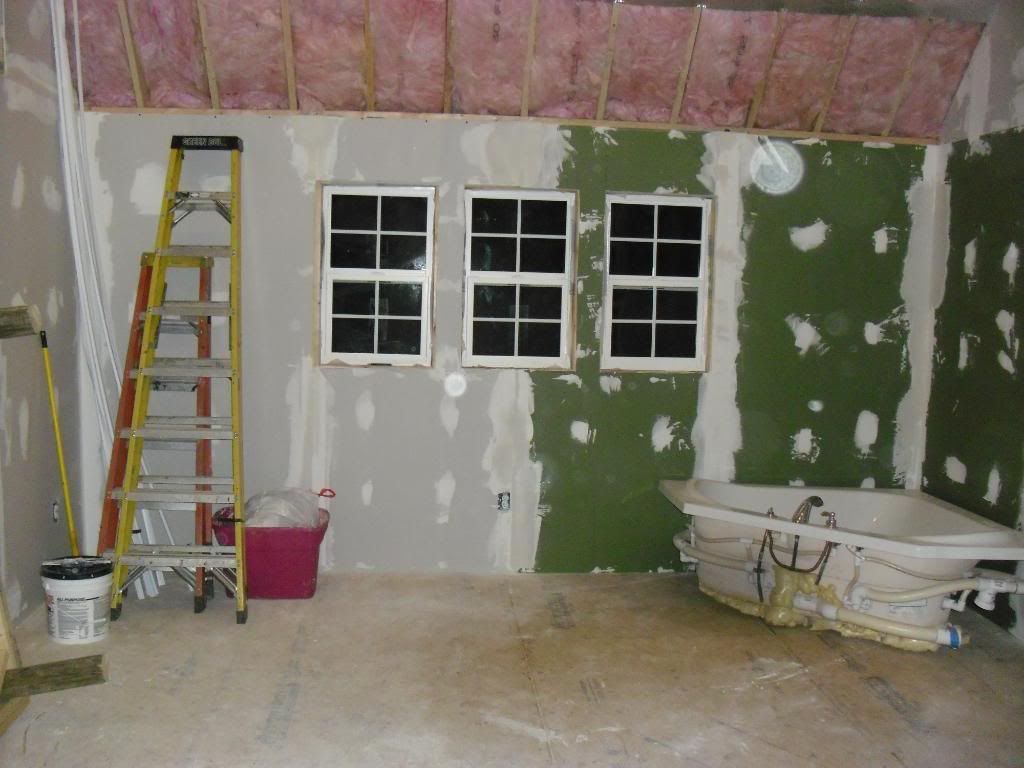

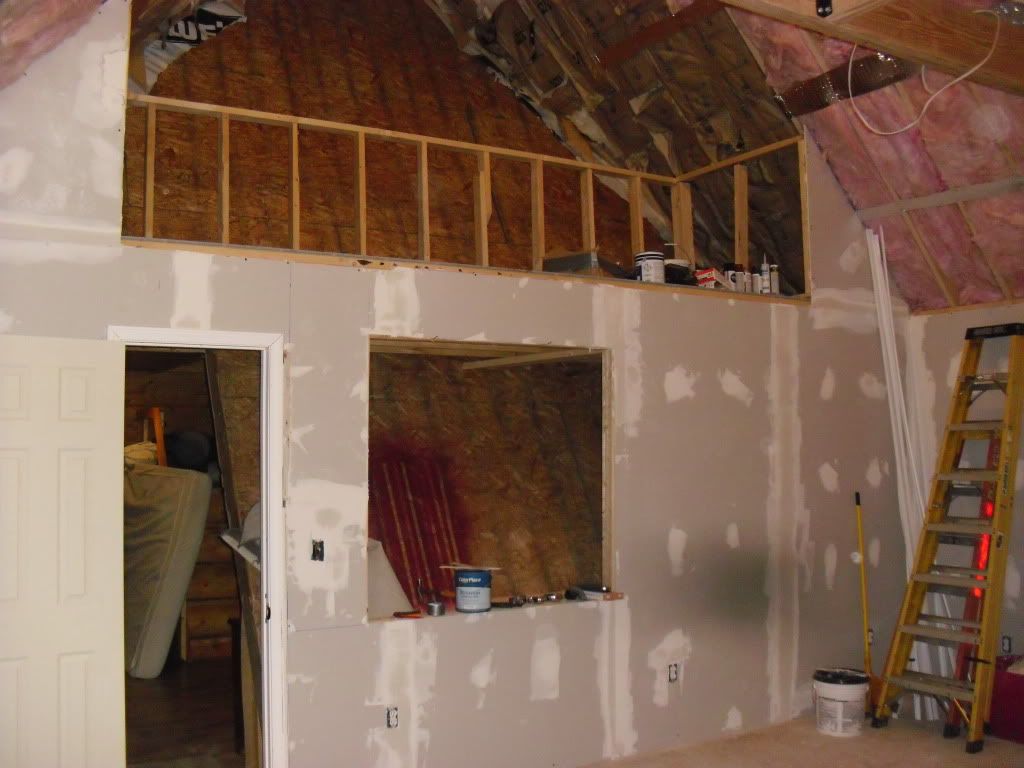
I will have pine trim going up all corners and around all windows and doors as well as all the way across where the upper and lower wall meets above the french doors. The loft area and ceiling will be covered with pine. Not sure if I want to build a bookshelf or a small closet in the area I have cut out in the drywall yet. If I do a shelf I will have to build some type of closet upstairs in the loft. Any ideas will be much appreciated.
Title: Re: 20x32 A frame cabin Central KY
Post by: ben2go on December 31, 2011, 09:17:47 PM
Post by: ben2go on December 31, 2011, 09:17:47 PM
The area cut out above the doors looks like a good place to build out into a sleeping loft.
Title: Re: 20x32 A frame cabin Central KY
Post by: EaglesSJ on December 31, 2011, 09:59:48 PM
Post by: EaglesSJ on December 31, 2011, 09:59:48 PM
Its only 4 ft deep. not really enough for a sleeping loft. I have thought about building it out into the room further though. But Im not sure if we want another bed in our bedroom or not. I was thinking more of a lounge area.
Title: Re: 20x32 A frame cabin Central KY
Post by: ben2go on January 01, 2012, 02:41:02 PM
Post by: ben2go on January 01, 2012, 02:41:02 PM
My thought was to cantilever the build out off of the rafters of the main house roof.The floor joist would have to be through bolted I think.Just a thought.I kind got that "Little House On the Prairie" thought in my head when I saw that space.Did you ever watch that show and see how the sleeping loft was laid out?I thought it was kinda neat.Should have been warm that high and close to the chimney.
Title: Re: 20x32 A frame cabin Central KY
Post by: dug on January 02, 2012, 09:38:59 AM
Post by: dug on January 02, 2012, 09:38:59 AM
Man, even when you're just cruising you fly. No wonder you are the Eagle!
Title: Re: 20x32 A frame cabin Central KY
Post by: PorkChopsMmm on January 02, 2012, 09:50:41 PM
Post by: PorkChopsMmm on January 02, 2012, 09:50:41 PM
Looking good. Wish I would have used the greenboard in a few places. I've got a few questions for you. We have not moved into our place yet and I ran into a few issues when being there for more than a day or so...
You mentioned you need to run your generator every other day. What are your biggest loads? I have a very similar set up (6 240 watt panels, outback 48v inverter, 205 amp hr battery bank @ 48v, etc) and I needed to run our generator twice a day while we were up there for 4 days. We basically got "0" sun the entire time but this was pretty disheartening. Can you expand on your experience? Also, do you have a generator auto-start or do you manually fire one up? I can't imagine my wife walking out to pull-start one of our generators once or twice a day in the winter time. I could see this being harder for your pregnant wife. We have a fridge, although it is fairly efficient at ~333 Kw hrs a year, all LED lights, energy star fans, etc.
Also, can you detail more of your experience with pipe freezing? I have a Rheem external tankless propane water heater, linked below, and it *requires* electricity be present even if the water has been drained from the unit. I drained it, but removed the power, and the freezing temperatures broke some small copper piping inside. Also disheartening.
http://www.amazon.com/Rheem-RTG-64XP-Outdoor-Tankless-Bathroom/dp/B003OSL4AU

Thanks for always posting your progress in great detail!
You mentioned you need to run your generator every other day. What are your biggest loads? I have a very similar set up (6 240 watt panels, outback 48v inverter, 205 amp hr battery bank @ 48v, etc) and I needed to run our generator twice a day while we were up there for 4 days. We basically got "0" sun the entire time but this was pretty disheartening. Can you expand on your experience? Also, do you have a generator auto-start or do you manually fire one up? I can't imagine my wife walking out to pull-start one of our generators once or twice a day in the winter time. I could see this being harder for your pregnant wife. We have a fridge, although it is fairly efficient at ~333 Kw hrs a year, all LED lights, energy star fans, etc.
Also, can you detail more of your experience with pipe freezing? I have a Rheem external tankless propane water heater, linked below, and it *requires* electricity be present even if the water has been drained from the unit. I drained it, but removed the power, and the freezing temperatures broke some small copper piping inside. Also disheartening.
http://www.amazon.com/Rheem-RTG-64XP-Outdoor-Tankless-Bathroom/dp/B003OSL4AU
Thanks for always posting your progress in great detail!
Title: Re: 20x32 A frame cabin Central KY
Post by: EaglesSJ on January 03, 2012, 12:47:36 AM
Post by: EaglesSJ on January 03, 2012, 12:47:36 AM
Quote from: PorkChopsMmm on January 02, 2012, 09:50:41 PM
Looking good. Wish I would have used the greenboard in a few places. I've got a few questions for you. We have not moved into our place yet and I ran into a few issues when being there for more than a day or so...
You mentioned you need to run your generator every other day. What are your biggest loads? I have a very similar set up (6 240 watt panels, outback 48v inverter, 205 amp hr battery bank @ 48v, etc) and I needed to run our generator twice a day while we were up there for 4 days. We basically got "0" sun the entire time but this was pretty disheartening. Can you expand on your experience? Also, do you have a generator auto-start or do you manually fire one up? I can't imagine my wife walking out to pull-start one of our generators once or twice a day in the winter time. I could see this being harder for your pregnant wife. We have a fridge, although it is fairly efficient at ~333 Kw hrs a year, all LED lights, energy star fans, etc.
Also, can you detail more of your experience with pipe freezing? I have a Rheem external tankless propane water heater, linked below, and it *requires* electricity be present even if the water has been drained from the unit. I drained it, but removed the power, and the freezing temperatures broke some small copper piping inside. Also disheartening.
http://www.amazon.com/Rheem-RTG-64XP-Outdoor-Tankless-Bathroom/dp/B003OSL4AU
Thanks for always posting your progress in great detail!
I think the reason you are having to start your generator more often is the fact that your battery bank is half the size of mine. We are running a 1000 Ah battery bank at 24v. Which would equal a 500 Ah if we had a 48v system. As for our usage, we have a small fridge that pulls about 330kw a year, 6-8 13w bulbs, microwave, ceiling fan on low, 2 laptops, small LCD tv and dvd player in coltons room, water pump, various chargers, and a cordless phone. We run about 20% drain per day. If we get no sun this means we run for 2 days before were down to about 60%. I almost always start the generator at about 70-75% though. Also I have my battery meter set at 700 Ah instead of 1000ah so that my calculations are conservative if anything. If you are simply relying on voltage to tell you how discharged your batteries are this is significantly affected by the temperature.
The generator is a manual start. Meaning I have to walk about 100 yards up the hill to the shed to start it. We want to get an auto start set up but I havent found a way to add one to a pull start generator. Were out and about many times throughout the day packing in firewood or letting the dog out to pee so it really isnt much of an inconvenience. How long are you having to let the gen set run for a full charge?
As for the pipes freezing, I never had a pipe freeze and bust inside the house as we always have a fire going. The pipes under the house froze a couple times last year and the only one that ever busted was pipe that feeds the garden hose. If you havent underpinned around your house yet do that. Also if you have a way to shut your water off before you leave do that and then open all your faucets and leave them that way so that any ice that forms will have room to expand and wont be trapped inside your pipes to build up pressure and burst.
If you have anymore questions at all feel free to ask. If you prefer a phone call shoot me an email or PM and ill send you my number. I hope I helped at least a little :)
Title: Re: 20x32 A frame cabin Central KY
Post by: EaglesSJ on January 03, 2012, 01:00:52 AM
Post by: EaglesSJ on January 03, 2012, 01:00:52 AM
Here are the past couple days progress pics. We havent done alot because we are out of funds. I was laid off right before Christmas and I am still looking for work. We did manage to sand the drywall, paint, stain the beams, trim where they join the drywall, and build the lower half of the loft stairs out of reclaimed lumber from the stairs that were in our living room previously. I also reused the boards cut from the wall where the entry to the addition now is. We had over half of a 5 gallon bucket left of brown paint from the underpinning and decided to paint the OSB flooring to make it a little easier to sweep and for looks since it will be another month or so until we can do anything else with it. Please keep in mind that the loft area and the area where the upper and lower wall meets above the french doors will all have wood trim and this is the reason for not having finished drywall seams in those areas. I will probably be trimming around the windows and doors and such in a week or so. But it is livable at this point and that is the key. My next priority is fireproofing the wall behind and beside the woodstove as I can tell the wood is starting to really dry out. I will more than likely do something with copper sheeting. Not sure yet though as we really need to put the money to use elsewhere so drywall maybe what happens.
We are about $3000 from completing the addition both inside and out. $1000 inside for TG ceiling and loft area, $500 for flooring, $200 for tub plumbing and surrounds, and then about $1300 for log siding and exterior finishing. Anyways without further ado, here are the pics. Probably the last for a week or so at least.
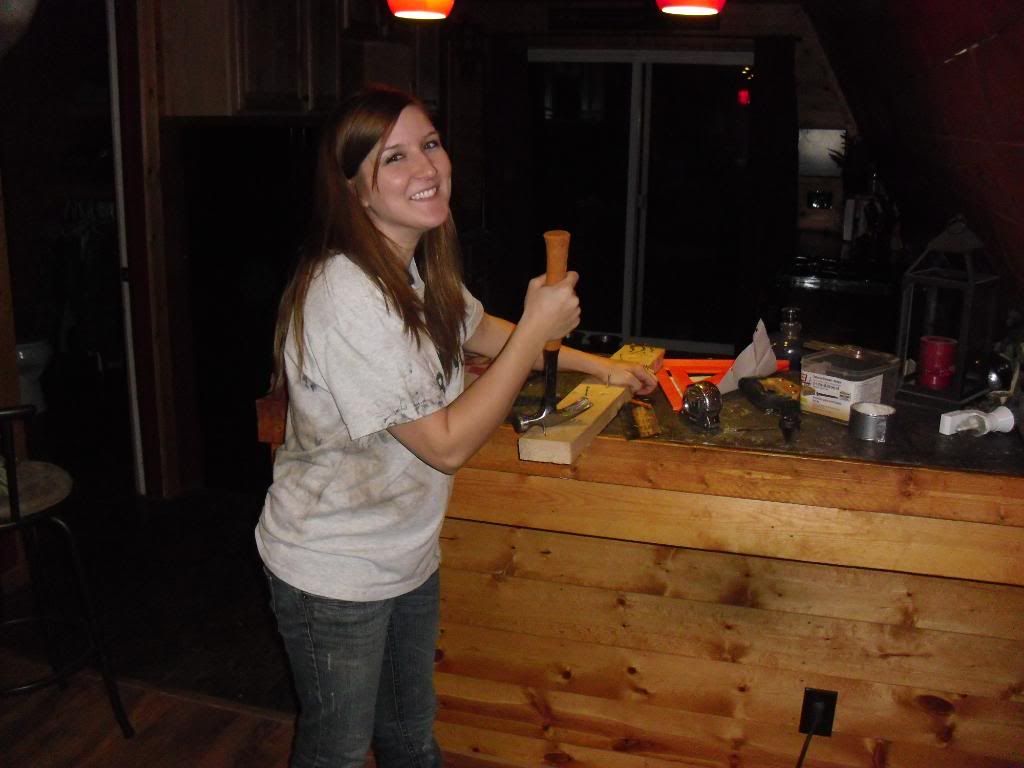
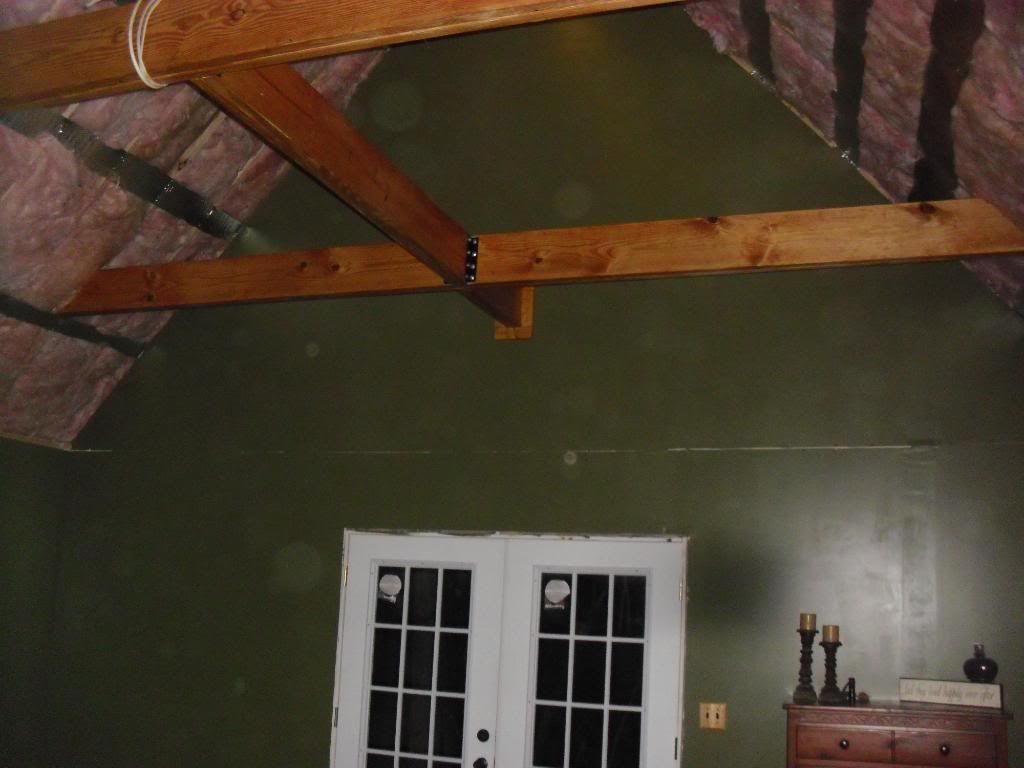
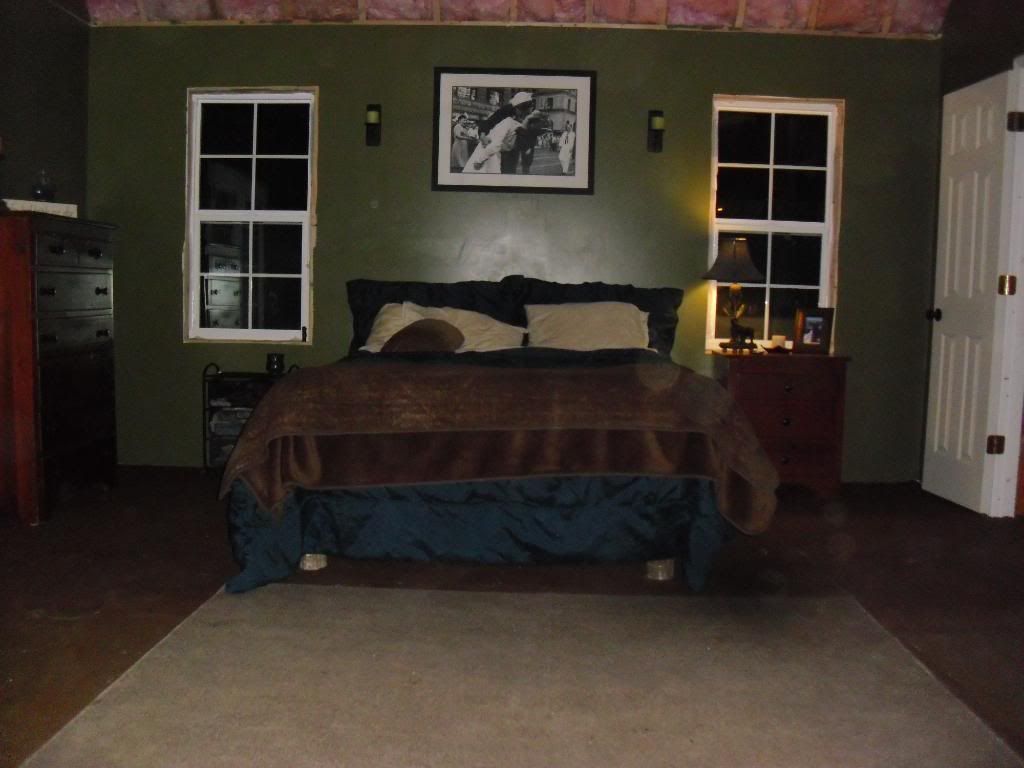
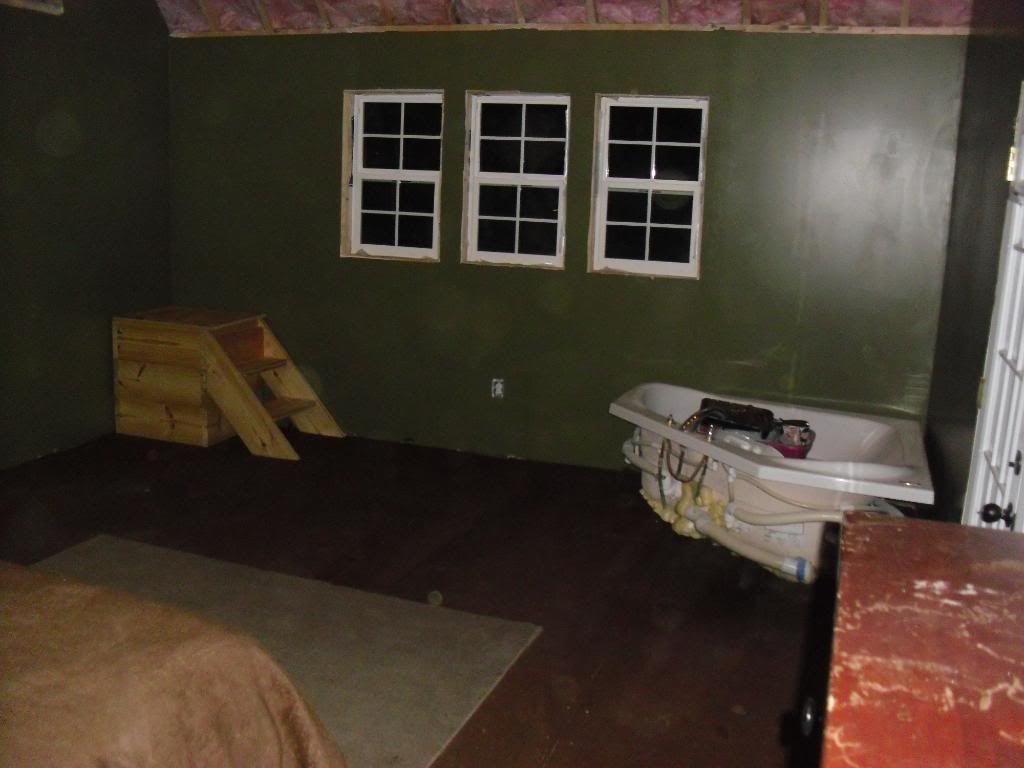

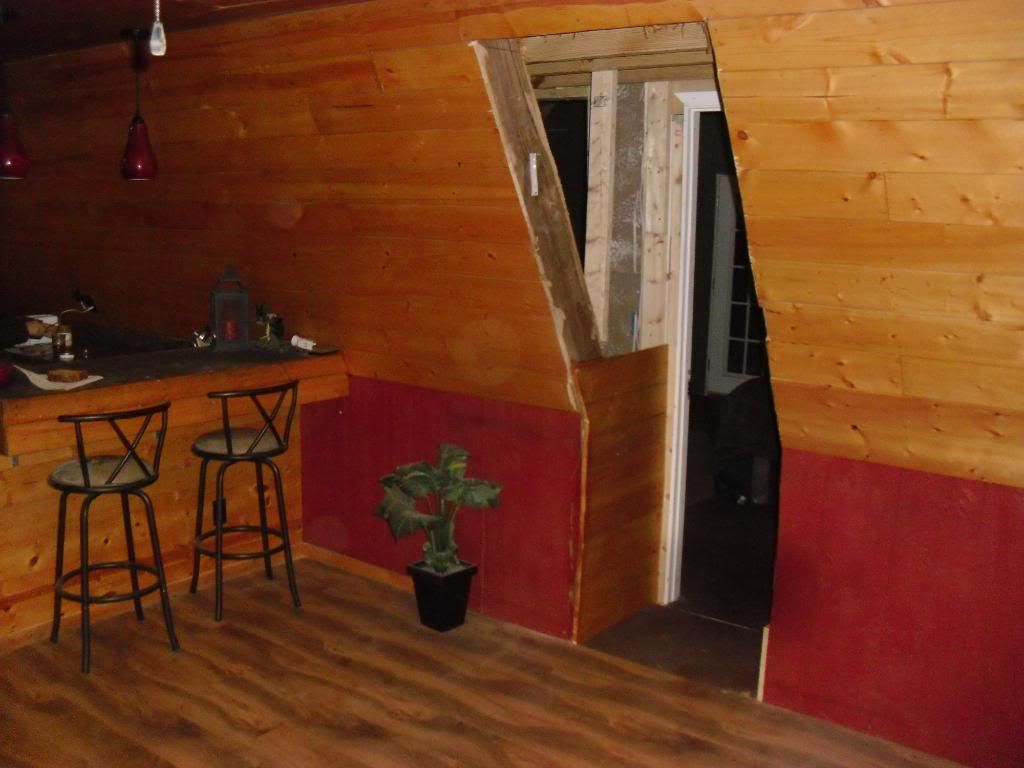

We are about $3000 from completing the addition both inside and out. $1000 inside for TG ceiling and loft area, $500 for flooring, $200 for tub plumbing and surrounds, and then about $1300 for log siding and exterior finishing. Anyways without further ado, here are the pics. Probably the last for a week or so at least.
Title: Re: 20x32 A frame cabin Central KY
Post by: southbalto on January 03, 2012, 10:12:01 AM
Post by: southbalto on January 03, 2012, 10:12:01 AM
I've been following your progress since the start. Congrads on the new addition (s).
The only thing I've been really concerned with is the placement of that woodstove. Even with the shielding, the connector pipe going into the ceiling support looks way too close to the wall.
Have you considered moving the hearth to your new bedroom area? You could then vent it straight up using relatively inexpensive single or double wall black (connector) pipe and into a ceiling support box at the peak of your addition. You could build out an interior window in your loft space which would allow warm air to move into the original upstairs space. I think that design would create a really nice convection loop. You would also get some additional head from the system off the increased surface area of the connector pipe.
Just something to think about.....
Also, you might want to look at a newer epa type stove. They throw a ton more heat than those old box type stoves.
Title: Re: 20x32 A frame cabin Central KY
Post by: OlJarhead on January 03, 2012, 10:31:01 AM
Post by: OlJarhead on January 03, 2012, 10:31:01 AM
Sorry to hear about the lay off :( Right before Christmas even! That sucks.
I suspect, however, that like me it just gives you more time to do things around the farm? ;) Hope so!
Cheers
Erik
I suspect, however, that like me it just gives you more time to do things around the farm? ;) Hope so!
Cheers
Erik
Title: Re: 20x32 A frame cabin Central KY
Post by: Squirl on January 03, 2012, 12:12:20 PM
Post by: Squirl on January 03, 2012, 12:12:20 PM
Quote from: EaglesSJ on January 03, 2012, 12:47:36 AM
The generator is a manual start. Meaning I have to walk about 100 yards up the hill to the shed to start it. We want to get an auto start set up but I havent found a way to add one to a pull start generator.
I have seen it done, but it depends on the engine. They sell starters for many small honda, briggs, and honda clone (harbor freight) engines on ebay. IIRC they are usually around $50. They are usually found with the go kart racing stuff. I have not had to do it myself yet.
Title: Re: 20x32 A frame cabin Central KY
Post by: MountainDon on January 03, 2012, 12:42:52 PM
Post by: MountainDon on January 03, 2012, 12:42:52 PM
Check Jack's Small Engines
Title: Re: 20x32 A frame cabin Central KY
Post by: MountainDon on January 03, 2012, 12:45:50 PM
Post by: MountainDon on January 03, 2012, 12:45:50 PM
Then check TheSolar.Biz for the required electronics tp permit the inverter to auto start the generator
Both those places used to sell the needed parts. Haven't checked to see if they still do
Both those places used to sell the needed parts. Haven't checked to see if they still do
Title: Re: 20x32 A frame cabin Central KY
Post by: EaglesSJ on January 03, 2012, 12:54:00 PM
Post by: EaglesSJ on January 03, 2012, 12:54:00 PM
Quote from: MtnDon on January 03, 2012, 12:45:50 PM
Then check TheSolar.Biz for the required electronics tp permit the inverter to auto start the generator
Both those places used to sell the needed parts. Haven't checked to see if they still do
So basically I need a 24v starter of some sort for my generator since I run a 24v battery bank, and then something like this:
http://store.thesolarbiz.com/online/ProductDesc.aspx?code=TSB-090021&type=4&eq=&desc=Generator-Start-Kit-for-Outback-System&key=it
how will I turn the gen set off from the house? it has a manual on off electric switch on the front.
Title: Re: 20x32 A frame cabin Central KY
Post by: Redoverfarm on January 03, 2012, 12:55:54 PM
Post by: Redoverfarm on January 03, 2012, 12:55:54 PM
This is what I got to start mine. But the biggest concern is a starter for what you have.
http://www.magnumenergy.com/Products/AGS-N.htm
The starter will be 12v (motorcycle type) and there needs to be a battery in place on the generator to start. The above unit can be placed away from the generator and just the needed wiring to run from it to the generator. Ideally if you run an extra pair of wires from your battery bank/inverter to the generator to charge the start battery of the generator. I am not that versed on this but you will actually be using the AGS instead of a key start but then again you will need to figure out how to wire it as if it came with an electric start. All your key in an electric start is doing is closing a circuit to start.
Title: Re: 20x32 A frame cabin Central KY
Post by: MountainDon on January 03, 2012, 01:13:00 PM
Post by: MountainDon on January 03, 2012, 01:13:00 PM
Call TheSolar.biz. They are pretty good folks and likely have the answer.
Title: Re: 20x32 A frame cabin Central KY
Post by: Squirl on January 03, 2012, 01:43:14 PM
Post by: Squirl on January 03, 2012, 01:43:14 PM
Also some charge controllers have remote start capabilities too, not just inverters. There are many add ons to most modern RE equipment. IIRC you have an outback which can use either the controller or inverter to activate the starter motor.
It could all be moot if you can't convert your pull start generator to an electric start, unless you buy a new generator.
It could all be moot if you can't convert your pull start generator to an electric start, unless you buy a new generator.
Title: Re: 20x32 A frame cabin Central KY
Post by: EaglesSJ on January 04, 2012, 01:46:17 AM
Post by: EaglesSJ on January 04, 2012, 01:46:17 AM
Quote from: southbalto on January 03, 2012, 10:12:01 AM
I've been following your progress since the start. Congrads on the new addition (s).
The only thing I've been really concerned with is the placement of that woodstove. Even with the shielding, the connector pipe going into the ceiling support looks way too close to the wall.
Also, you might want to look at a newer epa type stove. They throw a ton more heat than those old box type stoves.
Not sure if you read or not but there is nothing behind that shield except for a 10" pocket of air. There is no wood back there. I cut all the wood out from behind the shield before I put it up.
Also I was checking all the newer epa stoves that Lowes and tractor supply carried. (about 6 different models) and they all put out less btus than mine. Not sure if I just wasnt looking in the right spot or what but mine rates at 90000 BTU and most of the others rate from 60-80k.
Now back to the sheilding, at this moment it is a moot point because I cut out all combustible material in that corner and installed 5/8" fireboard in its place leaving a 1/2" air space in between the board and the rafters/studs. I am also going to install a small DC fan behind the stove to suck most of that hot air in and blow it across the room instead of being trapped in that corner.
Title: Re: 20x32 A frame cabin Central KY
Post by: southbalto on January 04, 2012, 09:47:24 AM
Post by: southbalto on January 04, 2012, 09:47:24 AM
Yea I was most concerned with the connection from the stove pipe to the class a support box. Single wall needs 18"...I'm not sure if the wall shielding reduces the clearances or not. It just looks really tight.
As for the stove, I'm suprised they are claiming 90K+ btus. I imagine you would have to run that thing really hard to get that kind of output.
Note that it's rated for a 800 sqft space
http://www.vogelzang.com/browse.cfm/standard-boxwood-stove/4,13.html
compare that to the englander 15 which is rated for a space more than twice the size at 1800 sqft and claims a 60K btu output.
http://www.homedepot.com/Building-Materials-Fireplace-Hearth-Freestanding-Stoves/h_d1/N-5yc1vZaqyr/R-100157775/h_d2/ProductDisplay?langId=-1&storeId=10051&catalogId=10053
Title: Re: 20x32 A frame cabin Central KY
Post by: PorkChopsMmm on January 04, 2012, 01:28:01 PM
Post by: PorkChopsMmm on January 04, 2012, 01:28:01 PM
Here is a PDF explaining how to set up the Outback for 2 wire or 3 wire starting generators. I saved this for when I hook up my generator in the future.
http://www.outbackpower.com/pdf/tech_notes/advanced_generator_start.pdf (http://www.outbackpower.com/pdf/tech_notes/advanced_generator_start.pdf)
http://www.outbackpower.com/pdf/tech_notes/advanced_generator_start.pdf (http://www.outbackpower.com/pdf/tech_notes/advanced_generator_start.pdf)
Title: Re: 20x32 A frame cabin Central KY
Post by: EaglesSJ on January 04, 2012, 01:53:31 PM
Post by: EaglesSJ on January 04, 2012, 01:53:31 PM
Quote from: southbalto on January 04, 2012, 09:47:24 AM
Yea I was most concerned with the connection from the stove pipe to the class a support box. Single wall needs 18"...I'm not sure if the wall shielding reduces the clearances or not. It just looks really tight.
As for the stove, I'm suprised they are claiming 90K+ btus. I imagine you would have to run that thing really hard to get that kind of output.
Note that it's rated for a 800 sqft space
http://www.vogelzang.com/browse.cfm/standard-boxwood-stove/4,13.html
compare that to the englander 15 which is rated for a space more than twice the size at 1800 sqft and claims a 60K btu output.
http://www.homedepot.com/Building-Materials-Fireplace-Hearth-Freestanding-Stoves/h_d1/N-5yc1vZaqyr/R-100157775/h_d2/ProductDisplay?langId=-1&storeId=10051&catalogId=10053
Your looking at the wrong stove. We have the US stove 2421 which is alot larger than that vozelgang and is rated for 1600 sq ft.
http://www.northerntool.com/shop/tools/product_200446396_200446396?cm_mmc=Aggregates-_-Google-_-Heaters,%20Stoves%20+%20Fireplaces%3EWood%20Stoves-_-175085
I am thinking of buying a 8" pipe and making a double wall pipe around the top piece of 6" to greatly decrease my heat in those tight clearances.
Title: Re: 20x32 A frame cabin Central KY
Post by: southbalto on January 04, 2012, 03:26:28 PM
Post by: southbalto on January 04, 2012, 03:26:28 PM
Got you. Yea, the double wall pipe allows you to get as close as 6" i believe...
Everything looks great btw...
Everything looks great btw...
Title: Re: 20x32 A frame cabin Central KY
Post by: EaglesSJ on January 05, 2012, 09:37:10 PM
Post by: EaglesSJ on January 05, 2012, 09:37:10 PM
Here is a couple pics of SOME of yesterdays work. I also trimmed out some windows and both doors in the addition. Starting on the closet today, got some rough sawed red cedar from the local mill and it smells fantastic! Really gonna be nice in the closet. Still have to trim it out and build a set of doors. Pics to come tomorrow hopefully.
Here are the pics of the new hearth setup. Its 5/8" fireboard with an air gap behind it painted it a dark grayish blue to match the stones underneath and then I added a 8" pipe around the top section of 6" to act as a heat shield. It now stays cool enough to lay your hand on the upper most corner where the pipe meets the box. (hottest portion of the whole set up) I am going to add a small fan in the corner to help circulate the air away from the whole area as much as possible if for no other reason than to distribute the heat through the cabin a bit more.
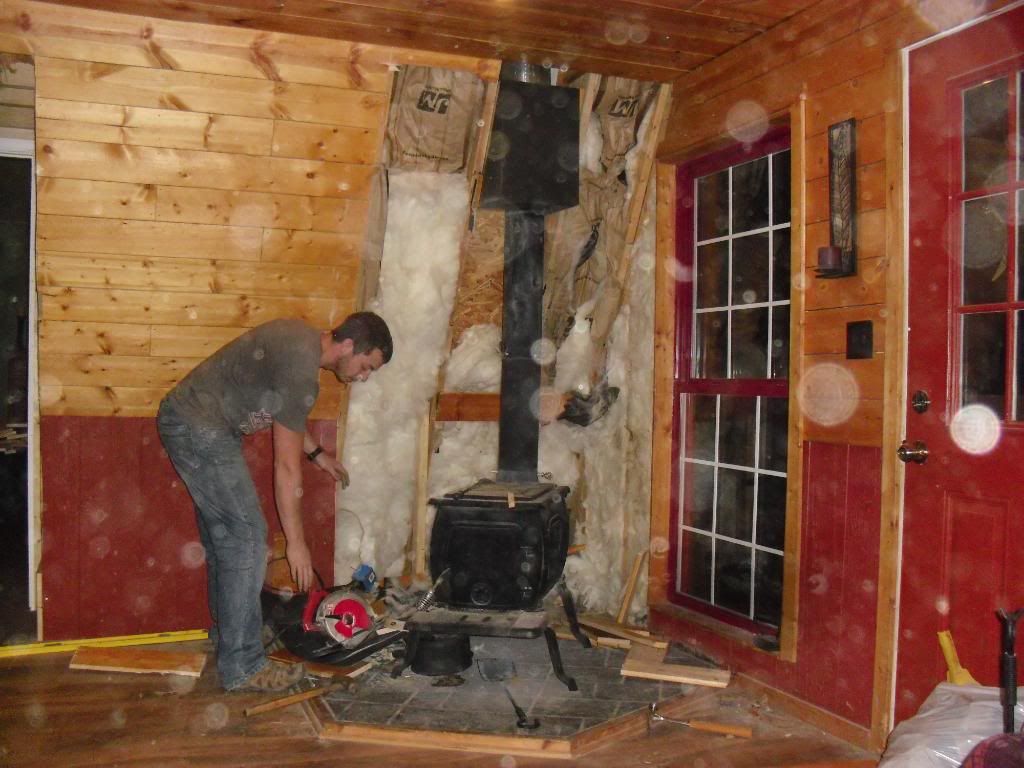
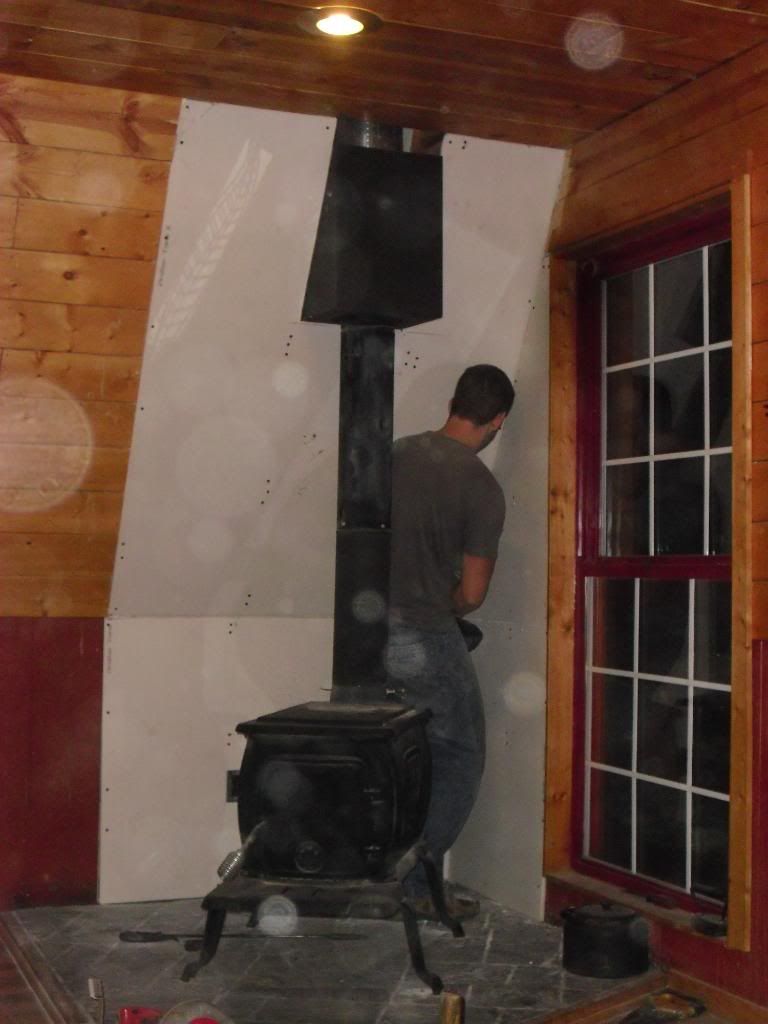
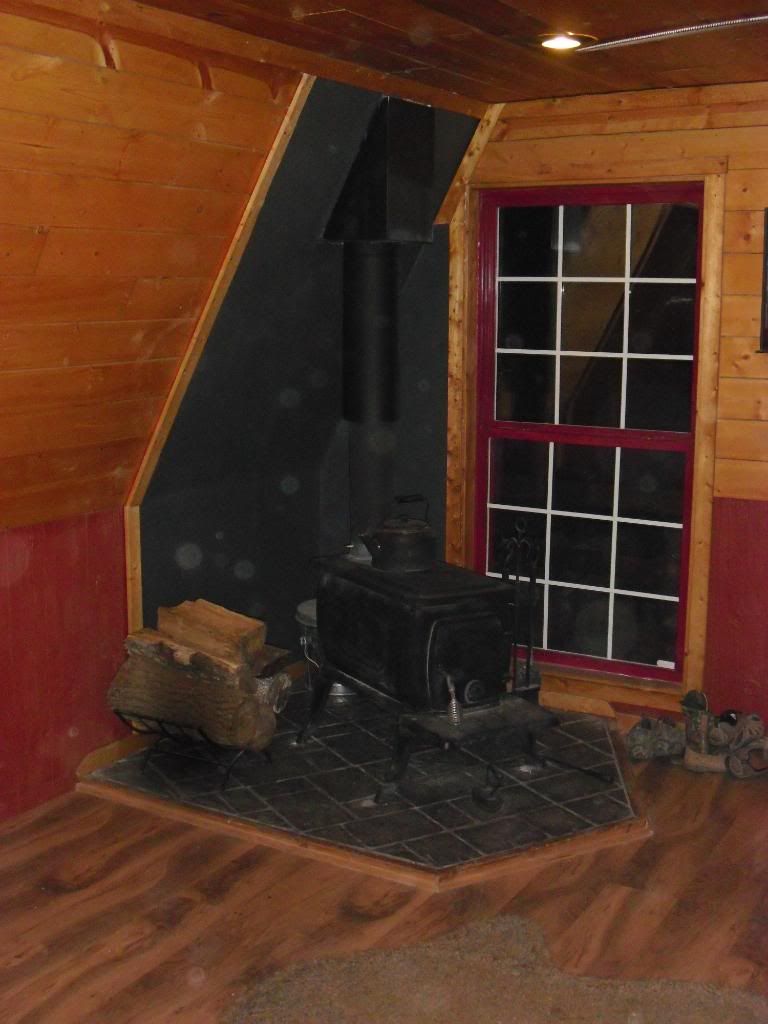
Here are the pics of the new hearth setup. Its 5/8" fireboard with an air gap behind it painted it a dark grayish blue to match the stones underneath and then I added a 8" pipe around the top section of 6" to act as a heat shield. It now stays cool enough to lay your hand on the upper most corner where the pipe meets the box. (hottest portion of the whole set up) I am going to add a small fan in the corner to help circulate the air away from the whole area as much as possible if for no other reason than to distribute the heat through the cabin a bit more.
Title: Re: 20x32 A frame cabin Central KY
Post by: OkieJohn2 on January 06, 2012, 07:20:22 AM
Post by: OkieJohn2 on January 06, 2012, 07:20:22 AM
Just curious if you have seen these:
http://www.amazon.com/Caframo-Ecofan-Original-Black-Blade/dp/B001AYXNUY (http://www.amazon.com/Caframo-Ecofan-Original-Black-Blade/dp/B001AYXNUY)
I have never seen one in use, perhaps other people here have more info. They are rather cool looking tho, if they work.
http://www.amazon.com/Caframo-Ecofan-Original-Black-Blade/dp/B001AYXNUY (http://www.amazon.com/Caframo-Ecofan-Original-Black-Blade/dp/B001AYXNUY)
I have never seen one in use, perhaps other people here have more info. They are rather cool looking tho, if they work.
Title: Re: 20x32 A frame cabin Central KY
Post by: Redoverfarm on January 06, 2012, 07:48:00 AM
Post by: Redoverfarm on January 06, 2012, 07:48:00 AM
Quote from: OkieJohn2 on January 06, 2012, 07:20:22 AM
Just curious if you have seen these:
http://www.amazon.com/Caframo-Ecofan-Original-Black-Blade/dp/B001AYXNUY (http://www.amazon.com/Caframo-Ecofan-Original-Black-Blade/dp/B001AYXNUY)
I have never seen one in use, perhaps other people here have more info. They are rather cool looking tho, if they work.
Okie my parents have one and yes they do work. Not sure about this one but the original does. I think there's as about $50 more. They sat theres on the stove top as it needs a good bit of heat to work.
Title: Re: 20x32 A frame cabin Central KY
Post by: MountainDon on January 06, 2012, 10:04:40 AM
Post by: MountainDon on January 06, 2012, 10:04:40 AM
I have also heard from a couple people who own them that they are not sure they really do much good or are worth the expenditure. ??? They work best when the stove is really hot. My experience has been that a hot stove manages to create convection currents reasonably well. ???
We do get reasonable use from our ceiling fan and it also helps in warm weather.
We do get reasonable use from our ceiling fan and it also helps in warm weather.
Title: Re: 20x32 A frame cabin Central KY
Post by: Bob S. on January 06, 2012, 04:12:50 PM
Post by: Bob S. on January 06, 2012, 04:12:50 PM
AWESOME!!!
Title: Re: 20x32 A frame cabin Central KY
Post by: scott b on January 06, 2012, 07:31:39 PM
Post by: scott b on January 06, 2012, 07:31:39 PM
Hi, I have been following your thread for quite a while now and I have to say you're doing a great job. I'm trying to make a decision and thought maybe you could help. I recently bought a run down A-frame that I have been remodeling, or rebuilding I should say. I refaced the rafters with osb, then tar papered it, then put on purlins and then the steel roof. I am now ready to insulate the inside, but not sure the route to go. I know spray foam is the best way to go but it's a little pricier than I'd like. I would like to go with batt insulation but I'm being told that I need to vent it with baffles because the plywood is going to sweat. I noticed that you did not vent yours and was just wondering if you had heard anything about this. Is it better to vent or not vent??
Title: Re: 20x32 A frame cabin Central KY
Post by: EaglesSJ on January 06, 2012, 11:24:58 PM
Post by: EaglesSJ on January 06, 2012, 11:24:58 PM
Quote from: scott b on January 06, 2012, 07:31:39 PM
Hi, I have been following your thread for quite a while now and I have to say you're doing a great job. I'm trying to make a decision and thought maybe you could help. I recently bought a run down A-frame that I have been remodeling, or rebuilding I should say. I refaced the rafters with osb, then tar papered it, then put on purlins and then the steel roof. I am now ready to insulate the inside, but not sure the route to go. I know spray foam is the best way to go but it's a little pricier than I'd like. I would like to go with batt insulation but I'm being told that I need to vent it with baffles because the plywood is going to sweat. I noticed that you did not vent yours and was just wondering if you had heard anything about this. Is it better to vent or not vent??
I was pretty sure that the only thing that sweated was the inside of the metal roof. That is the point in putting tar paper on before the roof. I dont think you will have a bit of trouble installing batts. I havent and Ive now had the walls apart and could see if there was any water.
Title: Re: 20x32 A frame cabin Central KY
Post by: EaglesSJ on January 06, 2012, 11:32:44 PM
Post by: EaglesSJ on January 06, 2012, 11:32:44 PM
pics as promised, going to add some bigger knobs but other than that the closet is finished.


Title: Re: 20x32 A frame cabin Central KY
Post by: MountainDon on January 07, 2012, 10:49:39 AM
Post by: MountainDon on January 07, 2012, 10:49:39 AM
scott b. With your roof sheathed on the outside with OSB there is the possibility of moisture laden air from the interior contacting that surface when the space is insulated with batts. If that surface is below the dew point (http://countryplans.com/smf/index.php?topic=11723.msg150497#msg150497) moisture will condense on that surface. That's the reason cathedral ceilings require an air space with batt type insulation; and an A-frame is pretty much all cathedral roof. Spray foam of sufficient thickness will bond to the underside and make it warmer than the dew point. Rigid foam sheet insulation added to the outside of the OSB sheathing will do the same thing and permit the cavity to be filled with batt inmsulation.
Title: Re: 20x32 A frame cabin Central KY
Post by: EaglesSJ on January 07, 2012, 09:58:08 PM
Post by: EaglesSJ on January 07, 2012, 09:58:08 PM
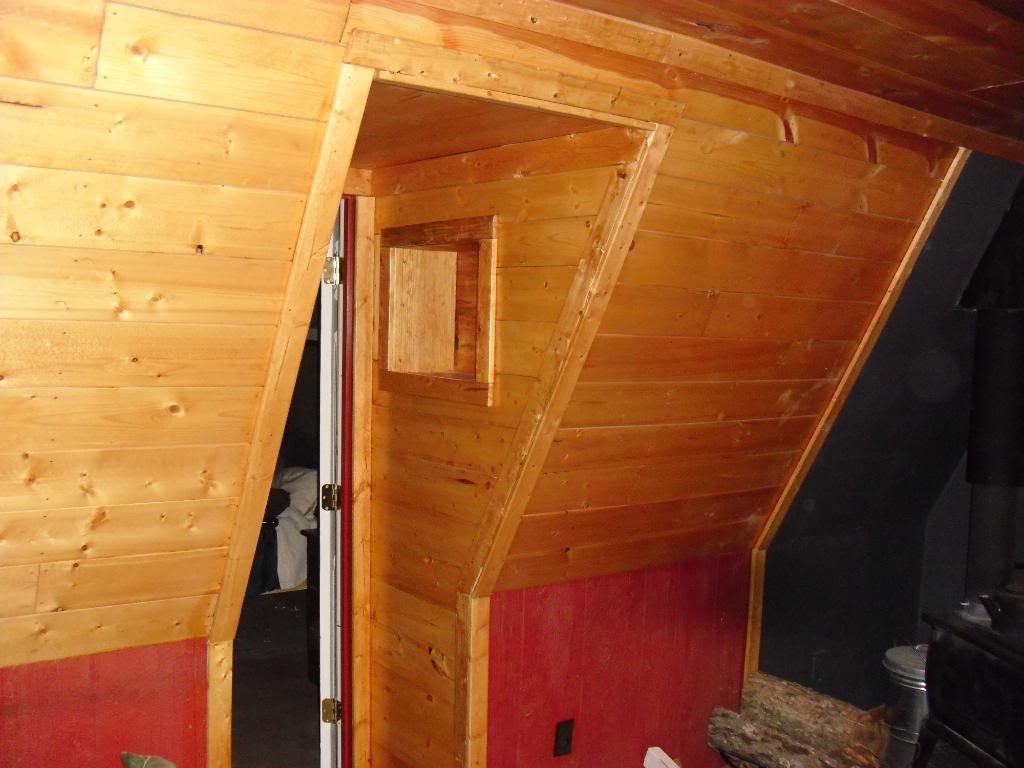

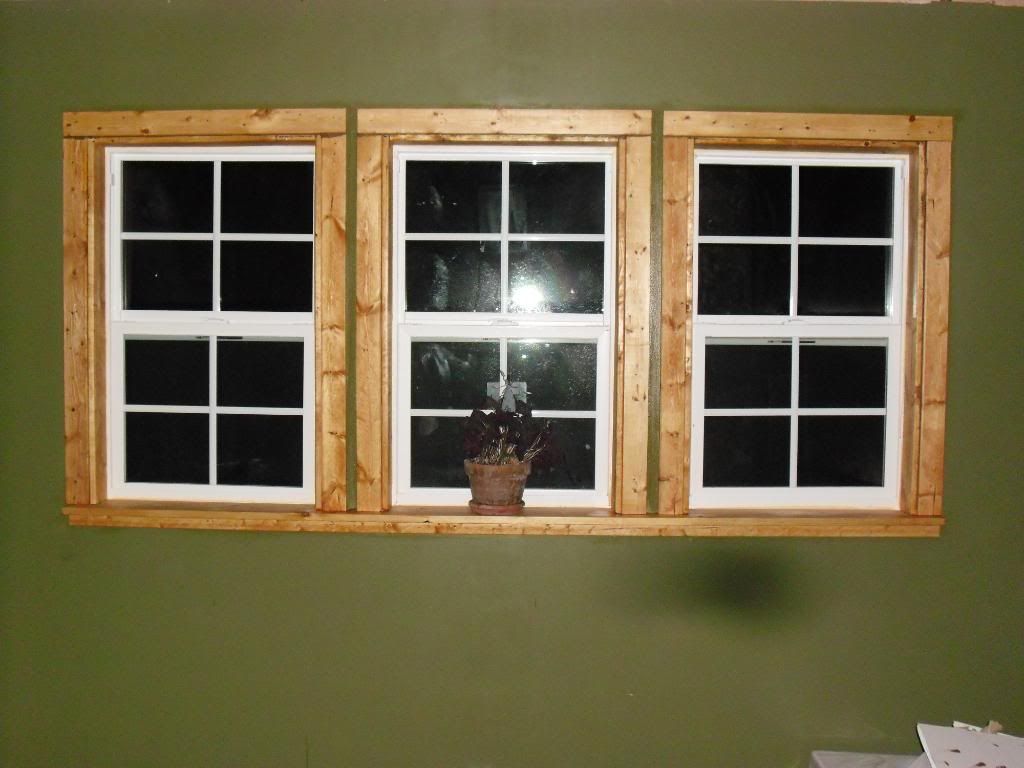

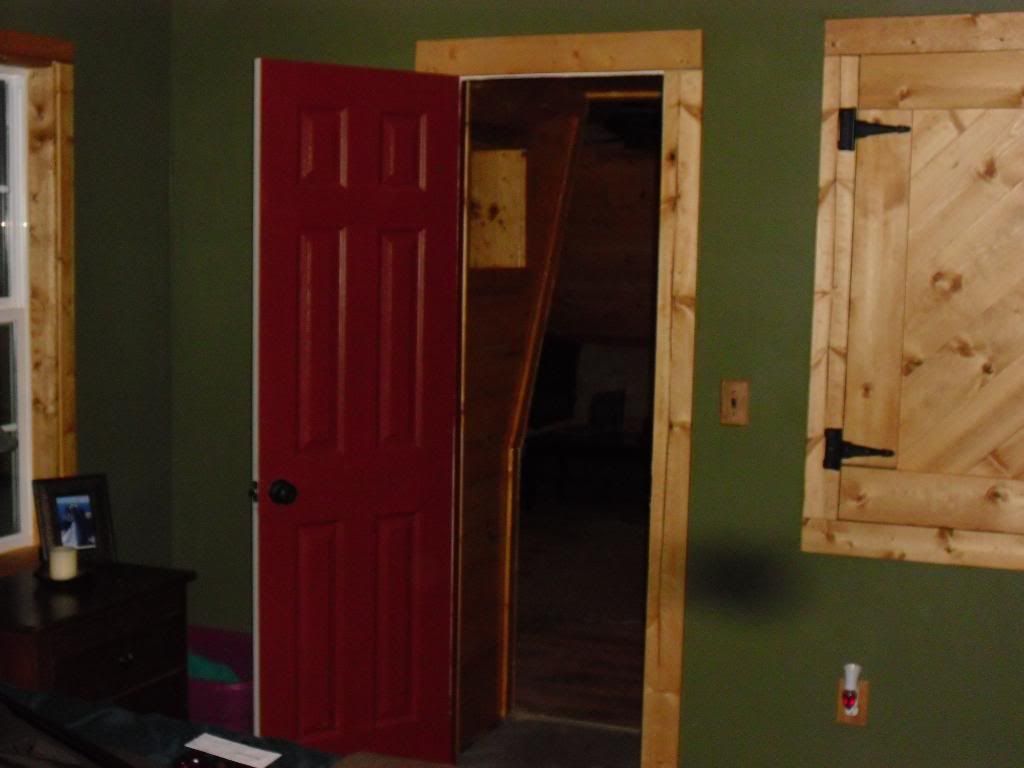
Title: Re: 20x32 A frame cabin Central KY
Post by: ben2go on January 07, 2012, 10:25:43 PM
Post by: ben2go on January 07, 2012, 10:25:43 PM
That looks great.Nice work. [cool]
Title: Re: 20x32 A frame cabin Central KY
Post by: OlJarhead on January 08, 2012, 10:33:00 AM
Post by: OlJarhead on January 08, 2012, 10:33:00 AM
Very Nice!
Title: Re: 20x32 A frame cabin Central KY
Post by: EaglesSJ on January 16, 2012, 02:58:47 PM
Post by: EaglesSJ on January 16, 2012, 02:58:47 PM
well even after the new hearth I still wasnt happy with all the heat that was building up in that corner. I tried putting a fan back there and various other alternatives but when I would go to bed at night I just didnt feel safe knowing how hot all that wood and the window and such were getting. The only other thing to do short of a complete remodel of the cabin was to get a different stove. So thats just what I done and boy are we glad we did. This thing uses probably 1/4 of the wood the other one did, it keeps the house alot warmer, and it has that nifty little window which we are growing quite fond of. The best thing is that it has a built in heat shield all the way around and a blower so the clearances are reduced to 6" to the rear (we have it at about 20") and 8" to the sides (we have it about 16") as for the pipe going into the ceiling it never even gets warm to the touch! The wall and the whole area behind the stove is nice and cool now. We are very happy and feel alot better about the safety aspect of it.
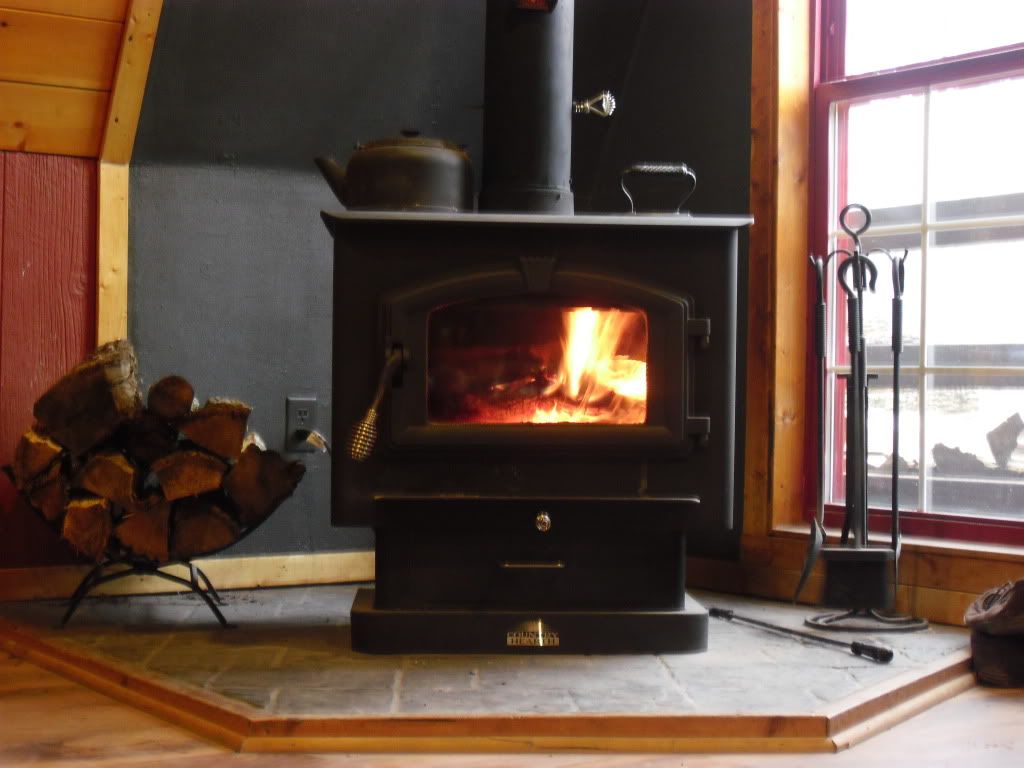
Title: Re: 20x32 A frame cabin Central KY
Post by: rhelm on January 16, 2012, 03:06:31 PM
Post by: rhelm on January 16, 2012, 03:06:31 PM
Right on! Looks great!
Title: Re: 20x32 A frame cabin Central KY
Post by: MountainDon on January 16, 2012, 03:17:39 PM
Post by: MountainDon on January 16, 2012, 03:17:39 PM
[thumb] Looks like a good choice. Much better than the old one. I'm sure you will be much happier with it. [thumb]
Title: Re: 20x32 A frame cabin Central KY
Post by: rick91351 on January 16, 2012, 04:11:09 PM
Post by: rick91351 on January 16, 2012, 04:11:09 PM
Thanks I will sleep better as well knowing that has been changed. Not being a smart ass! ;D No really it has been bothering me as well. I get way to wired into some of these projects and builds. [cool] Rick
Title: Re: 20x32 A frame cabin Central KY
Post by: southbalto on January 17, 2012, 09:25:58 AM
Post by: southbalto on January 17, 2012, 09:25:58 AM
Looks great.........
The secondary combustion system on those things really makes for a nice fireworks show. I remember when I switched over from a 1970s VC Defiant to a new epa stove there was a bit of a learning curve. My old stove seemed to burn 1 year oak no problem.....the new one needs super dry wood 2-3 year bucked, split, and stacked. That really was the only downside. No brainer given the substantially increased heat output and clean burns. When my epa stove is running at temp there is zero smoke coming off the stack...
Your chimney system is relatively short.....Any issues with draft and getting the top plate up to temperature?
Title: Re: 20x32 A frame cabin Central KY
Post by: ajbremer on January 19, 2012, 06:04:20 AM
Post by: ajbremer on January 19, 2012, 06:04:20 AM
Thursday Morning - January 19th, 2012 @ 5:01am Oklahoma
Hey EagleSJ,
That stove looks great. I think I found it on the internet, is it the Country Hearth Wood Burning Model 2500? I
see that it runs around $1,300. I would imagine it's around a $2000 project with all the triple wall pipe etc?
Here's the link that I found to the stove:
http://www.northlineexpress.com/item/5SV-2500/Country-Hearth-Woodburning-Stove-2500 (http://www.northlineexpress.com/item/5SV-2500/Country-Hearth-Woodburning-Stove-2500)
Title: Re: 20x32 A frame cabin Central KY
Post by: southbalto on January 19, 2012, 10:08:37 AM
Post by: southbalto on January 19, 2012, 10:08:37 AM
Quote from: ajbremer on January 19, 2012, 06:04:20 AM
Thursday Morning - January 19th, 2012 @ 5:01am Oklahoma
Hey EagleSJ,
That stove looks great. I think I found it on the internet, is it the Country Hearth Wood Burning Model 2500? I
see that it runs around $1,300. I would imagine it's around a $2000 project with all the triple wall pipe etc?
Here's the link that I found to the stove:
http://www.northlineexpress.com/item/5SV-2500/Country-Hearth-Woodburning-Stove-2500 (http://www.northlineexpress.com/item/5SV-2500/Country-Hearth-Woodburning-Stove-2500)
If you're in the market, and can wait a few more months, you might check lowes/HD. They typically have blow out sales on their EPA stoves beginning in March.
Title: Re: 20x32 A frame cabin Central KY
Post by: EaglesSJ on January 19, 2012, 11:21:51 AM
Post by: EaglesSJ on January 19, 2012, 11:21:51 AM
Quote from: ajbremer on January 19, 2012, 06:04:20 AM
Thursday Morning - January 19th, 2012 @ 5:01am Oklahoma
Hey EagleSJ,
That stove looks great. I think I found it on the internet, is it the Country Hearth Wood Burning Model 2500? I
see that it runs around $1,300. I would imagine it's around a $2000 project with all the triple wall pipe etc?
Here's the link that I found to the stove:
http://www.northlineexpress.com/item/5SV-2500/Country-Hearth-Woodburning-Stove-2500 (http://www.northlineexpress.com/item/5SV-2500/Country-Hearth-Woodburning-Stove-2500)
Its not the 2500 model its the 2000 model. I bought the stove at tractor supply and it was on sale for $499. If you have one in your area you might want to look into it. If not they have them for sale every year for $599. They go on sale for 100 bucks off around january every year. I paid about 100 bucks each for 3 ft sections of chimney pipe. If you want to do some reading on it you can search for US STOVES 2000 model. Lots of good reviews and even a couple videos I think.
Title: Re: 20x32 A frame cabin Central KY
Post by: ajbremer on January 19, 2012, 07:48:06 PM
Post by: ajbremer on January 19, 2012, 07:48:06 PM
Thursday Night - January 19th, 2012 @ 6:46pm Oklahoma
Hey Eagle,
Wow, thanks for the info on the stove. My wife loves it and the price is great! I'm pretty sure we're going to buy one of them, maybe even kind of copy how you build your back and platform.
Thanks again.
Hey Eagle,
Wow, thanks for the info on the stove. My wife loves it and the price is great! I'm pretty sure we're going to buy one of them, maybe even kind of copy how you build your back and platform.
Thanks again.
Title: Re: 20x32 A frame cabin Central KY
Post by: EaglesSJ on January 20, 2012, 07:32:03 AM
Post by: EaglesSJ on January 20, 2012, 07:32:03 AM
Sounds great to me. Anyone have any ideas on how to get a transfer of air between the rooms going. Last night it was 84 degrees in the living room and only 58 in the addition. Thats an incredible temp difference. Not only that but it was downright uncomfortable! :)
Title: Re: 20x32 A frame cabin Central KY
Post by: Redoverfarm on January 20, 2012, 08:55:59 AM
Post by: Redoverfarm on January 20, 2012, 08:55:59 AM
Being that there is just one doorway between the two rooms it is doubtful that you will ever get enough warm air transfered that way. You may be able to build a couple of air chase's near the ceiling in the stove room and another for cold air return near the floor. Not sure whether natural convection will be enough though. You might have to assist it with a low voltage fan in the chase.
As a temporary solution something like this might help
http://shop.sportsmansguide.com/net/cb/door-frame-fan.aspx?a=196430
As a temporary solution something like this might help
http://shop.sportsmansguide.com/net/cb/door-frame-fan.aspx?a=196430
Title: Re: 20x32 A frame cabin Central KY
Post by: southbalto on January 20, 2012, 10:12:51 AM
Post by: southbalto on January 20, 2012, 10:12:51 AM
Quote from: EaglesSJ on January 20, 2012, 07:32:03 AM
Sounds great to me. Anyone have any ideas on how to get a transfer of air between the rooms going. Last night it was 84 degrees in the living room and only 58 in the addition. Thats an incredible temp difference. Not only that but it was downright uncomfortable! :)
I've struggled with this too. I've found it to be way more effective to position fans so that they blow the colder air into the stove room as opposed to the other way around.
Would it be possible to cut out an interior window at the top of the stairs providing air flow to the addition? It would probably make for a nice convection loop.
Title: Re: 20x32 A frame cabin Central KY
Post by: glenn kangiser on January 20, 2012, 11:53:30 AM
Post by: glenn kangiser on January 20, 2012, 11:53:30 AM
Quote from: Redoverfarm on January 20, 2012, 08:55:59 AM
Being that there is just one doorway between the two rooms it is doubtful that you will ever get enough warm air transfered that way. You may be able to build a couple of air chase's near the ceiling in the stove room and another for cold air return near the floor. Not sure whether natural convection will be enough though. You might have to assist it with a low voltage fan in the chase.
As a temporary solution something like this might help
http://shop.sportsmansguide.com/net/cb/door-frame-fan.aspx?a=196430
I used to build stoves and we had a model that was ducted underneath and a return under the floor came up under the stove. As the air was heated in the double wall of the stove convection caused it to rise and pull the cold air from under the floor in the back room out and replacement warm air was pulled in near the top of the room or through an open door and wall vent. As John mentioned the cold air must be drawn from the floor area directly from the room - ducted - for best effect.
Title: Re: 20x32 A frame cabin Central KY
Post by: Bob S. on January 20, 2012, 05:40:22 PM
Post by: Bob S. on January 20, 2012, 05:40:22 PM
It always amazes me how much information you can glean from this forum.
I would never have thought about a duct running from the back bedroom out to under the stove. So simple it would have to work.
I think he could modify the heat shield that he has on the stove in some fashion.
Who knows might even help keep the pipes from freezing.
I would never have thought about a duct running from the back bedroom out to under the stove. So simple it would have to work.
I think he could modify the heat shield that he has on the stove in some fashion.
Who knows might even help keep the pipes from freezing.
Title: Re: 20x32 A frame cabin Central KY
Post by: EaglesSJ on January 28, 2012, 02:15:12 PM
Post by: EaglesSJ on January 28, 2012, 02:15:12 PM
first coat of stain on the new siding. Still need to put another coat to make it match the main part of the cabin. Progress is slow I know. I can only do what money allows these days :(

Title: Re: 20x32 A frame cabin Central KY
Post by: archimedes on January 28, 2012, 02:46:20 PM
Post by: archimedes on January 28, 2012, 02:46:20 PM
looking good [cool]
Title: Re: 20x32 A frame cabin Central KY
Post by: Sassy on January 28, 2012, 10:02:39 PM
Post by: Sassy on January 28, 2012, 10:02:39 PM
Looks wonderful! Great job :)
Title: Re: 20x32 A frame cabin Central KY
Post by: ajbremer on January 29, 2012, 04:44:32 AM
Post by: ajbremer on January 29, 2012, 04:44:32 AM
That is very beautiful and very well done.
Title: Re: 20x32 A frame cabin Central KY
Post by: OlJarhead on January 29, 2012, 05:39:37 PM
Post by: OlJarhead on January 29, 2012, 05:39:37 PM
Very nice!
Do you ever have problems with the draft of that chimney? I won't lecture on it, but I'm curious about it's performance.
Thanks
Do you ever have problems with the draft of that chimney? I won't lecture on it, but I'm curious about it's performance.
Thanks
Title: Re: 20x32 A frame cabin Central KY
Post by: EaglesSJ on January 29, 2012, 06:20:55 PM
Post by: EaglesSJ on January 29, 2012, 06:20:55 PM
When i had the other stove in here with that short straight pipe it sounded like a jet engine it drew so well. After I installed the new stove and added the two 90s it didnt draw as well. So I added another 3 ft piece of chimney to it and now it draws just as well as before the new stove and the added elbows. I was under the impression that a chimney had to extend past the top of the house for it to draw. However I dont see how this thing could possibly be any better than it is right now. I NEVER have any smoke when i open the door and it always burns good. Even lighting a small piece of paper wadded up it will try to suck it up the chimney.
Perhaps it is because the wind comes from that side of the house most of the time? I wish I knew the reason. Regardless Im thankful that it does.
Perhaps it is because the wind comes from that side of the house most of the time? I wish I knew the reason. Regardless Im thankful that it does.
Title: Re: 20x32 A frame cabin Central KY
Post by: EaglesSJ on January 29, 2012, 06:24:23 PM
Post by: EaglesSJ on January 29, 2012, 06:24:23 PM
I will also add that it doesnt take long at all. Perhaps 30-45 minutes from making a new fire for the smoke to disappear from the top of the chimney and it to burn nice and hot creating full combustion with all the gases.
Title: Re: 20x32 A frame cabin Central KY
Post by: OlJarhead on February 02, 2012, 12:28:43 AM
Post by: OlJarhead on February 02, 2012, 12:28:43 AM
Good to hear. I've seen others done similarly and wondered about the draft. Having it in the windy side is likely a big help!
Title: Re: 20x32 A frame cabin Central KY
Post by: EaglesSJ on February 13, 2012, 06:45:59 PM
Post by: EaglesSJ on February 13, 2012, 06:45:59 PM
Contemplating adding an outside air kit to my wood stove to see if I can get more heat out of it. Whats the consensus on this? Does an OAK give you more heat by sucking less air from the room into the stove or is it a waste of time unless your stove has trouble with draft?
Title: Re: 20x32 A frame cabin Central KY
Post by: MountainDon on February 13, 2012, 09:10:59 PM
Post by: MountainDon on February 13, 2012, 09:10:59 PM
I'm not certain on this..., I'm thinking out loud. Species vary in heat content by virtue of their weight, density. A 6 inch round of oak contains more BTU's than the same size stick of aspen because there is more wood fiber in the log. So, it seems to be that per BTU either wood will consume the same amount of air. Does that sound reasonable, or not? Anyone?
If that is correct then the heat output of the stove is dependent on how much air it can intake and exhaust. A load of oak will last longer than a load of aspen. The longer burn time produces more BTU in total but perhaps there is not all that much difference in the number of BTU's per hour? ???
Does your stove burn brighter / better with a nearby window opened?
We have a fresh air intake. I did notice the stove performed better. The stove also performed better with a window slightly opened. I guess I got the cabin fairly well sealed against air infiltration. Theoretically a fresh air inlet directed right to the stove intake should result in a warmer cabin. I can't say I noticed our cabin being warmer. But our stove works better.
Another point to keep in mind is that ideally, according to the stove manufacturers specs we should have an extra couple feet of chimney, so that could have made a difference too. I wanted to add chimney only as a last resort as I didn't want to deal with the extra pipe length/height come time to clean the chimney.
Title: Re: 20x32 A frame cabin Central KY
Post by: Don_P on February 13, 2012, 10:56:45 PM
Post by: Don_P on February 13, 2012, 10:56:45 PM
Draft is a tricky thing, I think the best they can do is give best practices.
The whole time we've been working the mason and I have been really concerned over whether we would have adequate draft. The mountain rises steeply behind us which can cause a roller and the saddle we're on gets windswept from several directions.
We needed some heat and were still ~10' below the peak. I didn't want to risk flames up the wall, there is cement board up but I put a metal shroud over the top of the flue so flame can't jet up. Inside we needed to give the mason room to work so the pipe rises about 8 feet vertical out of the stove and then runs 8' horizontal. This shouldn't have drawn well at all. We didn't have a thing to worry about. I'm not saying it draws but you just open the door and drop logs in the neighborhood ;D. The only time it has smoked is when we poured cores and forgot to remove the board covering the flue d*. When wind hits that side it sure seems like we would get a backdraft, go figure.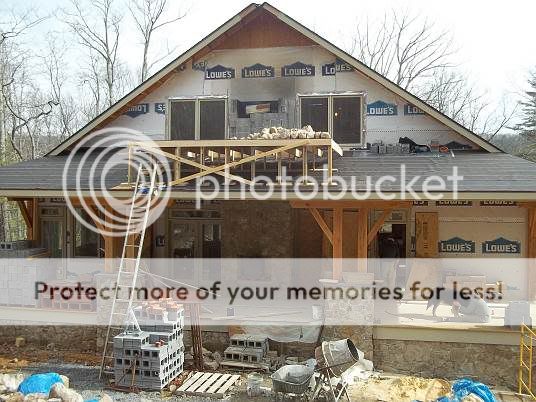
Title: Re: 20x32 A frame cabin Central KY
Post by: EaglesSJ on February 14, 2012, 10:29:35 AM
Post by: EaglesSJ on February 14, 2012, 10:29:35 AM
Quote from: MountainDon on February 13, 2012, 09:10:59 PM
I'm not certain on this..., I'm thinking out loud. Species vary in heat content by virtue of their weight, density. A 6 inch round of oak contains more BTU's than the same size stick of aspen because there is more wood fiber in the log. So, it seems to be that per BTU either wood will consume the same amount of air. Does that sound reasonable, or not? Anyone?
If that is correct then the heat output of the stove is dependent on how much air it can intake and exhaust. A load of oak will last longer than a load of aspen. The longer burn time produces more BTU in total but perhaps there is not all that much difference in the number of BTU's per hour? ???
Does your stove burn brighter / better with a nearby window opened?
We have a fresh air intake. I did notice the stove performed better. The stove also performed better with a window slightly opened. I guess I got the cabin fairly well sealed against air infiltration. Theoretically a fresh air inlet directed right to the stove intake should result in a warmer cabin. I can't say I noticed our cabin being warmer. But our stove works better.
Another point to keep in mind is that ideally, according to the stove manufacturers specs we should have an extra couple feet of chimney, so that could have made a difference too. I wanted to add chimney only as a last resort as I didn't want to deal with the extra pipe length/height come time to clean the chimney.
I agree with the theory on air consumption. Cracking a window does nothing for the fire. However with the air intake opened all the way I can start to feel cool air being pulled through seam where the knee wall meets the pine. It also comes in from under the kitchen stove as there is no knee wall behind this area. (didnt want to waste lumber covering an area that would be covered with cabinets and the stove.
Title: Re: 20x32 A frame cabin Central KY
Post by: MountainDon on February 14, 2012, 11:43:51 AM
Post by: MountainDon on February 14, 2012, 11:43:51 AM
I would install a fresh air delivery system with that...
Title: Re: 20x32 A frame cabin Central KY
Post by: EaglesSJ on February 16, 2012, 08:32:41 PM
Post by: EaglesSJ on February 16, 2012, 08:32:41 PM
We are closing off the vaulted ceiling and turning it into a guest bedroom. Got most of the floor done tonight. Were going to add a dormer out from the roof as well.
Title: Re: 20x32 A frame cabin Central KY
Post by: PorkChopsMmm on February 16, 2012, 09:01:25 PM
Post by: PorkChopsMmm on February 16, 2012, 09:01:25 PM
Good to hear. Looked like a lot of usable space up there. How is your solar doing? We moved to within a few miles of our cabin... move in is in May. Until then I have a lot of work to do!
Title: Re: 20x32 A frame cabin Central KY
Post by: umtallguy on February 16, 2012, 10:27:55 PM
Post by: umtallguy on February 16, 2012, 10:27:55 PM
whats your cabin cost up to now?
excluding the solar setup
excluding the solar setup
Title: Re: 20x32 A frame cabin Central KY
Post by: EaglesSJ on February 17, 2012, 05:19:34 PM
Post by: EaglesSJ on February 17, 2012, 05:19:34 PM
about 34-36k.
Title: Re: 20x32 A frame cabin Central KY
Post by: tommytebco on February 17, 2012, 07:58:15 PM
Post by: tommytebco on February 17, 2012, 07:58:15 PM
REGARDS OUTSIDE AIR.
Purpose of outside air supply is to avoid using warm air to feed the fire. The draft you refer to is sucking the air you want to be warm and replacing it with outside air from cracks, vents or open windows. The air feed brings the cold air direct to the fire, leaving the warm inside air to get even warmer.
A good idea in my opinion.
Title: Re: 20x32 A frame cabin Central KY
Post by: EaglesSJ on February 18, 2012, 11:05:58 PM
Post by: EaglesSJ on February 18, 2012, 11:05:58 PM
any idea where i can get some 2" flexible tube to make the "outside air kit" out of? lowes, walmart, local lumber place are all a no go
Title: Re: 20x32 A frame cabin Central KY
Post by: rick91351 on February 18, 2012, 11:25:02 PM
Post by: rick91351 on February 18, 2012, 11:25:02 PM
2.5 inch is a can do at Rockler or Woodcraft.
Title: Re: 20x32 A frame cabin Central KY
Post by: MountainDon on February 18, 2012, 11:35:54 PM
Post by: MountainDon on February 18, 2012, 11:35:54 PM
Why so small? My memory partly fails me on the exact size, but I believe the VC Aspen fresh air kit we bought used standard 4 inch flexible aluminum dryer vent pipe. The kit did not include the flex vent, only the adapter and mounting screw. The pipe I bought at either Big Orange or Big Blue, right off the shelf. Think that was 4 inch. On the outside I mated that to a standard aluminum dryer vent hood with the flap removed. There are special in-swing vents but I never bothered with ine. I did install a double layer of 1/4 hardware cloth with an insect screen between them.
Yes definitly a 4 inch pipe... I remember buying a new 4 1/4" hole saw.
Yes definitly a 4 inch pipe... I remember buying a new 4 1/4" hole saw.
Title: Re: 20x32 A frame cabin Central KY
Post by: Redoverfarm on February 18, 2012, 11:50:38 PM
Post by: Redoverfarm on February 18, 2012, 11:50:38 PM
My Hearthstone had a 3" to the stove. I used rigid 3" metal (24") and an adapter to 4" PVC through the wall. The biggest concern is insects and mice so you had better do as Don suggest. Not that they will get anywhere except into the stove but it could restrict your airflow.
Title: Re: 20x32 A frame cabin Central KY
Post by: MountainDon on February 19, 2012, 12:10:31 AM
Post by: MountainDon on February 19, 2012, 12:10:31 AM
Ok. Curiosity got the better of me. I looked back in my topic. I did use a 4 inch dryer vent hood. I also used an adapter from 4 inch down to 4 inch so I could connect 3 inch aluminum flex to the stove adapter. I don't remember where I found the adapter but I've had the local vehicle exhaust shop make adapters in the past... but this one is store bought.

Title: Re: 20x32 A frame cabin Central KY
Post by: rick91351 on February 19, 2012, 01:23:14 AM
Post by: rick91351 on February 19, 2012, 01:23:14 AM
Quote from: MountainDon on February 19, 2012, 12:10:31 AM
Ok. Curiosity got the better of me. I looked back in my topic. I did use a 4 inch dryer vent hood. I also used an adapter from 4 inch down to 4 inch so I could connect 3 inch aluminum flex to the stove adapter. I don't remember where I found the adapter but I've had the local vehicle exhaust shop make adapters in the past... but this one is store bought.
MD outside in the dryer vent, is that where you mounted the small fan to help pull the air?
The woodworker supply outfits use the 2.5 inch on a vent fixture mostly between the router tool fence and the main dust collector in a router cabinet. This pulls the waste and dust way from the tool. It does restrict a lot of the pull there. I would not think it would work very well on a stove but ??? guess you don't know until you try.
Title: Re: 20x32 A frame cabin Central KY
Post by: Mad-Dax on February 19, 2012, 01:58:07 AM
Post by: Mad-Dax on February 19, 2012, 01:58:07 AM
How are those Evermaxx batteries holding up?..I might get some for starting off my system as well.
Title: Re: 20x32 A frame cabin Central KY
Post by: EaglesSJ on February 19, 2012, 09:10:28 AM
Post by: EaglesSJ on February 19, 2012, 09:10:28 AM
Not sure why the pipe on my little stove is so small but the hook up on the back of the stove is only 2" in diameter. Here are some progress pics. Were going with an open joist ceiling and they are stained a dark walnut color. They look black in the pics but in reality they are a bit lighter and the wood grain is easily exposed. This the same color were going to stain the upstairs floor. Still waiting on the jacuzzi to get back from the paint shop. (had it coated the same color as the granite tile were going to use around it.)
Ready for Audrey's arrival:
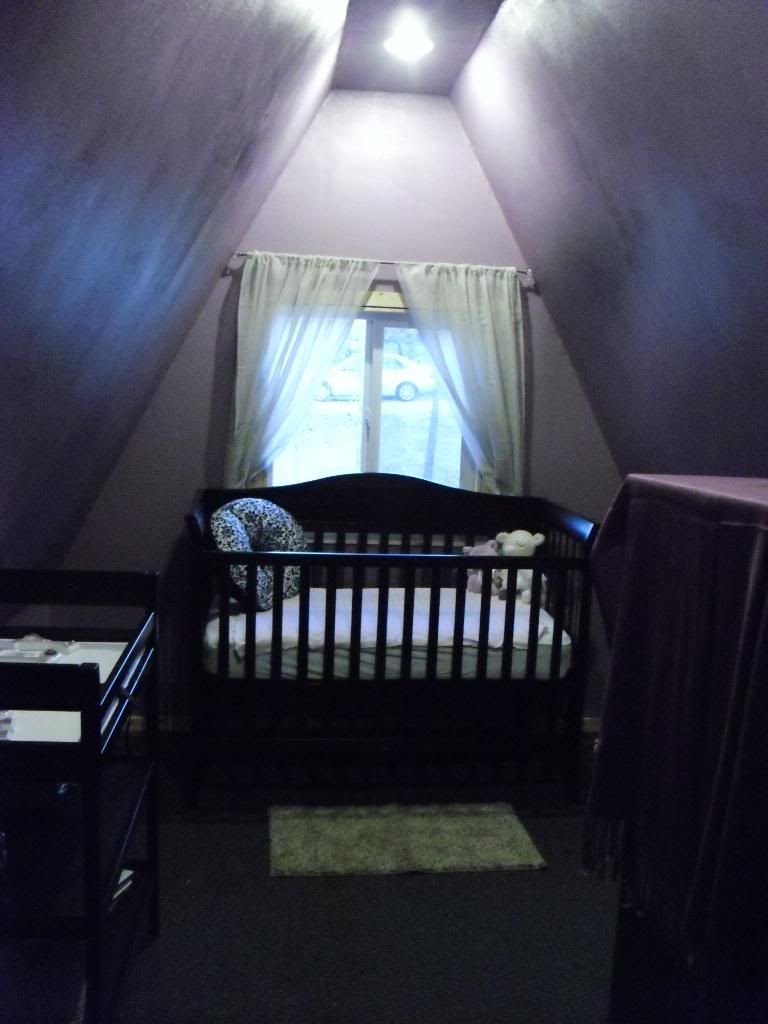

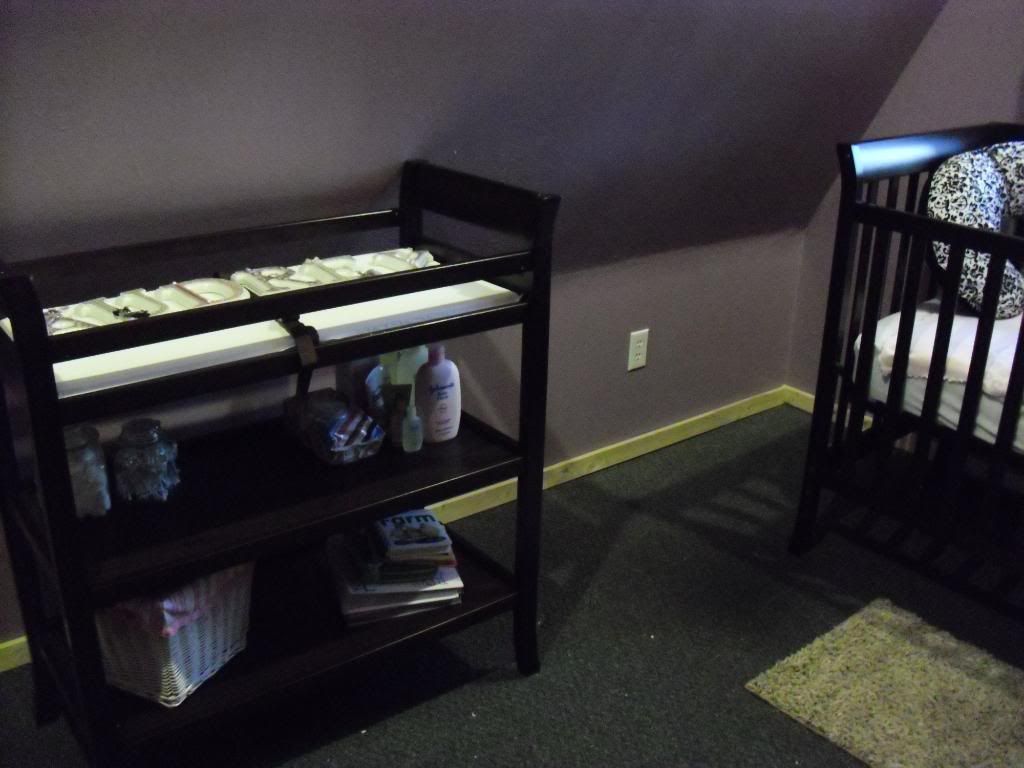
Colton in his "new" room:
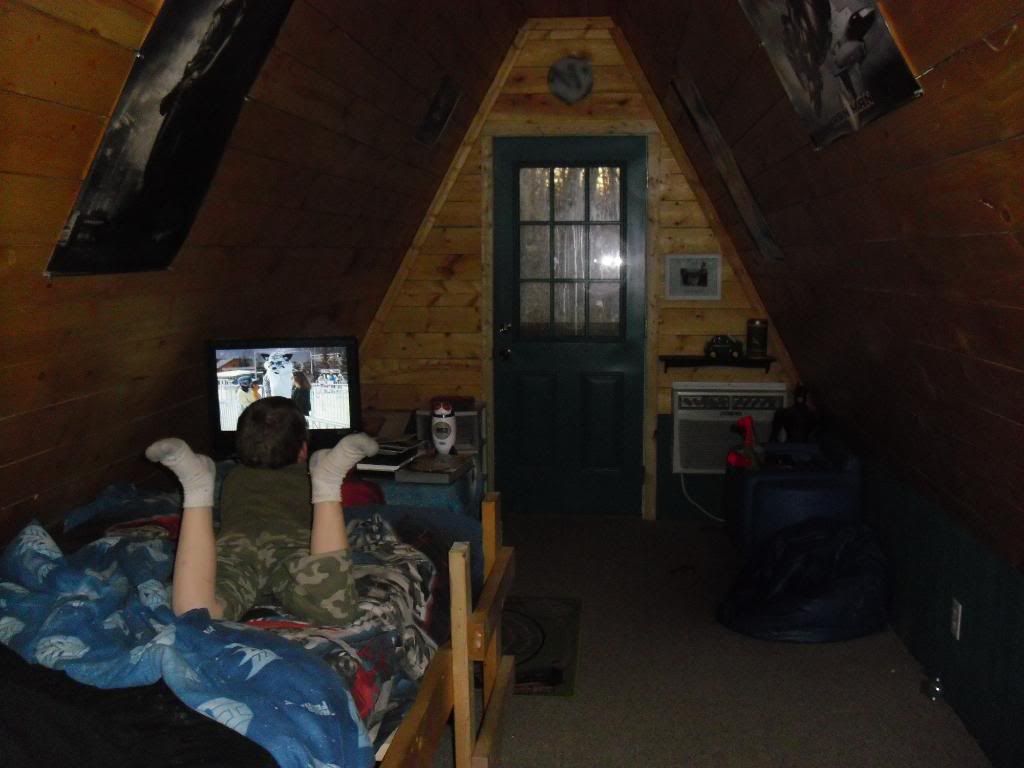
And the little progress I have made on our room thus far:
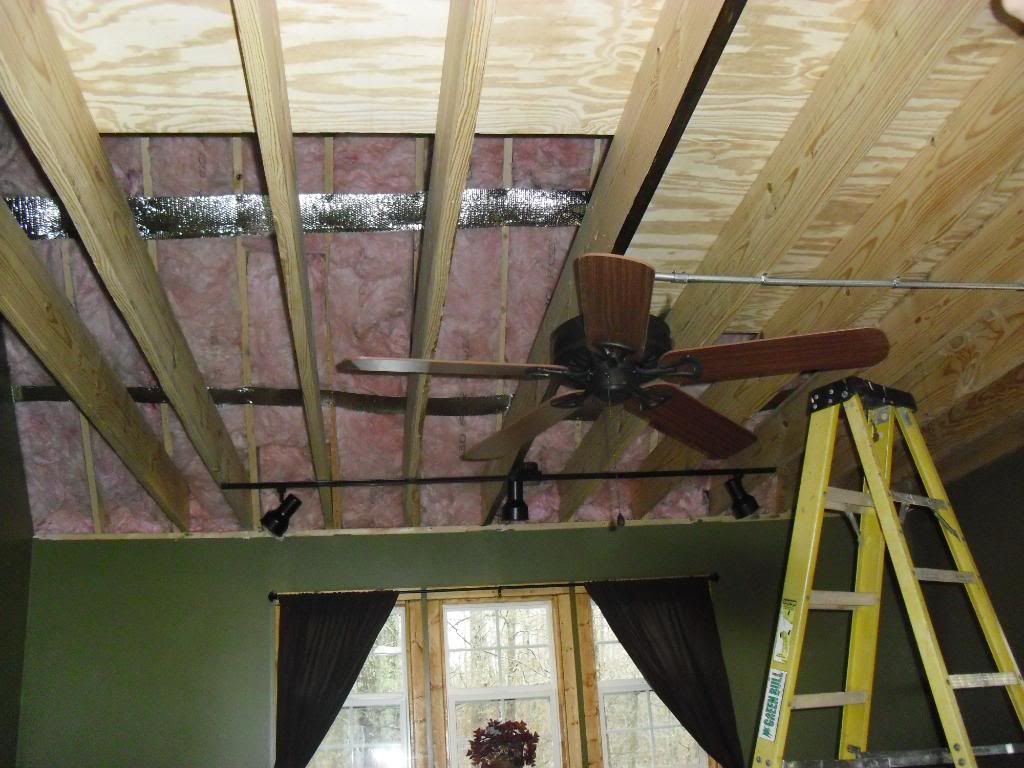
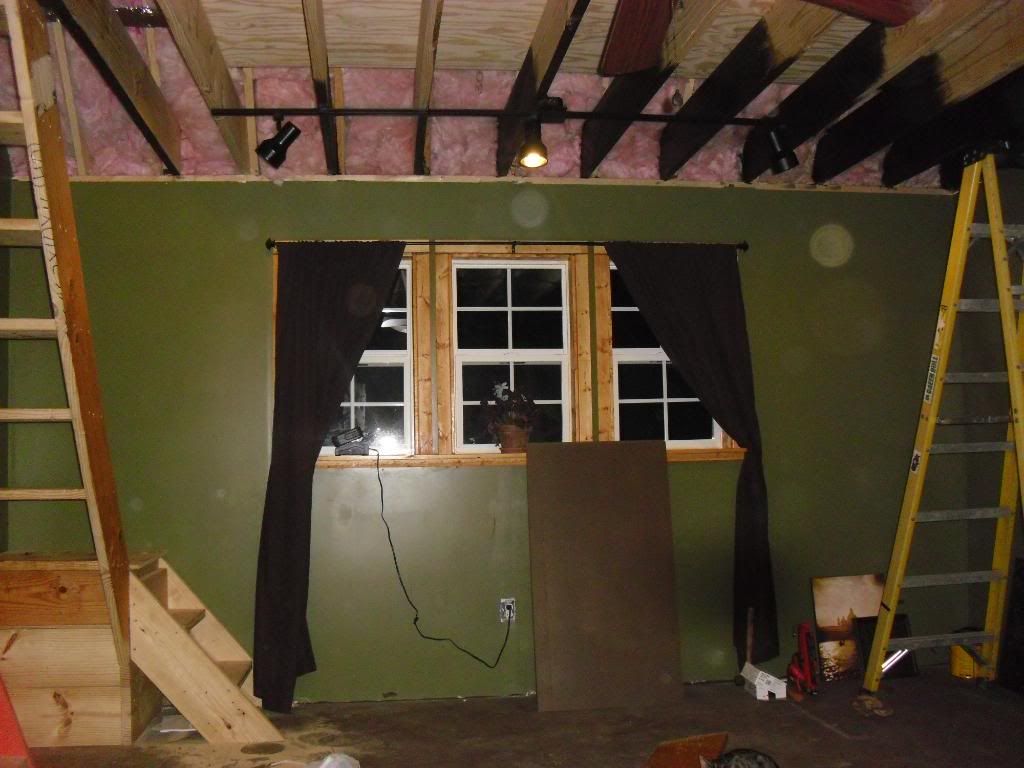
A little friend stopped by to visit us and we couldnt help but offer her a warm home. (Im a softy for animals)

And a pic of me and the queen headed out for date night

Ready for Audrey's arrival:
Colton in his "new" room:
And the little progress I have made on our room thus far:
A little friend stopped by to visit us and we couldnt help but offer her a warm home. (Im a softy for animals)
And a pic of me and the queen headed out for date night
Title: Re: 20x32 A frame cabin Central KY
Post by: EaglesSJ on February 19, 2012, 10:47:01 AM
Post by: EaglesSJ on February 19, 2012, 10:47:01 AM
One more of our belated Christmas present. 42" LED and PS3 slim/netflix package.

Title: Re: 20x32 A frame cabin Central KY
Post by: MountainDon on February 19, 2012, 12:51:09 PM
Post by: MountainDon on February 19, 2012, 12:51:09 PM

Title: Re: 20x32 A frame cabin Central KY
Post by: EaglesSJ on February 19, 2012, 01:49:09 PM
Post by: EaglesSJ on February 19, 2012, 01:49:09 PM
Quote from: Mad-Dax on February 19, 2012, 01:58:07 AM
How are those Evermaxx batteries holding up?..I might get some for starting off my system as well.
I would save my money and get better batteries. Ours started going bad after about a year. Walmart replaced all of them free of charge but it wasnt worth the hassle of disconnecting everything and hauling them up there.
Title: Re: 20x32 A frame cabin Central KY
Post by: phalynx on February 19, 2012, 07:26:53 PM
Post by: phalynx on February 19, 2012, 07:26:53 PM
That is simply a great home you have built for your family...
Title: Re: 20x32 A frame cabin Central KY
Post by: Mad-Dax on February 20, 2012, 10:39:47 PM
Post by: Mad-Dax on February 20, 2012, 10:39:47 PM
Quote from: phalynx on February 19, 2012, 07:26:53 PM
That is simply a great home you have built for your family...
I second that. You started your house about the same time I did mine...but you live in yours and mine just got barely dried in. You are inspiring though to get myself back in gear.
Title: Re: 20x32 A frame cabin Central KY
Post by: JohnJ on February 21, 2012, 11:59:53 PM
Post by: JohnJ on February 21, 2012, 11:59:53 PM
Great job on the home . . . and thanks for your Service to the Nation. I'm retired Army living in northeastern Tennessee.
I'm trying to understand the difference between building a cabin with a perimeter foundation and building one with piers like you did. (Foundation will be 12" diameter concrete piers reinforced with rebar spaced every 8 feet apart. 5 piers on either side and 5 down the middle for the center beam.)
The county inspector recommends a perimeter foundation and most homes around here have them. But what you and others on this Forum have built with piers looks pretty solid to me. I'm building what I call a 20 x 16 "shed" which will have a bathroom, bed, my computer, pool table, etc. basically my "man cave" but also suitable for my kids when they come visit. What I'm doing is a lot less complex than what you built.
Seeing as how you're an engineer :) I would appreciate any insight into the advantage of a perimeter vs a pier foundation. Even better, given that I'm basically building a Little House, what would you recommend?
John
Title: Re: 20x32 A frame cabin Central KY
Post by: EaglesSJ on February 22, 2012, 05:07:53 AM
Post by: EaglesSJ on February 22, 2012, 05:07:53 AM
The reason I chose a pier foundation is because my ground is so uneven. Had it not been for that I would have simply poured a concrete slab and built on top of that. No subfloor required that way. The piers are ALOT easier for the average joe to build. If you are only building a 20x16, 5 piers on either side and 5 down the middle is way overkill. Also if you dont want to fool with the concrete, 6x6 post with triangular bracing would work nice.
Title: Re: 20x32 A frame cabin Central KY
Post by: JohnJ on February 22, 2012, 01:54:52 PM
Post by: JohnJ on February 22, 2012, 01:54:52 PM
OK great. Yeah, piers look a lot easier. The county guy I spoke with today said there was no legal requirement but he recommended an 18-24" footer at least 6-8" thick beginning 18" from the top (frost depth). He said piers were fine as long as 1) the floor was anchored to the pier in some way and 2) he recommended building something around the perimeter of the house to protect pipes in winter and keep animals out.
What strikes me is that your home looks a lot bigger and heavier than anything I'm planning on building. So if it works for you it should work for me.
The real problem, I'm realizing, is that where i want to build is probably right on top of my septic system, water lines and electrical. I thought the septic was located further down hill but he said they're normally around 10-15 feet from the house. I'm trying to get someone to come out and locate the exact locations of my utilities but I have a feeling I'm dead in the water. Need to look for another site.
John
Title: Re: 20x32 A frame cabin Central KY
Post by: Southern Steve on March 28, 2012, 10:52:20 PM
Post by: Southern Steve on March 28, 2012, 10:52:20 PM
Eagles lad, where are you? Its been over a month. Hope everything is OK, that family is ok that you haven't slid off those steep roofs, etc. ??? ???
Title: Re: 20x32 A frame cabin Central KY
Post by: EaglesSJ on April 08, 2012, 12:27:35 PM
Post by: EaglesSJ on April 08, 2012, 12:27:35 PM
Im still around just busy with other things right now. Ill post up a couple pics though. Ill have pics of the completed pond area in a bit as we are working on a dock and rocks/landscaping, zipline, etc. But for now only have some zoomed in pics


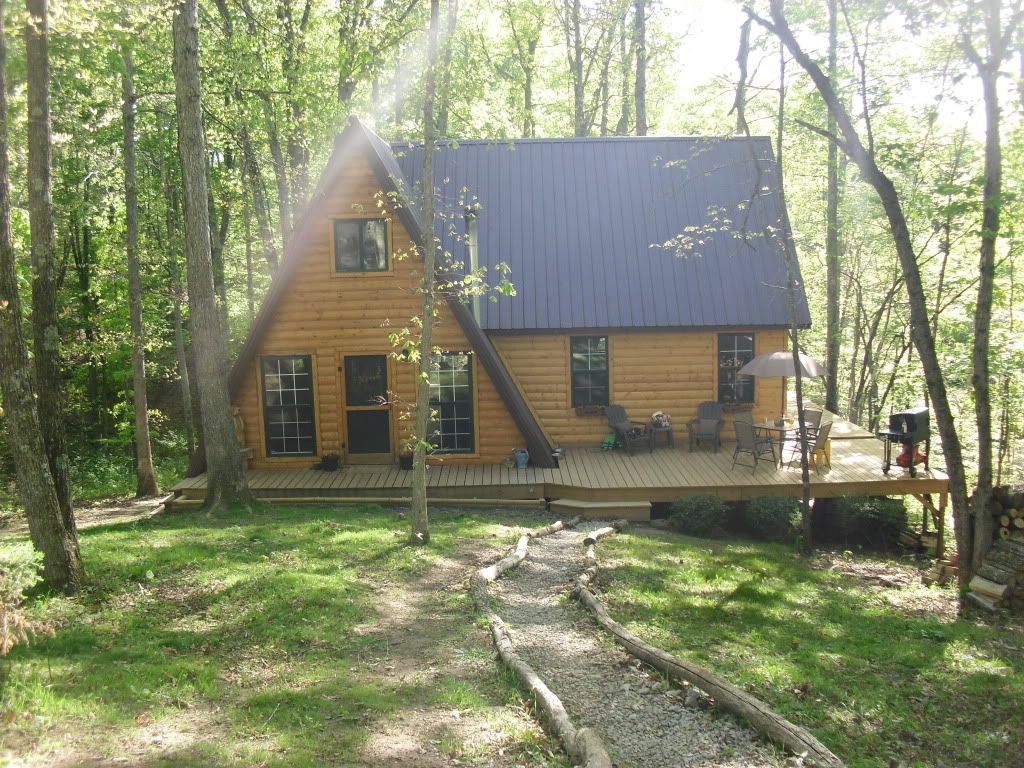

This little fella flew in our chimney today and I had to take apart the pipe to get him free.
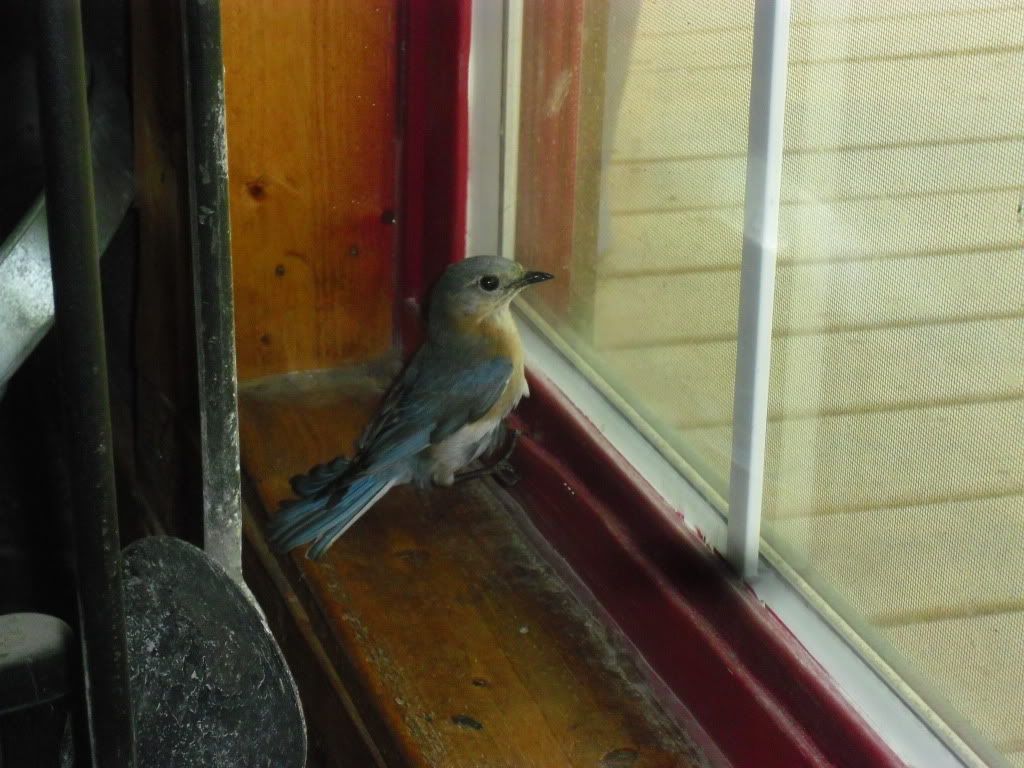
This little fella flew in our chimney today and I had to take apart the pipe to get him free.
Title: Re: 20x32 A frame cabin Central KY
Post by: EaglesSJ on April 13, 2012, 03:33:13 PM
Post by: EaglesSJ on April 13, 2012, 03:33:13 PM
here are the latest pics of the pond area. Need to get some grass to growing on the banks but we did get the dock built and the beach area done. Also ordered a nice aluminum ladder for the dock. I am also thinking about getting some tropical type trees to set out by the pond for that Caribbean feel. Still need to build a zipline as well but we couldnt wait to enjoy what we had already so we forgot about the cooler temps and went for it!
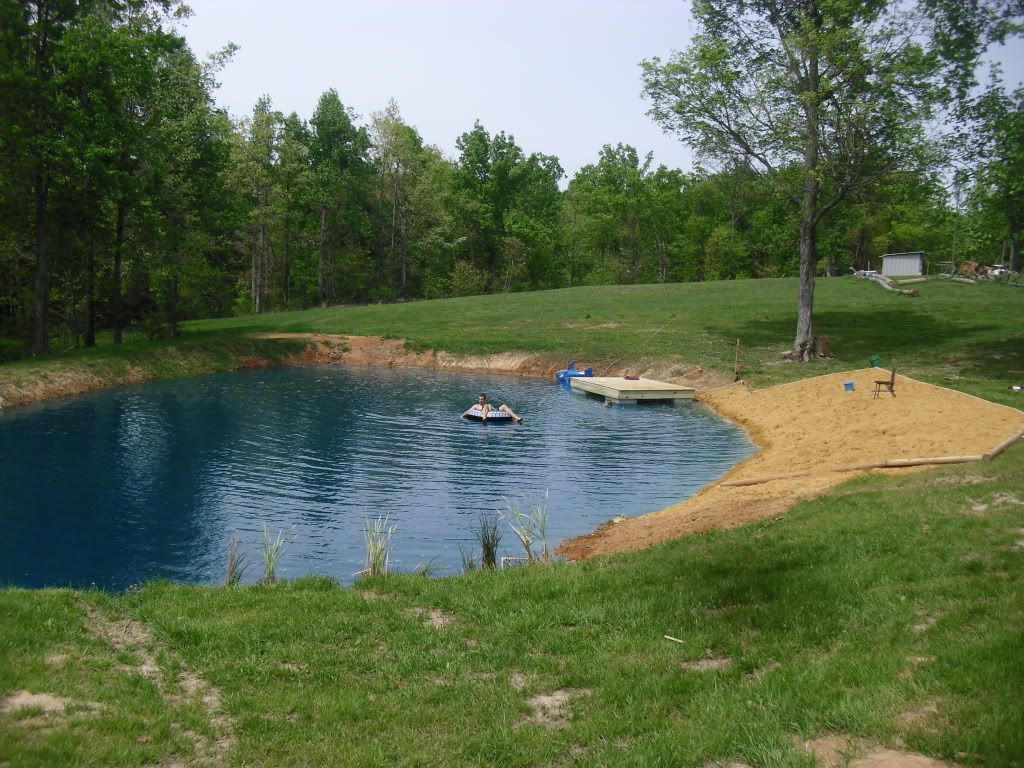

Title: Re: 20x32 A frame cabin Central KY
Post by: ben2go on April 13, 2012, 09:23:49 PM
Post by: ben2go on April 13, 2012, 09:23:49 PM
Did you dye the water? ???
Title: Re: 20x32 A frame cabin Central KY
Post by: Sassy on April 14, 2012, 01:20:18 AM
Post by: Sassy on April 14, 2012, 01:20:18 AM
I was wondering if you used pond liner.
Looks really refreshing, though - beautiful area :)
Looks really refreshing, though - beautiful area :)
Title: Re: 20x32 A frame cabin Central KY
Post by: hhbartlett on April 14, 2012, 07:32:35 AM
Post by: hhbartlett on April 14, 2012, 07:32:35 AM
What a beautiful spot. Did you build that pond? Your whole thread is an inspiration, should win an award for "Best Life Design".
Title: Re: 20x32 A frame cabin Central KY
Post by: EaglesSJ on April 14, 2012, 08:02:15 AM
Post by: EaglesSJ on April 14, 2012, 08:02:15 AM
Quote from: ben2go on April 13, 2012, 09:23:49 PM
Did you dye the water? ???
I put 1/2 gallon of aquashade pond dye/cleaner in it. The water clarity is really good without it but we wanted that blue color. You can see your feet standing in waist deep water.
Also there is no liner. Just a sandy clay soil. I didnt build the pond, we had it dug. I just built the dock, and the beach area, and prayed from lots of rain :)
Title: Re: 20x32 A frame cabin Central KY
Post by: rhelm on April 16, 2012, 06:48:35 AM
Post by: rhelm on April 16, 2012, 06:48:35 AM
Living the dream! [cool]
Title: Re: 20x32 A frame cabin Central KY
Post by: AdironDoc on April 16, 2012, 11:59:33 AM
Post by: AdironDoc on April 16, 2012, 11:59:33 AM
Awesome place! Looks like everyone has a great time at your camp. Where's the floating beer cooler?
Title: Re: 20x32 A frame cabin Central KY
Post by: beckhamk on April 16, 2012, 06:37:05 PM
Post by: beckhamk on April 16, 2012, 06:37:05 PM
wow - thats a heck of a pond! making me think of adding that to our place! ;D
Title: Re: 20x32 A frame cabin Central KY
Post by: EaglesSJ on April 25, 2012, 09:38:27 AM
Post by: EaglesSJ on April 25, 2012, 09:38:27 AM
Ah spring time on the farm and the adorable chirp of little young un's. Here are 25 of the 50 total. (other 25 still in route vs usps) We have Americauna, Black Australorp, Polish Crested, Red sexlink, Brown Leghorns, and Buff Orpingtons. These are in addition to the 21 full grown chickens we already have. If you cant tell we love chickens.

Title: Re: 20x32 A frame cabin Central KY
Post by: Sassy on April 25, 2012, 01:44:50 PM
Post by: Sassy on April 25, 2012, 01:44:50 PM
Ah, how cute! We are raising another 6 barred rock chicks - they're getting pretty big now - couple more months & they should start laying. We still have 5 barred rocks who are 4 or 5 yrs old. Glenn has been trying to get 2 or 3 that have been eating the eggs to stop - made new nesting boxes where the eggs roll down into a protected area they can't get to, screwed fake eggs in them...
We've been giving them ground oyster shells to supplement their diet although the feed we give them is supposed to have everything in it. Guess if they don't break the cannibalistic ways we'll have to let them run free outside the pen - the birds don't last too long around here when they are unprotected :(
BTW, that's an awful lot of chickens! Are you going to sell the eggs? When I was little we lived on a farm in Ohio - we had 100 white chickens - my parents sold most of the eggs. I had the job of collecting them all as my mom was afraid of them ::) We lived there from the time I was a baby until I was 5 y/o.
Title: Re: 20x32 A frame cabin Central KY
Post by: EaglesSJ on April 25, 2012, 04:03:16 PM
Post by: EaglesSJ on April 25, 2012, 04:03:16 PM
Were probably going to keep about 20 of the 50 chicks giving us a total of 40 hens. Then we will sell the rest when they get to laying age. People around here are always looking for hens. They are usually sold the day after I list them on craigslist. I had a problem with them eating eggs too. Ive noticed they mainly do it when their nesting boxes get low of padding (hay, straw, pine shavings, etc)
Title: Re: 20x32 A frame cabin Central KY
Post by: Bob S. on April 26, 2012, 08:46:33 PM
Post by: Bob S. on April 26, 2012, 08:46:33 PM
Us old farts remember that you chop off some of their heads and eat them.
Title: Re: 20x32 A frame cabin Central KY
Post by: CjAl on April 26, 2012, 09:46:18 PM
Post by: CjAl on April 26, 2012, 09:46:18 PM
i had 1000 in my.living room at one point chirping away. freak cold snap. wasnt any sleeping that night.
Title: Re: 20x32 A frame cabin Central KY
Post by: Sassy on April 27, 2012, 11:19:30 AM
Post by: Sassy on April 27, 2012, 11:19:30 AM
Quote from: CjAl on April 26, 2012, 09:46:18 PM
i had 1000 in my.living room at one point chirping away. freak cold snap. wasnt any sleeping that night.
That's a lot of chicks :D My grandmother from Minnesota had a hatchery business - she had a 2 story home & one story was for the hatchery.
Bob S... I also remember my dad chopping the heads off some of our chickens & seeing them run around in circles :o They were my friends, used to carry them around & swing w/them ::) guess the fascination of seeing them run around overcame any sadness that they would no longer be my friends d* I also remember dunking them in a bucket of hot water & plucking their feathers off [noidea' Never will forget the smell [waiting]
Title: Re: 20x32 A frame cabin Central KY
Post by: JavaMan on April 27, 2012, 12:56:01 PM
Post by: JavaMan on April 27, 2012, 12:56:01 PM
Quote from: Sassy on April 27, 2012, 11:19:30 AM
That's a lot of chicks :D My grandmother from Minnesota had a hatchery business - she had a 2 story home & one story was for the hatchery.
Bob S... I also remember my dad chopping the heads off some of our chickens & seeing them run around in circles :o They were my friends, used to carry them around & swing w/them ::) guess the fascination of seeing them run around overcame any sadness that they would no longer be my friends d* I also remember dunking them in a bucket of hot water & plucking their feathers off [noidea' Never will forget the smell [waiting]
Ah, the smell. that's the reason Beautiful won't let me butcher any of ours. We spent a few days before Thanksgiving two years ago with 26 of them in the brooding pen in the house (and no power for 3 days) - then the cousins showed up and one little girl loved them, but wanted to make them fly by holding them out in one hand and spinning like a top.
We wound up with 4 roos and a friend butchered three of them
Maybe next spring we'll get a few more chicks to start replacing the older hens.
I think I'll get a couple turkeys, too - call them Christmas and Thanksgiving. :)
I love the build. I wish I had 1/2 the energy you've got! You're the only guy I know that can work harder than Old Jarhead ;-)
Title: Re: 20x32 A frame cabin Central KY
Post by: OlJarhead on April 30, 2012, 03:08:22 PM
Post by: OlJarhead on April 30, 2012, 03:08:22 PM
Quote from: Bob S. on April 26, 2012, 08:46:33 PM
Us old farts remember that you chop off some of their heads and eat them.
LOL
Mom tried that and it got away! Headless chickens run around like crazy.
Best to ring their necks first!
Title: Re: 20x32 A frame cabin Central KY
Post by: EaglesSJ on May 19, 2012, 05:01:17 PM
Post by: EaglesSJ on May 19, 2012, 05:01:17 PM
here are the latest additions to our family. Our baby girl Audrey Marie, and our 4 Nubian kids; Princess Ann, Luisa, Big Brown, and Johnny.


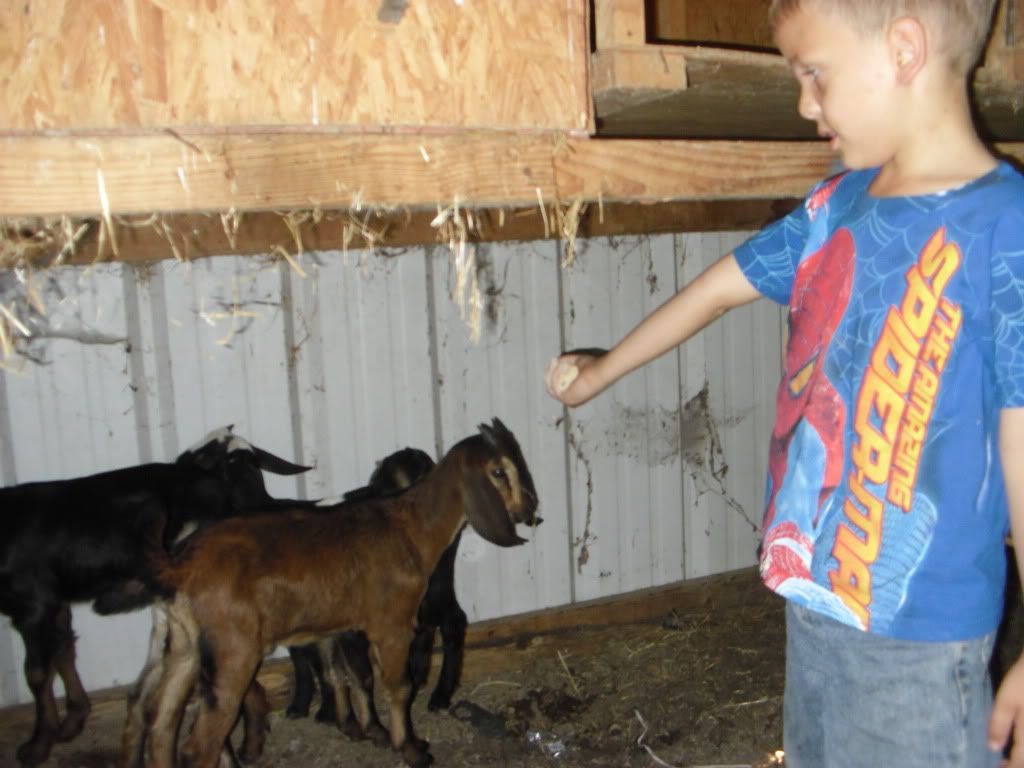
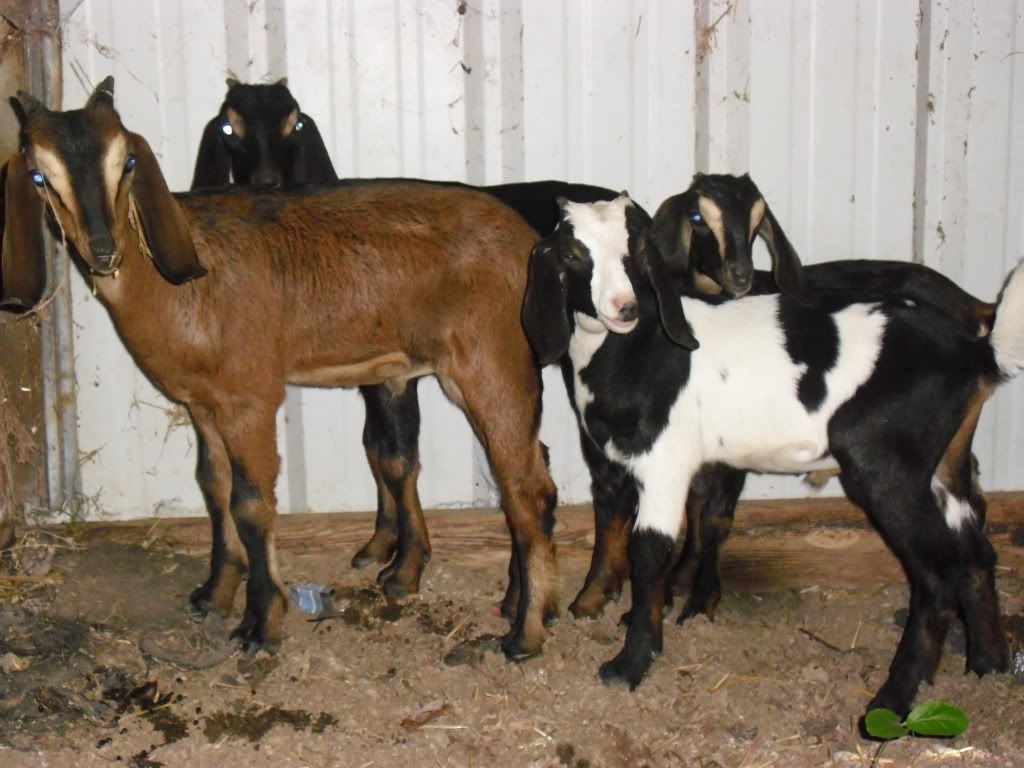
Title: Re: 20x32 A frame cabin Central KY
Post by: ben2go on May 19, 2012, 06:06:47 PM
Post by: ben2go on May 19, 2012, 06:06:47 PM
The babys home.Congrats.She's cute as a button. [cool]
Title: Re: 20x32 A frame cabin Central KY
Post by: OlJarhead on May 21, 2012, 10:13:14 AM
Post by: OlJarhead on May 21, 2012, 10:13:14 AM
Congrats! [cool]
Title: Re: 20x32 A frame cabin Central KY
Post by: mogie01 on May 21, 2012, 11:46:29 AM
Post by: mogie01 on May 21, 2012, 11:46:29 AM
Congratulations!! You have a beautiful family.
Title: Re: 20x32 A frame cabin Central KY
Post by: mtman on May 21, 2012, 05:48:15 PM
Post by: mtman on May 21, 2012, 05:48:15 PM
Congratulations!! What a doll baby!
Title: Re: 20x32 A frame cabin Central KY
Post by: Sassy on May 21, 2012, 08:01:01 PM
Post by: Sassy on May 21, 2012, 08:01:01 PM
Congratulations & w* to your beautiful new little girl! Your goat family is pretty nice, too c*
Title: Re: 20x32 A frame cabin Central KY
Post by: phalynx on May 21, 2012, 09:35:00 PM
Post by: phalynx on May 21, 2012, 09:35:00 PM
Congrats... Another addition to the A frame family....
Title: Re: 20x32 A frame cabin Central KY
Post by: astidham on May 22, 2012, 11:29:47 PM
Post by: astidham on May 22, 2012, 11:29:47 PM
Congratulations! she is beautiful!
Title: Re: 20x32 A frame cabin Central KY
Post by: EaglesSJ on May 28, 2012, 06:21:01 PM
Post by: EaglesSJ on May 28, 2012, 06:21:01 PM
been fencing the past couple days. 95 degrees and dry as a bone. Dug a few inches and then poured water in the hole. Waited a couple hours to soak in and then repeated. Ground was hard as a rock. Still have a couple strands of wire left to put up.
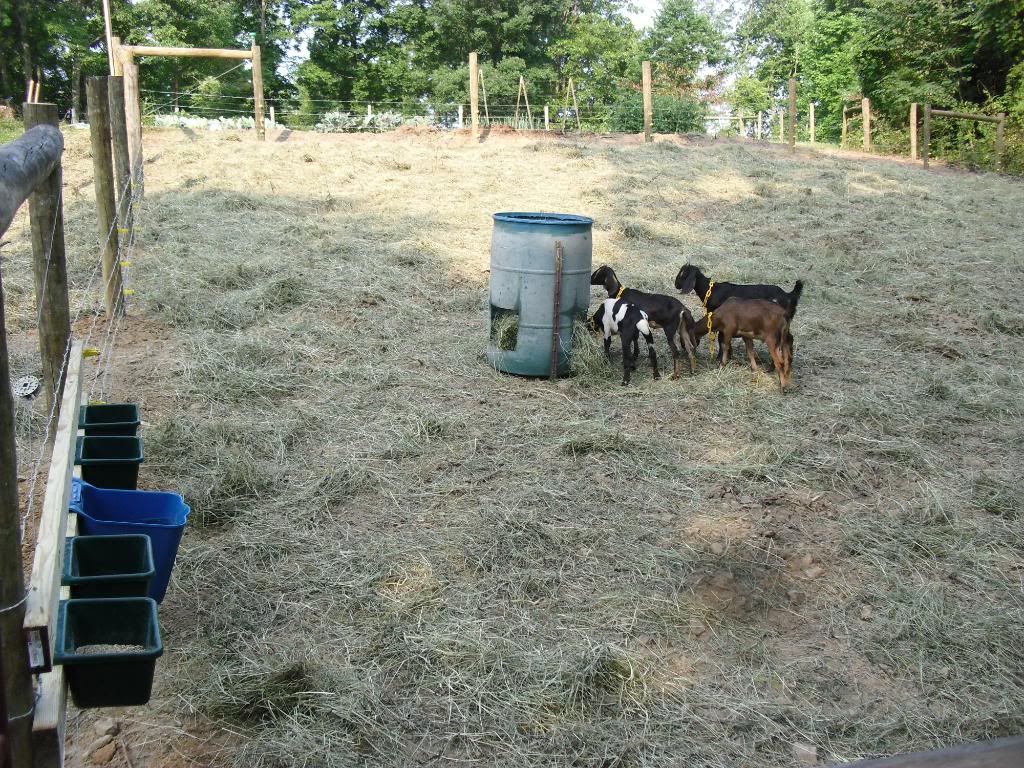

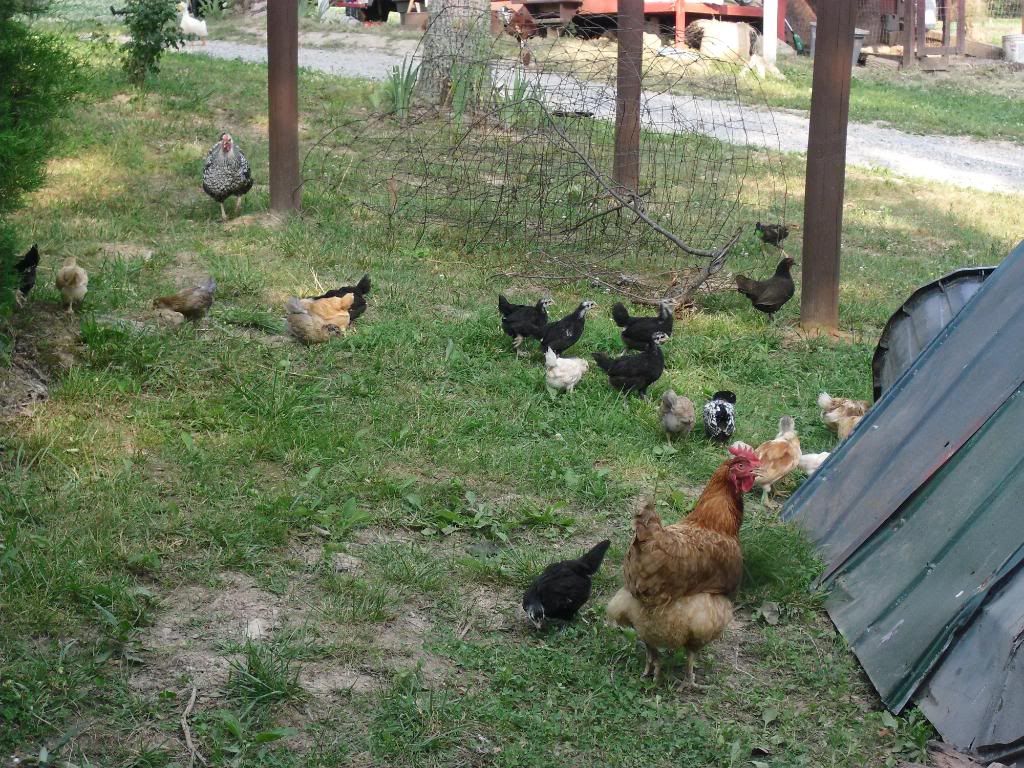
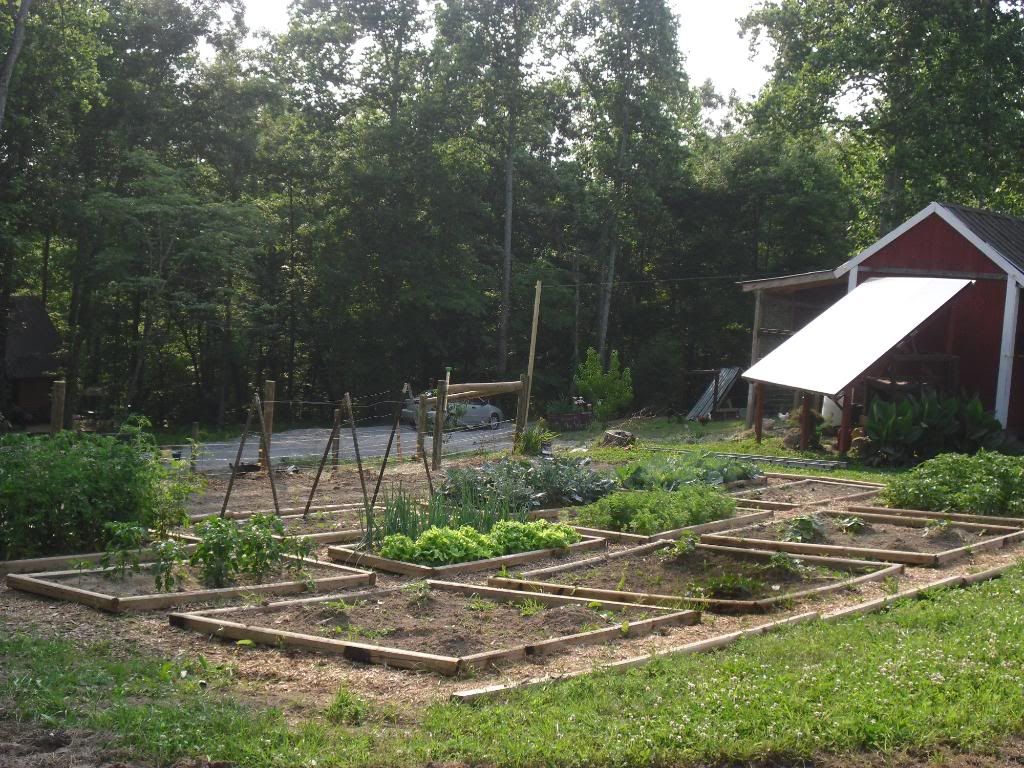
Title: Re: 20x32 A frame cabin Central KY
Post by: Texas Tornado on May 30, 2012, 07:18:37 AM
Post by: Texas Tornado on May 30, 2012, 07:18:37 AM
Congratulations!!!!!!
Title: Re: 20x32 A frame cabin Central KY
Post by: waterbug on May 30, 2012, 12:54:39 PM
Post by: waterbug on May 30, 2012, 12:54:39 PM
Congratulations on adding Audrey Marie to the family!
I always enjoy seeing and reading about the improvements you have made to your place.
I always enjoy seeing and reading about the improvements you have made to your place.
Title: Re: 20x32 A frame cabin Central KY
Post by: PorkChopsMmm on May 30, 2012, 12:58:16 PM
Post by: PorkChopsMmm on May 30, 2012, 12:58:16 PM
Ditto on the congratulations. It is always fun seeing new life, baby or goat or otherwise!
Quick question -- do you have a garage or any larger shed that you store vehicles or other larger equipment? I know you have your solar shed but I am wondering if you have plans for anything bigger. We have moved out to our place and are finding a garage or pole barn would be very useful. Just wondering if you have run into the same situation since you have lived at your place for so long.
Quick question -- do you have a garage or any larger shed that you store vehicles or other larger equipment? I know you have your solar shed but I am wondering if you have plans for anything bigger. We have moved out to our place and are finding a garage or pole barn would be very useful. Just wondering if you have run into the same situation since you have lived at your place for so long.
Title: Re: 20x32 A frame cabin Central KY
Post by: EaglesSJ on May 30, 2012, 03:07:40 PM
Post by: EaglesSJ on May 30, 2012, 03:07:40 PM
Thanks to all for the congrats. We couldnt be any prouder of our family! As for the shed/barn, it has been burning a hole in my head for a couple months now. Problem is I have too much going on and not enough funds to cover it all. I still have to finish the addition. Although a barn of some sort will have to be built before winter because we have to have somewhere to store a seasons worth of hay for the animals. Around here farmers sell out by September.
Title: Re: 20x32 A frame cabin Central KY
Post by: PorkChopsMmm on May 30, 2012, 03:17:31 PM
Post by: PorkChopsMmm on May 30, 2012, 03:17:31 PM
Wow, good point on the hay. That is not something I thought of. If you find a solution for a cheap shed/barn/garage shelter please let us know. I have priced out pole barns and it looks like I would be in for $5k for an unassembled 24x28 pole barn. That is just too much money and it would take me a long time to do myself. Congrats again!
Title: Re: 20x32 A frame cabin Central KY
Post by: EaglesSJ on June 02, 2012, 04:14:03 PM
Post by: EaglesSJ on June 02, 2012, 04:14:03 PM
More homesteading pictures. These are our pigs, Boss Hog and Lucy. They are hamp/york crosses. They will be our breeders and we will eat/sell their offspring. Our kittens are getting old enough to walk around, and the baby chicks are already roaming around eating bugs. The kids are really warming up to us as well with the biggest buck really loving me. The others came bounding over when the seen Lindsay with the camera.
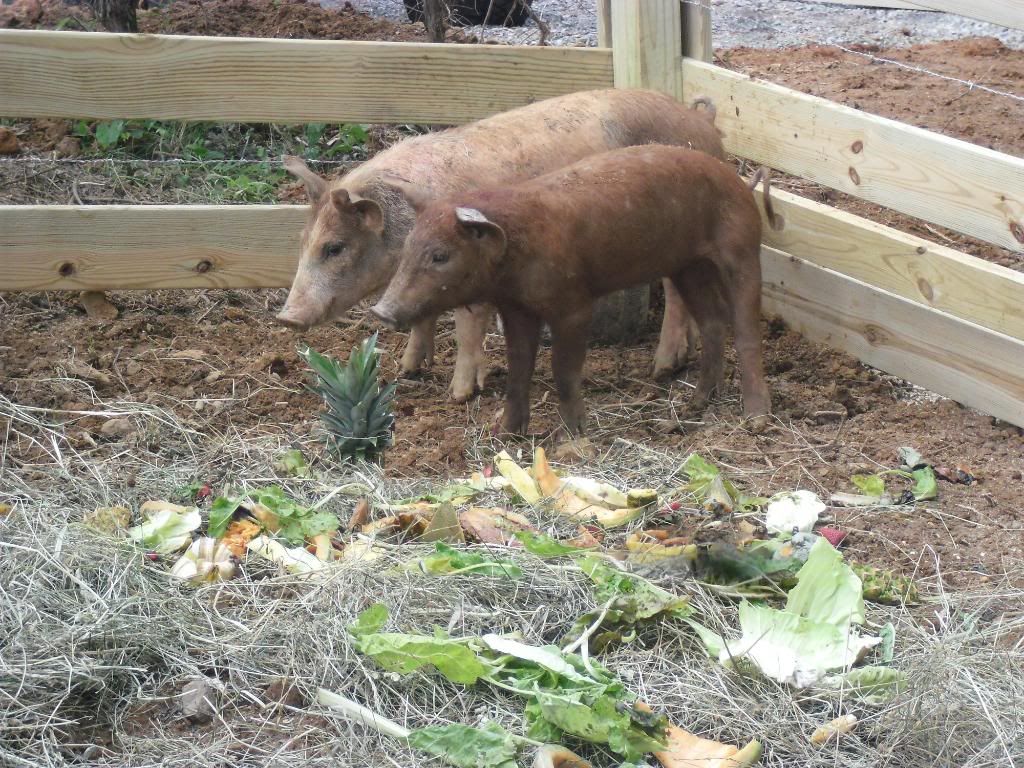
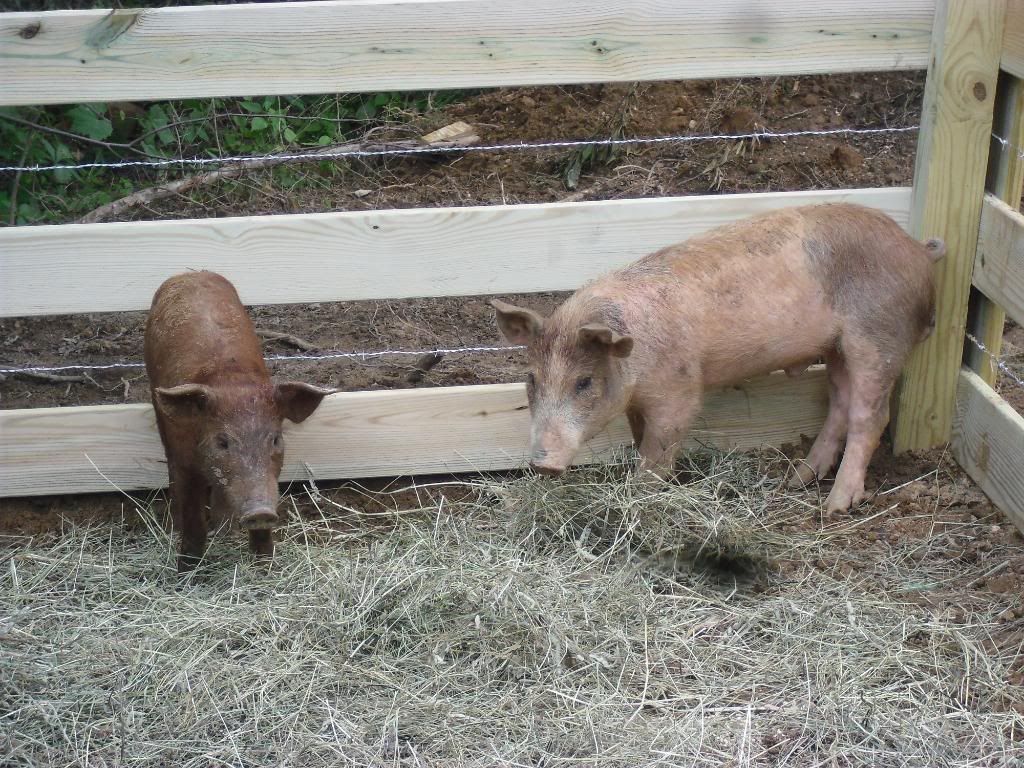

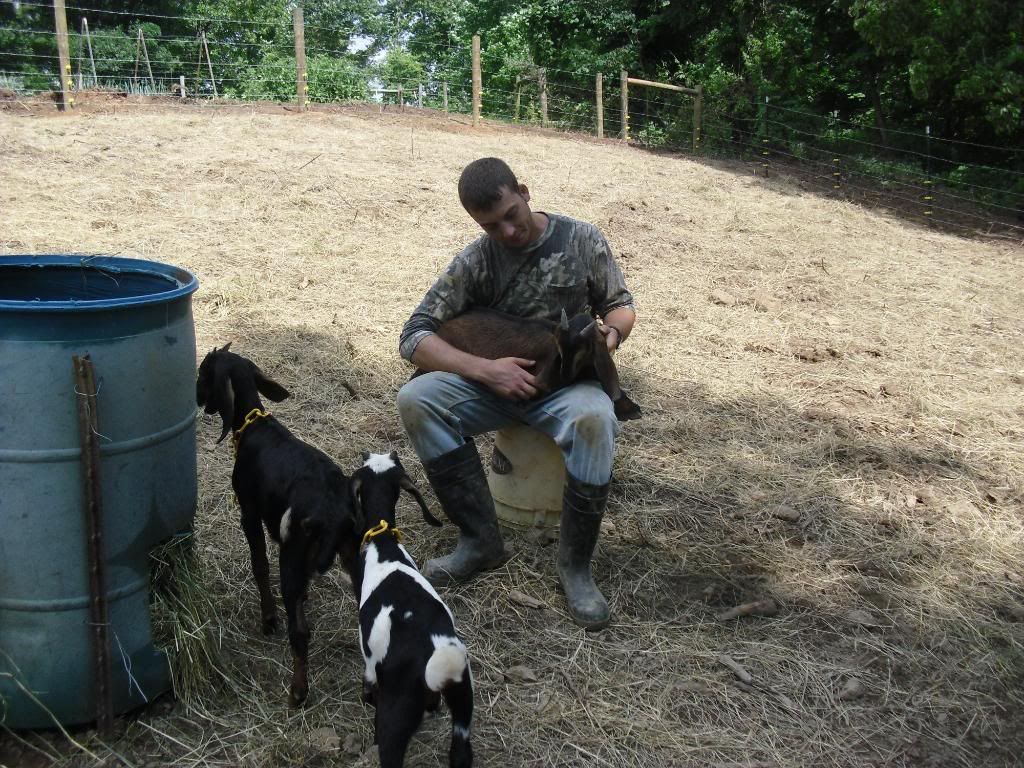
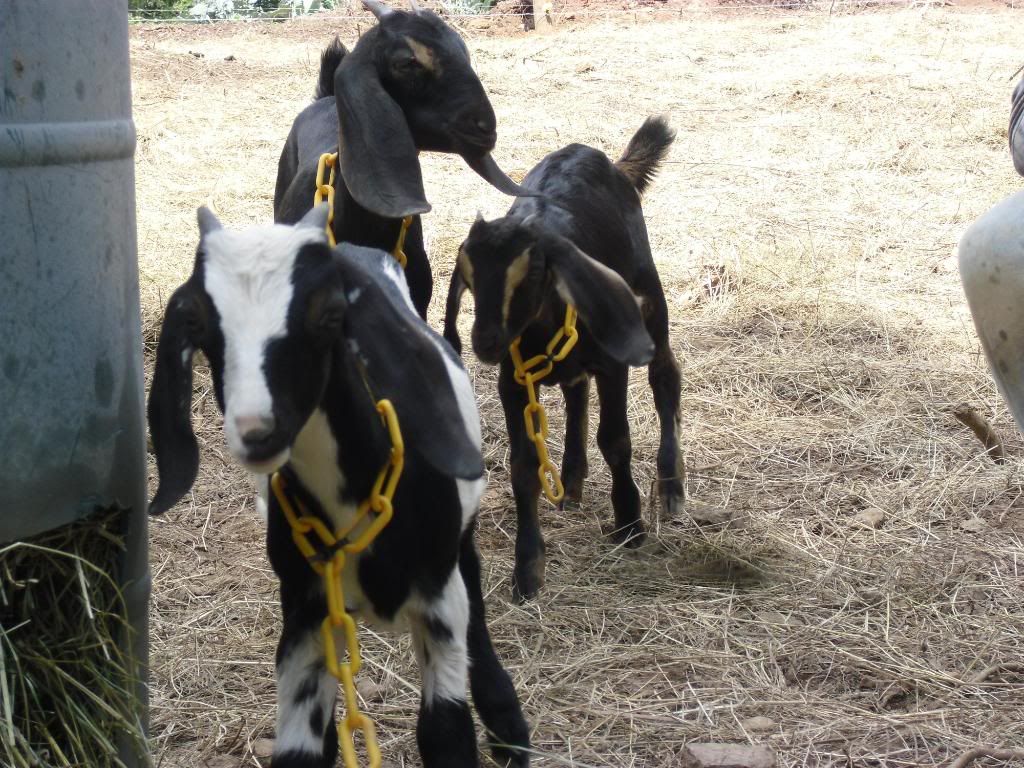
Title: Re: 20x32 A frame cabin Central KY
Post by: MJW on June 03, 2012, 11:45:57 AM
Post by: MJW on June 03, 2012, 11:45:57 AM
I have followed your thread and you are really living the dream! Congrats to you!
Where are you located in KY?
Where are you located in KY?
Title: Re: 20x32 A frame cabin Central KY
Post by: EaglesSJ on June 03, 2012, 12:28:24 PM
Post by: EaglesSJ on June 03, 2012, 12:28:24 PM
Right in the middle of the state near a little place called Mt. Sherman
Title: Re: 20x32 A frame cabin Central KY
Post by: MJW on June 03, 2012, 01:10:22 PM
Post by: MJW on June 03, 2012, 01:10:22 PM
Your story is most inspiring.
Thanks for sharing it!
Thanks for sharing it!
Title: Re: 20x32 A frame cabin Central KY
Post by: Southern Steve on June 04, 2012, 08:09:59 PM
Post by: Southern Steve on June 04, 2012, 08:09:59 PM
same area Abraham Lincoln was born in. cool.
Title: Re: 20x32 A frame cabin Central KY
Post by: EaglesSJ on June 04, 2012, 09:03:10 PM
Post by: EaglesSJ on June 04, 2012, 09:03:10 PM
Quote from: Southern Steve on June 04, 2012, 08:09:59 PM
same area Abraham Lincoln was born in. cool.
about 15 minutes down the road
Title: Re: 20x32 A frame cabin Central KY
Post by: mgramann on June 13, 2012, 03:32:28 PM
Post by: mgramann on June 13, 2012, 03:32:28 PM
Why the switch to 48? Are you getting a bigger inverter?
BTW- I love your homestead! Keep posting updates and pics-they are quite inspirational. We hope to be doing something similar in the Michigan U.P. soon!
BTW- I love your homestead! Keep posting updates and pics-they are quite inspirational. We hope to be doing something similar in the Michigan U.P. soon!
Title: Re: 20x32 A frame cabin Central KY
Post by: EaglesSJ on June 13, 2012, 04:04:17 PM
Post by: EaglesSJ on June 13, 2012, 04:04:17 PM
Adding 8 sharp 230w panels if the deal goes through. I didnt want to have to buy and wire up another $700 flexmax 80 controller so I opted to go to 48v. Ill also gain just a hair more efficiency and it will allow me to have up to a 5kW array on my current charge controller.
Title: Re: 20x32 A frame cabin Central KY
Post by: John Raabe on June 15, 2012, 10:11:48 AM
Post by: John Raabe on June 15, 2012, 10:11:48 AM
EaglesSJ
Thanks for the update and great photos. You sure have a lot of life going on there! :D :D :D
Thanks for the update and great photos. You sure have a lot of life going on there! :D :D :D
Title: Re: 20x32 A frame cabin Central KY
Post by: EaglesSJ on June 16, 2012, 10:32:20 AM
Post by: EaglesSJ on June 16, 2012, 10:32:20 AM
Ok guys so Im needing some help wiring up some solar panels. I bought 8 230w sharp panels (ND-u230Q1) to be exact. They are listed as 24v panels. I also have my 6 Kyocera 210w panels which are 26.6v maximum output.
I have a flex max 80 charge controller and will be going to a 48v system via my new Outback vfx3648 inverter. So Im thinking that I wire up two sets of four 230w sharps in series. This gives me a total of 120v dc maximum output at 17amps (each set being 120v 8.48amps)
I run these two sets into my combiner box. Each set on its own 15amp breaker. I leave my existing panel setup as is. Three 26.6v panels wired in series for a total of 79.8v at 7.9amps per set (79.8v 16amp total for both sets) Each again being on its own 15amp breaker is it currently is.
Am I going about this the right way? Or is there a better way to wire these items up?
Title: Re: 20x32 A frame cabin Central KY
Post by: EaglesSJ on June 16, 2012, 11:44:27 AM
Post by: EaglesSJ on June 16, 2012, 11:44:27 AM
After further reading I see that I cannot do that large of a voltage difference. So what if I buy 1 more sharp 230 bringing my total up to 9. Then I could wire 3 in series for a total of 90 volts. My other array will be 79.8 volts or 80v for arguments sake. This will leave me with a 10vdc difference going into the combiner box. Will this be a problem?
Title: Re: 20x32 A frame cabin Central KY
Post by: CjAl on June 16, 2012, 11:50:48 AM
Post by: CjAl on June 16, 2012, 11:50:48 AM
how about two of each in series? or is that not a good idea?
Title: Re: 20x32 A frame cabin Central KY
Post by: EaglesSJ on June 16, 2012, 12:00:42 PM
Post by: EaglesSJ on June 16, 2012, 12:00:42 PM
That doesnt give me enough power to fully charge my batteries. 26.6v x2 =53.2v I need at least 60 volts available to me.
Title: Re: 20x32 A frame cabin Central KY
Post by: CjAl on June 16, 2012, 12:03:37 PM
Post by: CjAl on June 16, 2012, 12:03:37 PM
i meant two of your old ones and two of your new ones in a single series circuit. then both would be.equal. i just wasnt sure if you could mix the panels
Title: Re: 20x32 A frame cabin Central KY
Post by: EaglesSJ on June 16, 2012, 12:17:38 PM
Post by: EaglesSJ on June 16, 2012, 12:17:38 PM
Lol funny you should say that because I was just about to suggest that I wire 2 of my old in series with 3 new giving me a total voltage of 143.2vdv and around 7.7amps
I can wire it that way because the kyoceras are 7.9amp and the sharps are 7.61amp which by my calculations are within 4% of each other and the voltage is under the 150vdvc limit set by outback
Here are links to specs if anyone wants to check my calcs
http://www.solardesigntool.com/components/module-panel-solar/Kyocera/KD210GX-LPU/specification-data-sheet.html;jsessionid=5432CC1B1790340ED8659928298DE780
http://www.ecodirect.com/Sharp-ND-U230C1-230-Watt-24-Volt-p/sharp-nd-u230q1.htm
Title: Re: 20x32 A frame cabin Central KY
Post by: EaglesSJ on June 16, 2012, 12:22:56 PM
Post by: EaglesSJ on June 16, 2012, 12:22:56 PM
Quote from: CjAl on June 16, 2012, 12:03:37 PM
i meant two of your old ones and two of your new ones in a single series circuit. then both would be.equal. i just wasnt sure if you could mix the panels
I cant do 2 and 2 because i have 8 of 1 and 6 of the other.
Title: Re: 20x32 A frame cabin Central KY
Post by: CjAl on June 16, 2012, 12:34:21 PM
Post by: CjAl on June 16, 2012, 12:34:21 PM
sorry i saw 8 and thought that was.total now. i am driving, missed the finer details but you got my point.
damn. thats a huge array
damn. thats a huge array
Title: Re: 20x32 A frame cabin Central KY
Post by: CjAl on June 16, 2012, 12:49:54 PM
Post by: CjAl on June 16, 2012, 12:49:54 PM
if you did 2+3 then what would you do with the remaining 4 sharps?
too bad you dont have 6 and 9, that would put you at 23 amps, 143 v with three banks runnng parralel
too bad you dont have 6 and 9, that would put you at 23 amps, 143 v with three banks runnng parralel
Title: Re: 20x32 A frame cabin Central KY
Post by: EaglesSJ on June 16, 2012, 01:01:13 PM
Post by: EaglesSJ on June 16, 2012, 01:01:13 PM
Quote from: CjAl on June 16, 2012, 12:49:54 PM
if you did 2+3 then what would you do with the remaining 4 sharps?
too bad you dont have 6 and 9, that would put you at 23 amps, 143 v with three banks runnng parralel
I think you missed something. I will have 9 sharps total and my current 6 kyoceras my array will look like this:
KSSSK
KSSSK
KSSSK
I am doing that to keep the array aesthetically balanced.
Wiring each string in series will provide 143.2 v and around 7.7 amps for a total of 1102watts per string, or 3306 total array size
Title: Re: 20x32 A frame cabin Central KY
Post by: CjAl on June 16, 2012, 01:07:01 PM
Post by: CjAl on June 16, 2012, 01:07:01 PM
ya i swapped them around in my head. im just going to shut up now, i should know better then to run numbers in my head on 2hr sleep.
Title: Re: 20x32 A frame cabin Central KY
Post by: CjAl on June 16, 2012, 01:09:24 PM
Post by: CjAl on June 16, 2012, 01:09:24 PM
btw i am totally envious of your setup. i would kill to take that meter off my house. in southeast tx you can just imagine how much power i.use for just air conditioning
Title: Re: 20x32 A frame cabin Central KY
Post by: EaglesSJ on June 16, 2012, 01:14:02 PM
Post by: EaglesSJ on June 16, 2012, 01:14:02 PM
Quote from: CjAl on June 16, 2012, 01:07:01 PM
ya i swapped them around in my head. im just going to shut up now, i should know better then to run numbers in my head on 2hr sleep.
lol actually having someone to sit here and work it through with really helped. So thanks. Do you not run on PV? I thought when I checked out your thread I seen something about that in there?
Title: Re: 20x32 A frame cabin Central KY
Post by: CjAl on June 16, 2012, 01:25:40 PM
Post by: CjAl on June 16, 2012, 01:25:40 PM
im not running anything right now. i have to get the cabin built first, just got half the.pire done last weekend hopefully finish them monday when i get home. i have no power at the site i run my tools off a 2500w power invertor hooked to either the four batteries on.my semi or the battery in my suburban. if i use the burb i have to run it the whole time, the truck can run app day without charging.
i plan to start a pv setup and mabey wind too since my place is the high spot in the area altho thats not saying much.
due to our demand for ac i think i am.going to put radiant in the floor then i will dig a half dozen or so shallow wells to run the pipe down. hopefully that will help lessen the ac, plus in winter i can redirect it to a solar water heater to heat the house. of course we dont need a whole lot of heat, mid 40's is real cold for us
Title: Re: 20x32 A frame cabin Central KY
Post by: AdironDoc on June 16, 2012, 02:05:29 PM
Post by: AdironDoc on June 16, 2012, 02:05:29 PM
Quote from: CjAl on June 16, 2012, 01:25:40 PM
i have to get the cabin built first,
I practiced positive visualization... I imagined my cabin built, dropped tons of money on stuff like a wood stove, then simply had the cabin built around it! I'm quite sure I'm not the only one! :P
Title: Re: 20x32 A frame cabin Central KY
Post by: CjAl on June 16, 2012, 02:12:41 PM
Post by: CjAl on June 16, 2012, 02:12:41 PM
lol, i hear ya. mine was supposed to be dried in by now but i blew up a semi and had to.buy another, kind of set me back to say the least. my building permit is actuwlly expired now, it was supposed to.be dried in by this time last month and i havnt started the deck yet. im a 350lb truck driver from WI, trust me i.didnt.plan to be pouring concrete and building in the middle of tx summer. d*
Title: Re: 20x32 A frame cabin Central KY
Post by: EaglesSJ on June 20, 2012, 09:50:20 AM
Post by: EaglesSJ on June 20, 2012, 09:50:20 AM
Ok so apparently the flexmax 80 can only handle 150vdc of voc NOT isc. So here is the shape Im in. I have 9 sharp 230s with a 37.1 VOC and 6 kyoceras with a 33.2 VOC.
I currently have 3 sharps and 2 kyoceras wired in series. That puts my VOC too high for the CC. I would like to wire these in a way that I didnt have to buy another charge controller. Even if it means losing a little power. I dont want to sink another $700 in another flexmax controller.
I currently have 3 sharps and 2 kyoceras wired in series. That puts my VOC too high for the CC. I would like to wire these in a way that I didnt have to buy another charge controller. Even if it means losing a little power. I dont want to sink another $700 in another flexmax controller.
Title: Re: 20x32 A frame cabin Central KY
Post by: PorkChopsMmm on June 20, 2012, 10:08:31 AM
Post by: PorkChopsMmm on June 20, 2012, 10:08:31 AM
Have you tried using this string sizing tool from Outback? It has helped me figure some things out. I don't think your issue is going to be loosing power -- it will be frying your CC if you exceed certain ratings, especially this winter when the panels are cold and get hit with the bright morning sun.
http://www.outbackpower.com/resources/string_sizing_tool/ (http://www.outbackpower.com/resources/string_sizing_tool/)
http://www.outbackpower.com/resources/string_sizing_tool/ (http://www.outbackpower.com/resources/string_sizing_tool/)
Title: Re: 20x32 A frame cabin Central KY
Post by: Squirl on June 20, 2012, 10:49:58 AM
Post by: Squirl on June 20, 2012, 10:49:58 AM
Don't forget with VOC you have to temperature correct for winter and also NEC requires a 25% safety margin. Mountain Don did a pretty good guide in the off grid power topic a while ago. At my latitude, stringing 3 "24v" panels in a row failed most charge controllers (196 volts with temp and safety corrections) . You are a bit south, but still get snow in the winter. You are probably within the specs to string three panels, but I'd be willing to bet dimes to donuts that more than three would fail most electrical guidelines.
37.1 VOC * 3 panels = 111.3 volts * 1.25 NEC margin = 139.125 volts * 1.15 estimated winter correction (you would need to calculate actual correction) = 160 Volts.
37.1 VOC * 3 panels = 111.3 volts * 1.25 NEC margin = 139.125 volts * 1.15 estimated winter correction (you would need to calculate actual correction) = 160 Volts.
Title: Re: 20x32 A frame cabin Central KY
Post by: Greenwood on June 20, 2012, 11:09:58 AM
Post by: Greenwood on June 20, 2012, 11:09:58 AM
I don't know much about solar power but you could put 5 strings of sharp-kycera-sharp, you would need to buy a nother sharp panel and not use one of the kyoceras you already have ( I think this is net cheaper then buying a new controller). That would give you 107.4V per string with a 25% safety margin and winter adjustment of 10% you would come in at 147.7V.
Title: Re: 20x32 A frame cabin Central KY
Post by: Squirl on June 20, 2012, 11:31:20 AM
Post by: Squirl on June 20, 2012, 11:31:20 AM
2 Sharps and 1 kyoceras will give you 4 solar strings of 107.4 volts and 1 string of 1 sharp and 2 kyoceras at 103.5 volts. Check you manual or with outback if the CC can handle two different input voltages like that. My recollection was that MPPT controllers don't handle different input voltages well.
If were stuck with the extra 3 panels, I would consider wiring them two in parrallel up to a low amperage 48v pwm controller and selling the third. Or spending a few dollars extra and getting a low amperage mppt controller.
If were stuck with the extra 3 panels, I would consider wiring them two in parrallel up to a low amperage 48v pwm controller and selling the third. Or spending a few dollars extra and getting a low amperage mppt controller.
Title: Re: 20x32 A frame cabin Central KY
Post by: Squirl on June 20, 2012, 12:39:53 PM
Post by: Squirl on June 20, 2012, 12:39:53 PM
Calculating winter temp correction.
Take the coldest ever recorded temperature for your location. Subtract that from the temperature the Voc is rated at on the panels. Take the answer and multiply it times the temperature coefficient from the panels.
For the sharps.
Panel Voc temp 25 degrees C.
Coldest temp ever for Lexington (central KY) -21 degrees F. (-29.44 C)
25--29.44 = 54.44 degrees C
Sharp panel temperature coefficient -.36%/ degree C
54.44 * .36 = 19.6
Adjustment factor for Sharp panels at Lexington KY 1.20
Title: Re: 20x32 A frame cabin Central KY
Post by: EaglesSJ on June 20, 2012, 02:34:59 PM
Post by: EaglesSJ on June 20, 2012, 02:34:59 PM
I guess Im just going to sell my Kyocera Panels and buy more sharp 230s.
Title: Re: 20x32 A frame cabin Central KY
Post by: EaglesSJ on June 20, 2012, 03:00:25 PM
Post by: EaglesSJ on June 20, 2012, 03:00:25 PM
Here are our panels for now. Mounted on a galvanized pipe rack with enough bracing to look like a giant erector set. Running a 15k BTU A/C and still charging the batteries is awesome
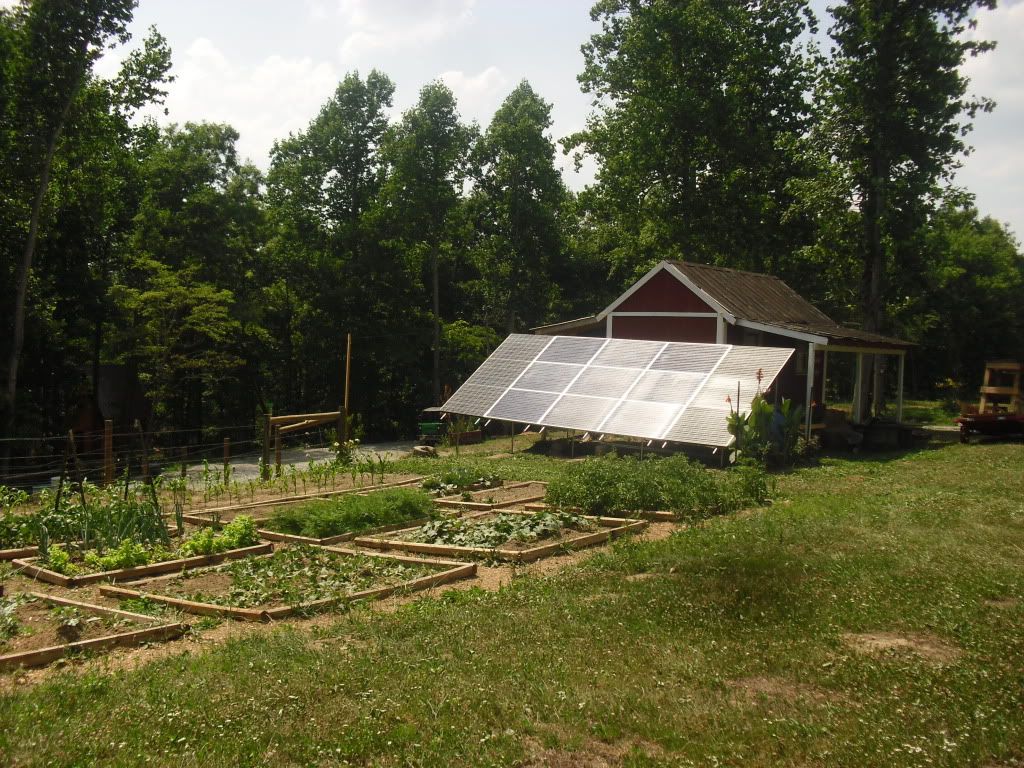
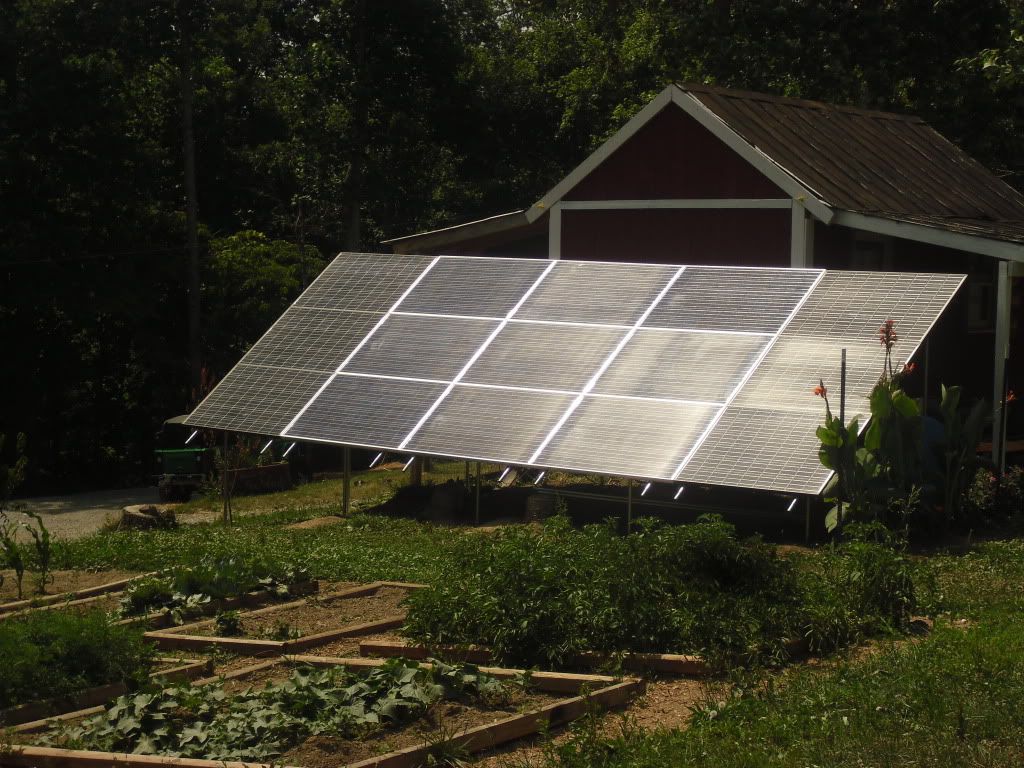
Title: Re: 20x32 A frame cabin Central KY
Post by: CjAl on June 20, 2012, 03:13:20 PM
Post by: CjAl on June 20, 2012, 03:13:20 PM
do you need tue cash or are ya open to horse trading? i would buy them but i csnt take a grand away from my build right now.
Title: Re: 20x32 A frame cabin Central KY
Post by: AdironDoc on June 20, 2012, 03:17:12 PM
Post by: AdironDoc on June 20, 2012, 03:17:12 PM
Quote from: EaglesSJ on June 20, 2012, 03:00:25 PM
Here are our panels for now. Mounted on a galvanized pipe rack with enough bracing to look like a giant erector set. Running a 15k BTU A/C and still charging the batteries is awesome
Nice array there [cool] Wish I had something like that on my house in the burbs. Like most of us, you arranged your panels all sitting up tight against each other. Having seen the amount of lift the wind creates over a large flat surface, I often wonder if it would be better to leave a small gap between each panel. Fortunately, mine are still where I left them. :P
Title: Re: 20x32 A frame cabin Central KY
Post by: EaglesSJ on June 21, 2012, 04:30:02 PM
Post by: EaglesSJ on June 21, 2012, 04:30:02 PM
Todays harvest. Some of the stuff is a bit smaller than max because we want to get 2 full crops out of the garden this year. The next crop will be put out today and wont be harvested until just before frost so that we get larger produce. The peppers are of course a constantly producing crop and we just picked some to start canning tonight.
Also had 7 baby chicks hatch out under mama hen yesterday and the day before. I absolutely love this time of year.


Also had 7 baby chicks hatch out under mama hen yesterday and the day before. I absolutely love this time of year.
Title: Re: 20x32 A frame cabin Central KY
Post by: UK4X4 on June 21, 2012, 06:27:41 PM
Post by: UK4X4 on June 21, 2012, 06:27:41 PM
That crop looks awsome- I came home today to find my new monster puppy decided to eat three chilli plants I've been working on for 9 months.....
2 may survive the mauling but the other is missing in action - I expect to find a significant deposit later this evening !
bogota seems to be a chilli free zone !
peppers and chilles are a constant crop plant if you have sun and heat- I guess they'l stand down for the winter up your end of the world.
Long term storage for chilles and peppers we basicly make a vinegar- olive oil mix - add the chopped chilles and peppers without seeds- i find they add bitterness along with the heat
add a few garlic cloves and store in a corked bottle
we have one bottle over 7 years old and just keep adding to the top......its pretty strong !
We use as a hot oil - re- adding the oil mix as required
peppers and garlic if you don't want the heat but just the flavor my wife minces no seeds -adds olive oil and stores in the fridge in a jar- we get about 6 months out of a jar- before its eaten ::) never got to test how long it would last !
Title: Re: 20x32 A frame cabin Central KY
Post by: AdironDoc on June 22, 2012, 01:25:16 PM
Post by: AdironDoc on June 22, 2012, 01:25:16 PM
Quote from: UK4X4 on June 21, 2012, 06:27:41 PM
That crop looks awsome-
Indeed it does!
Quote from: UK4X4 on June 21, 2012, 06:27:41 PM
Long term storage for chilles and peppers we basicly make a vinegar- olive oil mix - add the chopped chilles and peppers without seeds- i find they add bitterness along with the heat
add a few garlic cloves and store in a corked bottle
Mine are well on their way. I'm going to be sure and try your method out! I'm getting hungry thinking about it.. :P
Title: Re: 20x32 A frame cabin Central KY
Post by: CjAl on June 22, 2012, 04:15:08 PM
Post by: CjAl on June 22, 2012, 04:15:08 PM
the pepper oil sprinkled over a bowl of rice is awsome
Title: Re: 20x32 A frame cabin Central KY
Post by: EaglesSJ on July 01, 2012, 08:55:38 PM
Post by: EaglesSJ on July 01, 2012, 08:55:38 PM
Got a new battery bank installed today. The walmart Maxx-29s only made it 9 months!!!!! Luckily I got a full refund on them and was able to put the cash towards some golf cart batteries. With the first set lasting about 15 months and the second lasting 9 I can say that I DO NOT RECOMMEND them for off grid use.
Now onto what I bought. I got sixteen 6v 230aH golf cart batteries from Sams that say Deka on the top. Ive read that deka makes alright batteries. These weigh 67 pounds each and from a quick look under the caps have much thicker plates than the last set I had.
Thinking about getting another 8 of them to take my bank from 460 ah to 690ah at 48v. This would give us about 4-5 days of back up. Here are the pics. I like the fill cap setup. Twist one lever and all three come off.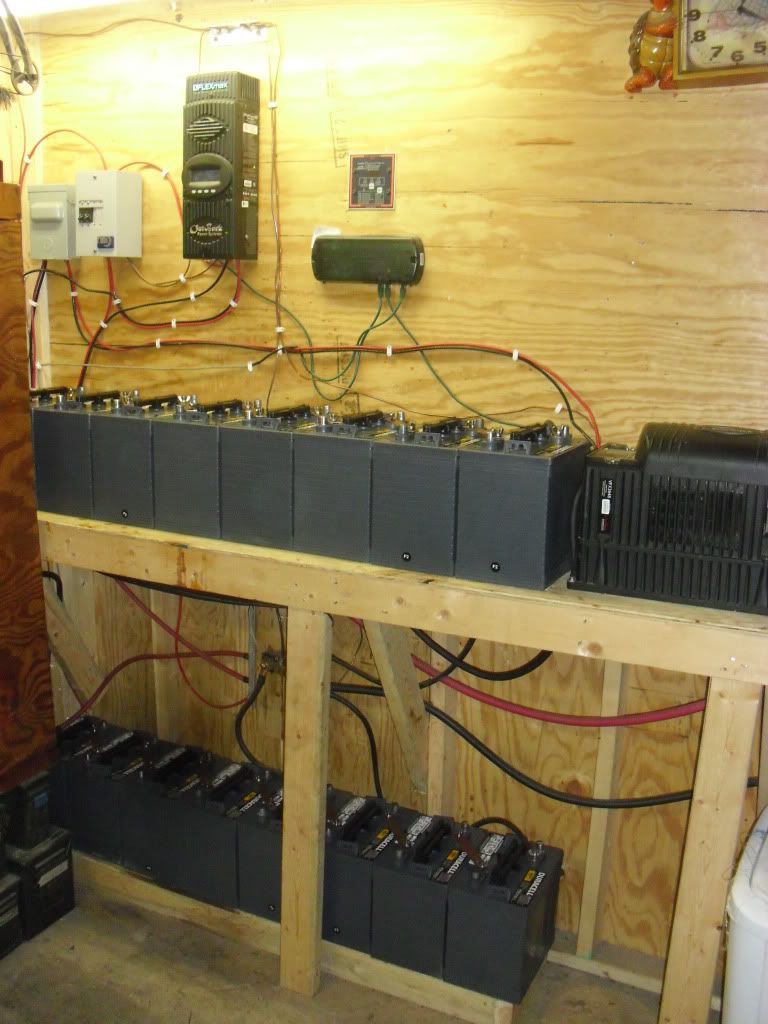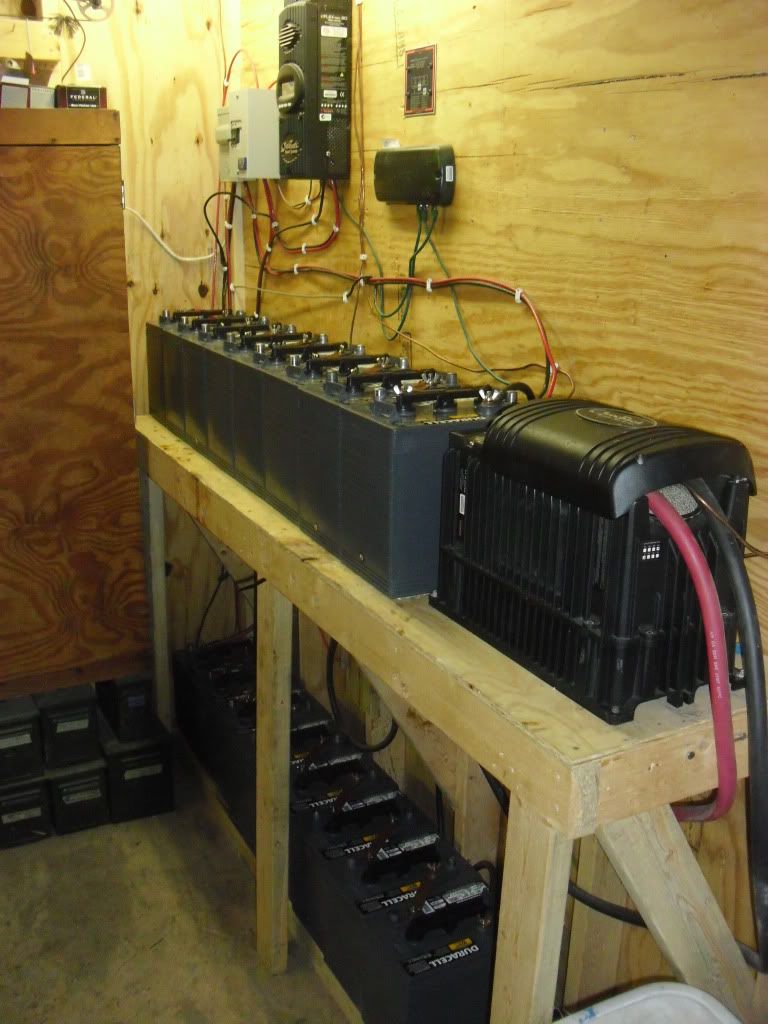
Title: Re: 20x32 A frame cabin Central KY
Post by: EaglesSJ on July 01, 2012, 09:19:49 PM
Post by: EaglesSJ on July 01, 2012, 09:19:49 PM
Couple of questions:
How long can I expect these to last? Anyone else using similar batteries?
Its been 106 here the past few days. How does the heat affect batteries and is there anything I can do to help negate the heat issue?
How long can I expect these to last? Anyone else using similar batteries?
Its been 106 here the past few days. How does the heat affect batteries and is there anything I can do to help negate the heat issue?
Title: Re: 20x32 A frame cabin Central KY
Post by: MountainDon on July 01, 2012, 09:27:19 PM
Post by: MountainDon on July 01, 2012, 09:27:19 PM
Quote from: EaglesSJ on July 01, 2012, 08:55:38 PM
How long can I expect these to last?
We have 12 similar batteries I bought at our Sam's July 2009. (24 VDC system) They are going strong and look like new when you peer into the cells. They test like new too with a hydrometer. How long will they last? Depends. ;D Depends on a number of things; usual depth of discharge, keeping fluid levels up, etc. etc...... I think we can get 7 years and it's been suggested that with our use pattern maybe 10 years. Stay tuned; I'll let everyone know as long as the batteries expire before I do. :D
Heat shortens life. That's where we have an advantage as out 8800 foot elevation location is cooler than that. Darn cold at times. We've been running daytime highs in the mid 80's but only for a few hours. Nights still cool into the 50's. We are returning tomorrow and I have my thermometer with me to check the internal temperature (I'm just curious... will report. )
Title: Re: 20x32 A frame cabin Central KY
Post by: MountainDon on July 01, 2012, 09:29:52 PM
Post by: MountainDon on July 01, 2012, 09:29:52 PM
PS: our usual/normal depth of discharge runs to a maximum of 20%; 25% on occasion, sometimes 15%. Some will think that the bank is oversized but I am most comfortable with it.
Title: Re: 20x32 A frame cabin Central KY
Post by: MountainDon on July 01, 2012, 09:34:53 PM
Post by: MountainDon on July 01, 2012, 09:34:53 PM
From AZ Wind-Sun.... (http://www.windsun.com/Batteries/Battery_FAQ.htm#Temperature%20Effects%20on%20Batteries)
"Even though battery capacity at high temperatures is higher, battery life is shortened. Battery capacity is reduced by 50% at -22 degrees F - but battery LIFE increases by about 60%. Battery life is reduced at higher temperatures - for every 15 degrees F over 77, battery life is cut in half. This holds true for ANY type of Lead-Acid battery, whether sealed, gelled, AGM, industrial or whatever. This is actually not as bad as it seems, as the battery will tend to average out the good and bad times."

Temperature scale is across the bottom; degrees Celius in larger bold font, degrees F in smaller font, in parentheses. Left side scale is battery capacity... sorry I haven't found a life vs temperature chart.
"Even though battery capacity at high temperatures is higher, battery life is shortened. Battery capacity is reduced by 50% at -22 degrees F - but battery LIFE increases by about 60%. Battery life is reduced at higher temperatures - for every 15 degrees F over 77, battery life is cut in half. This holds true for ANY type of Lead-Acid battery, whether sealed, gelled, AGM, industrial or whatever. This is actually not as bad as it seems, as the battery will tend to average out the good and bad times."
Temperature scale is across the bottom; degrees Celius in larger bold font, degrees F in smaller font, in parentheses. Left side scale is battery capacity... sorry I haven't found a life vs temperature chart.
Title: Re: 20x32 A frame cabin Central KY
Post by: glenn kangiser on July 01, 2012, 10:38:07 PM
Post by: glenn kangiser on July 01, 2012, 10:38:07 PM
Beautiful crop there. I need to get my onions soon as they are giving our gophers bad breath... [ouch]
The golf cart batteries should be a significant improvement over any deep cycle type. We never made a year with any combination deep cycle. The golf cart batteries as well as the L16 batteries are lead/antimony plates and much more durable and resistant to problems if they are taken care of.
I also need to pay more attention to that.
UK, we have noticed that about the peppers and have one that is 3 years old still producing now I think. Sorry to hear about yours.
Title: Re: 20x32 A frame cabin Central KY
Post by: EaglesSJ on July 02, 2012, 08:27:29 AM
Post by: EaglesSJ on July 02, 2012, 08:27:29 AM
Quote from: MountainDon on July 01, 2012, 09:34:53 PM
From AZ Wind-Sun.... (http://www.windsun.com/Batteries/Battery_FAQ.htm#Temperature%20Effects%20on%20Batteries)
"Even though battery capacity at high temperatures is higher, battery life is shortened. Battery capacity is reduced by 50% at -22 degrees F - but battery LIFE increases by about 60%. Battery life is reduced at higher temperatures - for every 15 degrees F over 77, battery life is cut in half. This holds true for ANY type of Lead-Acid battery, whether sealed, gelled, AGM, industrial or whatever. This is actually not as bad as it seems, as the battery will tend to average out the good and bad times."
Temperature scale is across the bottom; degrees Celius in larger bold font, degrees F in smaller font, in parentheses. Left side scale is battery capacity... sorry I haven't found a life vs temperature chart.
So if Im reading correct basically the heat of the summer decreases my batteries lifespan but then the winter increases my batteries lifespan so they cancel each other out?
"This is actually not as bad as it seems, as the battery will tend to average out the good and bad times."
South Central Kentucky's average annual temperature is 69 degrees.
Title: Re: 20x32 A frame cabin Central KY
Post by: EaglesSJ on July 04, 2012, 08:42:10 PM
Post by: EaglesSJ on July 04, 2012, 08:42:10 PM
Ok so I have installed the new batteries however I have been unable to get my battery voltage up past 53.2V My amp meter shows that I am charging at 36amp and my outback mate shows that I am charging at 2100w however my voltage never goes up. I let it charge like this for 5 hrs with the same result. My float is set to 55. My bulk and absorb is set to 58 and eq is set to 61. I would like to eq these batteries but for some reason its just not wanting to happen.
Title: Re: 20x32 A frame cabin Central KY
Post by: Squirl on July 05, 2012, 09:24:58 AM
Post by: Squirl on July 05, 2012, 09:24:58 AM
I am not as familiar with 48v banks. I don't know what the voltage is supposed to be at 100%.
If the voltage is consistently just lower regardless of the amount of power put in it and you can never get a full charge, you may have a bad battery in the bank. My recollection from Trojan's website, was they recommend charging the battery, disconnect everything from all the batteries, and if there is a voltage drop after a few hours without the batteries connected to anything, you have a bad battery.
http://www.trojanbattery.com/tools/faqs.aspx
Title: Re: 20x32 A frame cabin Central KY
Post by: EaglesSJ on July 05, 2012, 06:13:25 PM
Post by: EaglesSJ on July 05, 2012, 06:13:25 PM
Ok so after my panels pumped 13kW into the batteries and the generator pumped another 10kW into them I finally got them equalized at 60v for 2 hrs. I took a SG test and all the cells came out to between 1.230 and 1.250 From reading this should be between 1.270 and 1.300 for a fully charged cell. What gives? Should I equalize again?
Title: Re: 20x32 A frame cabin Central KY
Post by: Barry Broome on July 06, 2012, 08:33:51 PM
Post by: Barry Broome on July 06, 2012, 08:33:51 PM
How much do those batteries cost a piece?
Title: Re: 20x32 A frame cabin Central KY
Post by: EaglesSJ on July 06, 2012, 11:58:26 PM
Post by: EaglesSJ on July 06, 2012, 11:58:26 PM
Top is stamped DEKA east penn manufacturing. Call to them cleared that all components are made here in the US as well as being assembled here. Pretty cheap for a battery that people claim to get 5-10 years from.
http://www.samsclub.com/sams/shop/product.jsp?productId=prod3590220&navAction=push
http://www.samsclub.com/sams/shop/product.jsp?productId=prod3590220&navAction=push
Title: Re: 20x32 A frame cabin Central KY
Post by: EaglesSJ on July 07, 2012, 12:59:27 AM
Post by: EaglesSJ on July 07, 2012, 12:59:27 AM
after 6 hrs of equalization at 63v as directed by deka I now have readings between 1.255 and 1.75 on all cells with 80% falling between 1.260-1.265 I guess this is as good as I am going to get for now. I have spent alot of time with these batteries trying to be good to them and treat them like a little princess. Its now time to treat them like an ol team of mules and just use em until they wear out I guess. Im disappointed that I can not get them all up to 1.275 but there is little left to be done at this point. I have eqed them 3 times for a total of 10 hrs.
Title: Re: 20x32 A frame cabin Central KY
Post by: EaglesSJ on October 12, 2012, 07:18:14 PM
Post by: EaglesSJ on October 12, 2012, 07:18:14 PM
Built a new chicken coop and painted our shed as well as building a little porch out from it for additional storage.
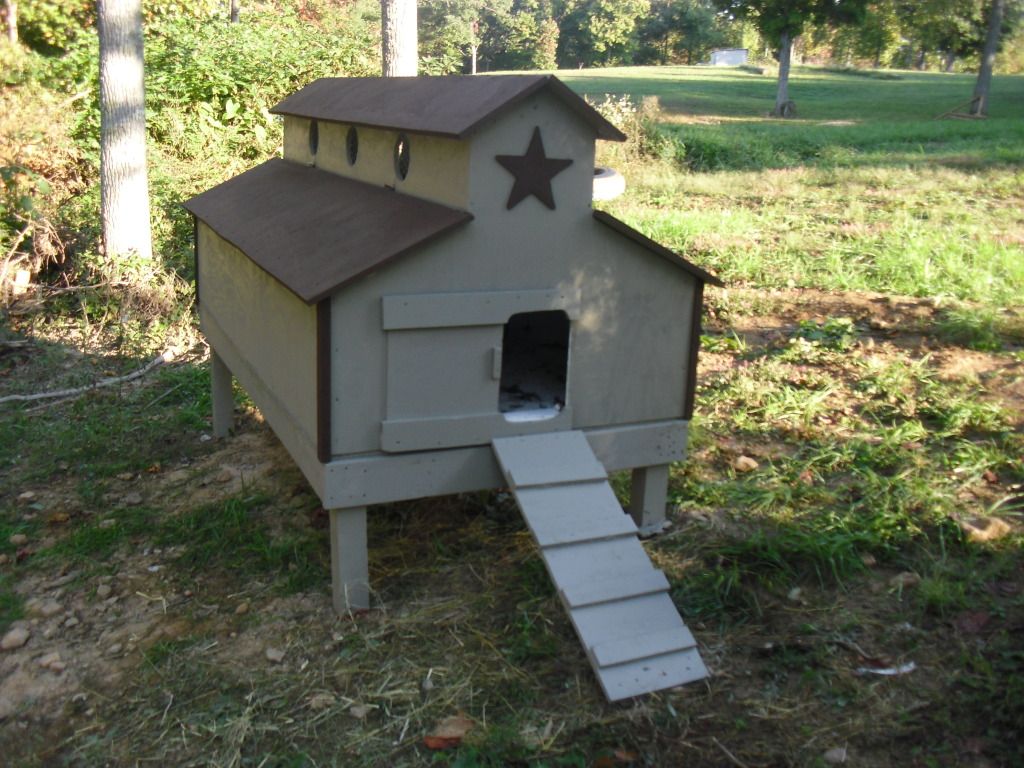
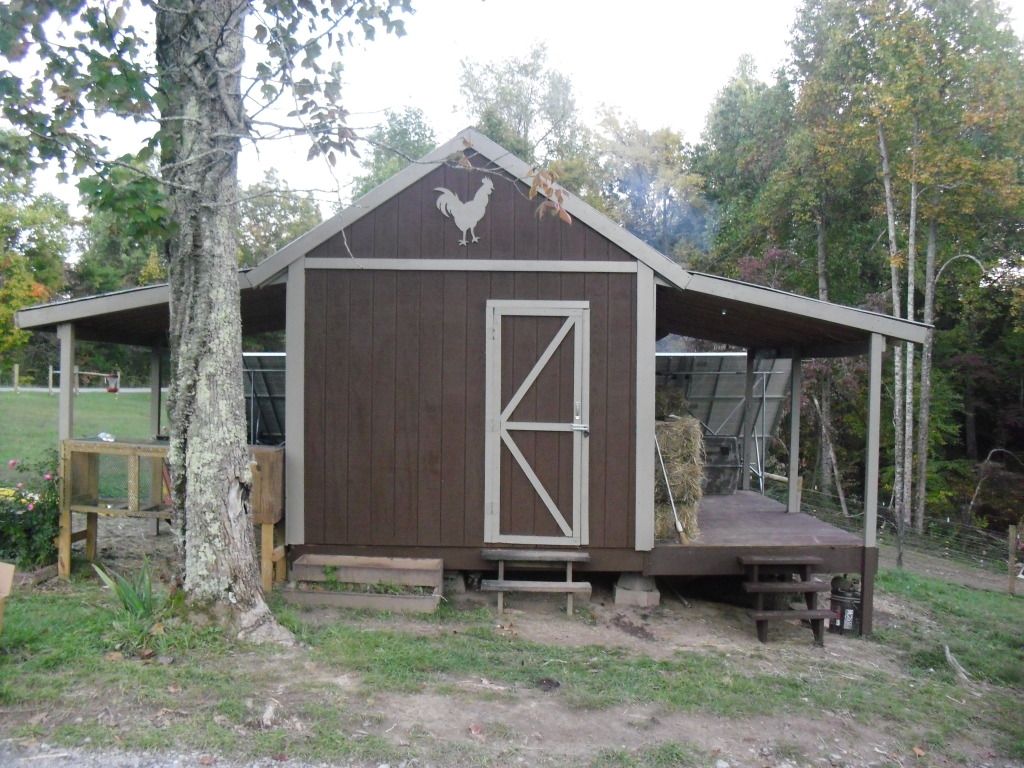
Title: Re: 20x32 A frame cabin Central KY
Post by: CjAl on October 13, 2012, 10:38:59 PM
Post by: CjAl on October 13, 2012, 10:38:59 PM
how is that new solar setup holding up to demand?
Title: Re: 20x32 A frame cabin Central KY
Post by: EaglesSJ on October 14, 2012, 03:57:09 PM
Post by: EaglesSJ on October 14, 2012, 03:57:09 PM
Quote from: CjAl on October 13, 2012, 10:38:59 PM
how is that new solar setup holding up to demand?
Lots more than we use. It is a 3450w array and it rarely ever gets over 1200w to keep the batteries up. The only time it ever hits 2.5-3k is if it has been cloudy for a few days and the batteries are low. Even then a day and a half to two days of sun and were back at full.
Title: Re: 20x32 A frame cabin Central KY
Post by: EaglesSJ on October 14, 2012, 03:58:59 PM
Post by: EaglesSJ on October 14, 2012, 03:58:59 PM
I should also add that I go rid of the 6 kyoceras and I now have a total of 15 sharp 230s. 5 strings of 3
Title: Re: 20x32 A frame cabin Central KY
Post by: sleepgsr on October 15, 2012, 07:46:19 PM
Post by: sleepgsr on October 15, 2012, 07:46:19 PM
Thanks for the update. I've been following your build for the past few years, and to say the least, I have been impressed. Its the inspiration for our family to buy some land and to build ourselves as well. - Thanks
Title: Re: 20x32 A frame cabin Central KY
Post by: semosam on October 16, 2012, 03:12:54 AM
Post by: semosam on October 16, 2012, 03:12:54 AM
First of all love your place and story very inspiring! I am curious about your log siding, what stain and color did you use on it and have you been happy with it and where did you get it from? thanks for the info in advance and keep up the good work!
Title: Re: 20x32 A frame cabin Central KY
Post by: EaglesSJ on October 17, 2012, 07:39:49 PM
Post by: EaglesSJ on October 17, 2012, 07:39:49 PM
Quote from: semosam on October 16, 2012, 03:12:54 AM
First of all love your place and story very inspiring! I am curious about your log siding, what stain and color did you use on it and have you been happy with it and where did you get it from? thanks for the info in advance and keep up the good work!
It is cedar natural tone from lowes. Olympic brand stain Im pretty sure. Very happy with it.
Title: Re: 20x32 A frame cabin Central KY
Post by: Zona on December 13, 2012, 01:41:03 PM
Post by: Zona on December 13, 2012, 01:41:03 PM
Eagles, gotta say your thread has inspired me to keep trucking more than any others. I've still got a few more years of saving to do (barring an emergency) but a setup like yours is what I strive for. [cool]
Title: Re: 20x32 A frame cabin Central KY
Post by: MJW on December 13, 2012, 03:29:26 PM
Post by: MJW on December 13, 2012, 03:29:26 PM
Eagles and his family have a super place and have done a great job putting it all together. He and his wife were gracious enough to let me and my family visit them while we were in KY earlier this year.
He has been a big inspiration to me and my wife and we hope we can accomplish much the same next year.
He has been a big inspiration to me and my wife and we hope we can accomplish much the same next year.
Title: Re: 20x32 A frame cabin Central KY
Post by: EaglesSJ on January 07, 2013, 08:17:24 PM
Post by: EaglesSJ on January 07, 2013, 08:17:24 PM
Lindsay's Christmas present.

Title: Re: 20x32 A frame cabin Central KY
Post by: shadetree69 on January 28, 2013, 10:04:47 PM
Post by: shadetree69 on January 28, 2013, 10:04:47 PM
Just wanted to say that I really liked reading about this project of yours. You truly have talent and I just wanted to say thanks for posting your story. Keep on enjoying life...
Title: Re: 20x32 A frame cabin Central KY
Post by: Kyo on February 13, 2013, 01:02:43 PM
Post by: Kyo on February 13, 2013, 01:02:43 PM
Great Cabin, I always liked the A-Frame in a Wooded Setting.. Fantastic Build !! Gathered quite a lot of ideas for my own build ( in the planning)...
Title: Re: 20x32 A frame cabin Central KY
Post by: ChewyTheGnome on February 18, 2013, 04:59:04 PM
Post by: ChewyTheGnome on February 18, 2013, 04:59:04 PM
I wanna start off by saying congratulations on the birth of your baby girl! She's a doll! Secondly I want to thank you for your post! I'm looking at building my own A-Frame home for my primary residence around June this year. I've been searching and searching online for information on how they're done, and this thread has been by far the most help! I absolutely love your home! And the similarities of yours be what I plan to build is crazy lol. I am curious though, I noticed you had started off with 28' 2x8's, and built it off the pitch instead of the angles. But you wound up cutting off some of the bottom rafter after they were secured in. Do you by any chance know the angles of ur house, and how tall it is to the peak? I'm lookin at building my A-Frame on 60 degree angles. With a 24 ft base, that'll give me 24' rafters. And should put the peak at just under 22' high. I'm curious as to how much head space that'll give me in the rooms, or if I should go with larger angles to get a steeper pitch. But I know that'll be putting my peak up closer to 30'. Any suggestions/advice?
Title: Re: 20x32 A frame cabin Central KY
Post by: EaglesSJ on February 19, 2013, 05:57:33 PM
Post by: EaglesSJ on February 19, 2013, 05:57:33 PM
My house is right at 20 ft at the ft. Seems like it was exactly 20 ft. I have a 24 pitch roof so you can do the figuring on that :)
Title: Re: 20x32 A frame cabin Central KY
Post by: ChewyTheGnome on February 20, 2013, 03:51:15 AM
Post by: ChewyTheGnome on February 20, 2013, 03:51:15 AM
K, did some figuring. Lol. You're A-Frame has 63.434 degree base angles (given the peak is 20'). If I was to do that angle with a 24' base, it'd put my peak right at a height of 24', with 26.8' rafters. I think I'll stick to the 60 degree angles and just hope my house doesn't look to "fat" lol. Thanks for the feedback!
Title: Re: 20x32 A frame cabin Central KY
Post by: Buckeye on April 15, 2013, 08:17:14 PM
Post by: Buckeye on April 15, 2013, 08:17:14 PM
I was curious how your batteries have been holding up? I've seen them for sale here and have been mighty tempted to start buying a few a week. Are you satisified with them so far?
Buckeye
Buckeye
Title: Re: 20x32 A frame cabin Central KY
Post by: MountainDon on April 15, 2013, 08:51:58 PM
Post by: MountainDon on April 15, 2013, 08:51:58 PM
QuoteI've seen them for sale here and have been mighty tempted to start buying a few a week
An unsolicited opinion, hope you don't mind, but if the purchases are going to end up spread over months and not a few weeks you are better off to save the money up and buy at once. And second along that line of thought, don't buy thrm until you are ready to install and use them. They start aging from the moment they are filled with battery acid.
Title: Re: 20x32 A frame cabin Central KY
Post by: EaglesSJ on April 16, 2013, 11:34:38 AM
Post by: EaglesSJ on April 16, 2013, 11:34:38 AM
Quote from: MountainDon on April 15, 2013, 08:51:58 PM
An unsolicited opinion, hope you don't mind, but if the purchases are going to end up spread over months and not a few weeks you are better off to save the money up and buy at once. And second along that line of thought, don't buy thrm until you are ready to install and use them. They start aging from the moment they are filled with battery acid.
Listen to this. You want to buy all the batteries you need all at once. If not the older batteries will "bring down" the new ones when connected. Like the old adage of "you're only as strong as your weakest link"
Title: Re: 20x32 A frame cabin Central KY
Post by: Abbey on April 16, 2013, 01:49:13 PM
Post by: Abbey on April 16, 2013, 01:49:13 PM
Hi Eagle,
Nice work you've been doing. I was wondering how you're simple septic system is holding up, or are you starting to "max" it out?
Nice work you've been doing. I was wondering how you're simple septic system is holding up, or are you starting to "max" it out?
Title: Re: 20x32 A frame cabin Central KY
Post by: Buckeye on April 18, 2013, 08:26:36 PM
Post by: Buckeye on April 18, 2013, 08:26:36 PM
Thanks for the tip on the batteries guys. I was still curious if the batteries were holding up well since you installed them Eagles.
Title: Re: 20x32 A frame cabin Central KY
Post by: MountainDon on April 20, 2013, 09:13:01 AM
Post by: MountainDon on April 20, 2013, 09:13:01 AM
Can't speak for EagleSJ but we do have the same type of battery, 12 of them. We're going into our fourth year. The plate top look like new still and they perform the same as when first put into service.
A lot of how they last is dependent upon the use or abuse they receive.
A lot of how they last is dependent upon the use or abuse they receive.
Title: Re: 20x32 A frame cabin Central KY
Post by: EaglesSJ on May 03, 2013, 03:39:05 PM
Post by: EaglesSJ on May 03, 2013, 03:39:05 PM
Quote from: Abbey on April 16, 2013, 01:49:13 PM
Hi Eagle,
Nice work you've been doing. I was wondering how you're simple septic system is holding up, or are you starting to "max" it out?
Septic is still running perfect. No troubles at all. Ive been out a couple times since installing it and poured in some yeast powder but thats it.
As for the batteries, ours seem to be doing fine. We have 16 of them and really wish we had 32. Like anything else in life. The more you have, the more you want. I am hoping we get at least 5 years out of them. I really dont know how to tell what the plates look like. Maybe Don can inform me. He knows an awful lot when it comes to these sorts of things. Im really a novice to all of this. I just do what I can with what I have.
Title: Re: 20x32 A frame cabin Central KY
Post by: Abbey on May 04, 2013, 10:15:59 AM
Post by: Abbey on May 04, 2013, 10:15:59 AM
Is the yeast to add beneficial bacteria to break down the organic solids?
Title: Re: 20x32 A frame cabin Central KY
Post by: EaglesSJ on May 06, 2013, 06:50:23 PM
Post by: EaglesSJ on May 06, 2013, 06:50:23 PM
Quote from: Abbey on May 04, 2013, 10:15:59 AM
Is the yeast to add beneficial bacteria to break down the organic solids?
exactly
Title: Re: 20x32 A frame cabin Central KY
Post by: Abbey on May 07, 2013, 06:51:35 AM
Post by: Abbey on May 07, 2013, 06:51:35 AM
Thanks for the info, I'm thinking I might do something along these lines for my place.
Title: Re: 20x32 A frame cabin Central KY
Post by: EaglesSJ on May 21, 2013, 09:49:49 AM
Post by: EaglesSJ on May 21, 2013, 09:49:49 AM
New parking area with small raised bed for our tomato plants and some flowers. Still need to get some grass seed on the hill behind it and a few other little odds and ends. The main thing was getting the food in the ground.
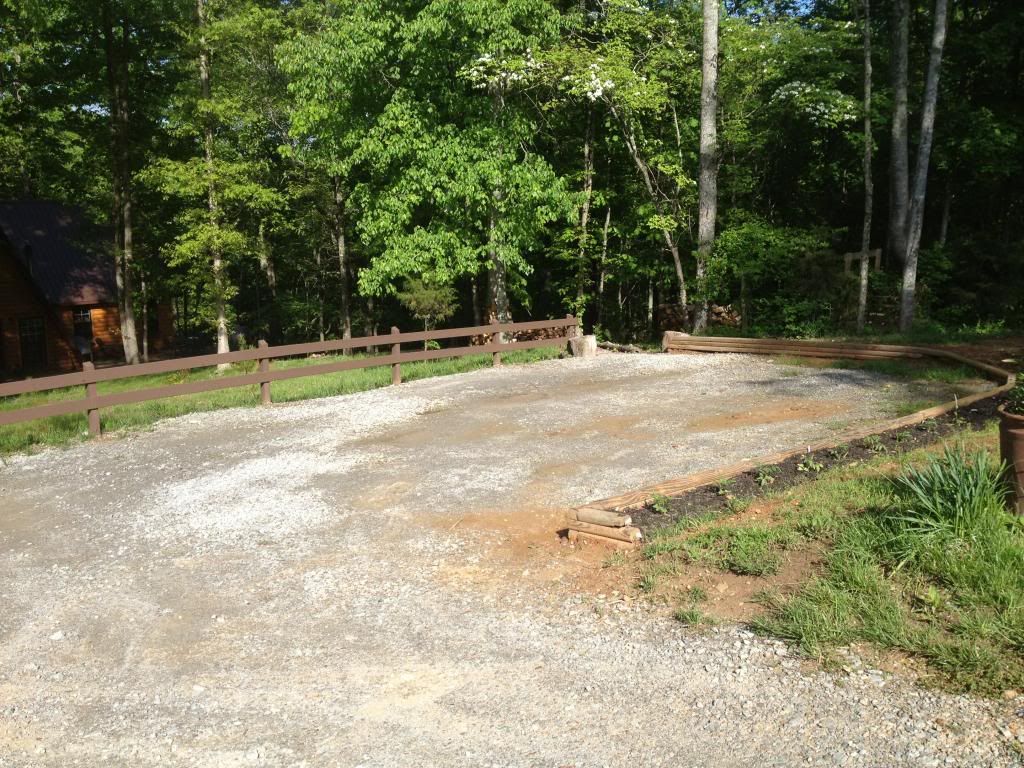 (https://s6.photobucket.com/user/EaglesSJ/media/IMG_0188_zpsc0293255.jpg.html)
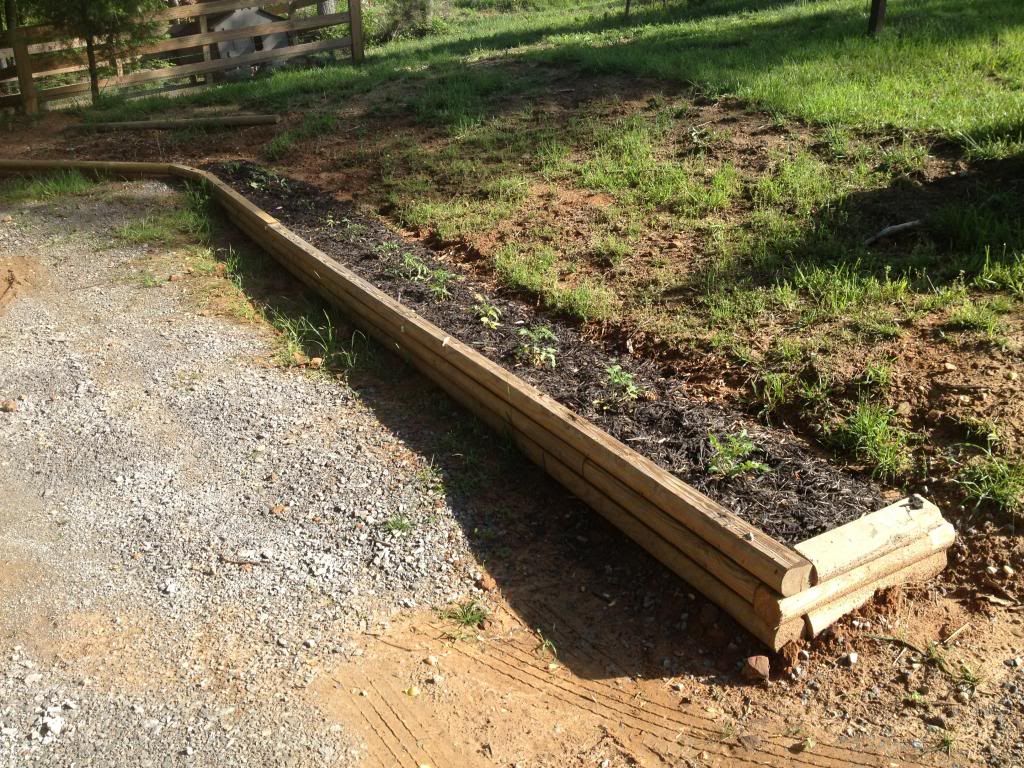 (https://s6.photobucket.com/user/EaglesSJ/media/IMG_0187_zps1b5d84fc.jpg.html)
(https://s6.photobucket.com/user/EaglesSJ/media/IMG_0188_zpsc0293255.jpg.html) (https://s6.photobucket.com/user/EaglesSJ/media/IMG_0187_zps1b5d84fc.jpg.html)
Title: Re: 20x32 A frame cabin Central KY
Post by: MountainDon on May 21, 2013, 10:02:58 AM
Post by: MountainDon on May 21, 2013, 10:02:58 AM
Quote from: EaglesSJ on May 03, 2013, 03:39:05 PMI really dont know how to tell what the plates look like. Maybe Don can inform me.
I took pictures of the new cells so I can compare. What you do not want to see is the formation of crystals on the plates. That's sulfation and to be avoided by bringing the batteries back to full charge every day. The CC should go into float mode every day if you are doing things right.
Title: Re: 20x32 A frame cabin Central KY
Post by: Redoverfarm on May 21, 2013, 07:55:26 PM
Post by: Redoverfarm on May 21, 2013, 07:55:26 PM
Quote from: Abbey on May 04, 2013, 10:15:59 AM
Is the yeast to add beneficial bacteria to break down the organic solids?
You can sit out a glass of milk and let it spoil and pour it into the septic tank and it will basicly add the bacteria to help disolve the solids.
Title: Re: 20x32 A frame cabin Central KY
Post by: ChewyTheGnome on June 23, 2013, 11:28:23 PM
Post by: ChewyTheGnome on June 23, 2013, 11:28:23 PM
Eagles, just curious. How did you run the plumbing on your house. I'm trying to figure out how to vent my lines without running multiple pipes all the way up from the bottom floor through the roof.......
Title: Re: 20x32 A frame cabin Central KY
Post by: EaglesSJ on June 28, 2013, 10:42:14 PM
Post by: EaglesSJ on June 28, 2013, 10:42:14 PM
I used Studor plumbing vents both on my toilet septic line and my sink/shower drain. There is no standard through the roof vent.
Title: Re: 20x32 A frame cabin Central KY
Post by: scoutineric on July 09, 2013, 08:19:57 PM
Post by: scoutineric on July 09, 2013, 08:19:57 PM
On your 26' rafters how much of it did you leave as overhang? How tall is the roofline from the base of your house/angle of the A's?
Does your 2nd floor get excessively warm in the summer? Did you do anything special for ventilation?
Does your 2nd floor get excessively warm in the summer? Did you do anything special for ventilation?
Title: Re: 20x32 A frame cabin Central KY
Post by: EaglesSJ on July 09, 2013, 09:12:49 PM
Post by: EaglesSJ on July 09, 2013, 09:12:49 PM
Quote from: scoutineric on July 09, 2013, 08:19:57 PM
On your 26' rafters how much of it did you leave as overhang? How tall is the roofline from the base of your house/angle of the A's?
Does your 2nd floor get excessively warm in the summer? Did you do anything special for ventilation?
I dont remember for sure but it seems like around 16 inches of overhang. Roofline is 20 ft. The second floor can get warmer than the rest of the house but this is negated now that we have A/C installed upstairs. It actually stays cooler up there than it does downstairs. Also with the window in the front and the screen door leading out onto the upstairs deck ventilation is no issue.
Title: Re: 20x32 A frame cabin Central KY
Post by: EaglesSJ on July 10, 2013, 10:05:33 AM
Post by: EaglesSJ on July 10, 2013, 10:05:33 AM
My latest addition to the homestead is a zero dollar wood shed. I cut and skinned the poles myself, and used some rough sawn poplar lumber for the floor. Had some left over 2x4s for the rafters and my dad gave me the nails and metal roofing. Thats my kind of project! It holds 9 rick of wood which conveniently is exactly what we will burn in 1 year. I split the storage in half so we can start using out of one side and refill it as soon as it is empty so that it has a full year to season before next years burning. What you see stacked in there now is seasoned red oak. There are few things I find more beauty in than stacked firewood. There is just something about knowing you will spend a warm cozy winter that is calming to the mind.
I am also in the process of converting over the compost bins to store firewood. Based on the measurements it should store another 3.5-4 rick of wood. There is a rick (face cord) shown in the picture. It is very green as it was cut just a few days ago. My grandpa, my son, and I went out and cut 2 loads. 90 degrees and 90% humidity makes for a miserable experience. I did manage to get an action shot of my grandpa in mid split. In other news our tomatoes are off to a slow start but are now producing a few here and there, especially the Romas. Chickens are up to full production. Getting 8-10 eggs per day out of 12 hens. Somehow we are managing to use them all.
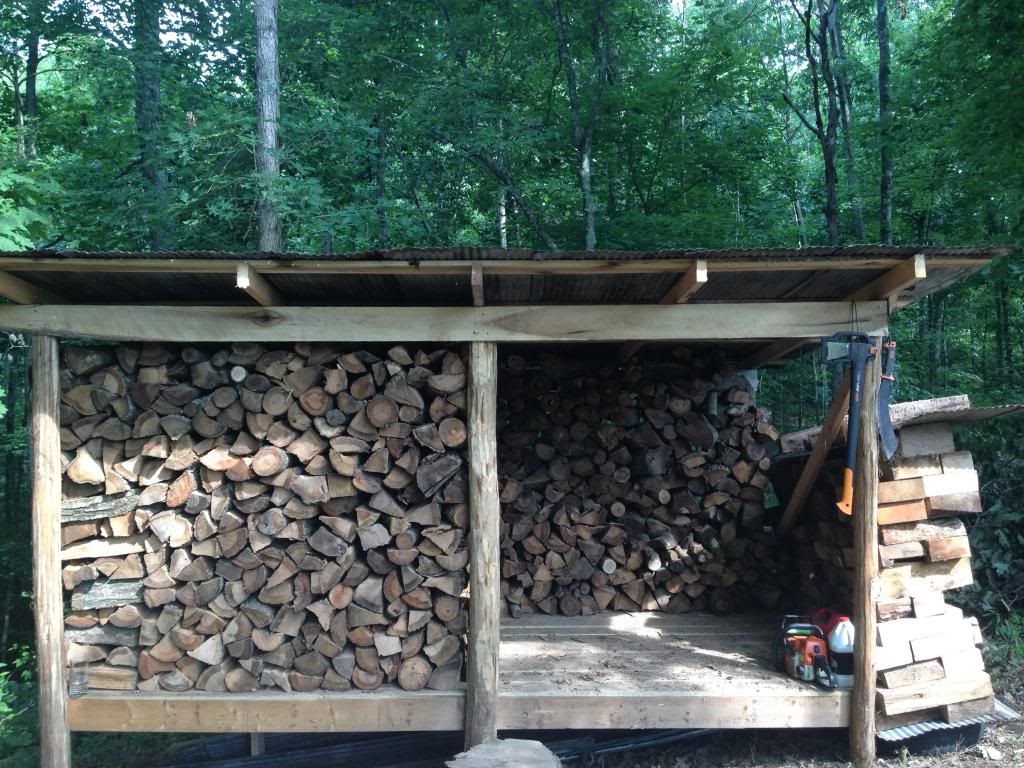 (https://s6.photobucket.com/user/EaglesSJ/media/IMG_0432_zps419e515e.jpg.html)
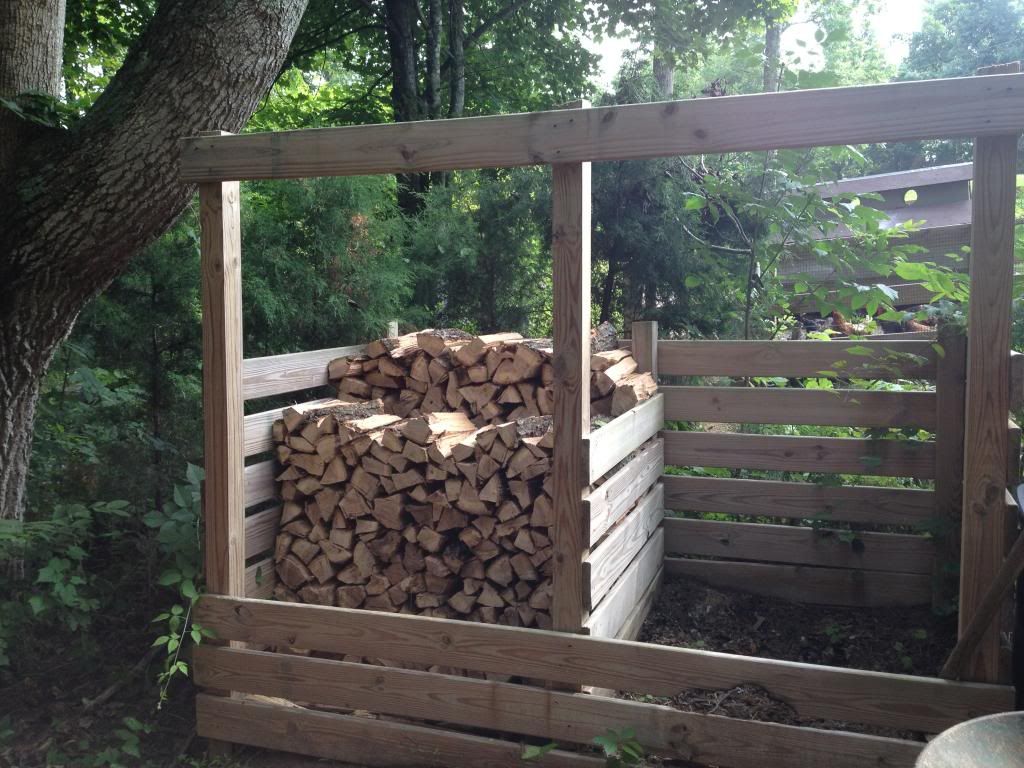 (https://s6.photobucket.com/user/EaglesSJ/media/IMG_0433_zps5a857b0e.jpg.html)
 (https://s6.photobucket.com/user/EaglesSJ/media/IMG_0429_zpsce9a68a2.jpg.html)
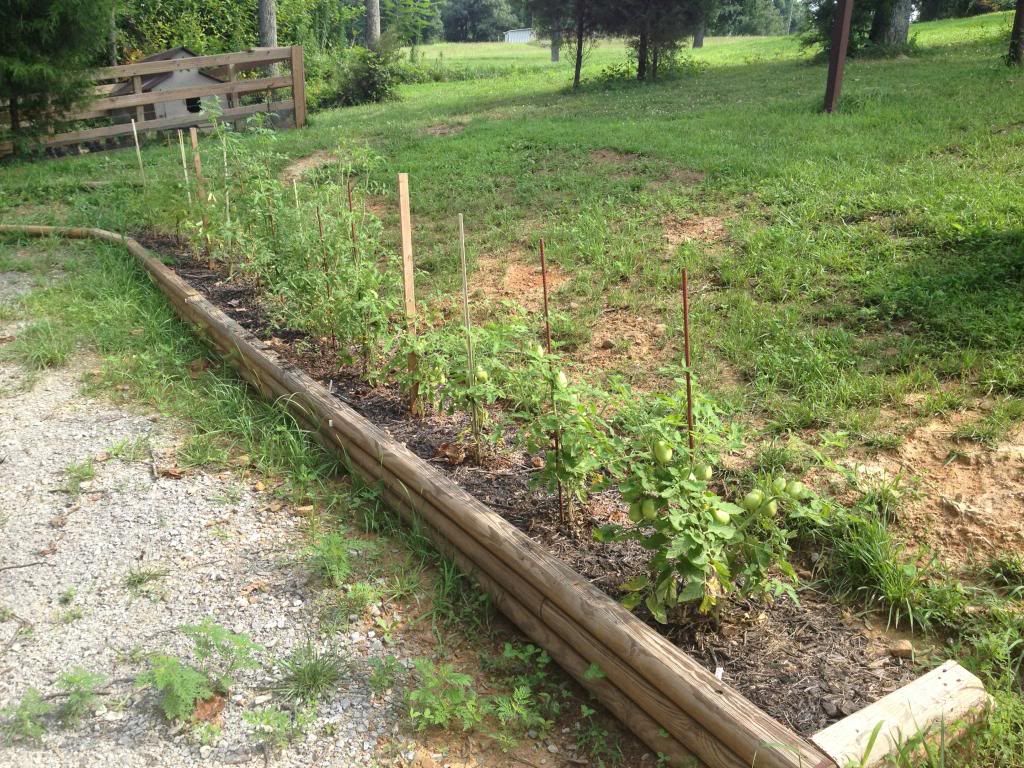 (https://s6.photobucket.com/user/EaglesSJ/media/IMG_0434_zpsa94684e3.jpg.html)
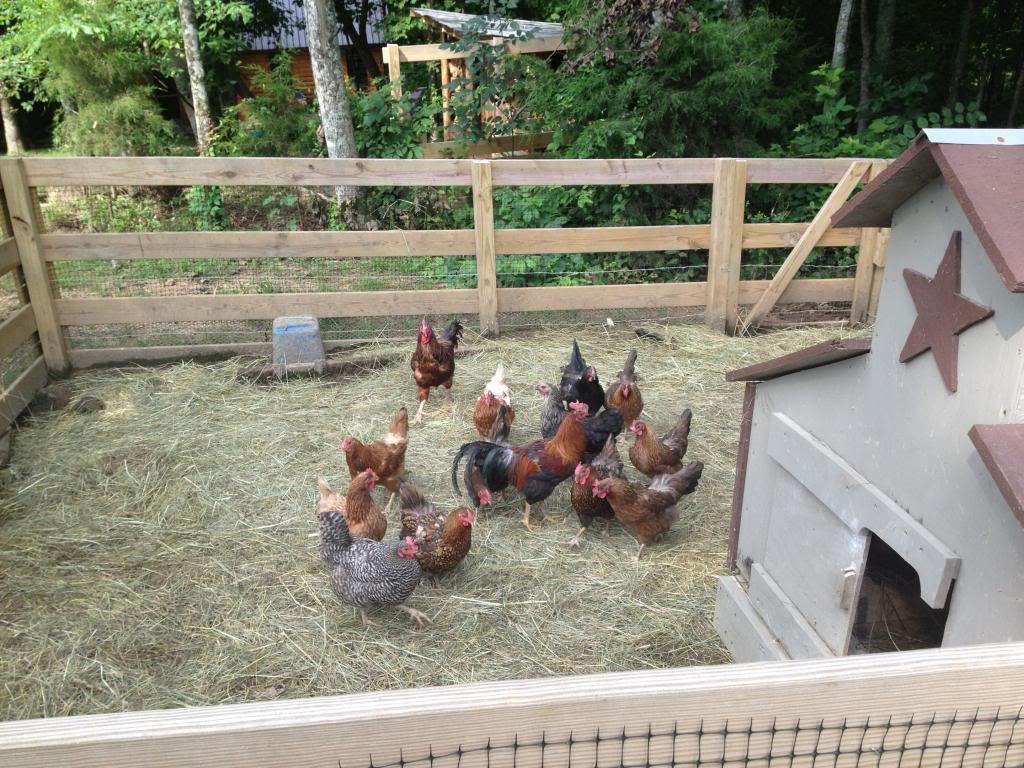 (https://s6.photobucket.com/user/EaglesSJ/media/IMG_0437_zps45ba316f.jpg.html)
I am also in the process of converting over the compost bins to store firewood. Based on the measurements it should store another 3.5-4 rick of wood. There is a rick (face cord) shown in the picture. It is very green as it was cut just a few days ago. My grandpa, my son, and I went out and cut 2 loads. 90 degrees and 90% humidity makes for a miserable experience. I did manage to get an action shot of my grandpa in mid split. In other news our tomatoes are off to a slow start but are now producing a few here and there, especially the Romas. Chickens are up to full production. Getting 8-10 eggs per day out of 12 hens. Somehow we are managing to use them all.
(https://s6.photobucket.com/user/EaglesSJ/media/IMG_0432_zps419e515e.jpg.html) (https://s6.photobucket.com/user/EaglesSJ/media/IMG_0433_zps5a857b0e.jpg.html) (https://s6.photobucket.com/user/EaglesSJ/media/IMG_0429_zpsce9a68a2.jpg.html) (https://s6.photobucket.com/user/EaglesSJ/media/IMG_0434_zpsa94684e3.jpg.html) (https://s6.photobucket.com/user/EaglesSJ/media/IMG_0437_zps45ba316f.jpg.html)
Title: Re: 20x32 A frame cabin Central KY
Post by: EaglesSJ on July 29, 2013, 08:14:44 PM
Post by: EaglesSJ on July 29, 2013, 08:14:44 PM
So for the past few days we have been working on the guest bedroom upstairs. It is a 16x20 room that is quite spacious and were actually wishing it were the master bedroom now! We still need to put down some flooring in the section below the built in shelves and a bit more trim stain and door but its almost done.
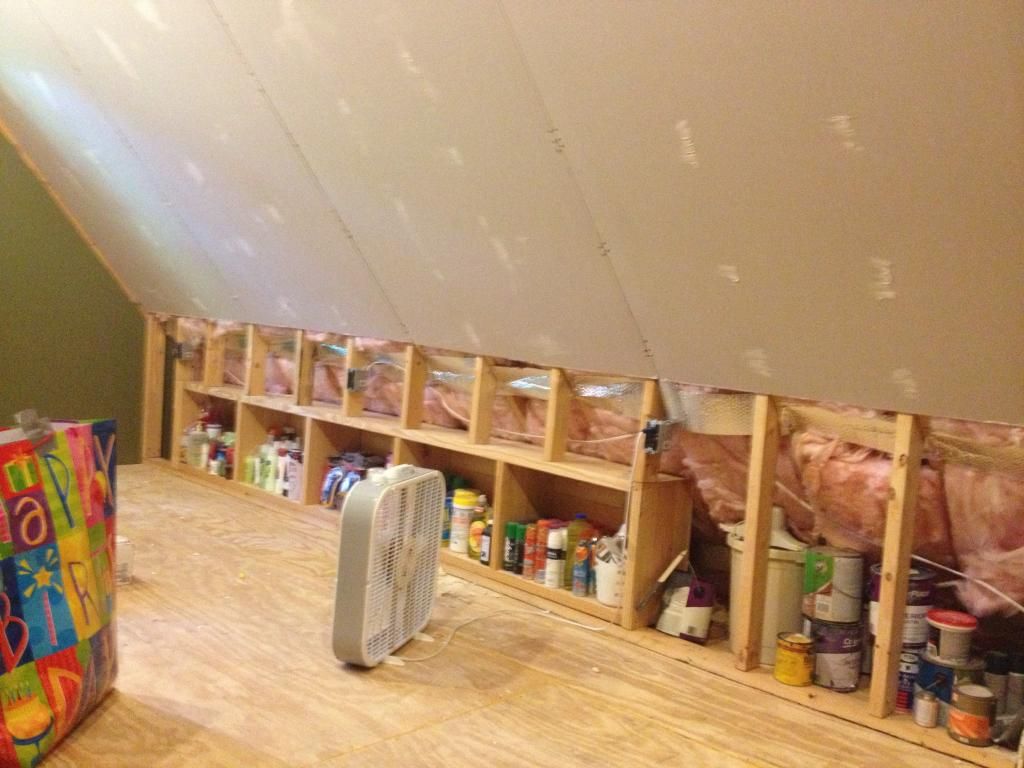 (//s6.photobucket.com/user/EaglesSJ/media/image_zps736a9313.jpg.html)
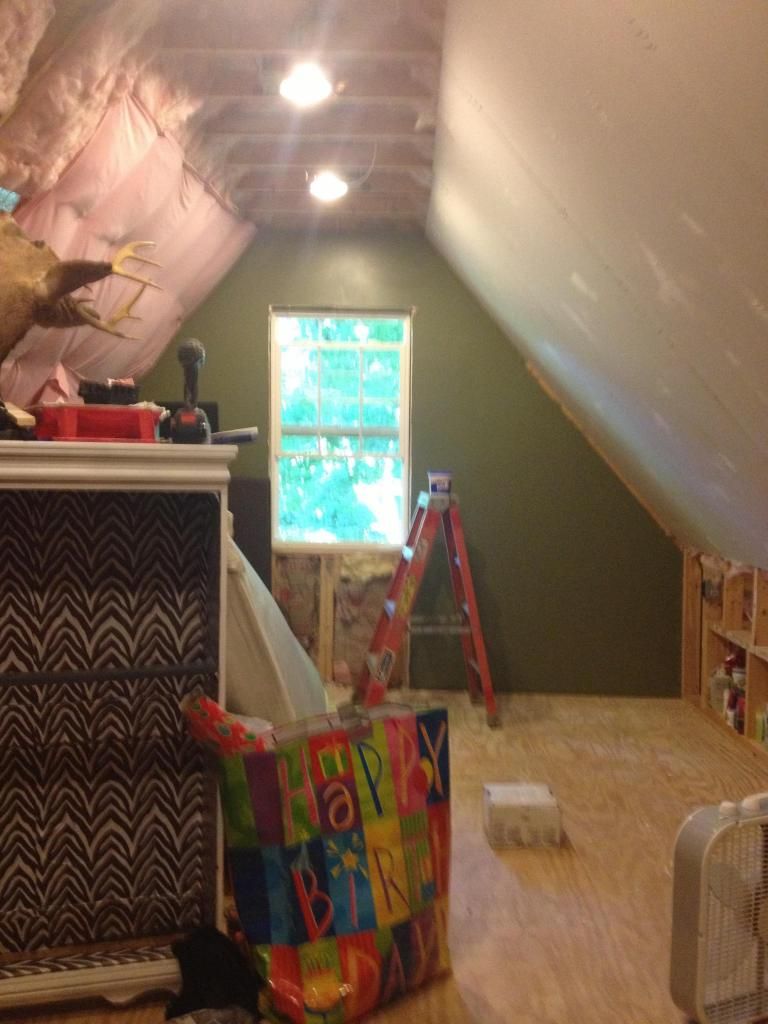 (https://s6.photobucket.com/user/EaglesSJ/media/image_zps4c727409.jpg.html)
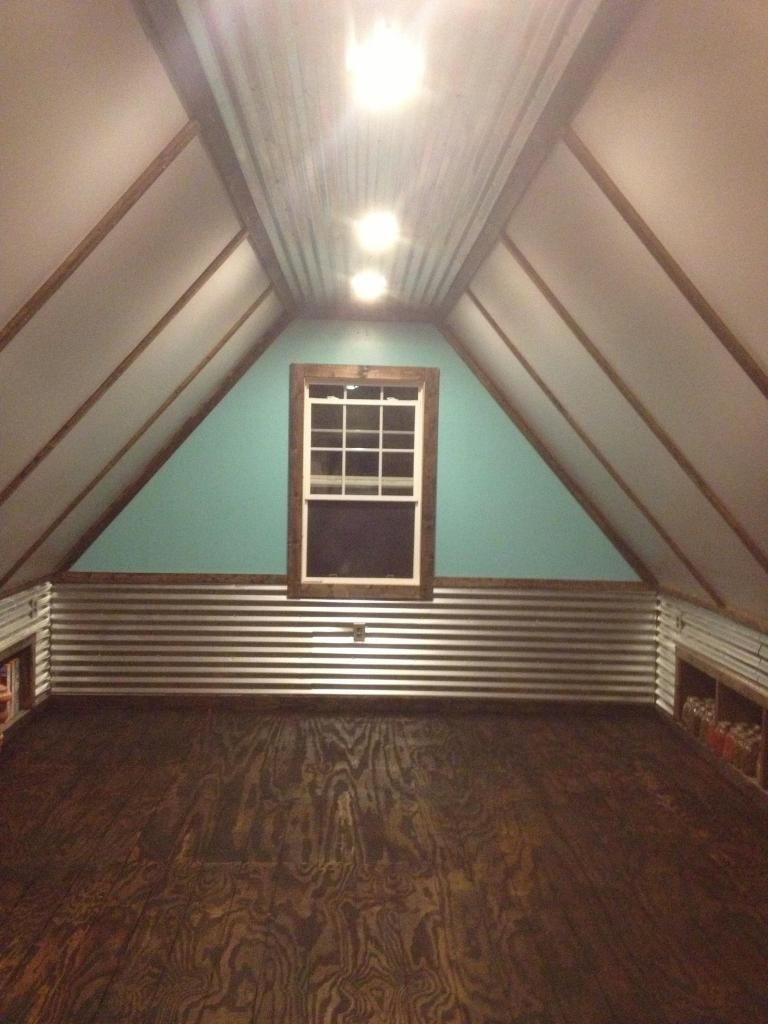 (https://s6.photobucket.com/user/EaglesSJ/media/image_zps3fe5b0c0.jpg.html)
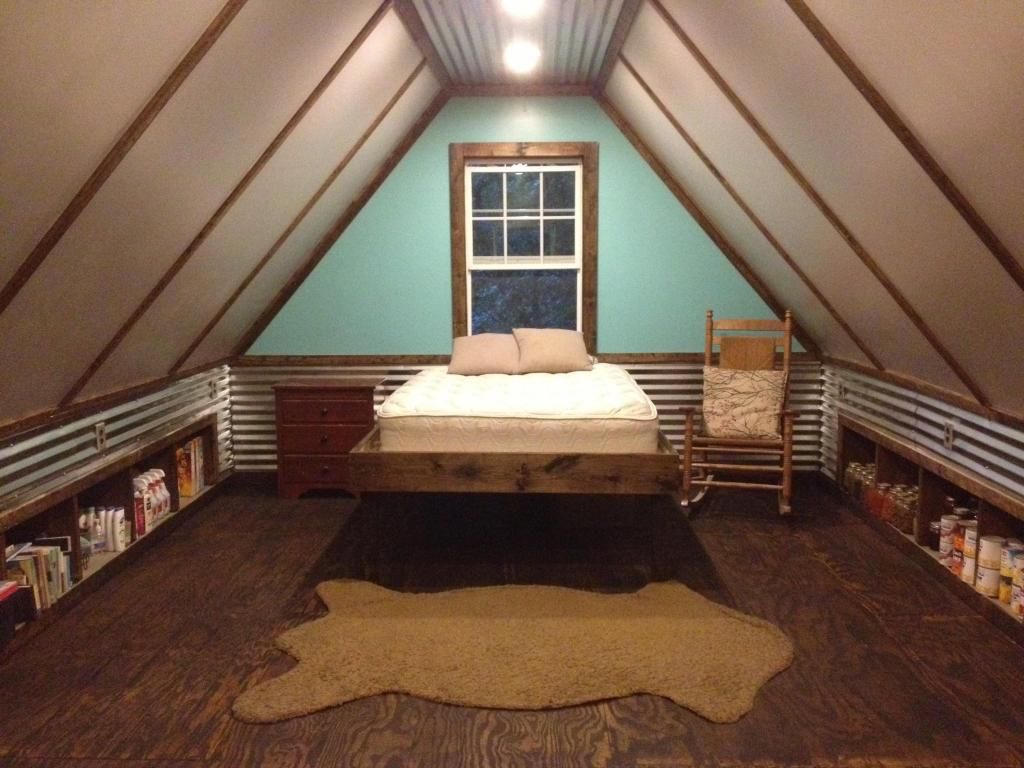 (https://s6.photobucket.com/user/EaglesSJ/media/image_zps08fe02b1.jpg.html)
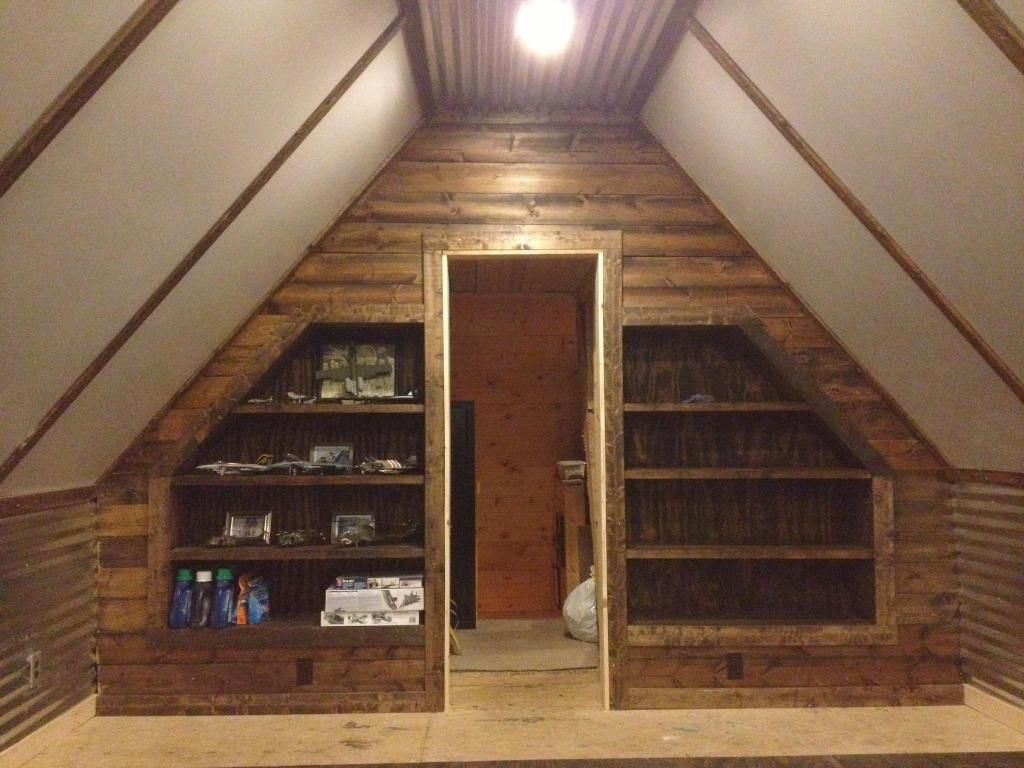 (https://s6.photobucket.com/user/EaglesSJ/media/image_zps4f69c221.jpg.html)
 (https://s6.photobucket.com/user/EaglesSJ/media/image_zpscded68fc.jpg.html)
(//s6.photobucket.com/user/EaglesSJ/media/image_zps736a9313.jpg.html) (https://s6.photobucket.com/user/EaglesSJ/media/image_zps4c727409.jpg.html) (https://s6.photobucket.com/user/EaglesSJ/media/image_zps3fe5b0c0.jpg.html) (https://s6.photobucket.com/user/EaglesSJ/media/image_zps08fe02b1.jpg.html) (https://s6.photobucket.com/user/EaglesSJ/media/image_zps4f69c221.jpg.html) (https://s6.photobucket.com/user/EaglesSJ/media/image_zpscded68fc.jpg.html)
Title: Re: 20x32 A frame cabin Central KY
Post by: willomiller on July 29, 2013, 10:23:10 PM
Post by: willomiller on July 29, 2013, 10:23:10 PM
Looking great man! One thing tho... where is the Black Hawk helicopter!? We really like the room.
Title: Re: 20x32 A frame cabin Central KY
Post by: Patrick on July 30, 2013, 04:53:53 PM
Post by: Patrick on July 30, 2013, 04:53:53 PM
Your wood shed is exactly how we did it at my dad's old place in MT cut and peeled logs built it big enough for a seasons worth of wood,They cooked with wood only for a few years also . We would spend the summer and it would need to be full before we went back home, I remember being so happy when he got a woodsplitter.
Title: Re: 20x32 A frame cabin Central KY
Post by: Frank W on September 29, 2013, 06:24:35 PM
Post by: Frank W on September 29, 2013, 06:24:35 PM
Awesome build!!! I'm new to the forum but have the same mindset. You did a great job. I raise Silver Fox rabbits and Red Bourbon turkeys. Got a few chickens too. My land is in Rutledge but your build has gave me a few ideas. Thanks!
BTW, What kinda bike did you get? I've had a few dirt bikes too(XR650, KTM525, and DRZ400). They are great for getting around rough country.
BTW, What kinda bike did you get? I've had a few dirt bikes too(XR650, KTM525, and DRZ400). They are great for getting around rough country.
Title: Re: 20x32 A frame cabin Central KY
Post by: Maxed on November 25, 2013, 12:58:53 AM
Post by: Maxed on November 25, 2013, 12:58:53 AM
I read through this entire thread today. Its amazing what you have accomplished. I plan on building a home similar to yours in TN very soon. I recently purchased some land up there and will be moving from the Texas Hill Country to TN. Have you done anything else lately to your home?
Title: Re: 20x32 A frame cabin Central KY
Post by: flokk on December 11, 2013, 04:48:48 PM
Post by: flokk on December 11, 2013, 04:48:48 PM
All I can say is, wow. I stumbled on this thread because I'm interested in learning to get off the grid and have been looking into buying land and erecting an A-frame. Read this from front to back and am so impressed. Kudos to you for making a dream out of a bad situation. Best of luck and thanks for the inspiration!
Title: Re: 20x32 A frame cabin Central KY
Post by: Headed out on December 24, 2013, 10:59:14 PM
Post by: Headed out on December 24, 2013, 10:59:14 PM
Thanks for all your work on this forum, you inspired me to get started while my son is small. Any thoughts now looking back that might help those of us starting out? Thanks for your service,Merry Christmas
Title: Re: 20x32 A frame cabin Central KY
Post by: EaglesSJ on January 05, 2014, 05:04:19 PM
Post by: EaglesSJ on January 05, 2014, 05:04:19 PM
There are lots of things I would have done different. One is to run my water pipes through the floor joist instead of under them. Doing so would allow me to insulate in between each joist and trap the heat from my house against the pipes. I would put my wood stove more in the center of the house instead of in a corner to make it easier to distribute the heat.
But if I ever build another home I will build it underground. This keeps you safe from storms and is a breeze to heat and cool. A lot cheaper as well. Were actually thinking of selling this place and starting over with an underground home. Lots and lots of work though. The thought of doing everything I have done all over again is enough to keep a man up at night.
But if I ever build another home I will build it underground. This keeps you safe from storms and is a breeze to heat and cool. A lot cheaper as well. Were actually thinking of selling this place and starting over with an underground home. Lots and lots of work though. The thought of doing everything I have done all over again is enough to keep a man up at night.
Title: Re: 20x32 A frame cabin Central KY
Post by: Buckeye on January 05, 2014, 06:26:25 PM
Post by: Buckeye on January 05, 2014, 06:26:25 PM
Your build thread made it look like a piece of cake Eagles! I started my A frame after following your build on this forum. I thought it would be a piece of cake because you made it look so easy....boy was I wrong d*. You are one hard working dude! I need to get my pics and start a build thread, it's too cold for me to be out there working!
Title: Re: 20x32 A frame cabin Central KY
Post by: Adam Roby on January 06, 2014, 11:41:33 PM
Post by: Adam Roby on January 06, 2014, 11:41:33 PM
Just had to let you know how inspiring your story is. You could literally write a book about everything you went through. Congratulations on an amazing build, a beautiful family, and the heart to conquer any challenge you are met with (both you and your better half). All the excuses I have made over the years not to build seem like nothing but a cop out now... you have re-motivated me. Thanks so much for sharing!
Title: Re: 20x32 A frame cabin Central KY
Post by: CjAl on January 10, 2014, 02:41:16 PM
Post by: CjAl on January 10, 2014, 02:41:16 PM
When I first started thinking about building myself I was working on plans for a diamond shaped house intended to be built into a hill. With the two long sides buried in the hill and the roof as well with the three faceted front walls exposed. Problem is hills are kind of hard to come by in TX. Would have been great in wi before I moved here. A lake lot came up for sale few weeks back and its a long gradual drop to the lake that would be great for it and I keep catching myself driving buy slowely looking at it. Lol. I should be kicked in yhe butt. I csnt seem to get this house done and I want to think about starting another.
Title: Re: 20x32 A frame cabin Central KY
Post by: rawlingsonline on December 28, 2014, 12:15:32 PM
Post by: rawlingsonline on December 28, 2014, 12:15:32 PM
Hi EaglesSJ just finished reading all 25 pages and almost a year on from the last post I was wonder how life is go? are you still living there Or are you building your undground house you spoke about? Hope all is well with you all.
Title: Re: 20x32 A frame cabin Central KY
Post by: GSPDOG on December 29, 2014, 08:31:49 PM
Post by: GSPDOG on December 29, 2014, 08:31:49 PM
Had not checked up on this as well. really came out nicely.
Title: Re: 20x32 A frame cabin Central KY
Post by: Texas Tornado on February 12, 2015, 04:23:58 PM
Post by: Texas Tornado on February 12, 2015, 04:23:58 PM
I love reading this story and wonder what all he has built since his last posting... :)
Title: Re: 20x32 A frame cabin Central KY
Post by: EaglesSJ on June 20, 2015, 11:33:34 AM
Post by: EaglesSJ on June 20, 2015, 11:33:34 AM
Haven't posted in awhile and so I wanted to update on what we have been doing. My business has been keeping me very busy but I have made time for a few projects. We completed the deck and added railing all the way around as well as a built in grilling area in the corner. Built a new chicken coop. I also finished the master bedroom complete with glass closet doors, corner jacuzzi, and a built in wall 75 gallon aquarium. Also had a huge pond dug behind the house. It surrounds the house on 2 sides. No pond would be complete without a zipline so I also ran one of those. 200 ft of cable makes for a nice summer splash! More to come as time goes on. If money stays flowing we plan on digging a full basement under the house before this winter.
 (https://s6.photobucket.com/user/EaglesSJ/media/Cabin/IMG_0416_zps2uj8lnp5.jpg.html)
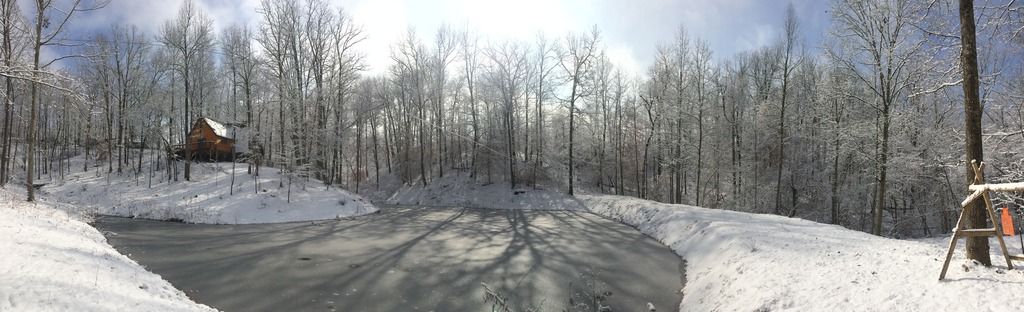 (https://s6.photobucket.com/user/EaglesSJ/media/Cabin/IMG_04201_zpsp4b7s8na.jpg.html)
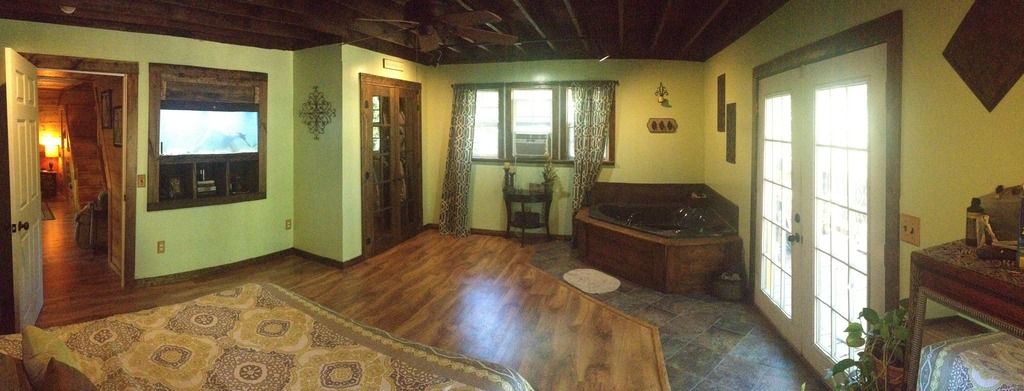 (https://s6.photobucket.com/user/EaglesSJ/media/Cabin/IMG_0049_zpscen3tlq2.jpg.html)
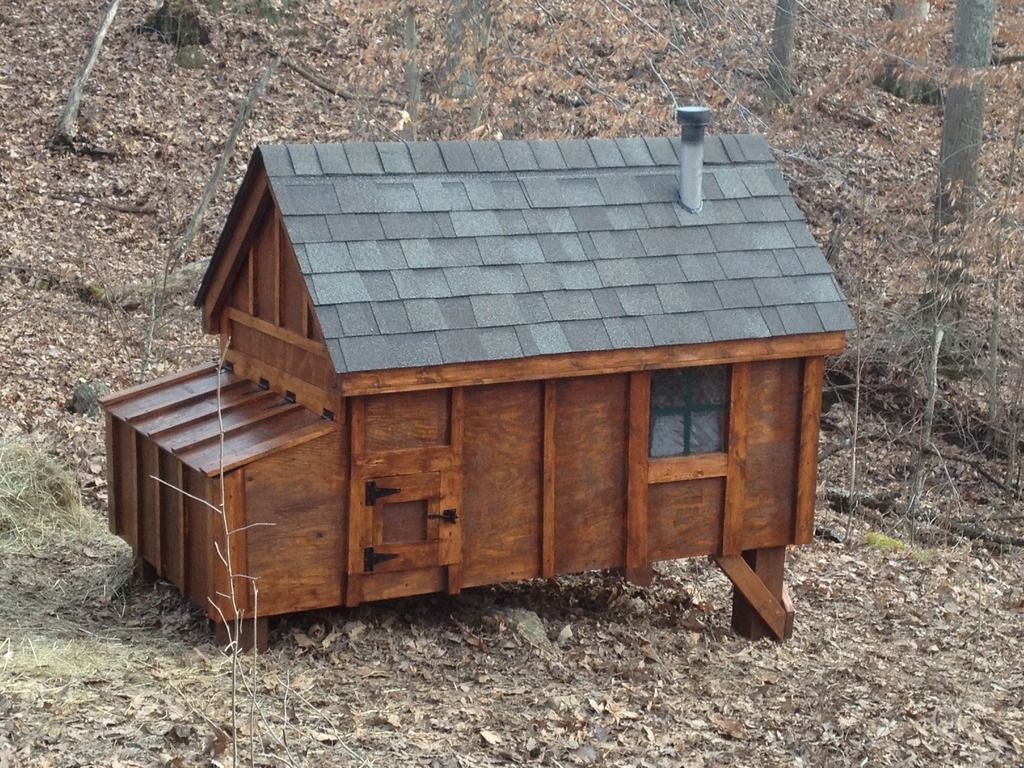 (https://s6.photobucket.com/user/EaglesSJ/media/Cabin/IMG_0013_zpss9f85ljk.jpg.html)
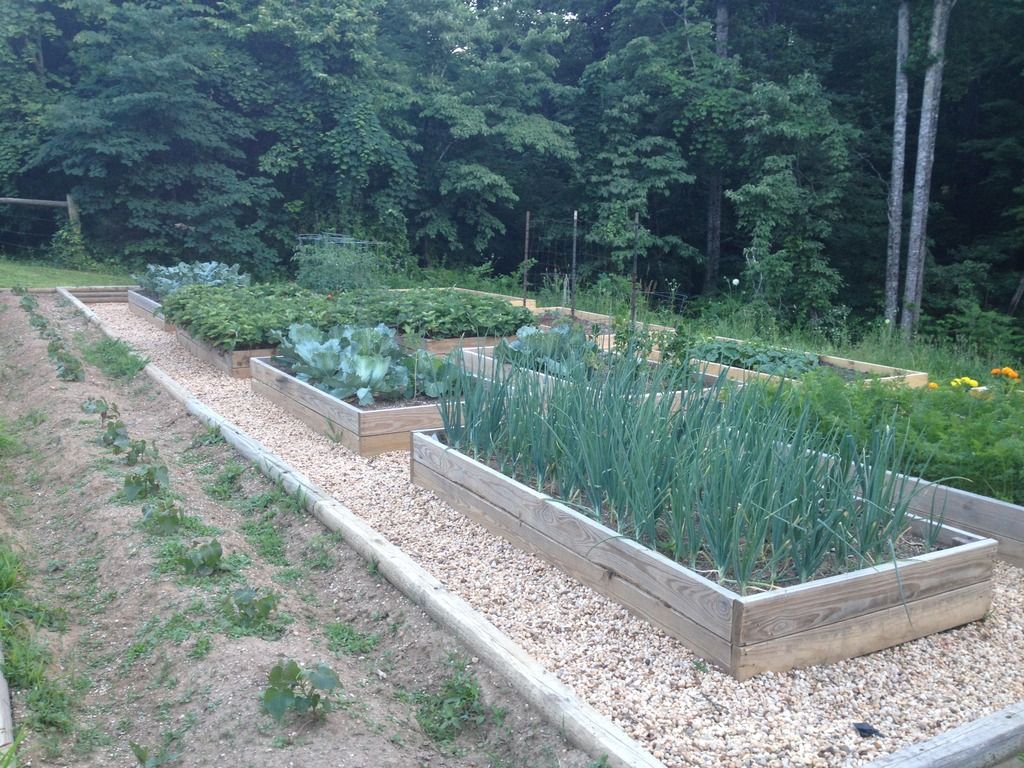 (https://s6.photobucket.com/user/EaglesSJ/media/Cabin/IMG_0033_zpsjjnfqb2f.jpg.html)
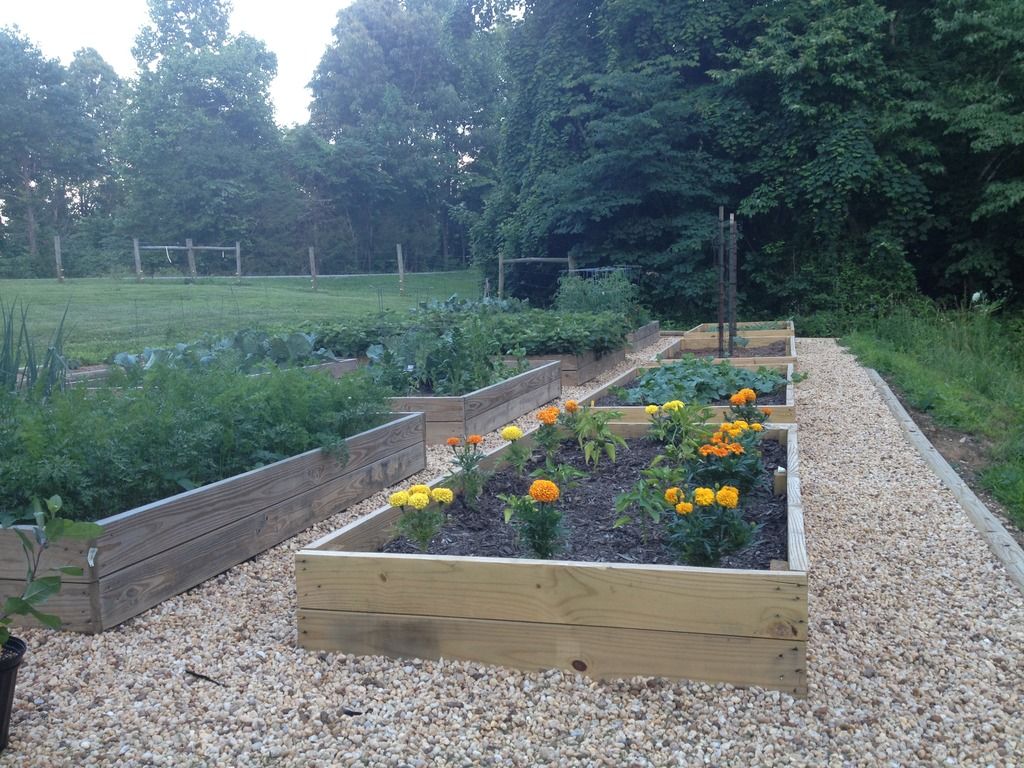 (https://s6.photobucket.com/user/EaglesSJ/media/Cabin/IMG_0032_zpsllrzynmq.jpg.html)
(https://s6.photobucket.com/user/EaglesSJ/media/Cabin/IMG_0416_zps2uj8lnp5.jpg.html) (https://s6.photobucket.com/user/EaglesSJ/media/Cabin/IMG_04201_zpsp4b7s8na.jpg.html) (https://s6.photobucket.com/user/EaglesSJ/media/Cabin/IMG_0049_zpscen3tlq2.jpg.html) (https://s6.photobucket.com/user/EaglesSJ/media/Cabin/IMG_0013_zpss9f85ljk.jpg.html) (https://s6.photobucket.com/user/EaglesSJ/media/Cabin/IMG_0033_zpsjjnfqb2f.jpg.html) (https://s6.photobucket.com/user/EaglesSJ/media/Cabin/IMG_0032_zpsllrzynmq.jpg.html)
Title: Re: 20x32 A frame cabin Central KY
Post by: Bob S. on June 20, 2015, 07:57:40 PM
Post by: Bob S. on June 20, 2015, 07:57:40 PM
Shane, Thanks for the update I have fallowed your build from the start and I think you have done a great job of building your family a nice home.
Bob
Bob
Title: Re: 20x32 A frame cabin Central KY
Post by: tommytebco on June 21, 2015, 06:34:29 AM
Post by: tommytebco on June 21, 2015, 06:34:29 AM
shane said "we plan on digging a full basement under the house before this winter."
Now, that's a project I will watch with interest!!!
Now, that's a project I will watch with interest!!!
Title: Re: 20x32 A frame cabin Central KY
Post by: rick91351 on June 21, 2015, 08:38:54 AM
Post by: rick91351 on June 21, 2015, 08:38:54 AM
WOW!!! You guys never cease to amaze me. Love the raised bed garden - and your house has turned out so nice. [cool]
Title: Re: 20x32 A frame cabin Central KY
Post by: dablack on June 22, 2015, 08:01:10 AM
Post by: dablack on June 22, 2015, 08:01:10 AM
That pond build is icing on the cake. That looks great!
Title: Re: 20x32 A frame cabin Central KY
Post by: Bob S. on June 22, 2015, 09:25:41 PM
Post by: Bob S. on June 22, 2015, 09:25:41 PM
d[d you enlarge the existing pond or did you make a new one?
Title: Re: 20x32 A frame cabin Central KY
Post by: J23 on August 03, 2015, 12:05:25 AM
Post by: J23 on August 03, 2015, 12:05:25 AM
The place looks great Sir!! Glad to hear that you are still going strong!
How did the 55 gallon drum septic hold up; it has been a few years, care to add a long term review?
How did the 55 gallon drum septic hold up; it has been a few years, care to add a long term review?
Title: Re: 20x32 A frame cabin Central KY
Post by: Rys on August 03, 2015, 09:40:27 AM
Post by: Rys on August 03, 2015, 09:40:27 AM
Inspirational! Thanks for sharing. : )
Title: Re: 20x32 A frame cabin Central KY
Post by: EaglesSJ on October 04, 2015, 08:46:19 PM
Post by: EaglesSJ on October 04, 2015, 08:46:19 PM
We added a new pond. . We have 2 now. One is about 300,000 gallons. The new one is almost a million. The septic tank is still working like new. Had a lot of naysayers but I haven't had a minutes trouble out of it. We had a couple batteries go bad out of our bank but God came through for us with a perfectly timed blessing and my uncle actually just replaced his bank and gave us all his old batteries that were the same type and age as ours so we now have a 690AH 48v bank or right around 36kw of storage. These are now 3.5 years old sams club batteries. I'm pretty convinced that for the money they are awesome off grid batteries. I have been hard on them the past year and a half with all the extra loads we have been adding.
Title: Re: 20x32 A frame cabin Central KY
Post by: irishseany on October 11, 2015, 12:01:33 AM
Post by: irishseany on October 11, 2015, 12:01:33 AM
Hey! This is my first post and i just wanna say how amazing it is to sit down and read through everything you have done. You truly are a great inspiration. Amazing work ethic, and great common sense, i wish the best for you and your family! On another note, i have a few questions about your home. I'm very interested in building my own A-Frame with my dad and brother, except on the grid. First off, is their anything you wish you would have done differently with the structure in the beginning? Such as have a full basement? or a larger main structure (20x40) maybe? Another question is insulation and heating. What kind of insulation did you use in your walls and floors? R30? And does the one fireplace do the job of heating the house well in the cold winters? Sorry in advance for so many questions! Im very curious and eager to begin my own life in an A-Frame :P Again, amazing job with everything!
Title: Re: 20x32 A frame cabin Central KY
Post by: EaglesSJ on October 31, 2015, 09:13:19 PM
Post by: EaglesSJ on October 31, 2015, 09:13:19 PM
Ok so to answer a recent question about what I would change. I wouldn't change anything because everything worked out for us at the right time. If you read through you will see things I chanes along the way. The latest being a full basement. They say a picture is worth a thousand words so I won't talk much. Here is what I have been working on the past few weeks. All digging was done with a CAT skid steer. Basically knocked out one concrete pier and jacked up the house near where it was and then set a welded double I beam on a 6" concrete pad in its place. After all beams were in place I poured a 6" footer around them and then poured my floor. I blocked the wall on the outside of the beams and I am building a interior wall out of 2x6s or 2x8s and will drywall it. Adding a theatre, 2nd bathroom (10x10, time shower,etc) and a kitchen and bar area along with a nice Clayton wood furnace. We are not only digging under the main 20x32 portion of the house but also the 16x20 bedroom addition which will give us an additional 1000 sq ft of space bringing us up to almost 2500 sq ft. Quite a lot larger than the original 720 sq ft a frame we had. We are planning more children if it is in Gods plan for us. I can honestly say that despite a few minor trials since I have turned my life over to God that blessing after blessing has been poured upon us. Your mileage may vary but my feet are planted. Without further ado here are the pics. To anyone wondering this is not a project to be taken lightly. It is extremely expensive and time consuming to dig under an existing home. It can be done however.
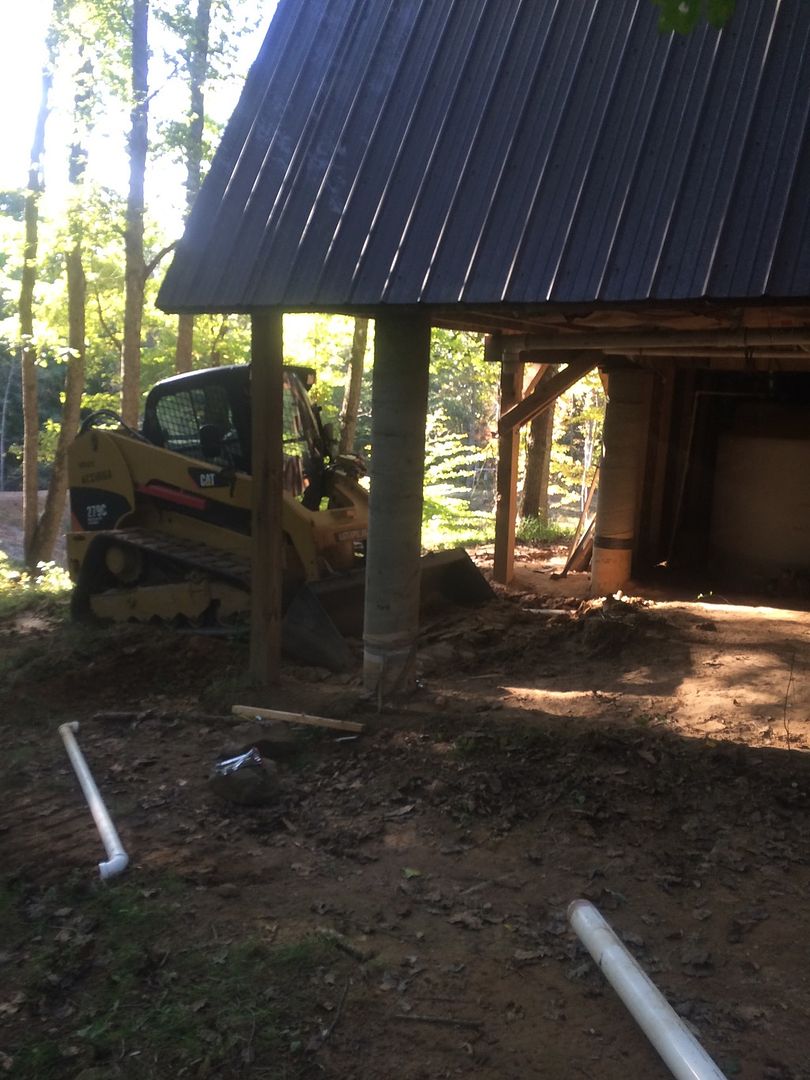 (https://s6.photobucket.com/user/EaglesSJ/media/Mobile%20Uploads/image_zpsggalh58t.jpg.html)
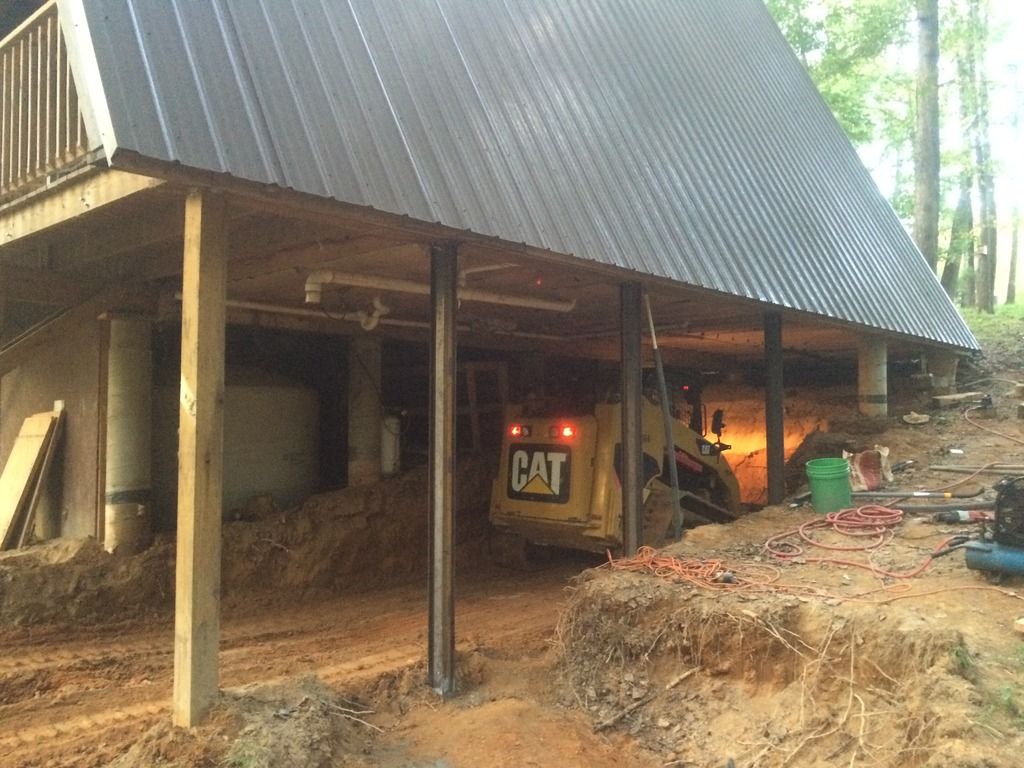 (https://s6.photobucket.com/user/EaglesSJ/media/Mobile%20Uploads/image_zpsqxw0xget.jpg.html)
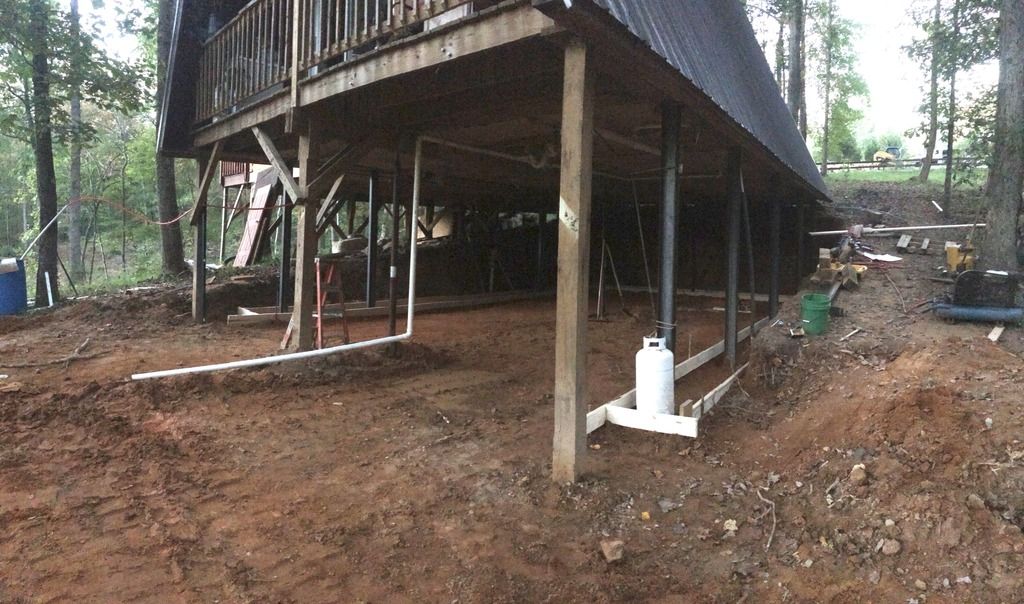 (https://s6.photobucket.com/user/EaglesSJ/media/Mobile%20Uploads/image_zpsxtwhut6z.jpg.html)
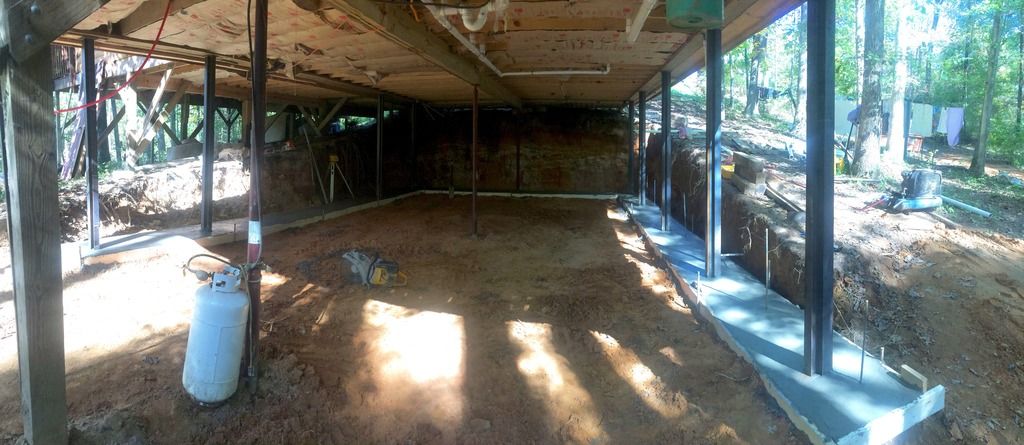 (https://s6.photobucket.com/user/EaglesSJ/media/Mobile%20Uploads/image_zpskvu0wxzr.jpg.html)
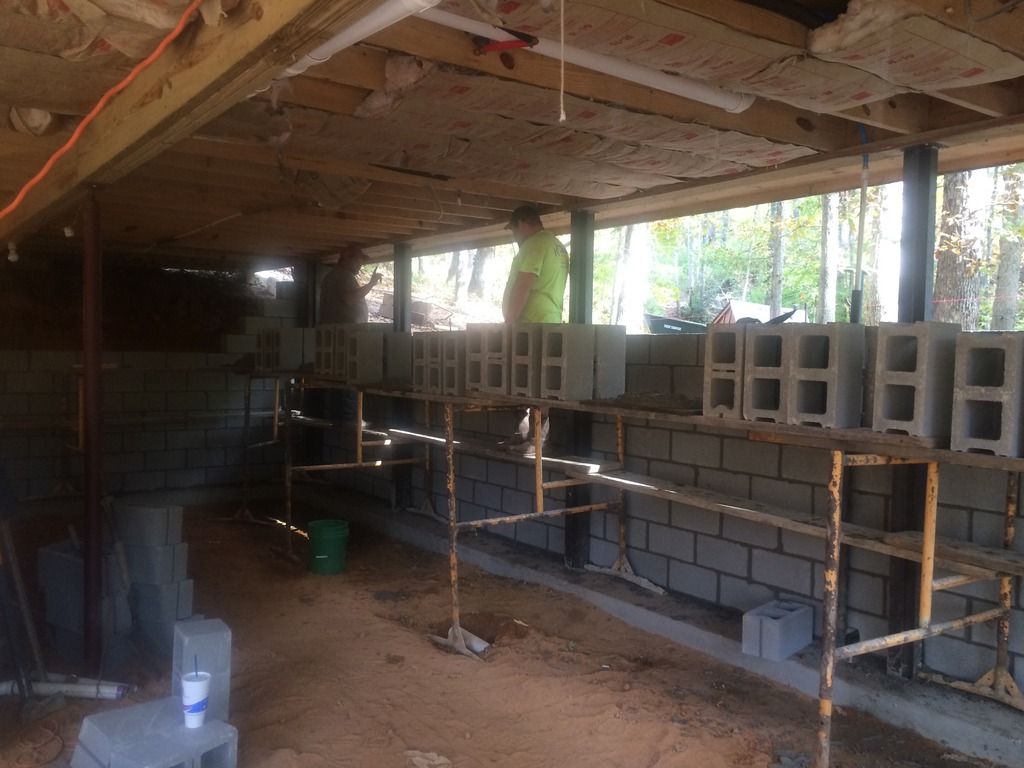 (https://s6.photobucket.com/user/EaglesSJ/media/Mobile%20Uploads/image_zpsgtmrlma0.jpg.html)
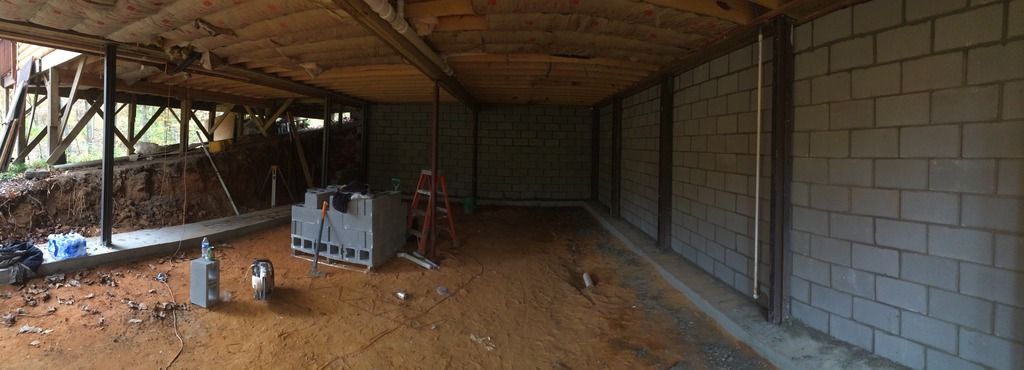 (https://s6.photobucket.com/user/EaglesSJ/media/Mobile%20Uploads/image_zpsqycsheta.jpg.html)
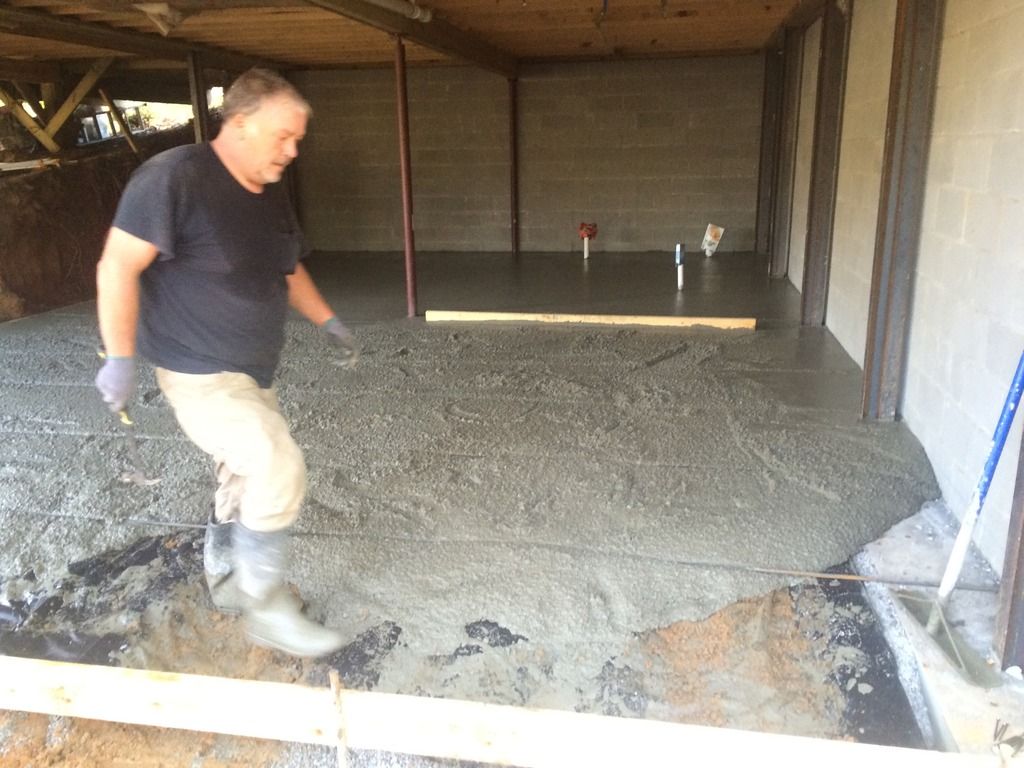 (https://s6.photobucket.com/user/EaglesSJ/media/Mobile%20Uploads/image_zpsmgzkiwqw.jpg.html)
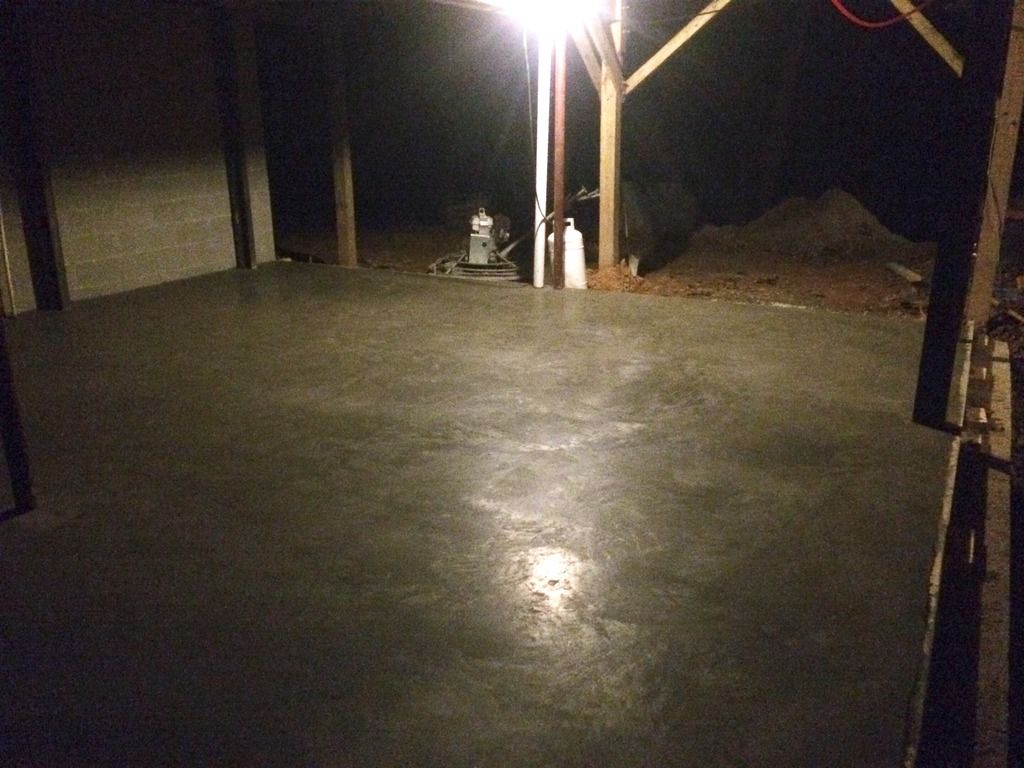 (https://s6.photobucket.com/user/EaglesSJ/media/Mobile%20Uploads/image_zpsfctm38hq.jpg.html)
(https://s6.photobucket.com/user/EaglesSJ/media/Mobile%20Uploads/image_zpsggalh58t.jpg.html) (https://s6.photobucket.com/user/EaglesSJ/media/Mobile%20Uploads/image_zpsqxw0xget.jpg.html) (https://s6.photobucket.com/user/EaglesSJ/media/Mobile%20Uploads/image_zpsxtwhut6z.jpg.html) (https://s6.photobucket.com/user/EaglesSJ/media/Mobile%20Uploads/image_zpskvu0wxzr.jpg.html) (https://s6.photobucket.com/user/EaglesSJ/media/Mobile%20Uploads/image_zpsgtmrlma0.jpg.html) (https://s6.photobucket.com/user/EaglesSJ/media/Mobile%20Uploads/image_zpsqycsheta.jpg.html) (https://s6.photobucket.com/user/EaglesSJ/media/Mobile%20Uploads/image_zpsmgzkiwqw.jpg.html) (https://s6.photobucket.com/user/EaglesSJ/media/Mobile%20Uploads/image_zpsfctm38hq.jpg.html)
Title: Re: 20x32 A frame cabin Central KY
Post by: Patrick on October 31, 2015, 09:45:35 PM
Post by: Patrick on October 31, 2015, 09:45:35 PM
Good for you and your family,Nothing like a dream coming true!I know you've been talking about doing that for a while awesome to see it come to life.I got a little experience with basements and they are a lot of work and worth every minute of it.
Title: Re: 20x32 A frame cabin Central KY
Post by: EaglesSJ on January 01, 2016, 05:39:27 PM
Post by: EaglesSJ on January 01, 2016, 05:39:27 PM
More progress pics. You can see the concrete patio area, fire pit, new wood shed, etc. Also found this little critter here roaming around. Southern flying squirrel. She was really sweet and actually fell asleep in my hand. The blue barrel was our temporary source of water while we worked on the basement until I got the 4 new food grade 275 gallon totes plumbed together. I will be building a insulated box around them in the next week or so with a hinged roof lid to keep them from freezing. I am hoping that by having one side touching the block wall of the house that enough heat will transfer through the wall to prevent freezing. Time will tell. If anyone has any questions feel free to ask. Will add interior pics as we finish out the basement.
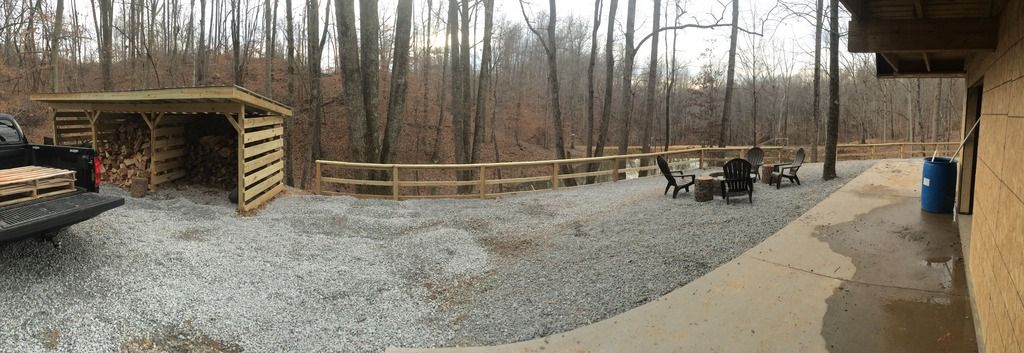 (https://s6.photobucket.com/user/EaglesSJ/media/Cabin/IMG_2055_zpstg0uhrju.jpg.html)
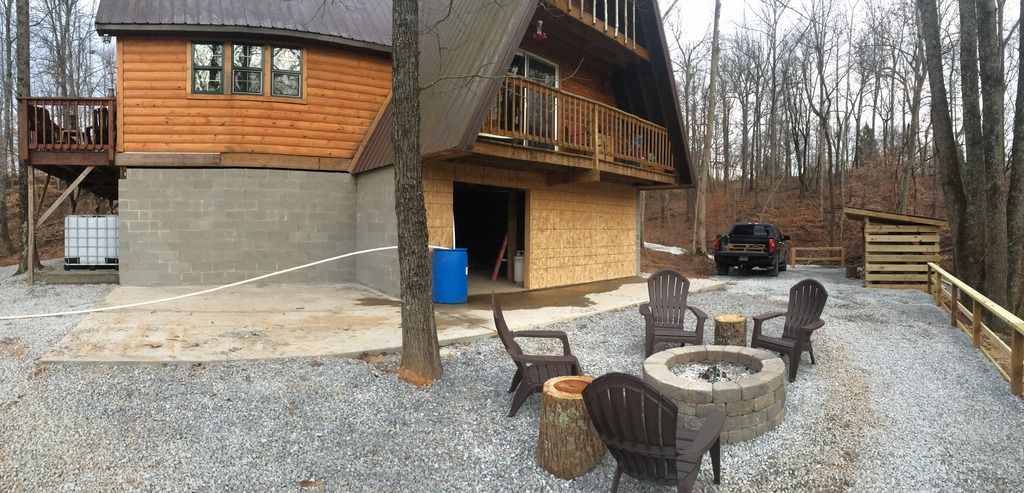 (https://s6.photobucket.com/user/EaglesSJ/media/Cabin/IMG_2054_zpsa99ni2p2.jpg.html)
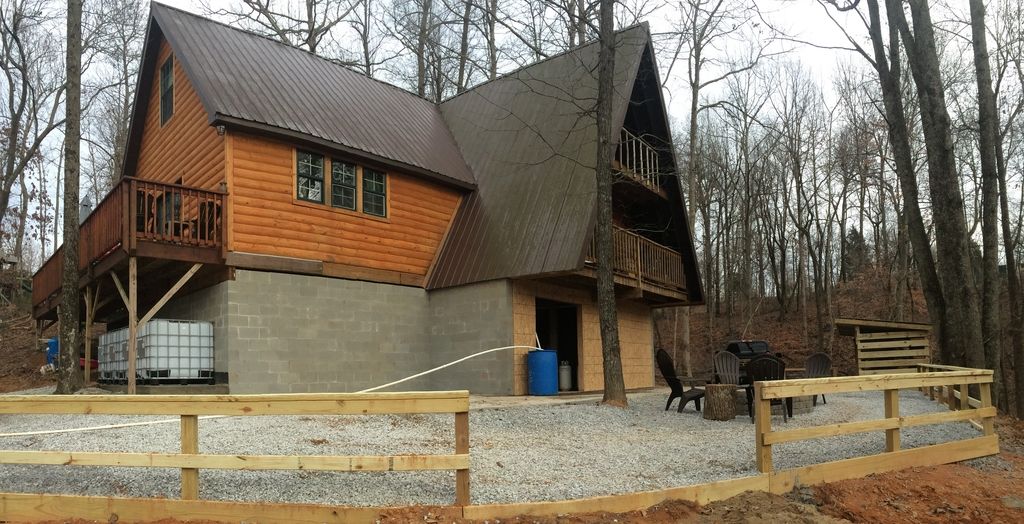 (https://s6.photobucket.com/user/EaglesSJ/media/Cabin/46569965-0560-4feb-9dfe-bb38c33c07eb_zpse9jutq0e.jpg.html)
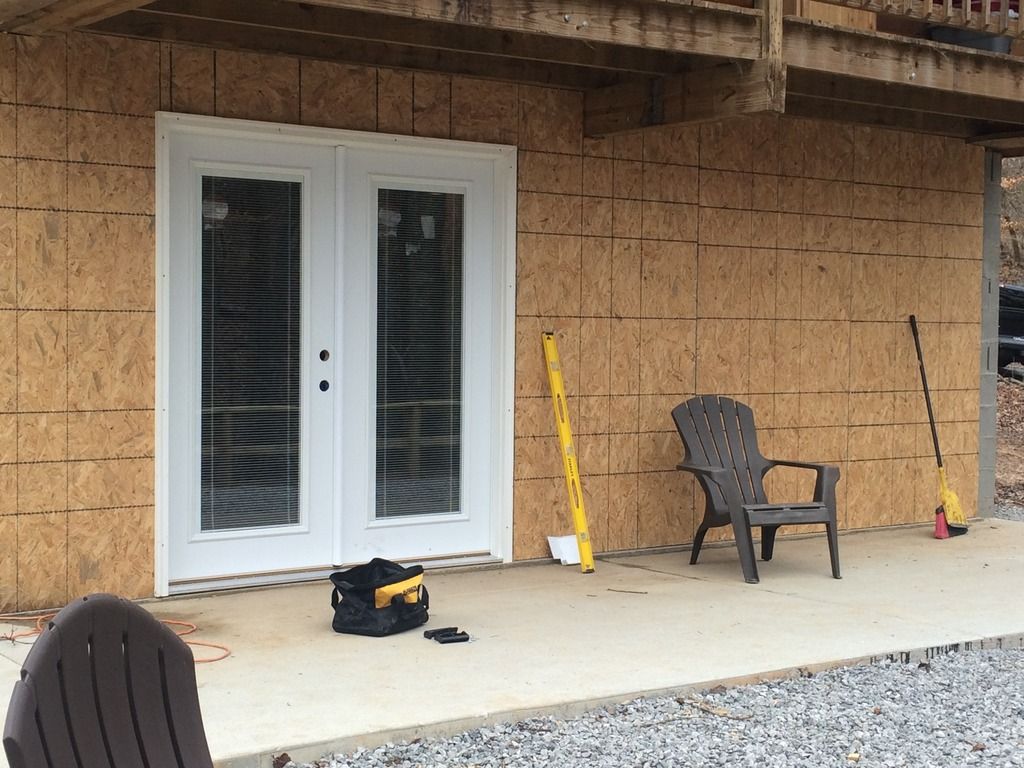 (https://s6.photobucket.com/user/EaglesSJ/media/Cabin/IMG_2108_zpssefogu6a.jpg.html)
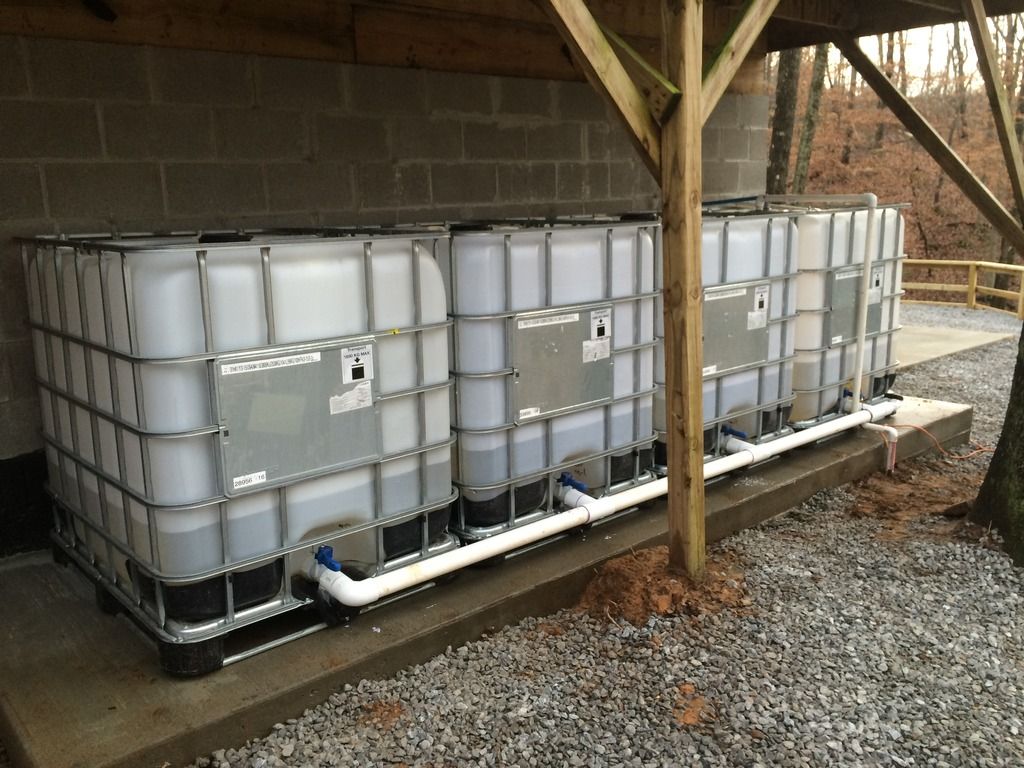 (https://s6.photobucket.com/user/EaglesSJ/media/Cabin/IMG_2062_zpsiohmfpwa.jpg.html)
 (https://s6.photobucket.com/user/EaglesSJ/media/Cabin/IMG_2125_zpsys4yxlle.jpg.html)
(https://s6.photobucket.com/user/EaglesSJ/media/Cabin/IMG_2055_zpstg0uhrju.jpg.html) (https://s6.photobucket.com/user/EaglesSJ/media/Cabin/IMG_2054_zpsa99ni2p2.jpg.html) (https://s6.photobucket.com/user/EaglesSJ/media/Cabin/46569965-0560-4feb-9dfe-bb38c33c07eb_zpse9jutq0e.jpg.html) (https://s6.photobucket.com/user/EaglesSJ/media/Cabin/IMG_2108_zpssefogu6a.jpg.html) (https://s6.photobucket.com/user/EaglesSJ/media/Cabin/IMG_2062_zpsiohmfpwa.jpg.html) (https://s6.photobucket.com/user/EaglesSJ/media/Cabin/IMG_2125_zpsys4yxlle.jpg.html)
Title: Re: 20x32 A frame cabin Central KY
Post by: ben2go on January 02, 2016, 12:45:29 PM
Post by: ben2go on January 02, 2016, 12:45:29 PM
The place is looking awesome.Nice work on the basement and water collection system.
Title: Re: 20x32 A frame cabin Central KY
Post by: irishseany on January 22, 2016, 03:59:17 PM
Post by: irishseany on January 22, 2016, 03:59:17 PM
What kind of insulation did you use in your walls and floors? Does it keep it warm enough in the winters?
Title: Re: 20x32 A frame cabin Central KY
Post by: EaglesSJ on January 23, 2016, 10:00:51 AM
Post by: EaglesSJ on January 23, 2016, 10:00:51 AM
R19 or R30 in all the walls. Nothing in the floor because we have the wood stove down in the basement. The new wood furnace keeps the house at 75 when its 15 outside. This is with it burning as low as it will go. (Damper in, no air knobs opened)
Title: Re: 20x32 A frame cabin Central KY
Post by: ChuckinVa on January 23, 2016, 10:35:23 PM
Post by: ChuckinVa on January 23, 2016, 10:35:23 PM
I really enjoy your build (s). I would be afraid of the PVC pipe freezing before the water storage tanks freezing. That is the point furthest away from the block wall. Maybe some self regulating heat tape or other freeze protection?
Title: Re: 20x32 A frame cabin Central KY
Post by: EaglesSJ on January 23, 2016, 11:50:59 PM
Post by: EaglesSJ on January 23, 2016, 11:50:59 PM
I can happily say it got down into the single digits here this week for many days and never had any freeze problems and right now they just have insulation packed around them. No wooden box yet or a roof. Crazy to say the least.
Title: Re: 20x32 A frame cabin Central KY
Post by: EaglesSJ on January 28, 2016, 10:11:20 PM
Post by: EaglesSJ on January 28, 2016, 10:11:20 PM
Hey Dennis. I got your PM but it wouldn't let me reply. Some sort of encoding error it said. Anyways hope you find the reply here. I used 2x8s and R19 in some spots and R30 insulation in others. If you have 2x6s only the R19 will fit but that will still put you being insulated exactly 50% better than most American homes since most use R13. And you are correct I just use plain ol fiberglass batts.
Title: Re: 20x32 A frame cabin Central KY
Post by: autumnarcher on February 23, 2016, 04:11:29 PM
Post by: autumnarcher on February 23, 2016, 04:11:29 PM
Just browsed through all 26 pages, mostly just looking at pics, reading here and there. I have to say you have done an amazing job.
I and my wife are planning on retiring to either KY or TN in another year or so, and doing something similar. Build a small retirement house, room for animals, garden etc. I got a lot of ideas from your build along. Im most interested in off grid electrical- cost to set up, etc. I'll be doing much more research on that. Seems to be you cover all of your electrical needs quite well, and it allows more flexibility in choosing property. Thank you for taking the time to share your journey. You've got a beautiful home and family. God bless!
I and my wife are planning on retiring to either KY or TN in another year or so, and doing something similar. Build a small retirement house, room for animals, garden etc. I got a lot of ideas from your build along. Im most interested in off grid electrical- cost to set up, etc. I'll be doing much more research on that. Seems to be you cover all of your electrical needs quite well, and it allows more flexibility in choosing property. Thank you for taking the time to share your journey. You've got a beautiful home and family. God bless!
Title: Re: 20x32 A frame cabin Central KY
Post by: Lakelife31 on August 06, 2016, 02:59:47 AM
Post by: Lakelife31 on August 06, 2016, 02:59:47 AM
Quote from: EaglesSJ on July 31, 2010, 08:48:56 PM
good to hear from you Ed. We got the floor done today and started on the back deck. Im going to order the rafters tomorrow and we should have them up in a couple days after they come in. They have to be special ordered 2x8 26 foot long. Gonna have alot of fun sitting them in huh? Anyways here are some pics of what all we did today with the help of my uncle, his son, and a couple friends.
Hey there!
Just curious, when all was said and done. What was the measurement on the rafters once they were all cut? From the roof ridge to the base. I know the rafters were 26 ft when you started. Also, I have been dissuaded from using a 26ft rafter out of fear of bending and twerking once it settles. Was this a concern for you at all? I had planned on splicing 14' and 10' 2x8s together. Thanks, your project has been a huge inspiration.
Title: Re: 20x32 A frame cabin Central KY
Post by: black_edelweiss on August 06, 2016, 01:14:43 PM
Post by: black_edelweiss on August 06, 2016, 01:14:43 PM
I'm also curious about this. Your project inspired me to build an A-frame, with a few twerks. The Roof Rafter details are a big question for me. I'll be using 2x10's because of a 150lb roof snow load, which will be too heavy to put up in one whole piece, so i'll have to splice them.
Title: Re: 20x32 A frame cabin Central KY
Post by: Colorado Eric on October 18, 2016, 04:52:21 PM
Post by: Colorado Eric on October 18, 2016, 04:52:21 PM
EaglesSJ - Thank you so much for posting and staying on top of updates with all you have done here, it is so inspiring! To see what you and you're family have done is incredible to say the least, you really are a talented and hardworking guy, holy cow! Puts me to shame! I read every page and followed every post with great interest and to see what it has all turned into - wow! Keep those updates coming, can't wait to see what you guys do next.
Eric
Eric
Title: Re: 20x32 A frame cabin Central KY
Post by: Rys on October 26, 2016, 10:22:32 AM
Post by: Rys on October 26, 2016, 10:22:32 AM
I have thourohly enjoyed reading your thread. You are an inspiration to those of us just getting started!
Title: Re: 20x32 A frame cabin Central KY
Post by: Aquamechanic on November 05, 2016, 09:22:11 AM
Post by: Aquamechanic on November 05, 2016, 09:22:11 AM
Like so many have said before me, I am thoroughly impressed with your progress, determination and drive. Thanks very much for the positive attitude and documenting of all the trials, errors and forward moving construction. Honestly, I'm surprised if you haven't been contacted to start a reality show!
Anyway, just bought 4 acres of hardwood/ softwood forest lakeside at the south end of the Canadian shield last month with plans on beginning our dream project next spring. We will be attempting many of the projects you have worked through although, no farm animals allowed in this zone :(
I dream of achieving the success that you have enjoyed. I am inspired.
Congratulations,
Following along from the Minden Highlands, Ontario
Title: Re: 20x32 A frame cabin Central KY
Post by: ben2go on November 05, 2016, 06:01:28 PM
Post by: ben2go on November 05, 2016, 06:01:28 PM
Quote from: Aquamechanic on November 05, 2016, 09:22:11 AM
Like so many have said before me, I am thoroughly impressed with your progress, determination and drive. Thanks very much for the positive attitude and documenting of all the trials, errors and forward moving construction. Honestly, I'm surprised if you haven't been contacted to start a reality show!
Anyway, just bought 4 acres of hardwood/ softwood forest lakeside at the south end of the Canadian shield last month with plans on beginning our dream project next spring. We will be attempting many of the projects you have worked through although, no farm animals allowed in this zone :(
I dream of achieving the success that you have enjoyed. I am inspired.
Congratulations,
Following along from the Minden Highlands, Ontario
w*
No farm animals? Are you close to a city or is there another reason for not allowing farm animals?
Title: Re: 20x32 A frame cabin Central KY
Post by: Travelore on November 12, 2016, 09:18:28 PM
Post by: Travelore on November 12, 2016, 09:18:28 PM
I just wanted to say thank you for sharing this incredible story these last few years. I've spent bit by bit working through this entire feed, and I'm in awe. I hop you and the family are doing well, and that you have been blessed since your last post. I think I can speak for all of us when I say I hope you post an update soon!
Title: Re: 20x32 A frame cabin Central KY
Post by: EaglesSJ on November 16, 2016, 02:47:46 PM
Post by: EaglesSJ on November 16, 2016, 02:47:46 PM
Thanks to each and everyone of you who has taken the time to comment on the thread. I am very thankful to have such a great group of people. For the questions about the rafters I don't remember the finished measurement. It was around a foot shorter than the original starting length once we cut the tails off. It has been a very busy year for me at work but I did manage to get a couple projects done here at the cabin. One of which was to install our very own home theatre. Screen is 8ft wide. Standard 5.1 Dolby digital surround sound. We have really enjoyed it so far. It's quickly become the new favorite hang out area. Once I build us a big farm table we will be changing what used to be our living room upstairs into a dining room so we can actually start having meals around a table together for once. I will try to continue to update as I can. Thanks again guys and gals for your support.
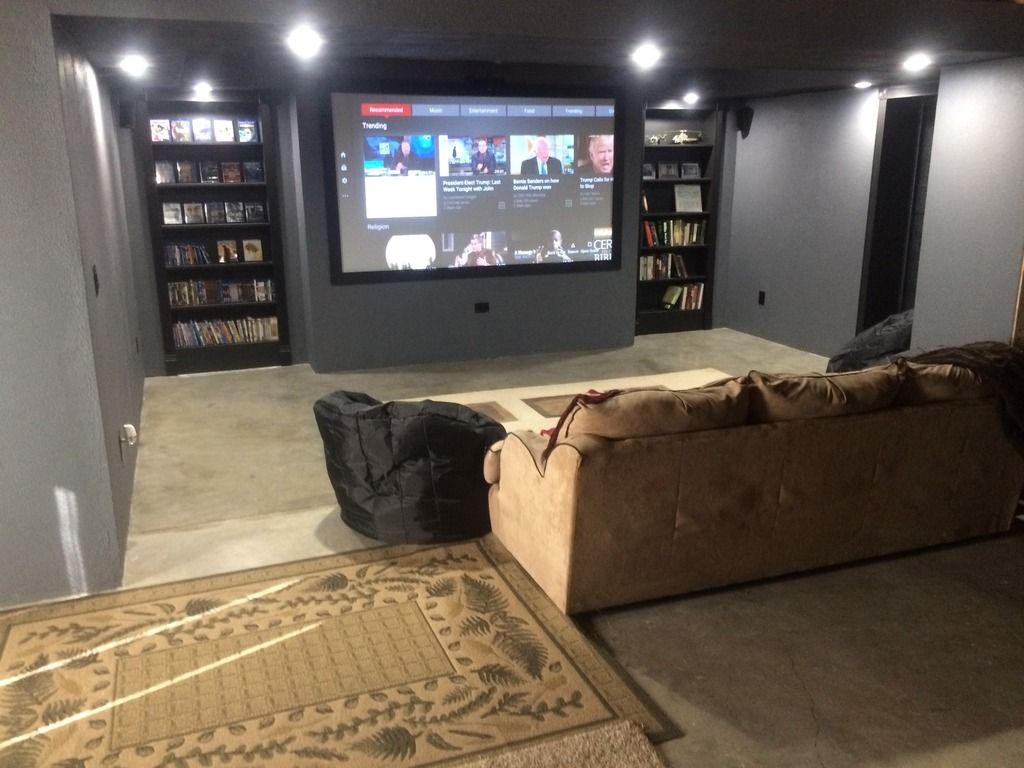 (https://s6.photobucket.com/user/EaglesSJ/media/Cabin/416F465B-3FD8-4305-92B0-04392C9EC822_zpsevxks05o.jpg.html)
(https://s6.photobucket.com/user/EaglesSJ/media/Cabin/416F465B-3FD8-4305-92B0-04392C9EC822_zpsevxks05o.jpg.html)
Title: Re: 20x32 A frame cabin Central KY
Post by: EaglesSJ on November 20, 2016, 01:52:31 PM
Post by: EaglesSJ on November 20, 2016, 01:52:31 PM
Finished up the new farm table and bench. Built both for around $130 total. After a couple hours with the orbital sander I stained it all with minwax special walnut and sealed it off by hand rubbing a mix of olive oil and beeswax into the wood.
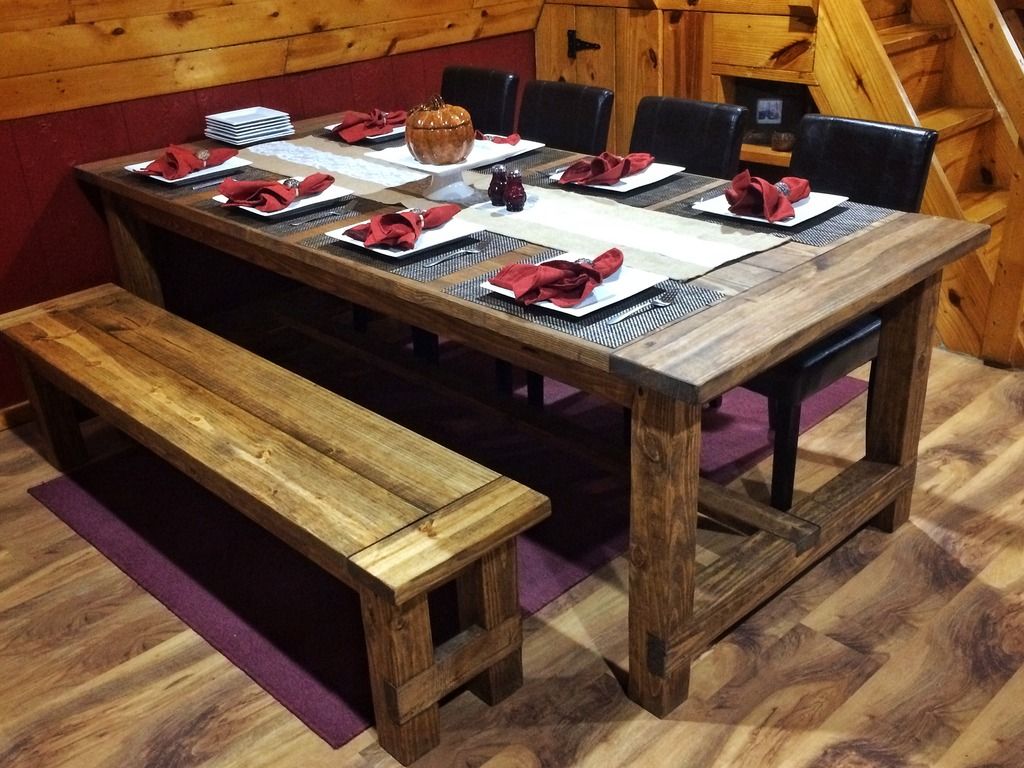 (https://s6.photobucket.com/user/EaglesSJ/media/Cabin/99EA1AE0-6692-43CE-8BA5-A333A22FF43E_zpssc2jasst.jpg.html)
(https://s6.photobucket.com/user/EaglesSJ/media/Cabin/99EA1AE0-6692-43CE-8BA5-A333A22FF43E_zpssc2jasst.jpg.html)
Title: Re: 20x32 A frame cabin Central KY
Post by: KyLawMan on December 15, 2016, 05:07:59 PM
Post by: KyLawMan on December 15, 2016, 05:07:59 PM
EaglesSJ,
Congrats on your abode. I have plans for an A-frame very similar to yours. Looking for land in Barren, Allen counties in KY. I do have some questions though. Did you have any issues with building permits, Health Dept. on your septic and gray water systems, is your house fully 12 volt or propane system (off-grid), and did you do your own plumbing? I was looking at building my own and doing all of the work but started finding code and regs about septic, perc tests, licensed electric work, etc. Just want to build my own if possible. I saw where you mentioned building it like the Amish which allowed you to do all work w/o permits....I'm hoping that I can do the same. I work for KSP and don't want to screw anything up that will mess that up. Thanks for posting all of your work here. It is definitely what I was looking for!
Congrats on your abode. I have plans for an A-frame very similar to yours. Looking for land in Barren, Allen counties in KY. I do have some questions though. Did you have any issues with building permits, Health Dept. on your septic and gray water systems, is your house fully 12 volt or propane system (off-grid), and did you do your own plumbing? I was looking at building my own and doing all of the work but started finding code and regs about septic, perc tests, licensed electric work, etc. Just want to build my own if possible. I saw where you mentioned building it like the Amish which allowed you to do all work w/o permits....I'm hoping that I can do the same. I work for KSP and don't want to screw anything up that will mess that up. Thanks for posting all of your work here. It is definitely what I was looking for!
Title: Re: 20x32 A frame cabin Central KY
Post by: EaglesSJ on December 15, 2016, 06:28:40 PM
Post by: EaglesSJ on December 15, 2016, 06:28:40 PM
Hello KyLawMan,
We're 100% off grid on a 120v setup using all outback power equipment. Since we were using no public utilities we weren't required to have any permits. When we dug our basement we also replaced the septic system you see in the photos on here. As for the plumbing I done all of that myself with pex. Plumbing and wiring are both easy. Just do a bit of reading first. Thanks for your comments and hope everything goes great with your build.
We're 100% off grid on a 120v setup using all outback power equipment. Since we were using no public utilities we weren't required to have any permits. When we dug our basement we also replaced the septic system you see in the photos on here. As for the plumbing I done all of that myself with pex. Plumbing and wiring are both easy. Just do a bit of reading first. Thanks for your comments and hope everything goes great with your build.
Title: Re: 20x32 A frame cabin Central KY
Post by: KyLawMan on December 15, 2016, 08:35:04 PM
Post by: KyLawMan on December 15, 2016, 08:35:04 PM
EaglesSJ,
Thanks for the response. I am also planning on using a Pex system since it is a simple system and I'm familiar with it from RV experience. I plan on using a 12 volt system and compost toilet with gray water filter for shower. Will be a camp/vacation home. Hoping I have same success as you with recent KY building permit changes that went into effect 2014......hoping since I'm not connected to their utilities that I will be good. What county you live in?
Thanks for the response. I am also planning on using a Pex system since it is a simple system and I'm familiar with it from RV experience. I plan on using a 12 volt system and compost toilet with gray water filter for shower. Will be a camp/vacation home. Hoping I have same success as you with recent KY building permit changes that went into effect 2014......hoping since I'm not connected to their utilities that I will be good. What county you live in?
Title: Re: 20x32 A frame cabin Central KY
Post by: EaglesSJ on December 15, 2016, 09:19:07 PM
Post by: EaglesSJ on December 15, 2016, 09:19:07 PM
I hadn't rather not share that info on a public message board. Finding me would be a bit to easy at that point.
Title: Re: 20x32 A frame cabin Central KY
Post by: azgreg on December 16, 2016, 10:18:39 AM
Post by: azgreg on December 16, 2016, 10:18:39 AM
I'm not a big A frame guy but I really like how yours is turning out. Plus I love that farm table. Good work man.
Title: Re: 20x32 A frame cabin Central KY
Post by: philvarnerlp9 on January 19, 2018, 09:41:21 PM
Post by: philvarnerlp9 on January 19, 2018, 09:41:21 PM
Wow, this is so cool! I am trying to view your progress in the images but photobucket has locked them up. Is there another place that you have posted the photos of your progress? This is great inspiration. Thanks for sharing!
Title: Re: 20x32 A frame cabin Central KY
Post by: ben2go on January 19, 2018, 11:06:07 PM
Post by: ben2go on January 19, 2018, 11:06:07 PM
Quote from: philvarnerlp9 on January 19, 2018, 09:41:21 PM
Wow, this is so cool! I am trying to view your progress in the images but photobucket has locked them up. Is there another place that you have posted the photos of your progress? This is great inspiration. Thanks for sharing!
You can use extensions in firefox and chrome to see the pics. Just go to add-ons in Firefox and extensions in chrome and do a search photobucket. They will come up.
Title: Re: 20x32 A frame cabin Central KY
Post by: EaglesSJ on May 21, 2018, 04:40:46 PM
Post by: EaglesSJ on May 21, 2018, 04:40:46 PM
Been a long time since we done an update so I thought I would share some progress pics. We spent the entire year of 2017 in Utah because I was attending helicopter flight school out there. I'm now a licensed helicopter pilot! We moved back to the cabin earlier this year and got back to work on things.
We now have a 4.1kw array and we are running 16 US battery L16s 48v 840ah total capacity. Just finished installing an outback 240v transformer to power our newest addition which we have longed for forever. Air conditioning! I installed a 24k btu 3 zone mini split system. We opted for the ceiling mounted models and hopefully the system will be up and running this week. HVAC guy is supposed to come tomorrow and hook up the lines and vacuum/charge with refridgerant. The rest of the work has just been framing/drywall to finish out the entire basement. Our little 700 sq ft a frame has grown to a 2400 sq ft house in just 8 years time. This will likely be the last of the building on the house itself.
Without further ado, here are some photos.
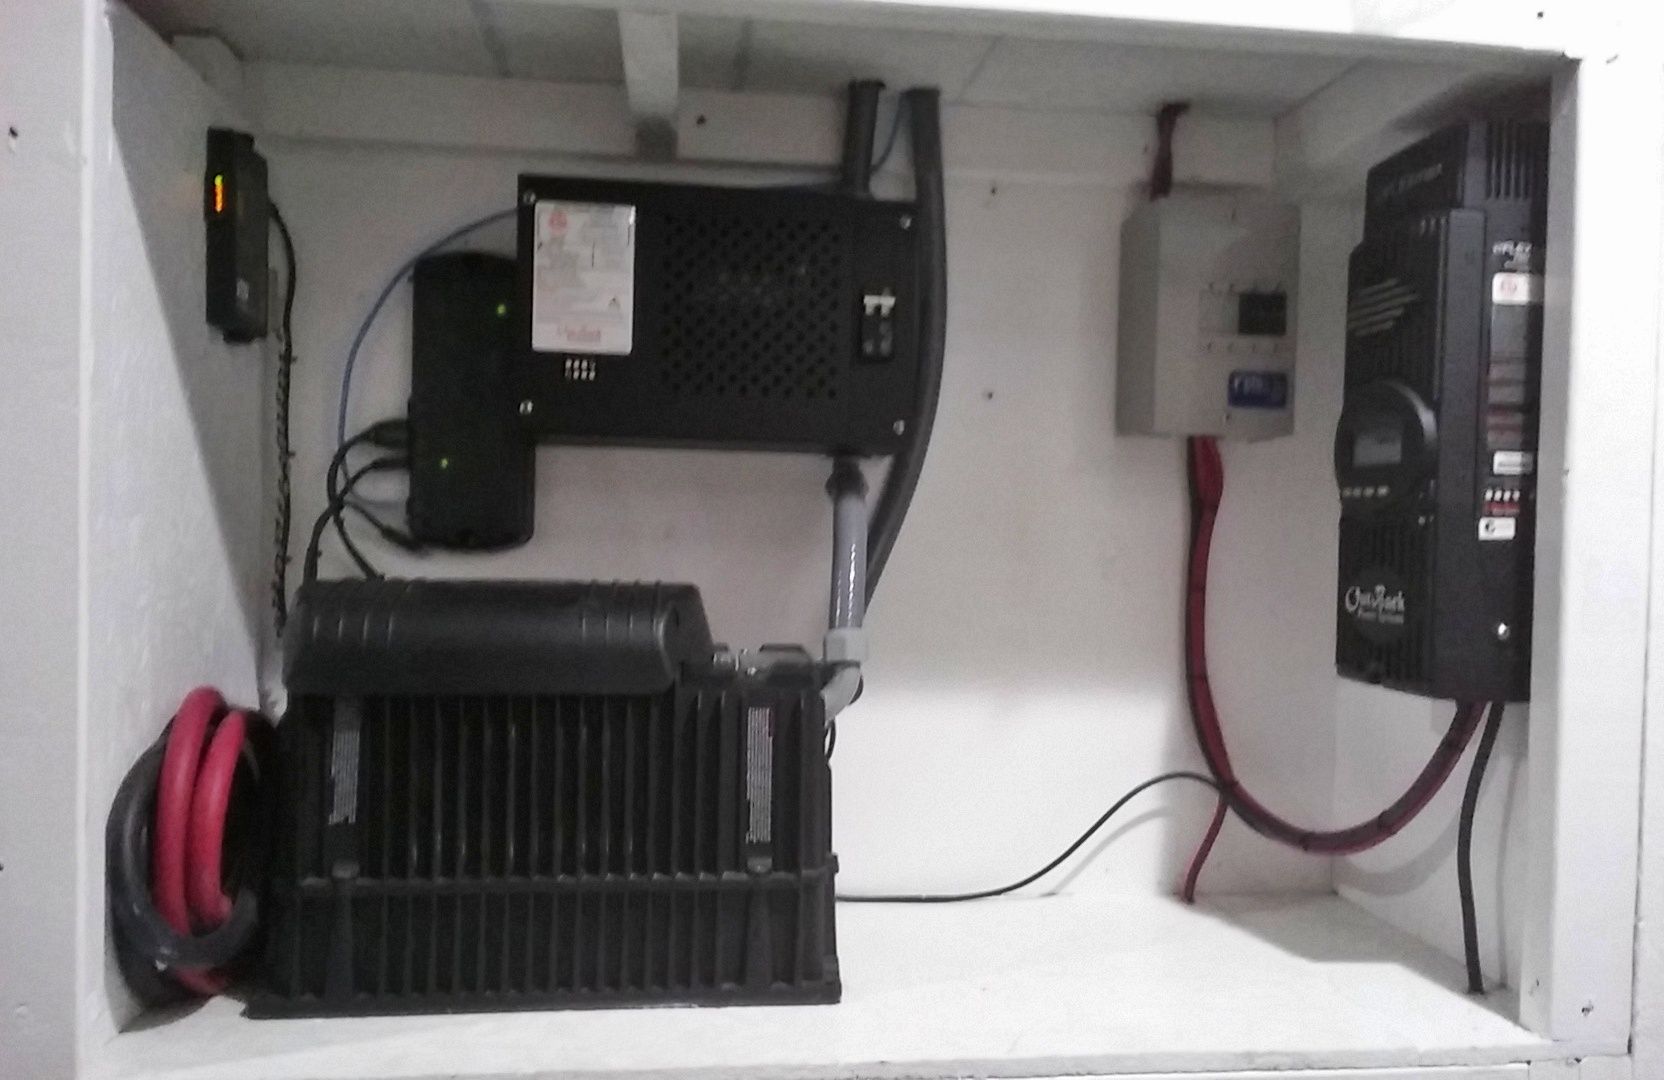 (https://s6.photobucket.com/user/EaglesSJ/media/0521181704-01_zpsb7omj7ep.jpeg.html)
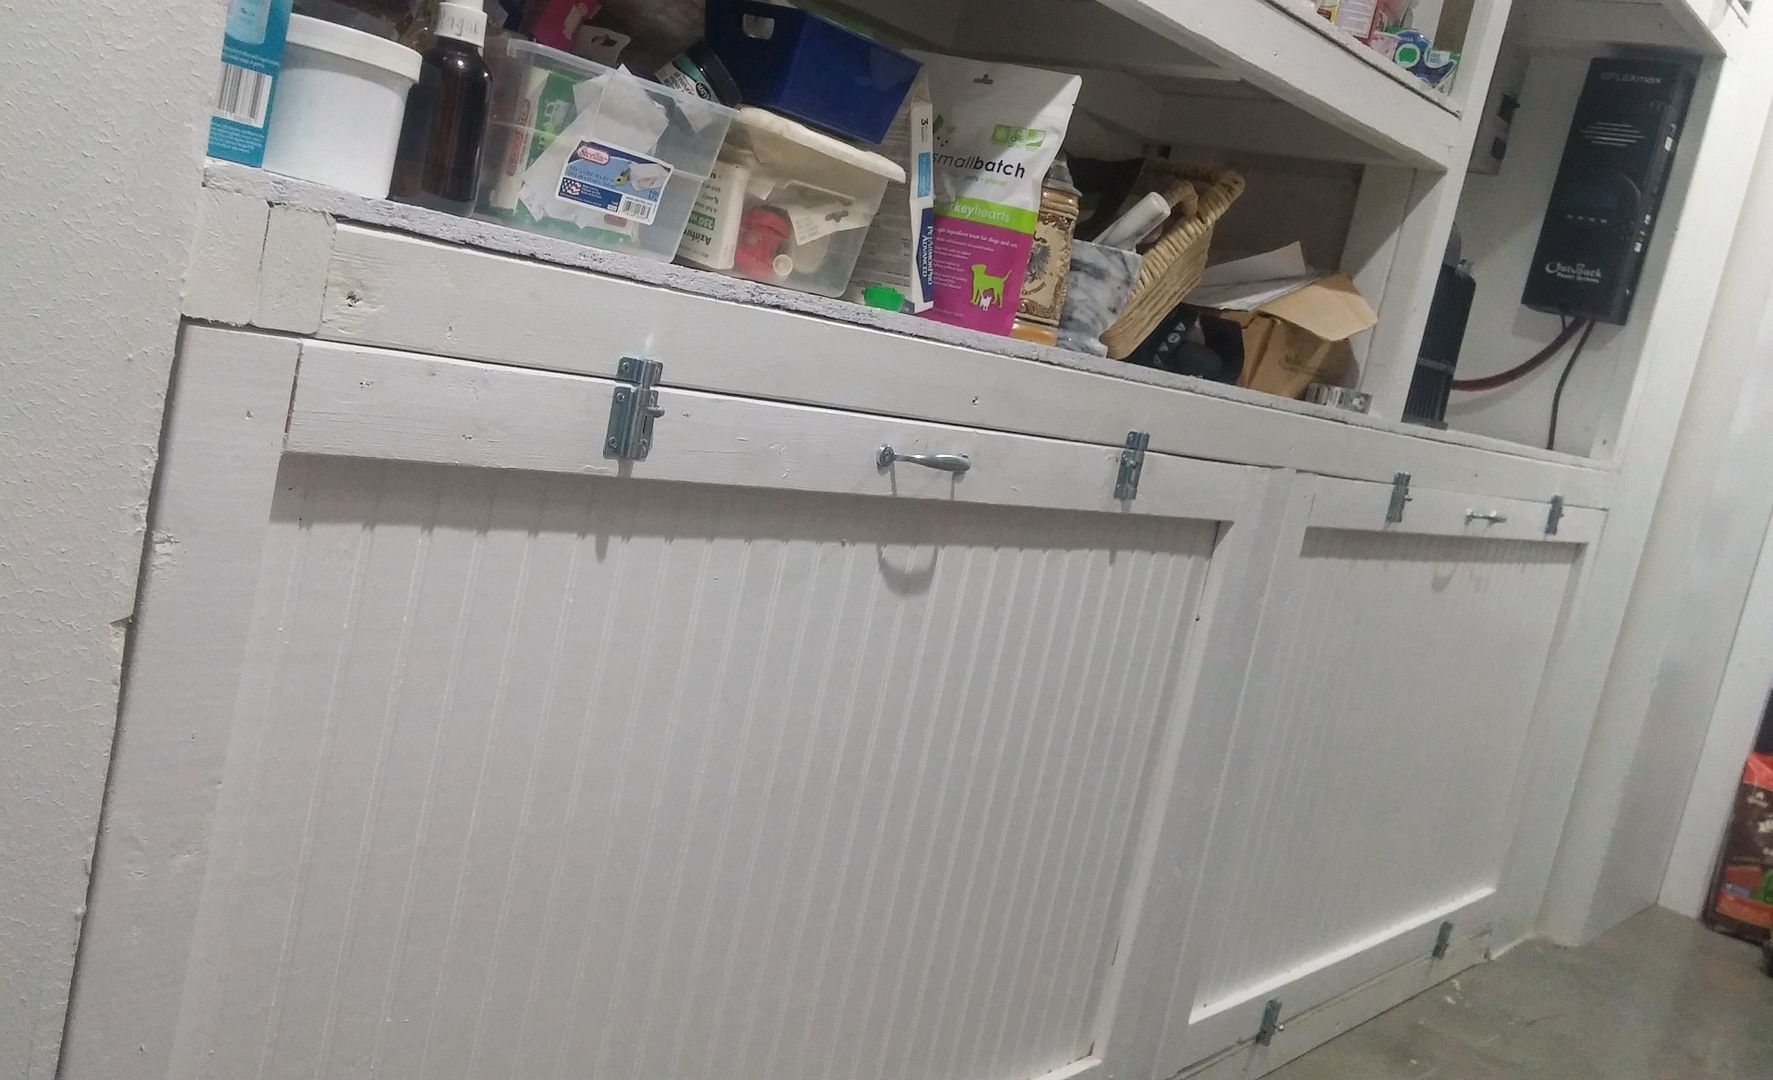 (https://s6.photobucket.com/user/EaglesSJ/media/0521181717_HDR-01_zps4eqwg25v.jpeg.html)
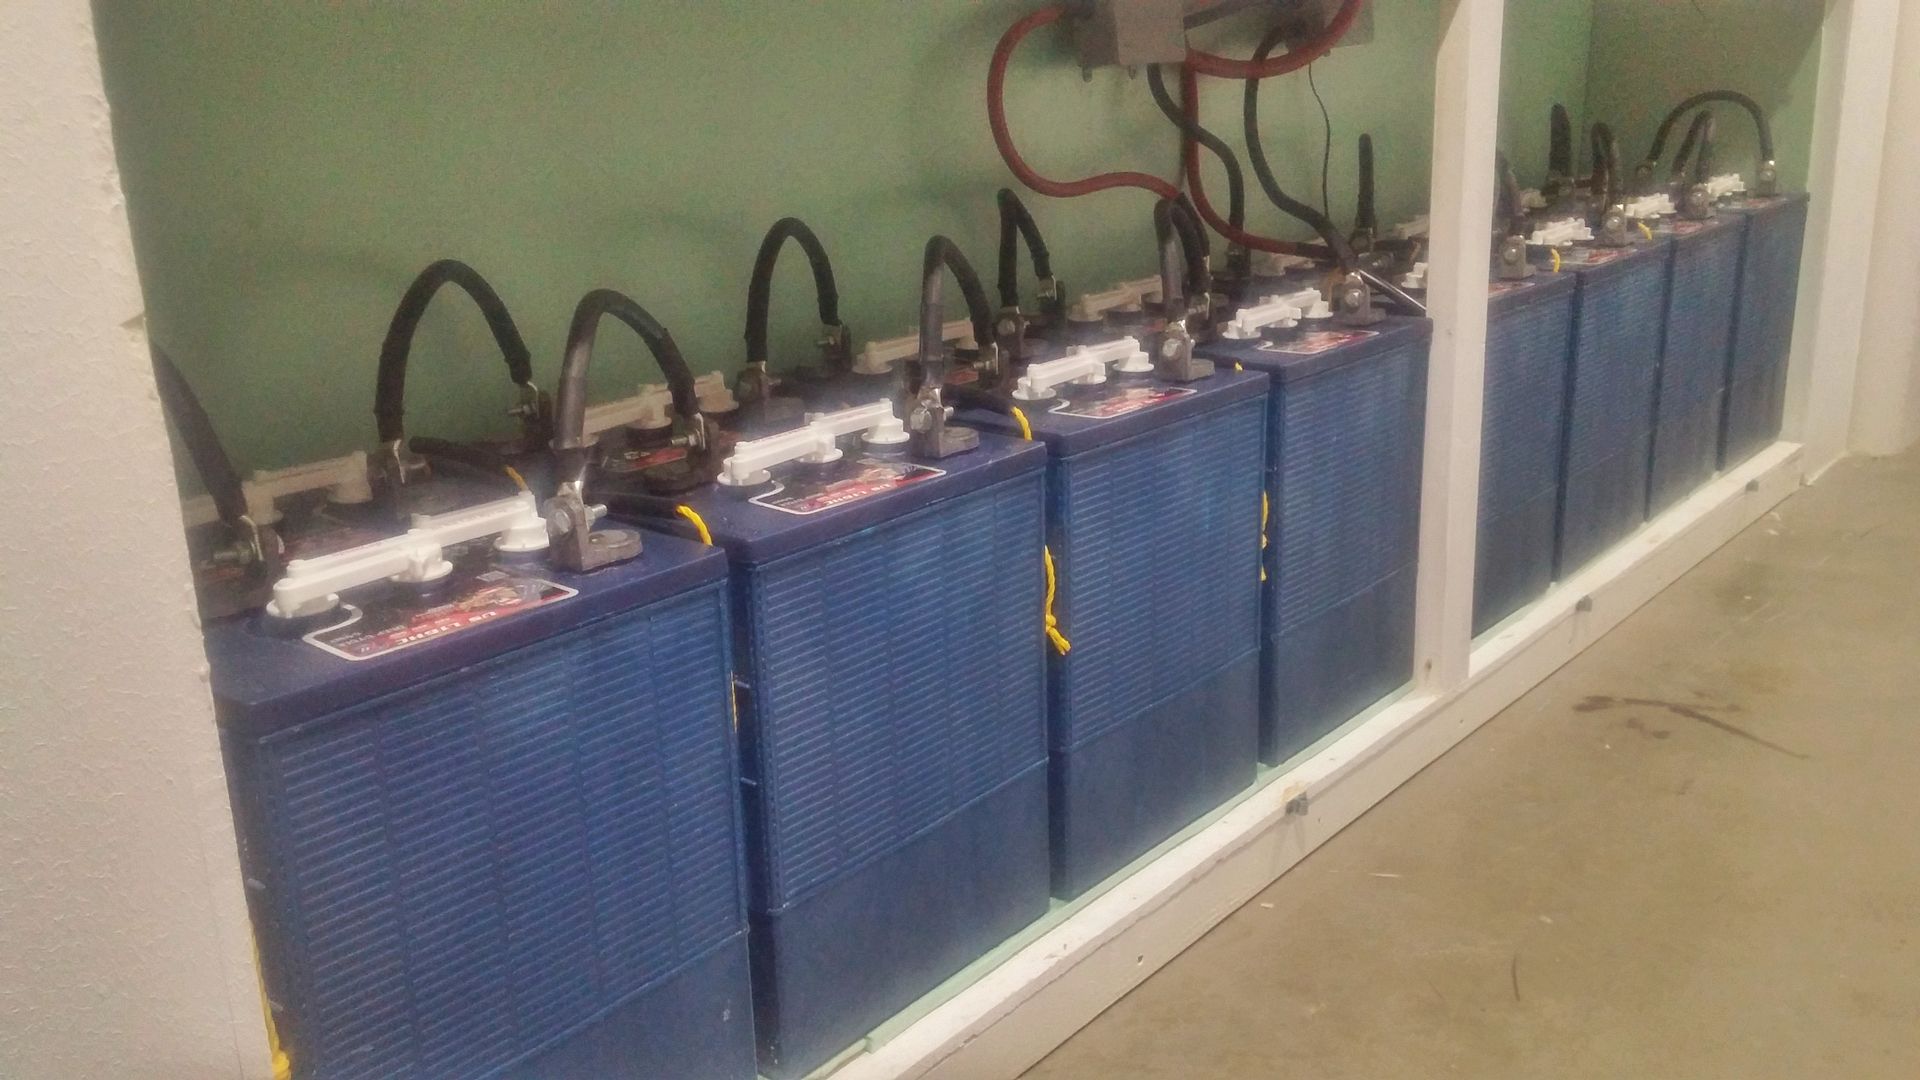 (https://s6.photobucket.com/user/EaglesSJ/media/0521181706_HDR-01_zpsdsqpyicy.jpeg.html)
 (https://s6.photobucket.com/user/EaglesSJ/media/0521181707a_HDR-01_zpsvcgos5wh.jpeg.html)
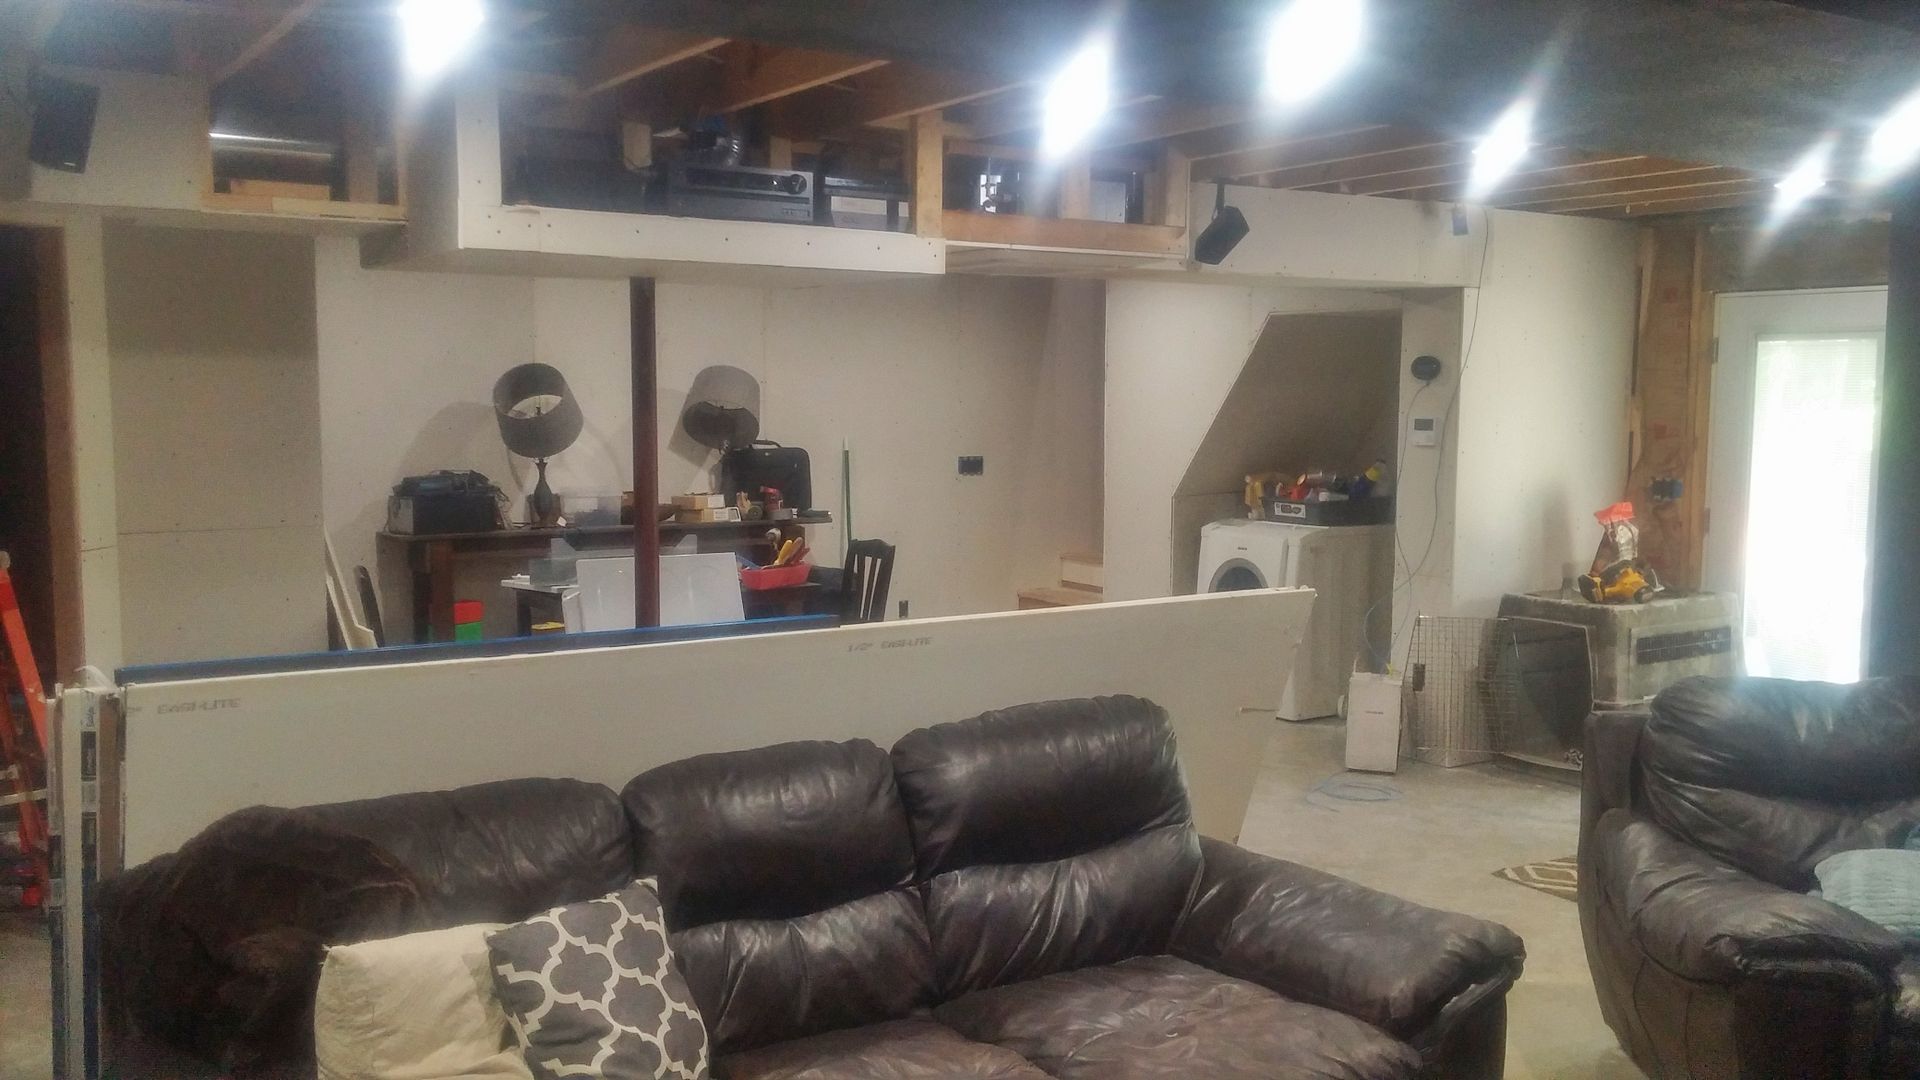 (https://s6.photobucket.com/user/EaglesSJ/media/0521181707_HDR-01_zpssqdwfehy.jpeg.html)
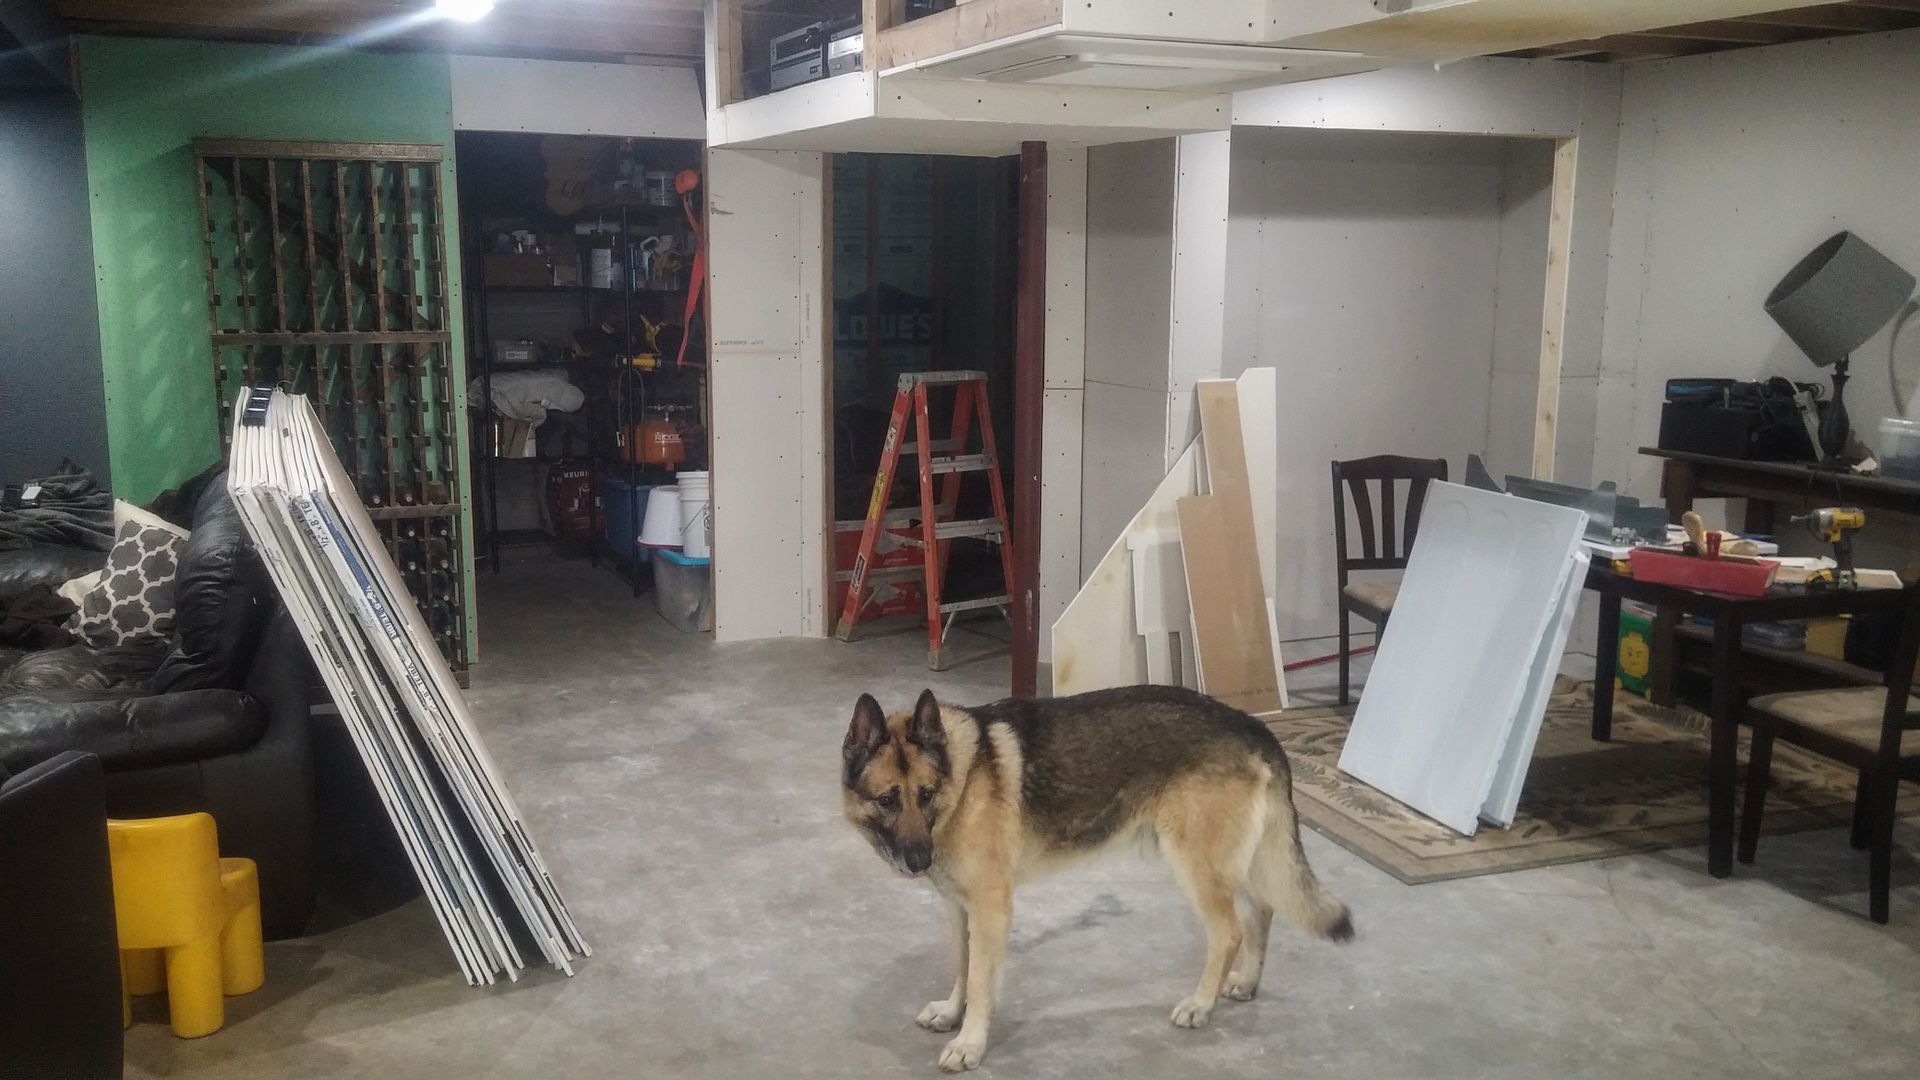 (https://s6.photobucket.com/user/EaglesSJ/media/0521181711_HDR-01_zpsuutxfmgs.jpeg.html)
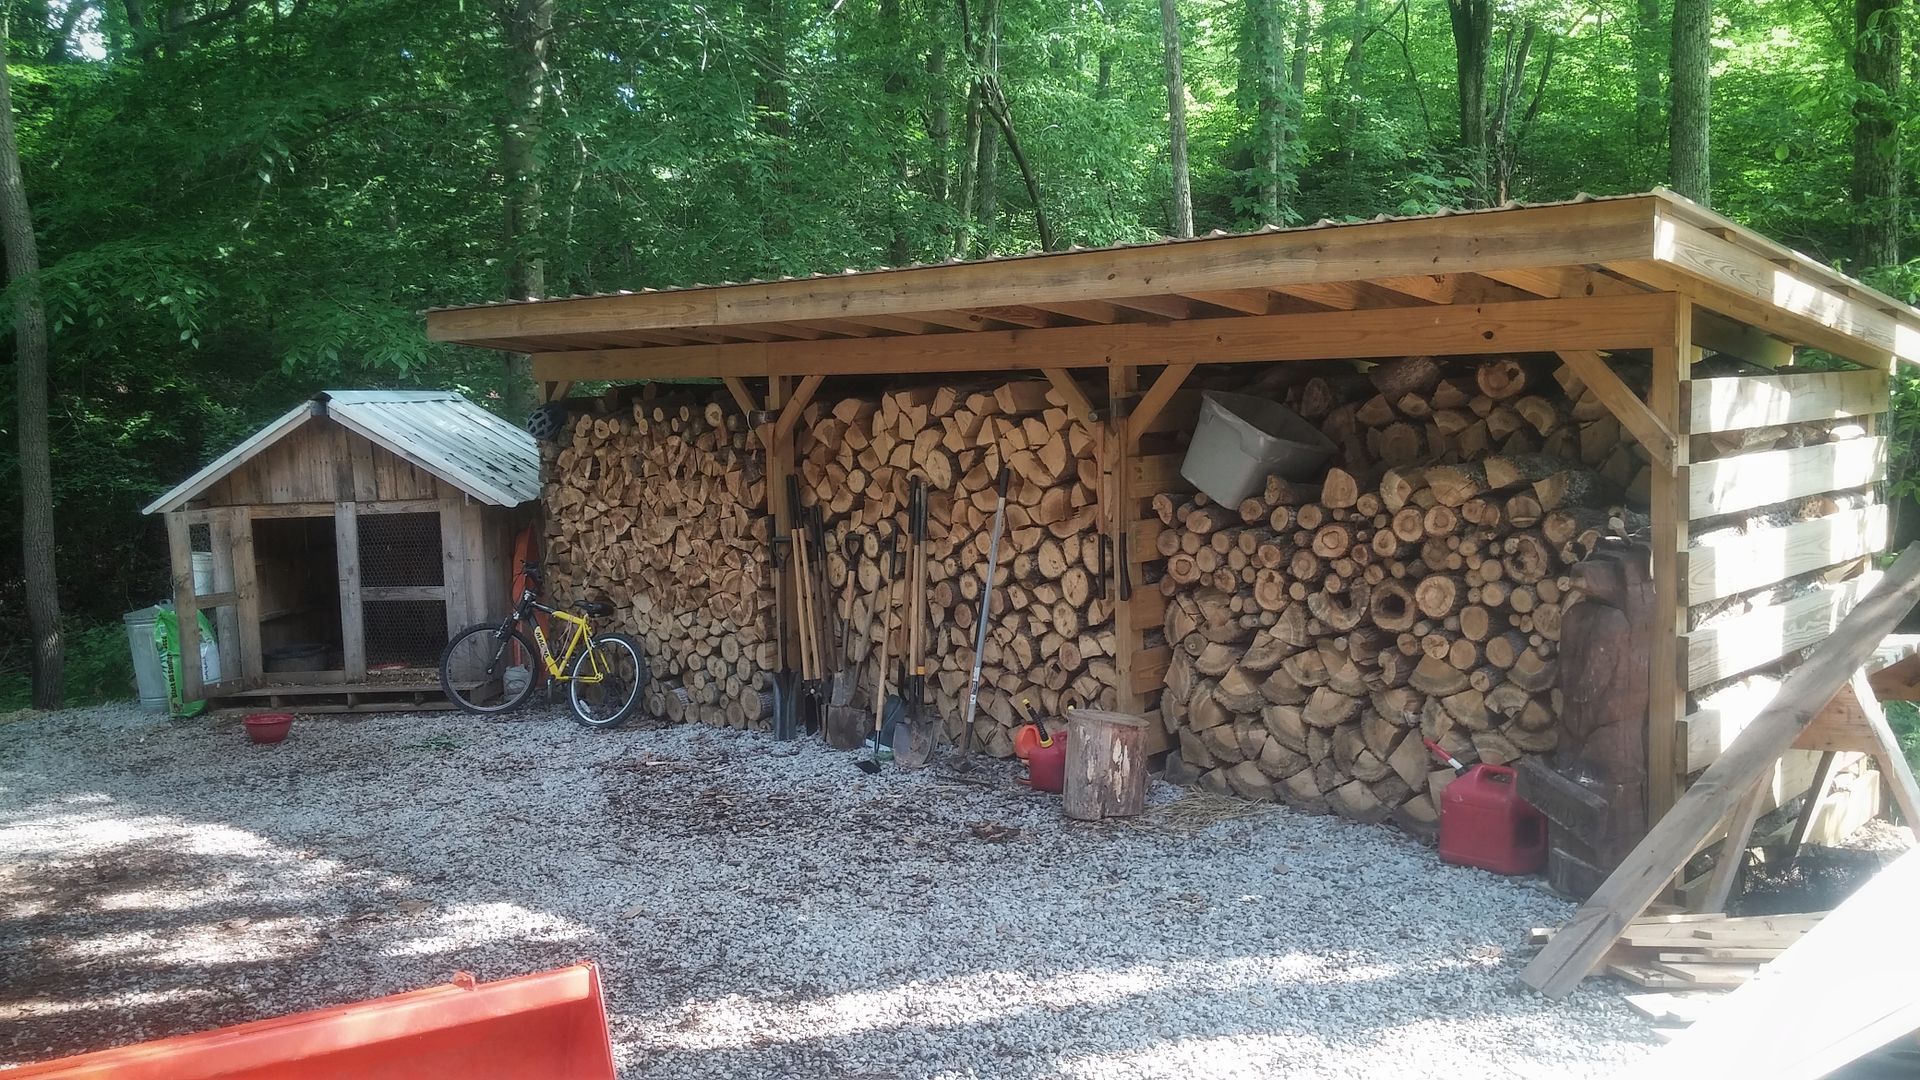 (https://s6.photobucket.com/user/EaglesSJ/media/0521181710_HDR-01_zps9s4cbjml.jpeg.html)
We now have a 4.1kw array and we are running 16 US battery L16s 48v 840ah total capacity. Just finished installing an outback 240v transformer to power our newest addition which we have longed for forever. Air conditioning! I installed a 24k btu 3 zone mini split system. We opted for the ceiling mounted models and hopefully the system will be up and running this week. HVAC guy is supposed to come tomorrow and hook up the lines and vacuum/charge with refridgerant. The rest of the work has just been framing/drywall to finish out the entire basement. Our little 700 sq ft a frame has grown to a 2400 sq ft house in just 8 years time. This will likely be the last of the building on the house itself.
Without further ado, here are some photos.
(https://s6.photobucket.com/user/EaglesSJ/media/0521181704-01_zpsb7omj7ep.jpeg.html) (https://s6.photobucket.com/user/EaglesSJ/media/0521181717_HDR-01_zps4eqwg25v.jpeg.html) (https://s6.photobucket.com/user/EaglesSJ/media/0521181706_HDR-01_zpsdsqpyicy.jpeg.html) (https://s6.photobucket.com/user/EaglesSJ/media/0521181707a_HDR-01_zpsvcgos5wh.jpeg.html) (https://s6.photobucket.com/user/EaglesSJ/media/0521181707_HDR-01_zpssqdwfehy.jpeg.html) (https://s6.photobucket.com/user/EaglesSJ/media/0521181711_HDR-01_zpsuutxfmgs.jpeg.html) (https://s6.photobucket.com/user/EaglesSJ/media/0521181710_HDR-01_zps9s4cbjml.jpeg.html)
Title: Re: 20x32 A frame cabin Central KY
Post by: EaglesSJ on May 21, 2018, 05:01:41 PM
Post by: EaglesSJ on May 21, 2018, 05:01:41 PM
And here are a few pics of helicopter stuff in case anyone is interested. Videos of flights can be found on my YouTube channel under the same user name. (eaglessj) my oldest son and I also got our scuba license while we were out there. There are some videos of diving as well.
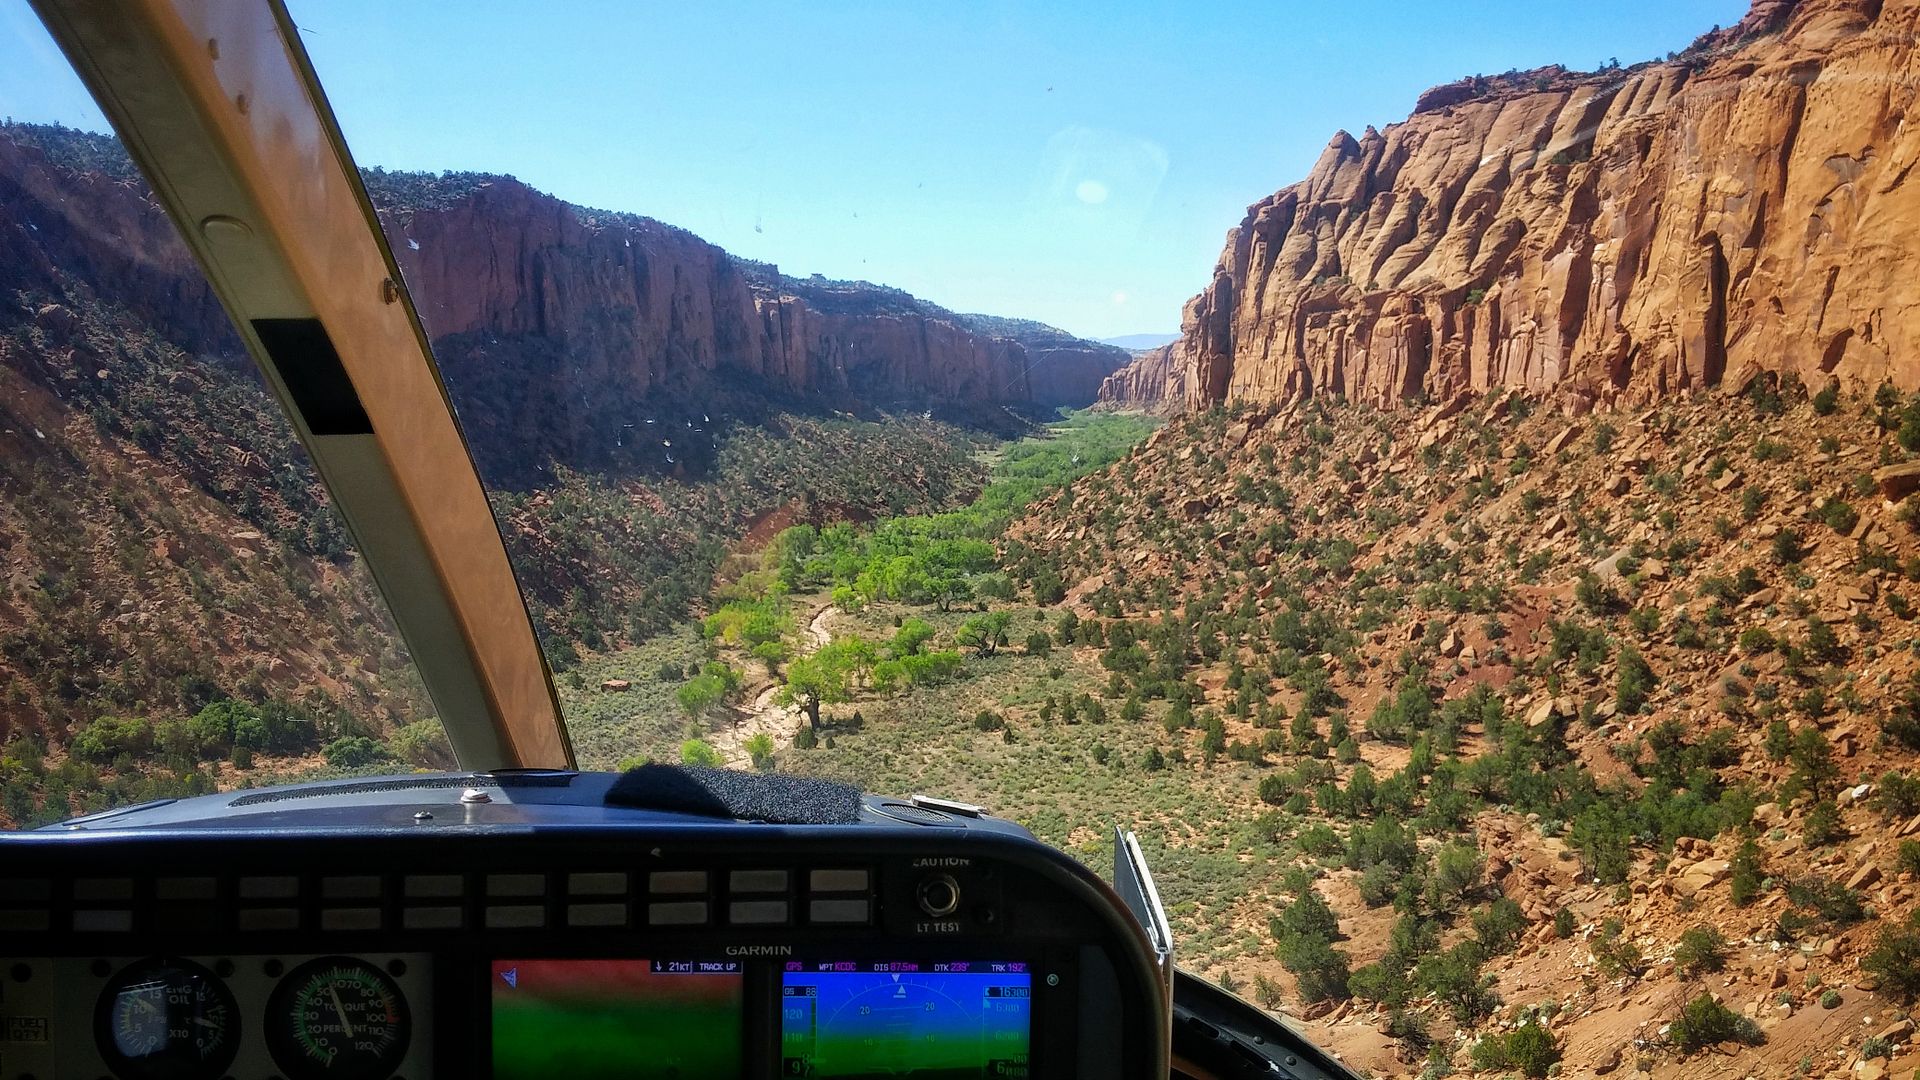 (https://s6.photobucket.com/user/EaglesSJ/media/0920171205-01_zpsgidwei5y.jpeg.html)
 (https://s6.photobucket.com/user/EaglesSJ/media/0930171348a-01_zpsqc0mv2wo.jpeg.html)
 (https://s6.photobucket.com/user/EaglesSJ/media/1128171047a_HDR-01_zps2fo7n4si.jpeg.html)
 (https://s6.photobucket.com/user/EaglesSJ/media/1129171022c_HDR-01_zpsl9v78twu.jpeg.html)
(https://s6.photobucket.com/user/EaglesSJ/media/0920171205-01_zpsgidwei5y.jpeg.html) (https://s6.photobucket.com/user/EaglesSJ/media/0930171348a-01_zpsqc0mv2wo.jpeg.html) (https://s6.photobucket.com/user/EaglesSJ/media/1128171047a_HDR-01_zps2fo7n4si.jpeg.html) (https://s6.photobucket.com/user/EaglesSJ/media/1129171022c_HDR-01_zpsl9v78twu.jpeg.html)
Title: Re: 20x32 A frame cabin Central KY
Post by: Redoverfarm on May 21, 2018, 05:03:10 PM
Post by: Redoverfarm on May 21, 2018, 05:03:10 PM
Not sure about your brand or model of mini-split but mine already has the Freon stored within the system . Once the system is vacuumed just turn a valve to charge it. Not sure all manufacturers do this or just a Mitsubishi.
Title: Re: 20x32 A frame cabin Central KY
Post by: EaglesSJ on May 21, 2018, 05:11:17 PM
Post by: EaglesSJ on May 21, 2018, 05:11:17 PM
Quote from: Redoverfarm on May 21, 2018, 05:03:10 PM
Not sure about your brand or model of mini-split but mine already has the Freon stored within the system . Once the system is vacuumed just turn a valve to charge it. Not sure all manufacturers do this or just a Mitsubishi.
Ours is an LG and comes charged with enough to do 72 ft of total lines. We have around 130ft of lines total because we had to run 3 units. 2 of which were around 50 ft away from outdoor unit. Do you run your mini split off grid? I'm wondering what sort of power consumption they have. Ours is 21.7 seer and is supposed to pull 1400 watts max power. By comparison our 12k btu window units pull around 1200 watts so we should be getting twice as much cooling for around the same power consumption since the mini split is 24k btu. I'm hoping that they won't need to run on max power very often. Most of our walls are 8-12" thick and insulated with R30 and the entire house is shaded.
Title: Re: 20x32 A frame cabin Central KY
Post by: Redoverfarm on May 21, 2018, 05:16:26 PM
Post by: Redoverfarm on May 21, 2018, 05:16:26 PM
No I am not off grid. I ran 4 units two of which were floor units and two ceiling units.
Title: Re: 20x32 A frame cabin Central KY
Post by: ben2go on May 22, 2018, 07:53:29 AM
Post by: ben2go on May 22, 2018, 07:53:29 AM
Congrats on getting your chopper license. I was a pilot for a few years. It was loads of fun moving peoples aircraft around and getting paid for it. [cool] My health put me out of the business tho. :-\
Title: Re: 20x32 A frame cabin Central KY
Post by: EaglesSJ on May 22, 2018, 10:00:05 PM
Post by: EaglesSJ on May 22, 2018, 10:00:05 PM
Quote from: ben2go on May 22, 2018, 07:53:29 AM
Congrats on getting your chopper license. I was a pilot for a few years. It was loads of fun moving peoples aircraft around and getting paid for it. [cool] My health put me out of the business tho. :-\
Thank you sir! Not sure what I'm going to do with it but I had a lot of fun getting it!
Title: Re: 20x32 A frame cabin Central KY
Post by: ben2go on May 23, 2018, 08:06:04 AM
Post by: ben2go on May 23, 2018, 08:06:04 AM
Quote from: EaglesSJ on May 22, 2018, 10:00:05 PM
Thank you sir! Not sure what I'm going to do with it but I had a lot of fun getting it!
You're welcome. You can always do flying crane service and drop AC units and chillers on rooftops of buildings. ;D
Title: Re: 20x32 A frame cabin Central KY
Post by: Don_P on May 23, 2018, 07:56:03 PM
Post by: Don_P on May 23, 2018, 07:56:03 PM
You've turned that into quite a home, well done!
I worked with a guy that did the helicopter crane thing but it was usually repo work, other helicopters, tanks, etc. Seems like it was always in a bad neighborhood.
They've been spraying and liming here the past month or two. They also clear the power lines by chopper, not a job I'd want.

How many hours does it take to get a helicopter ticket? I think single engine fixed wing is about 40?
I worked with a guy that did the helicopter crane thing but it was usually repo work, other helicopters, tanks, etc. Seems like it was always in a bad neighborhood.
They've been spraying and liming here the past month or two. They also clear the power lines by chopper, not a job I'd want.
How many hours does it take to get a helicopter ticket? I think single engine fixed wing is about 40?
Title: Re: 20x32 A frame cabin Central KY
Post by: ben2go on May 24, 2018, 06:59:02 AM
Post by: ben2go on May 24, 2018, 06:59:02 AM
Fixed wing single engine is 40 hours if the person is really wanting to get their private pilots license. A lot of people that used the school where I worked took up to 70 hours before their check ride was signed off by an FAA-certified instructor.
Title: Re: 20x32 A frame cabin Central KY
Post by: EaglesSJ on June 04, 2018, 07:26:09 PM
Post by: EaglesSJ on June 04, 2018, 07:26:09 PM
Quote from: Don_P on May 23, 2018, 07:56:03 PM
You've turned that into quite a home, well done!
I worked with a guy that did the helicopter crane thing but it was usually repo work, other helicopters, tanks, etc. Seems like it was always in a bad neighborhood.
They've been spraying and liming here the past month or two. They also clear the power lines by chopper, not a job I'd want.
How many hours does it take to get a helicopter ticket? I think single engine fixed wing is about 40?
10 hrs solo and 20 hrs of dual instruction, however it's very unlikely to get it in that time frame. Helicopters are extremely difficult in comparison to fixed wing. Most guys take 50 or more to pass a check ride.
Title: Re: 20x32 A frame cabin Central KY
Post by: EaglesSJ on July 02, 2018, 11:44:52 AM
Post by: EaglesSJ on July 02, 2018, 11:44:52 AM
A few updated photos post painting. Sorry for the slightly crooked pano shots.
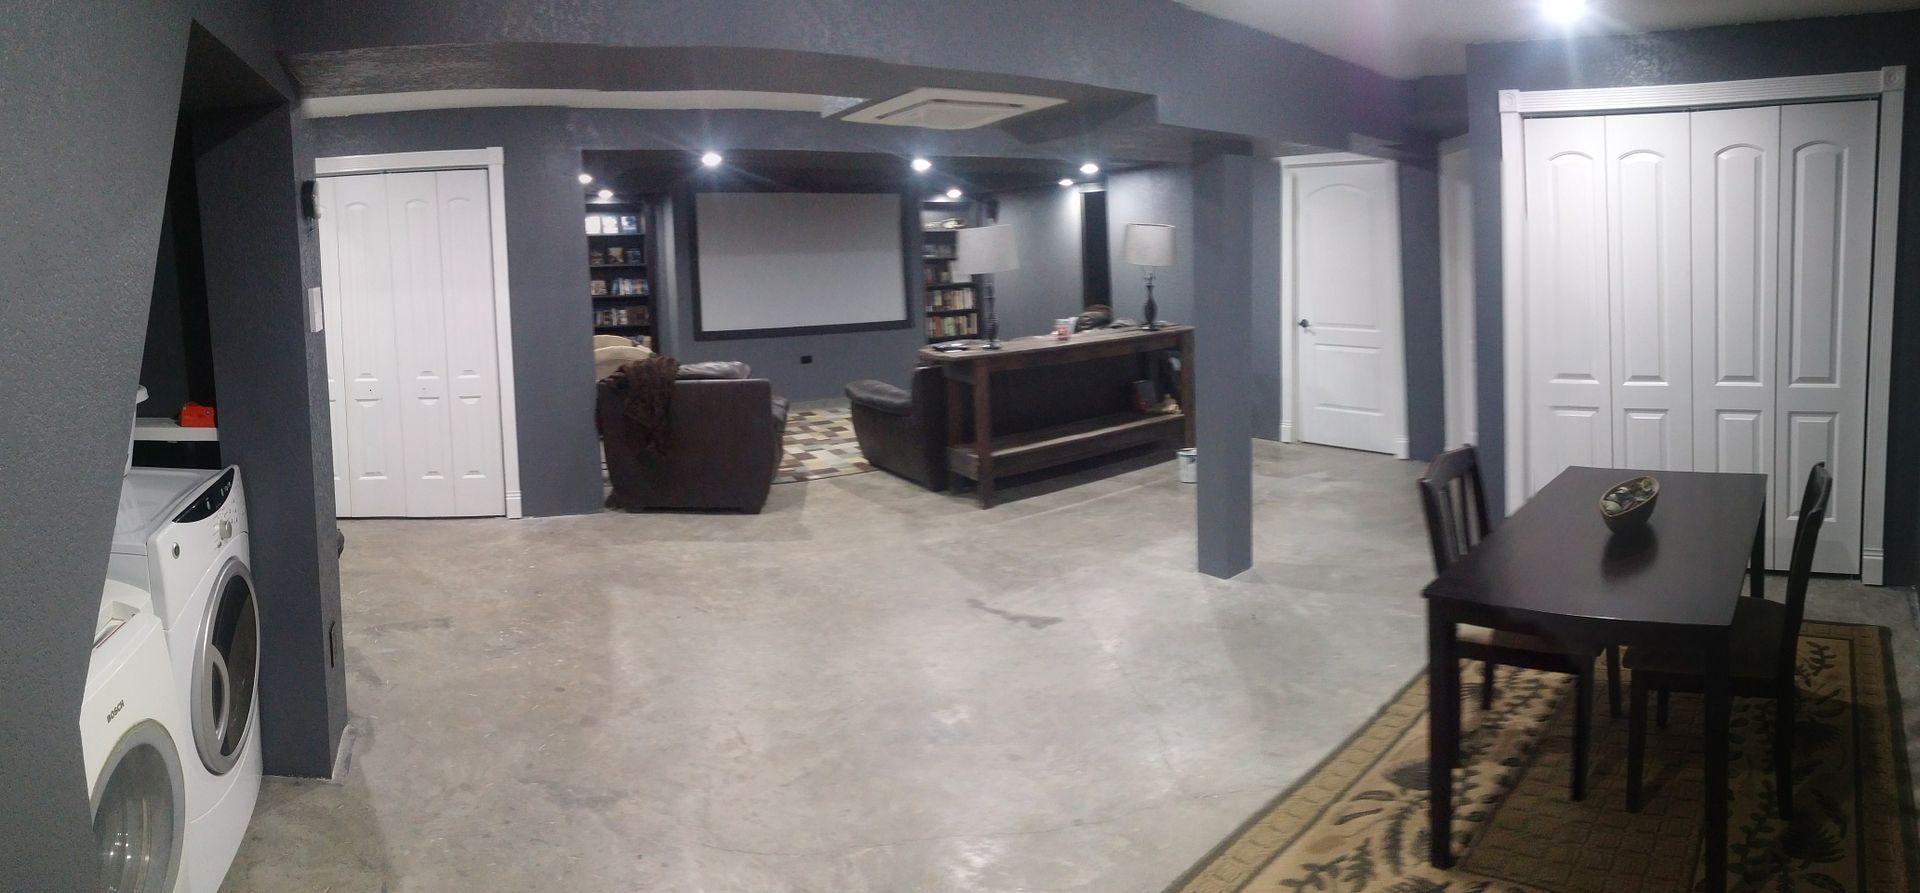 (https://s6.photobucket.com/user/EaglesSJ/media/0616182031_Pano1_zpsfsmdv7mq.jpg.html)
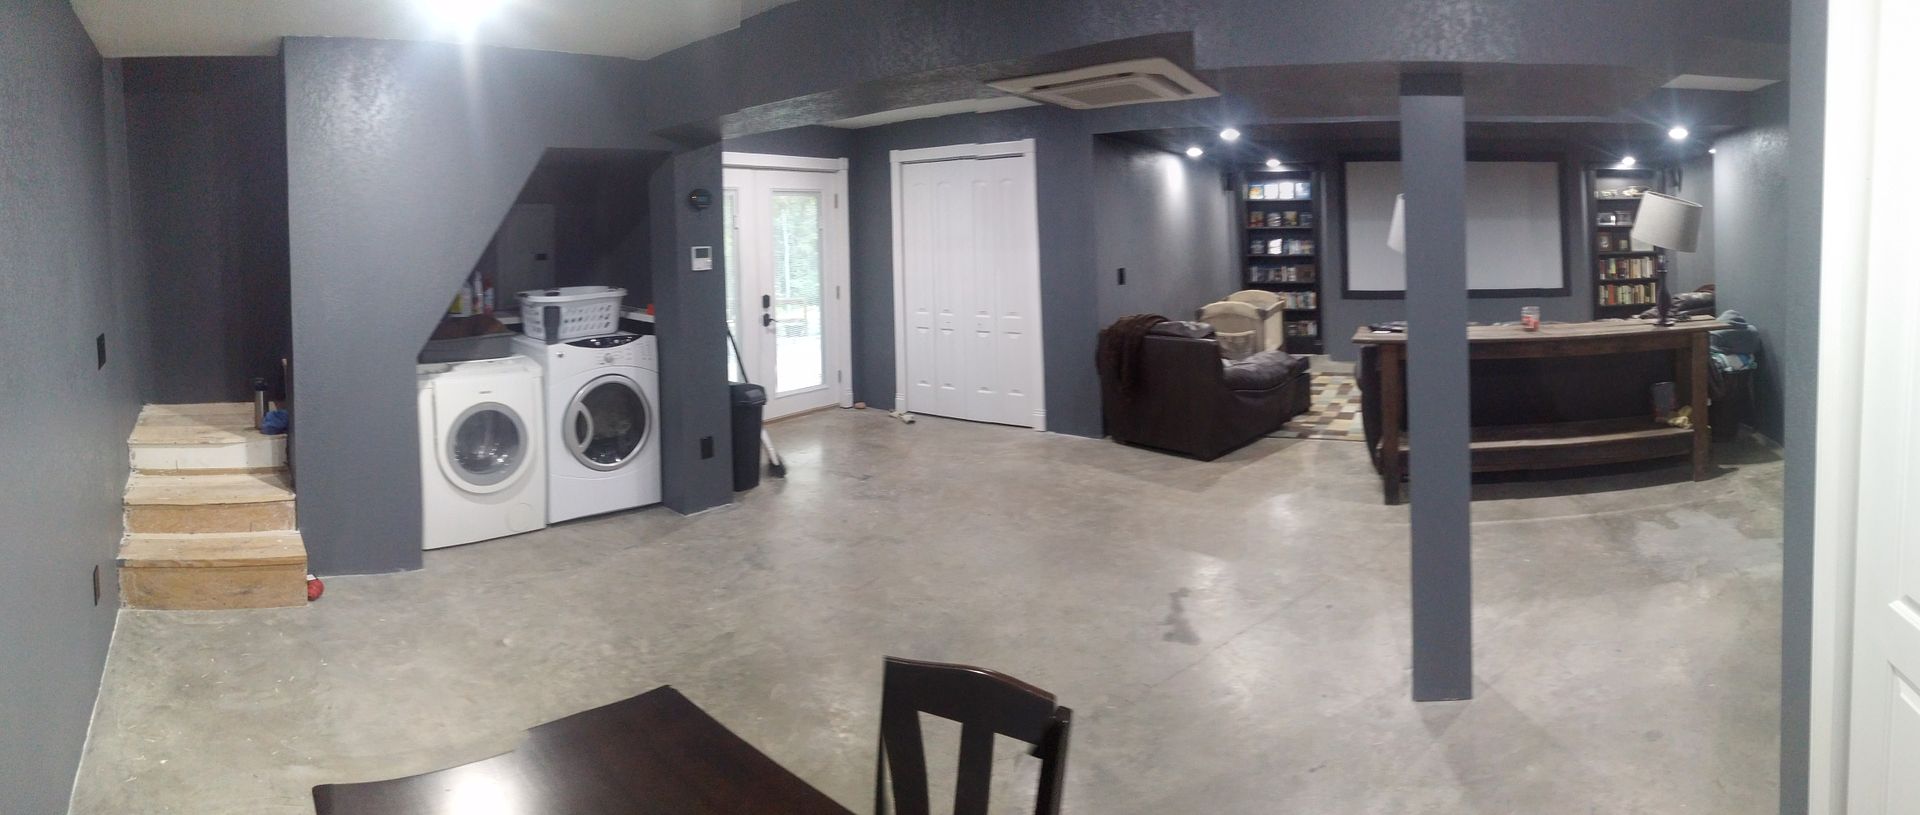 (https://s6.photobucket.com/user/EaglesSJ/media/0616182028a_Pano1_zpsnghx8x2p.jpg.html)
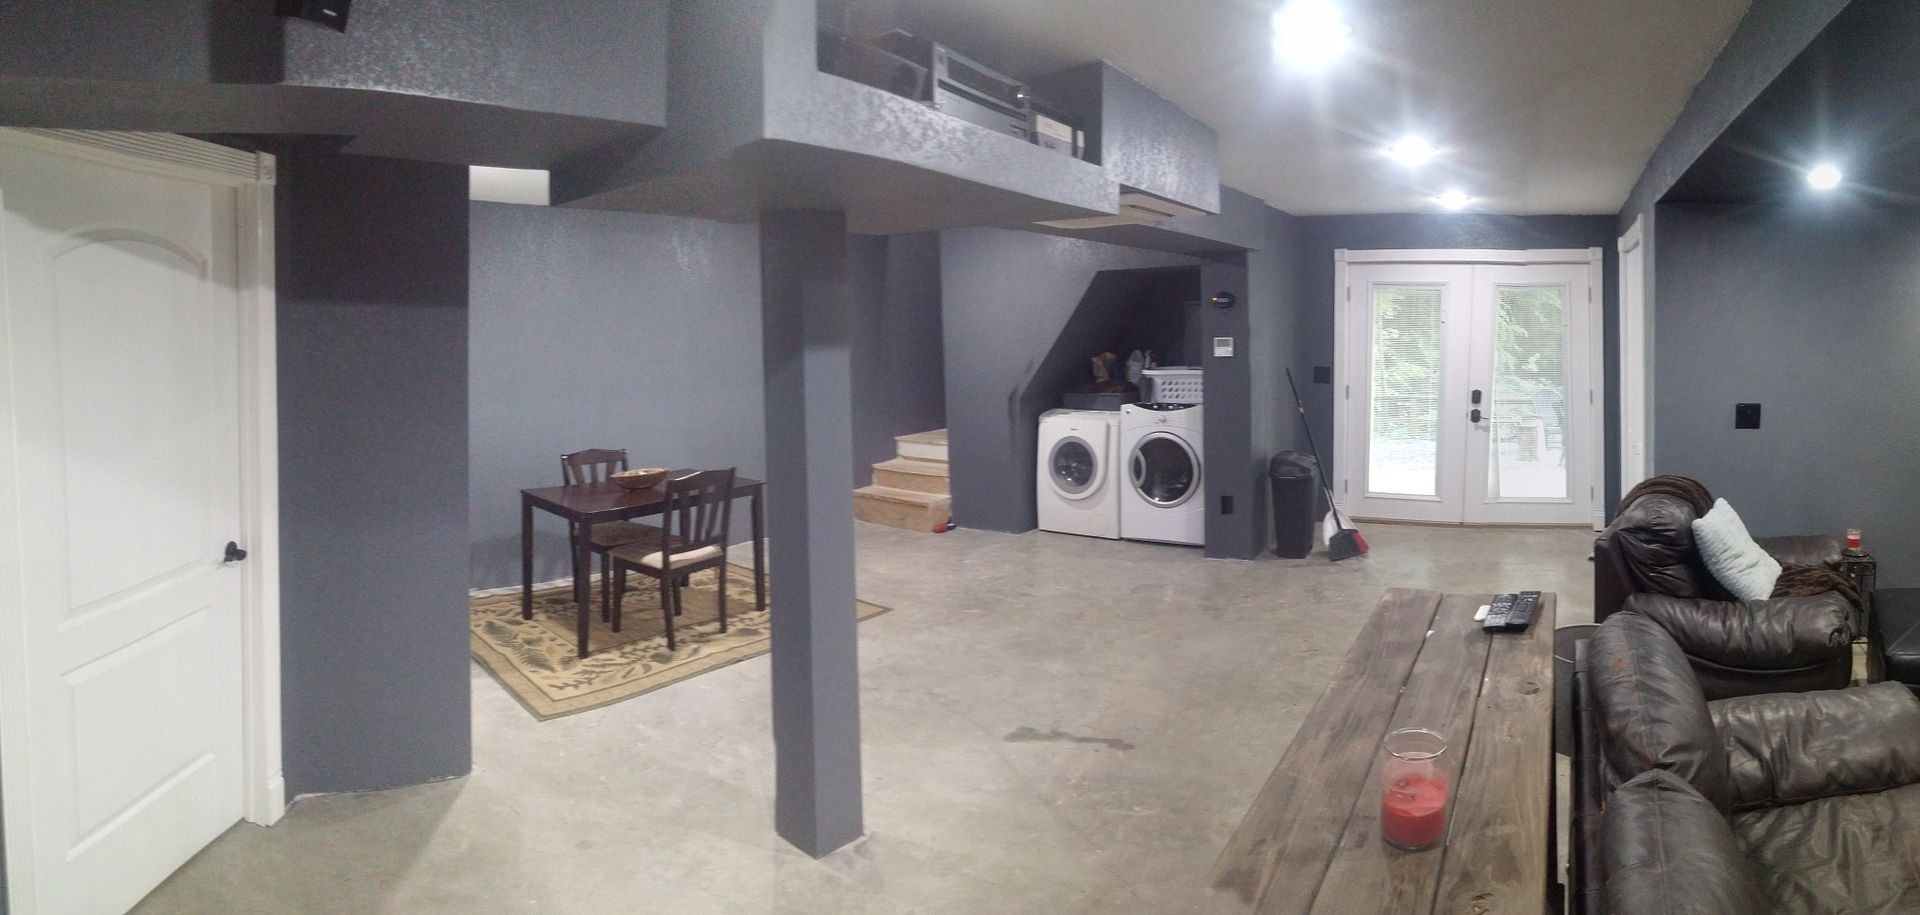 (https://s6.photobucket.com/user/EaglesSJ/media/0616182027_Pano1_zps7ceowku3.jpg.html)
(https://s6.photobucket.com/user/EaglesSJ/media/0616182031_Pano1_zpsfsmdv7mq.jpg.html) (https://s6.photobucket.com/user/EaglesSJ/media/0616182028a_Pano1_zpsnghx8x2p.jpg.html) (https://s6.photobucket.com/user/EaglesSJ/media/0616182027_Pano1_zps7ceowku3.jpg.html)
Title: Re: 20x32 A frame cabin Central KY
Post by: EaglesSJ on July 02, 2018, 11:50:06 AM
Post by: EaglesSJ on July 02, 2018, 11:50:06 AM
Here is one more of what I consider a "unique" ceiling idea. My wife actually came up with this one. I took sheets of 1/2" OSB and ripped them into 3 equal parts each being 4 feet wide and roughly 30" long. Then I used 1x2 stripping to make the rectangles. This was all screwed to the above floor joist with drywall screws. This created a simulated drop ceiling tile effect without losing any headroom and also makes it very easy to remove a small section of the ceiling to access wiring and plumbing.
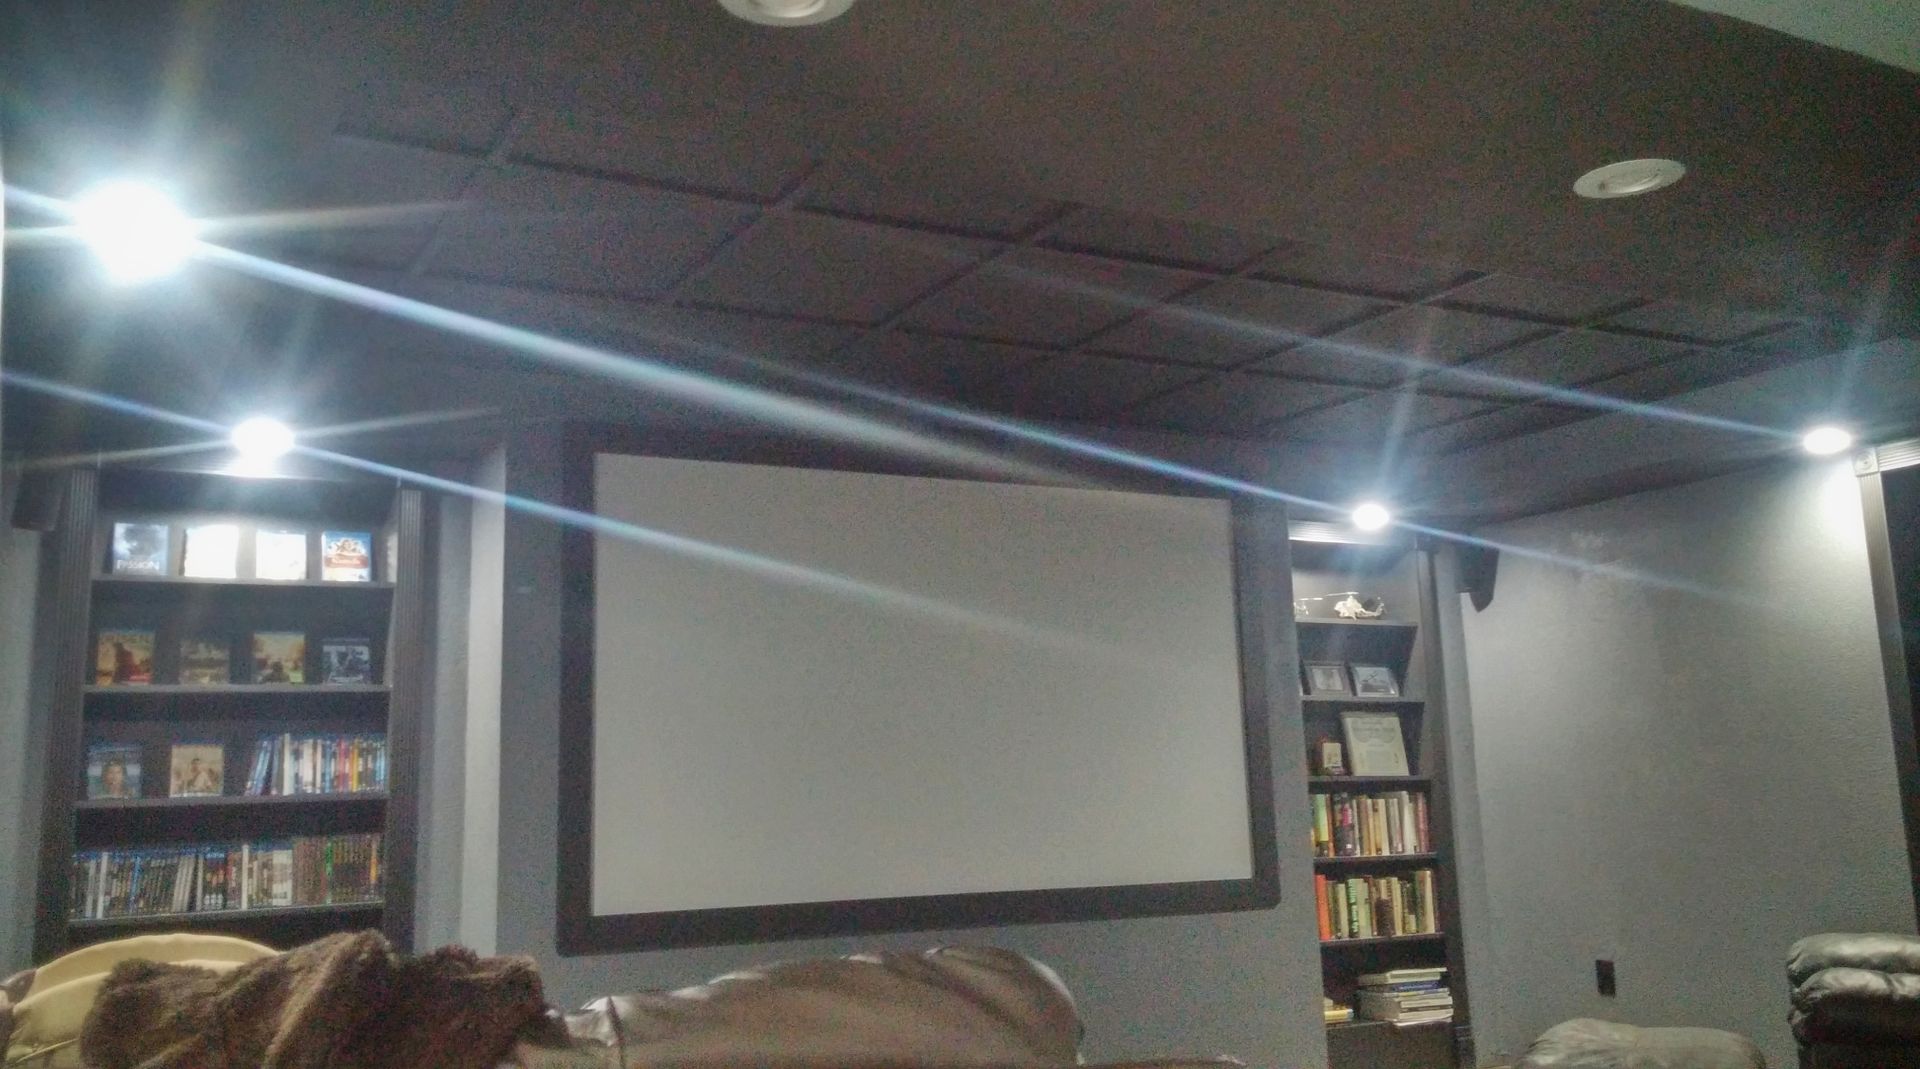 (https://s6.photobucket.com/user/EaglesSJ/media/0620181525_HDR-01_zpsxru1qsqu.jpeg.html)
(https://s6.photobucket.com/user/EaglesSJ/media/0620181525_HDR-01_zpsxru1qsqu.jpeg.html)
Title: Re: 20x32 A frame cabin Central KY
Post by: ben2go on July 03, 2018, 09:20:39 AM
Post by: ben2go on July 03, 2018, 09:20:39 AM
Quote from: EaglesSJ on July 02, 2018, 11:50:06 AM
Here is one more of what I consider a "unique" ceiling idea. My wife actually came up with this one. I took sheets of 1/2" OSB and ripped them into 3 equal parts each being 4 feet wide and roughly 30" long. Then I used 1x2 stripping to make the rectangles. This was all screwed to the above floor joist with drywall screws. This created a simulated drop ceiling tile effect without losing any headroom and also makes it very easy to remove a small section of the ceiling to access wiring and plumbing.
Your pics didn't come through for me so I pulled out the [ IMG] codes. That's a nice modern look to the A-frame cabin. I like it. Functional too with the ability to have access to to the house's system. [cool]
Title: Re: 20x32 A frame cabin Central KY
Post by: EaglesSJ on July 03, 2018, 10:46:43 AM
Post by: EaglesSJ on July 03, 2018, 10:46:43 AM
Quote from: ben2go on July 03, 2018, 09:20:39 AM
Your pics didn't come through for me so I pulled out the [ IMG] codes. That's a nice modern look to the A-frame cabin. I like it. Functional too with the ability to have access to to the house's system. [cool]
Yeah, we decided to go more modern in the basement. We will likely update the rest of the house to be a bit more modern as time progresses, Lord willing.
Title: Re: 20x32 A frame cabin Central KY
Post by: ben2go on July 03, 2018, 11:03:17 AM
Post by: ben2go on July 03, 2018, 11:03:17 AM
Quote from: EaglesSJ on July 03, 2018, 10:46:43 AM
Yeah, we decided to go more modern in the basement. We will likely update the rest of the house to be a bit more modern as time progresses, Lord willing.
Rustic outside, modern inside. People around my area of SC pay the big monies for that combination. [cool]
Title: Re: 20x32 A frame cabin Central KY
Post by: EaglesSJ on February 21, 2019, 10:17:46 AM
Post by: EaglesSJ on February 21, 2019, 10:17:46 AM
Just wanted to provide a quick update. We have recently added a mate3s to our solar setup and for anyone on the fence about it we have found it well worth the cost. It's wonderful to be able to simply check my phone in the morning and see how much our solar panels are sending to our batteries or what our current SOC is. We have also built a new 40x60 shop. Pics to follow if anyone is interested in seeing it.
Title: Re: 20x32 A frame cabin Central KY
Post by: ben2go on February 21, 2019, 12:23:30 PM
Post by: ben2go on February 21, 2019, 12:23:30 PM
Quote from: EaglesSJ on February 21, 2019, 10:17:46 AM
Just wanted to provide a quick update. We have recently added a mate3s to our solar setup and for anyone on the fence about it we have found it well worth the cost. It's wonderful to be able to simply check my phone in the morning and see how much our solar panels and sending to our batteries or what our current SOC is. We have also built a new 40x60 shop. Pics to follow if anyone is interested in seeing it.
Cool and yes to the shop pics.
Title: Re: 20x32 A frame cabin Central KY
Post by: MountainDon on February 21, 2019, 02:36:48 PM
Post by: MountainDon on February 21, 2019, 02:36:48 PM
Quote from: EaglesSJ on February 21, 2019, 10:17:46 AM
Just wanted to provide a quick update. We have recently added a mate3s to our solar setup and for anyone on the fence about it we have found it well worth the cost. It's wonderful to be able to simply check my phone in the morning and see how much our solar panels and sending to our batteries or what our current SOC is.
Great to hear you are happy with the newer mate. That is another good reason folks should give more thought to using one brand for the hardware. The CC, inverter and all work together and as improvements are made you can take advantage of them.
Title: Re: 20x32 A frame cabin Central KY
Post by: EaglesSJ on February 21, 2019, 04:26:32 PM
Post by: EaglesSJ on February 21, 2019, 04:26:32 PM
Quote from: MountainDon on February 21, 2019, 02:36:48 PM
Great to hear you are happy with the newer mate. That is another good reason folks should give more thought to using one brand for the hardware. The CC, inverter and all work together and as improvements are made you can take advantage of them.
Yeah, believe it or not I was actually thinking about you when I was doing the install. I wondered if you had one in your cabin or not. Seemed it would be helpful with you all not living there full time.
Title: Re: 20x32 A frame cabin Central KY
Post by: EaglesSJ on February 21, 2019, 04:38:39 PM
Post by: EaglesSJ on February 21, 2019, 04:38:39 PM
Quote from: ben2go on February 21, 2019, 12:23:30 PM
Cool and yes to the shop pics.
Here a few for you. This was built start to finish by my dad and I. We did have a crew come and pour the concrete and a crane operator come to help set the trusses. Other than that it was us doing the work.
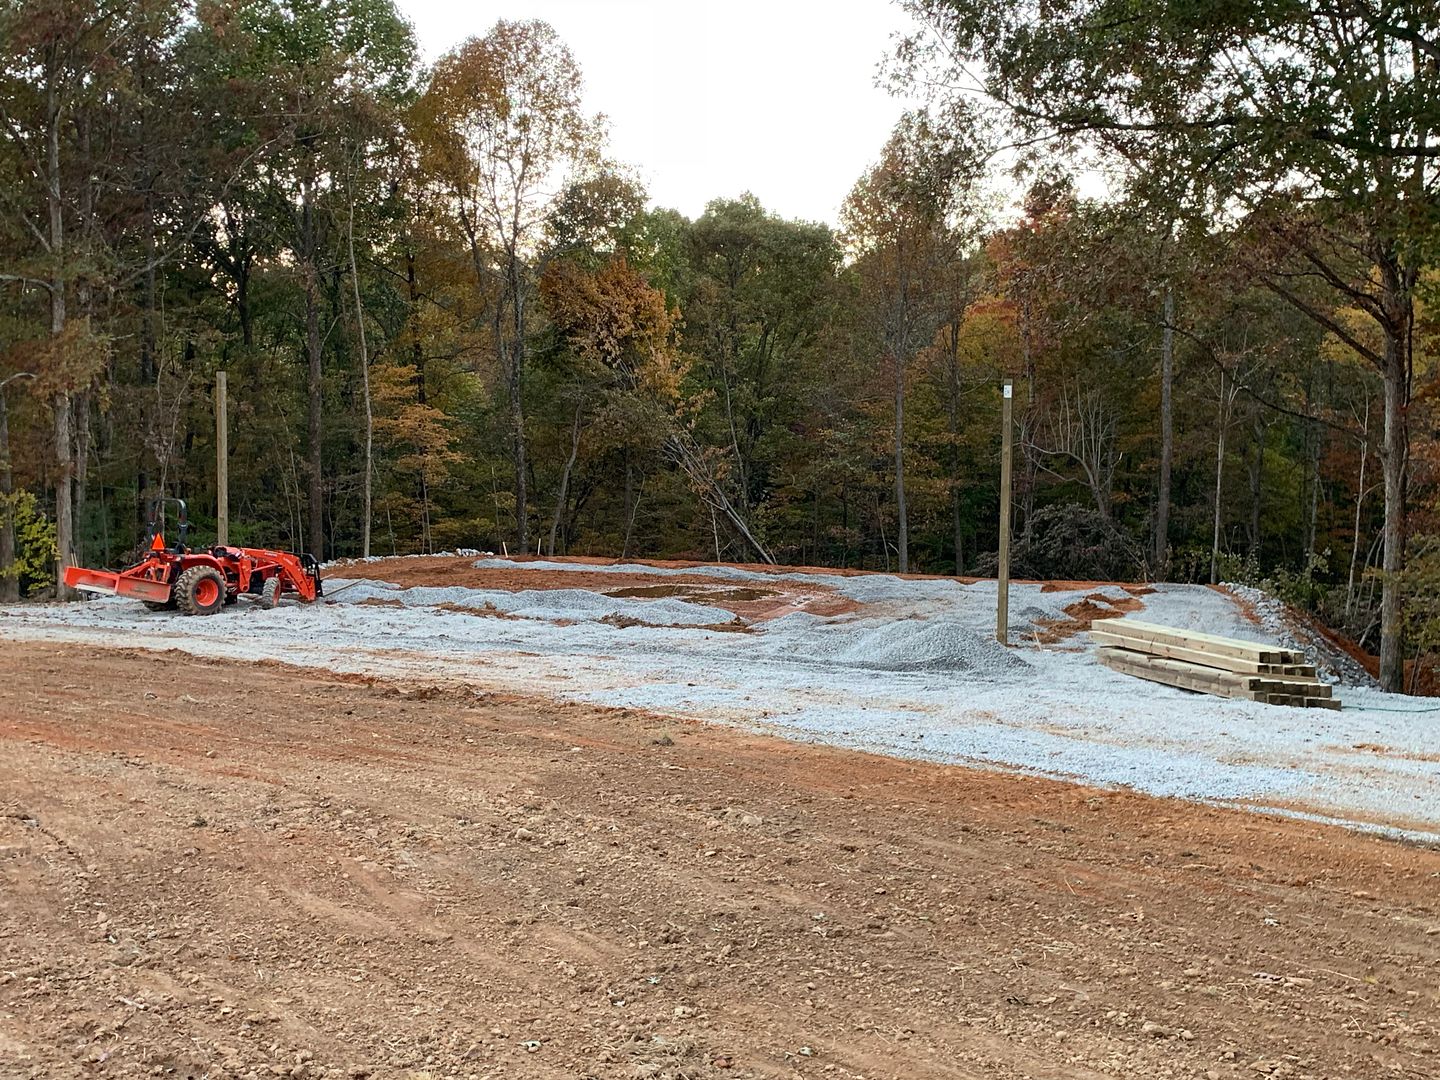 (https://s6.photobucket.com/user/EaglesSJ/media/0CE69816-007A-4C10-90CB-9738D977B275_zpstaqveazq.jpeg.html)
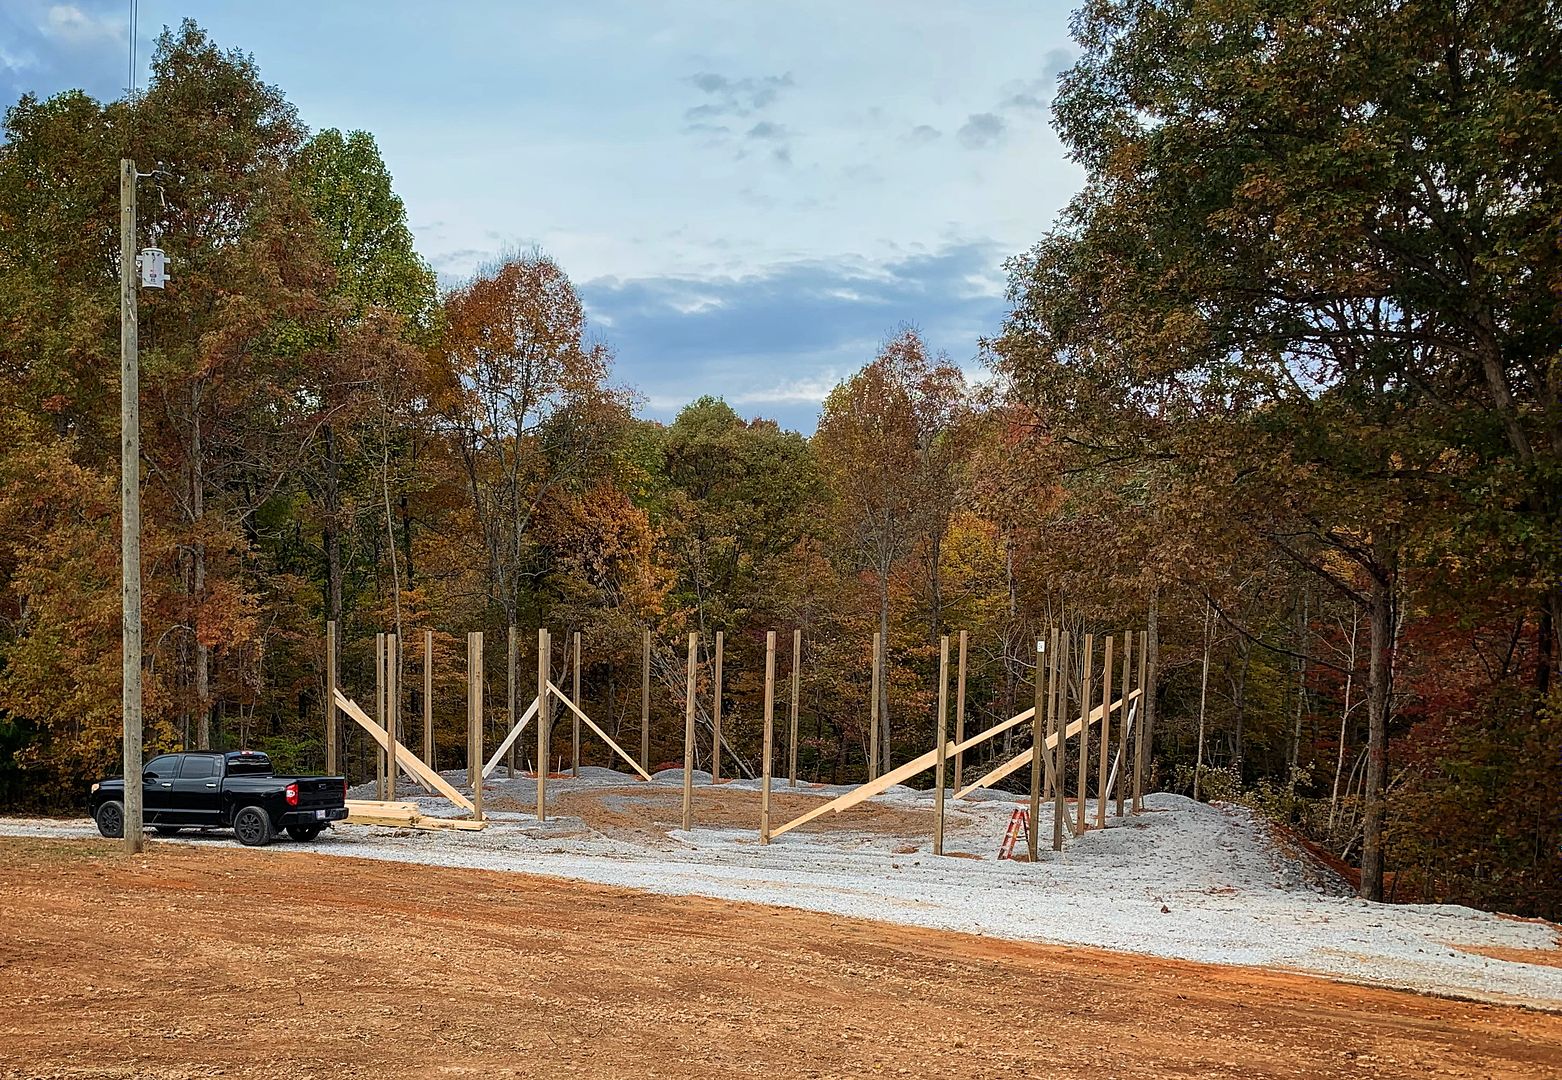 (https://s6.photobucket.com/user/EaglesSJ/media/7B943012-847C-4ED3-9B85-9D7B477A09EB_zpsptir733q.jpeg.html)
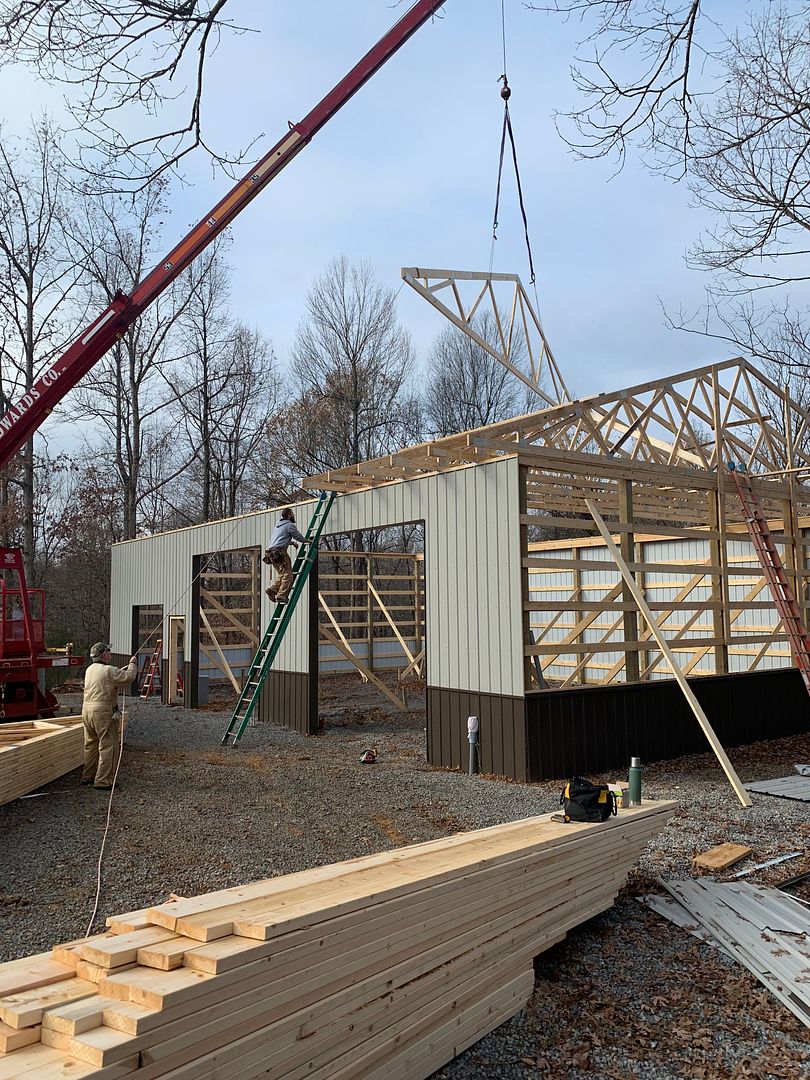 (https://s6.photobucket.com/user/EaglesSJ/media/594DF409-55FF-41A7-920F-C63FBDD55F39_zpsh77c5pdd.jpeg.html)
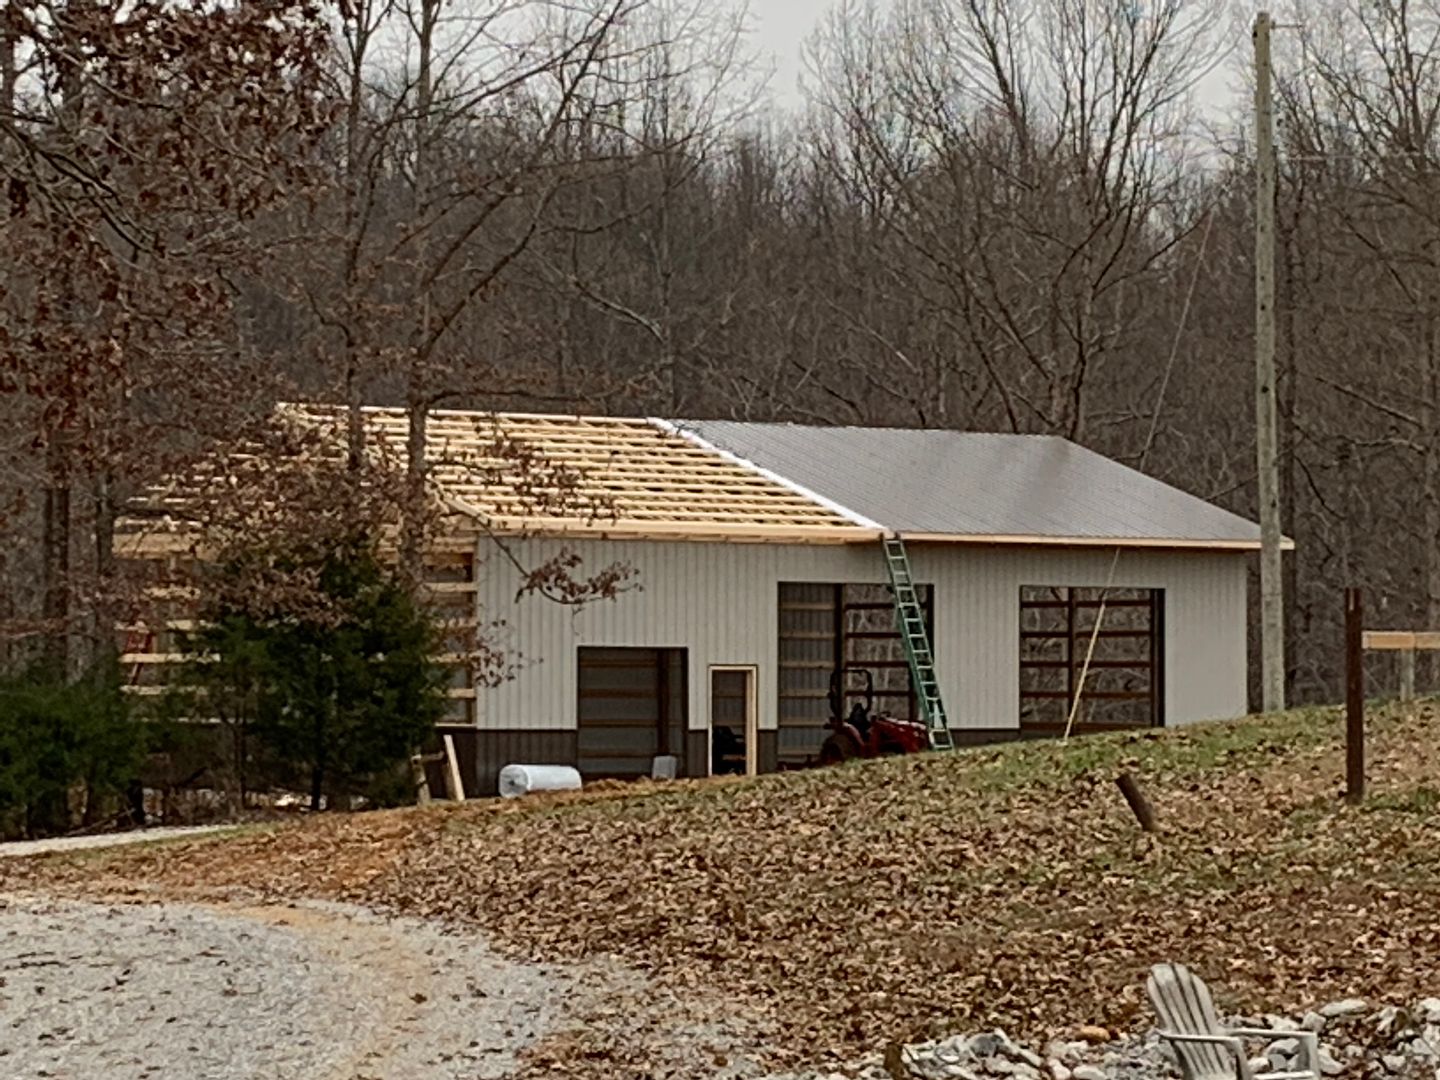 (https://s6.photobucket.com/user/EaglesSJ/media/AC8FF23A-D8A4-4E22-A8A0-13E14AF8D5FB_zpsufzupdos.jpeg.html)
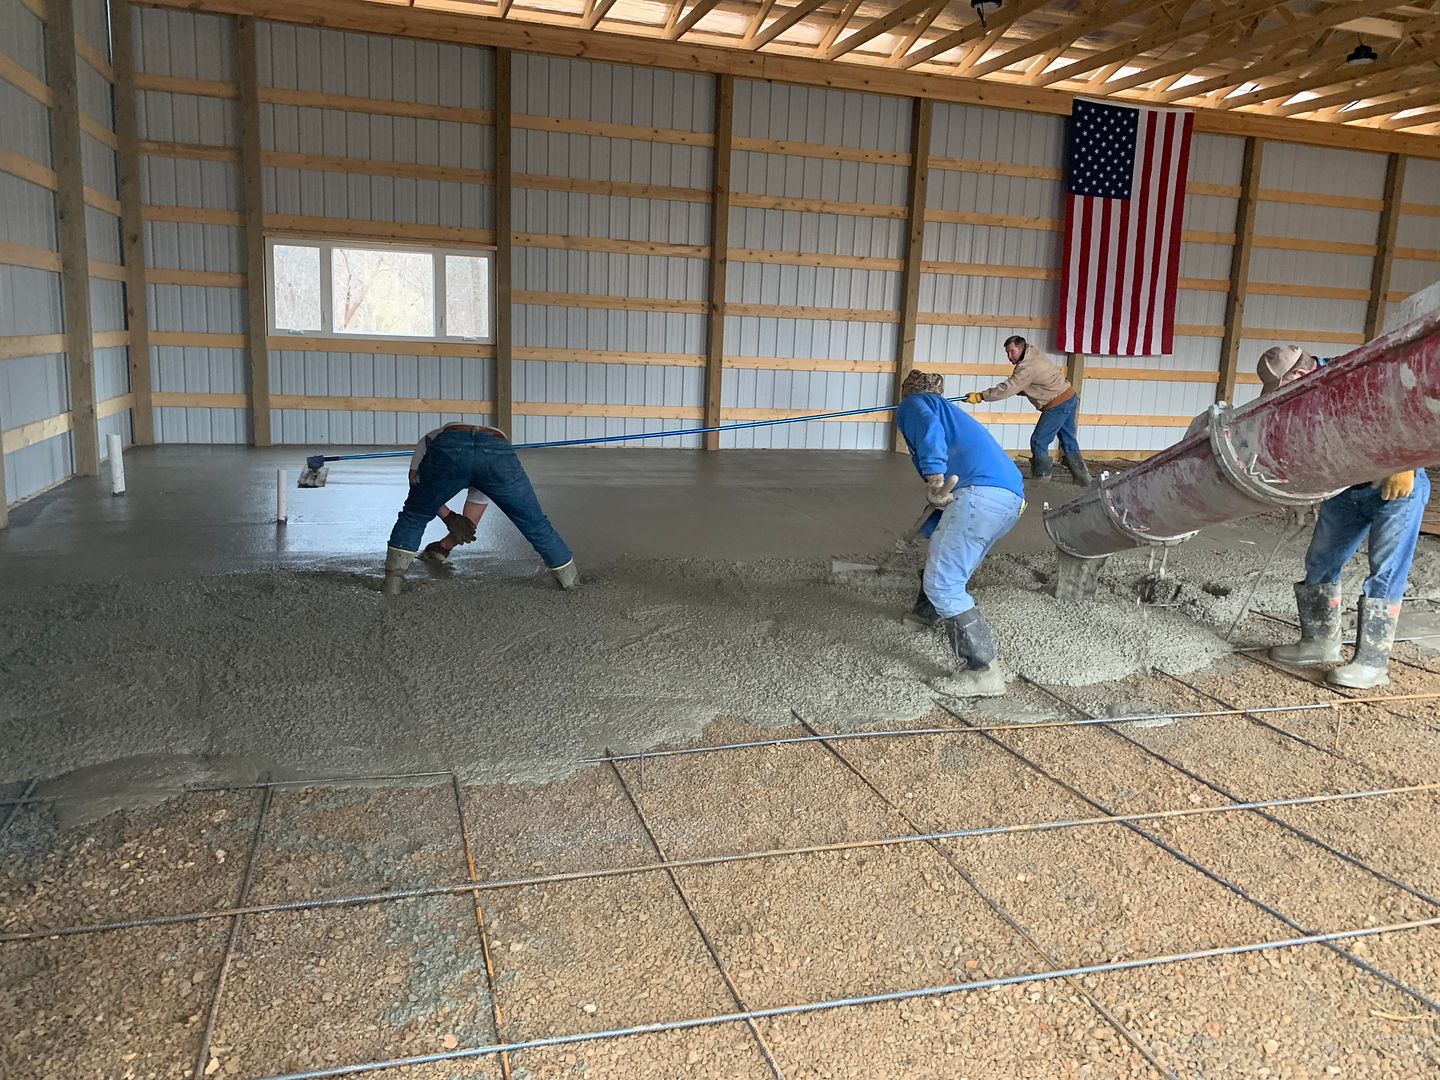 (https://s6.photobucket.com/user/EaglesSJ/media/2B9B6E4B-4AA0-4F04-B3D0-E0E7DD32AB14_zpsuuos6uvr.jpeg.html)
 (https://s6.photobucket.com/user/EaglesSJ/media/75799FEB-5261-4A04-8305-B8BB2B387700_zps3r700gwl.jpeg.html)
 (https://s6.photobucket.com/user/EaglesSJ/media/17E5C456-4299-48CF-960A-60ADF118170F_zpswt3id73j.jpeg.html)
 (https://s6.photobucket.com/user/EaglesSJ/media/DFF9114D-6261-4D38-89FC-6FD3DA129F53_zpsalrl6jkf.jpeg.html)
 (https://s6.photobucket.com/user/EaglesSJ/media/6522757E-34B4-4A11-A324-FDA60C573DA1_zpsxdc1kmhs.jpeg.html)
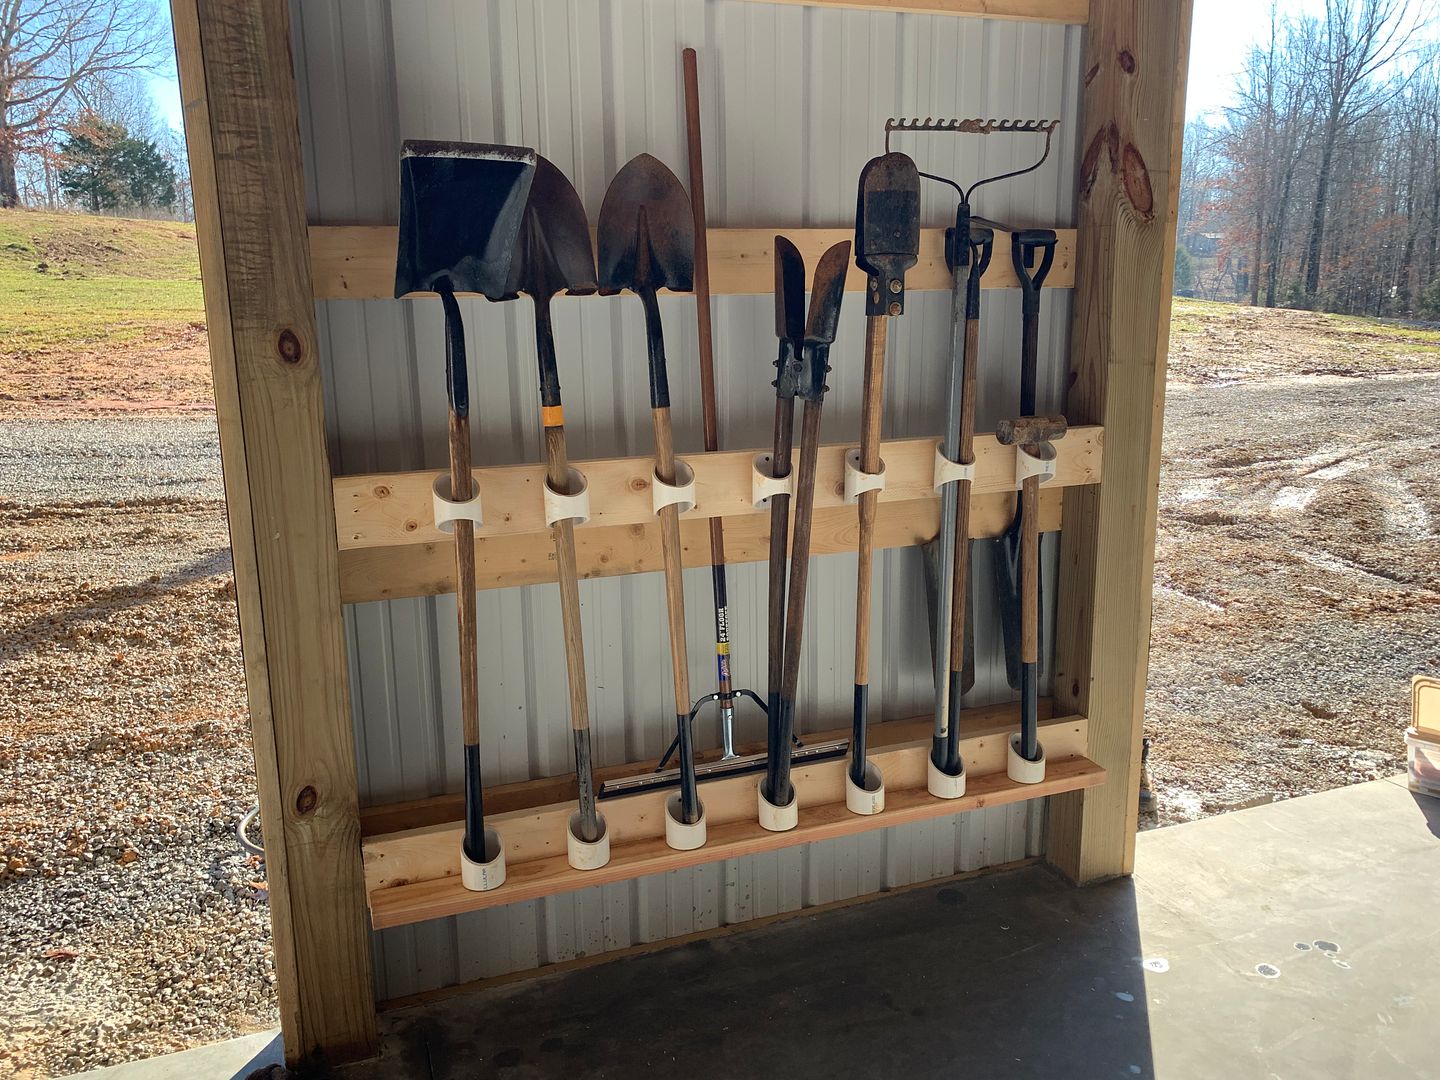 (https://s6.photobucket.com/user/EaglesSJ/media/6C023EAD-B7B0-43C1-AF69-9F10C5E4FA0F_zpsbs5hkula.jpeg.html)
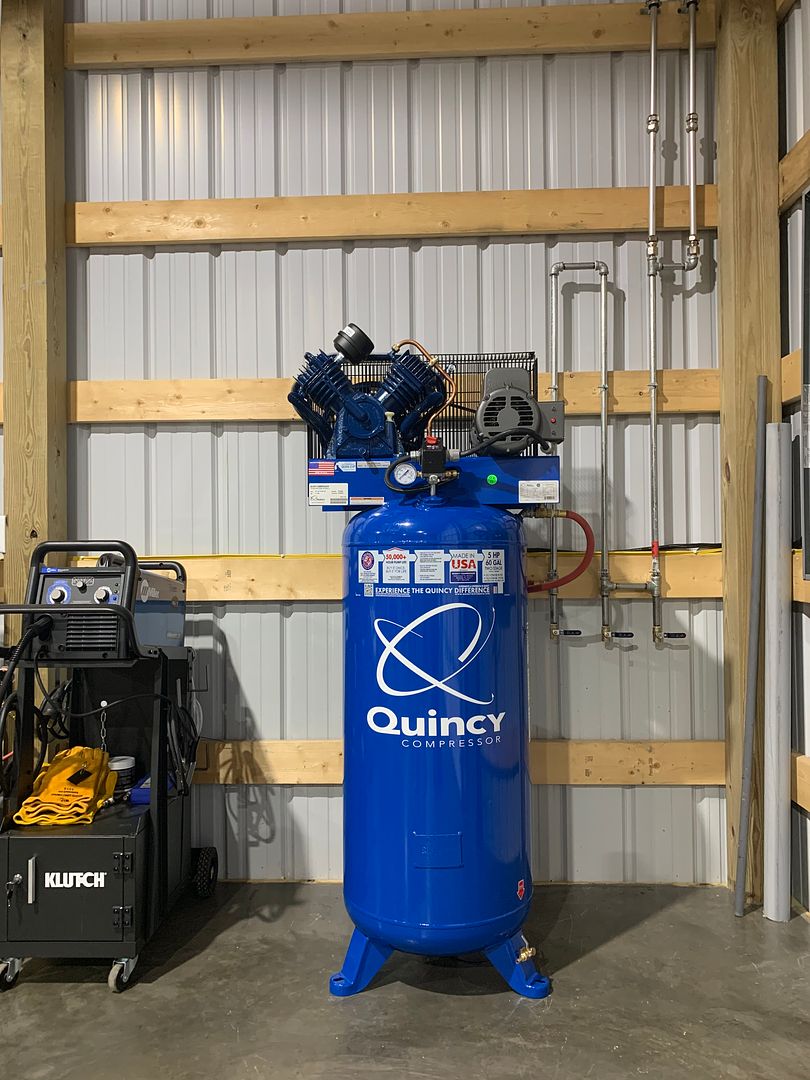 (https://s6.photobucket.com/user/EaglesSJ/media/73D74E9E-7497-493B-816E-79AC4D58091F_zpsnir8ekb9.jpeg.html)
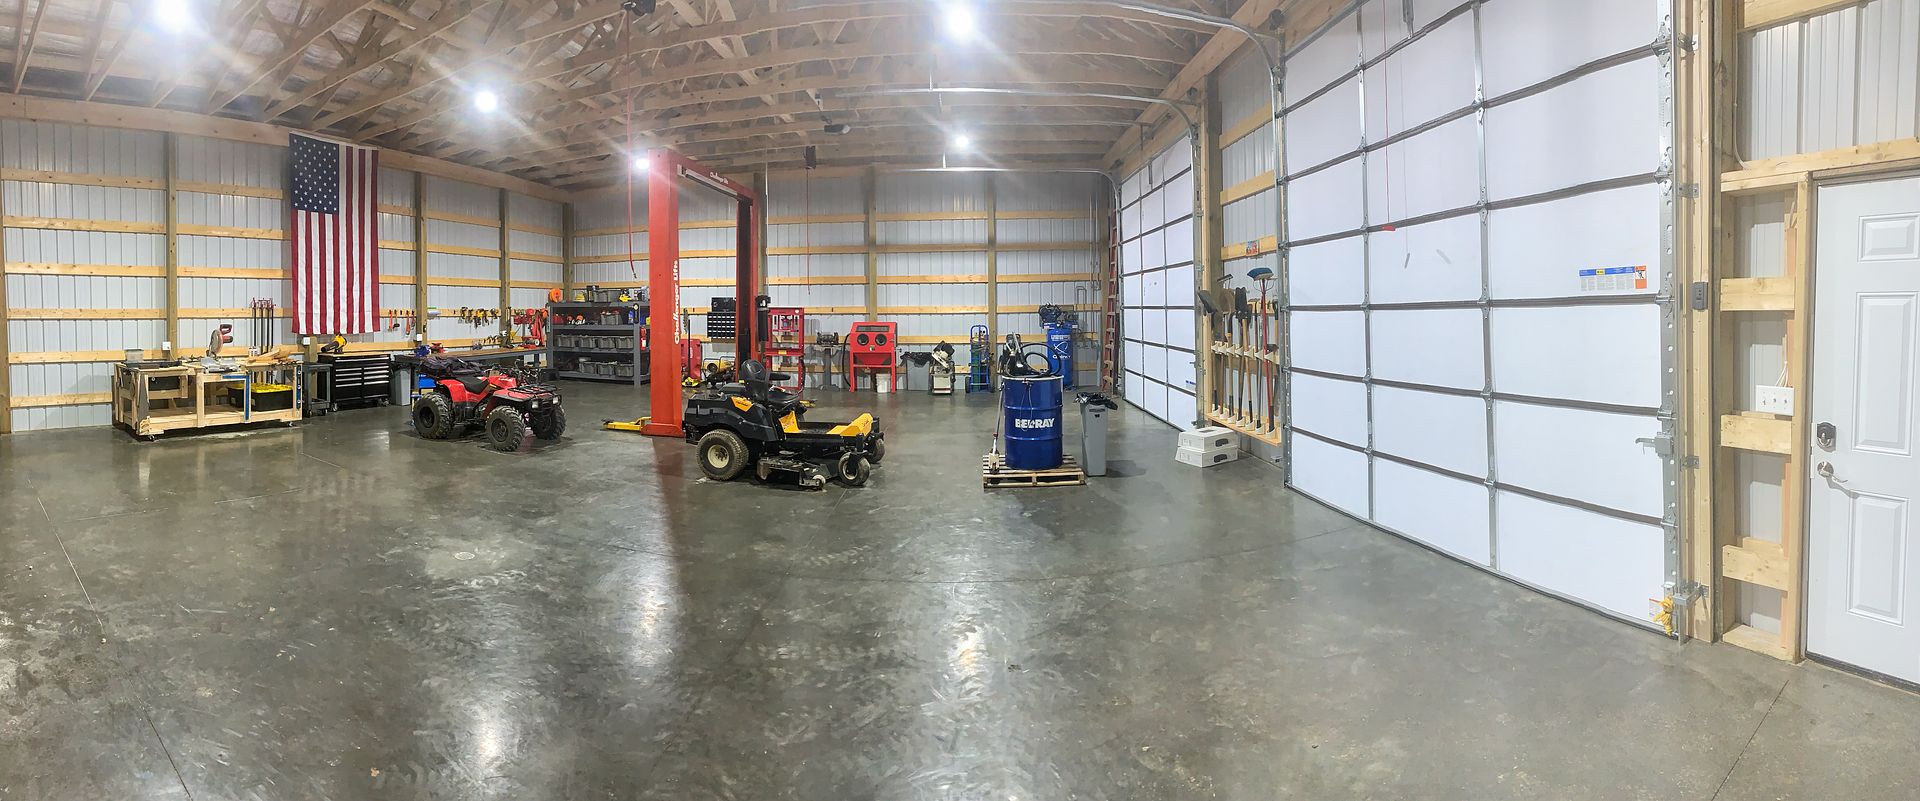 (https://s6.photobucket.com/user/EaglesSJ/media/792FBEFA-AE83-46A1-A2CA-74F51CB906E0_zps2e1lyybr.jpeg.html)
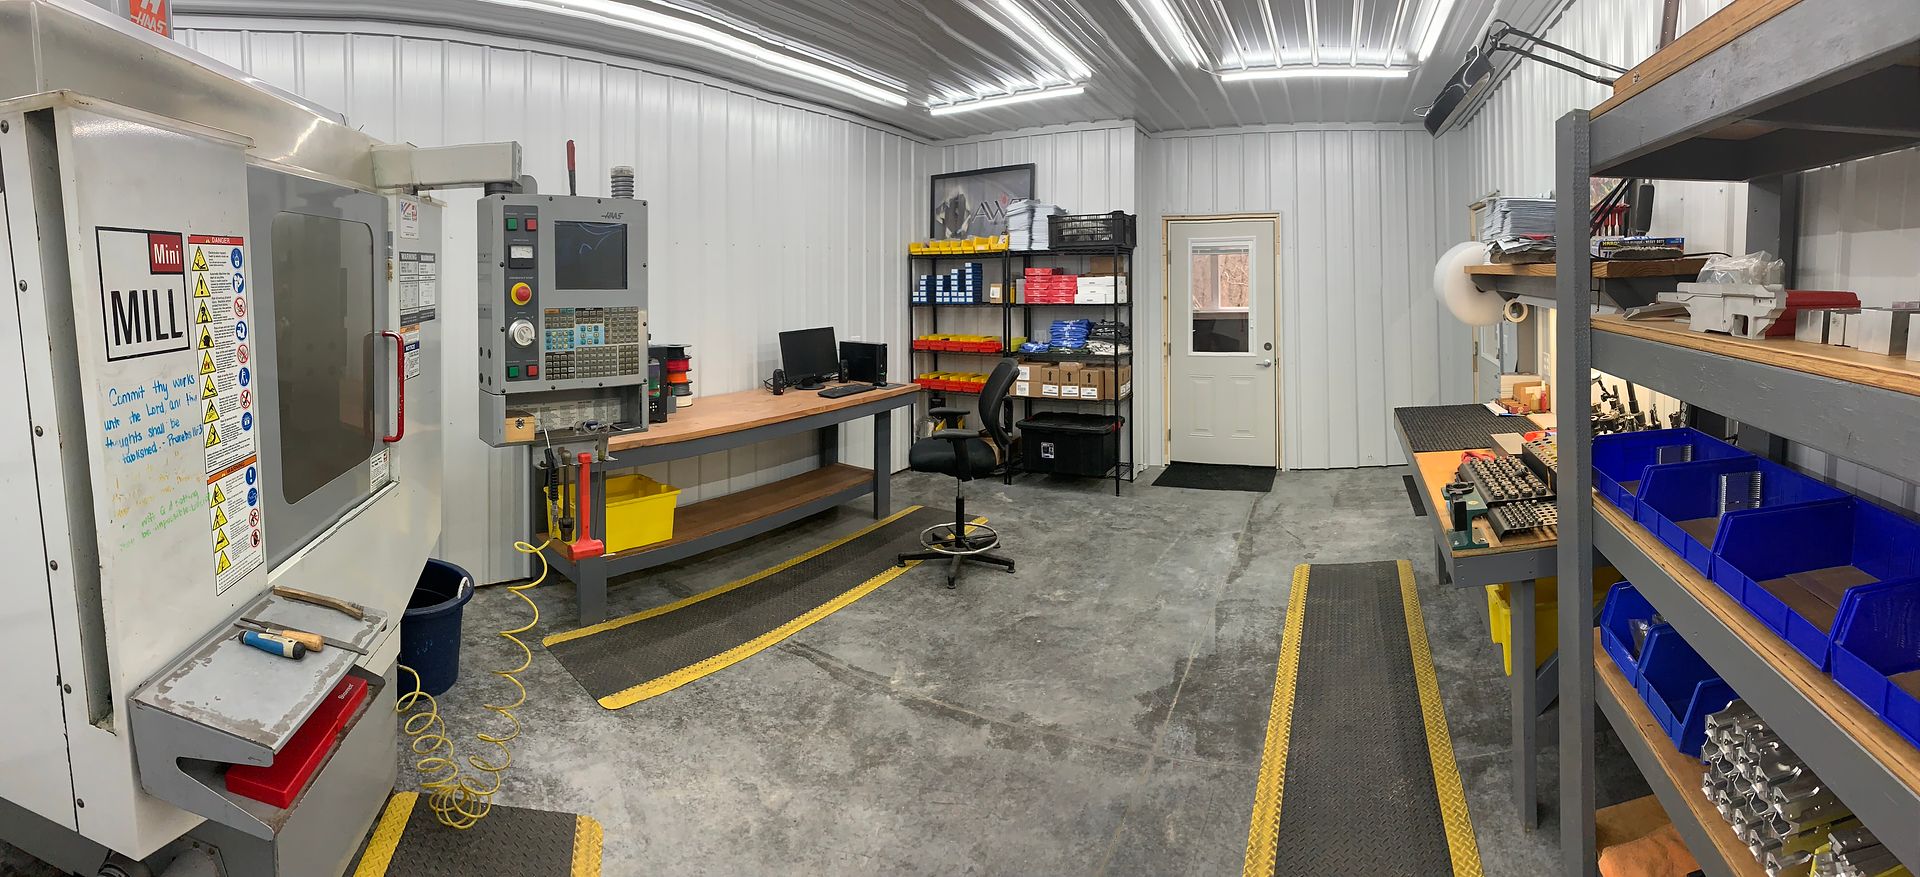 (https://s6.photobucket.com/user/EaglesSJ/media/F45FC8EF-B6D9-44DD-BB27-6F700C123185_zpsovqeztsl.jpeg.html)
 (https://s6.photobucket.com/user/EaglesSJ/media/99790951-B27A-4E99-95BF-2CB77B8EE561_zpswgx9cqy5.jpeg.html)
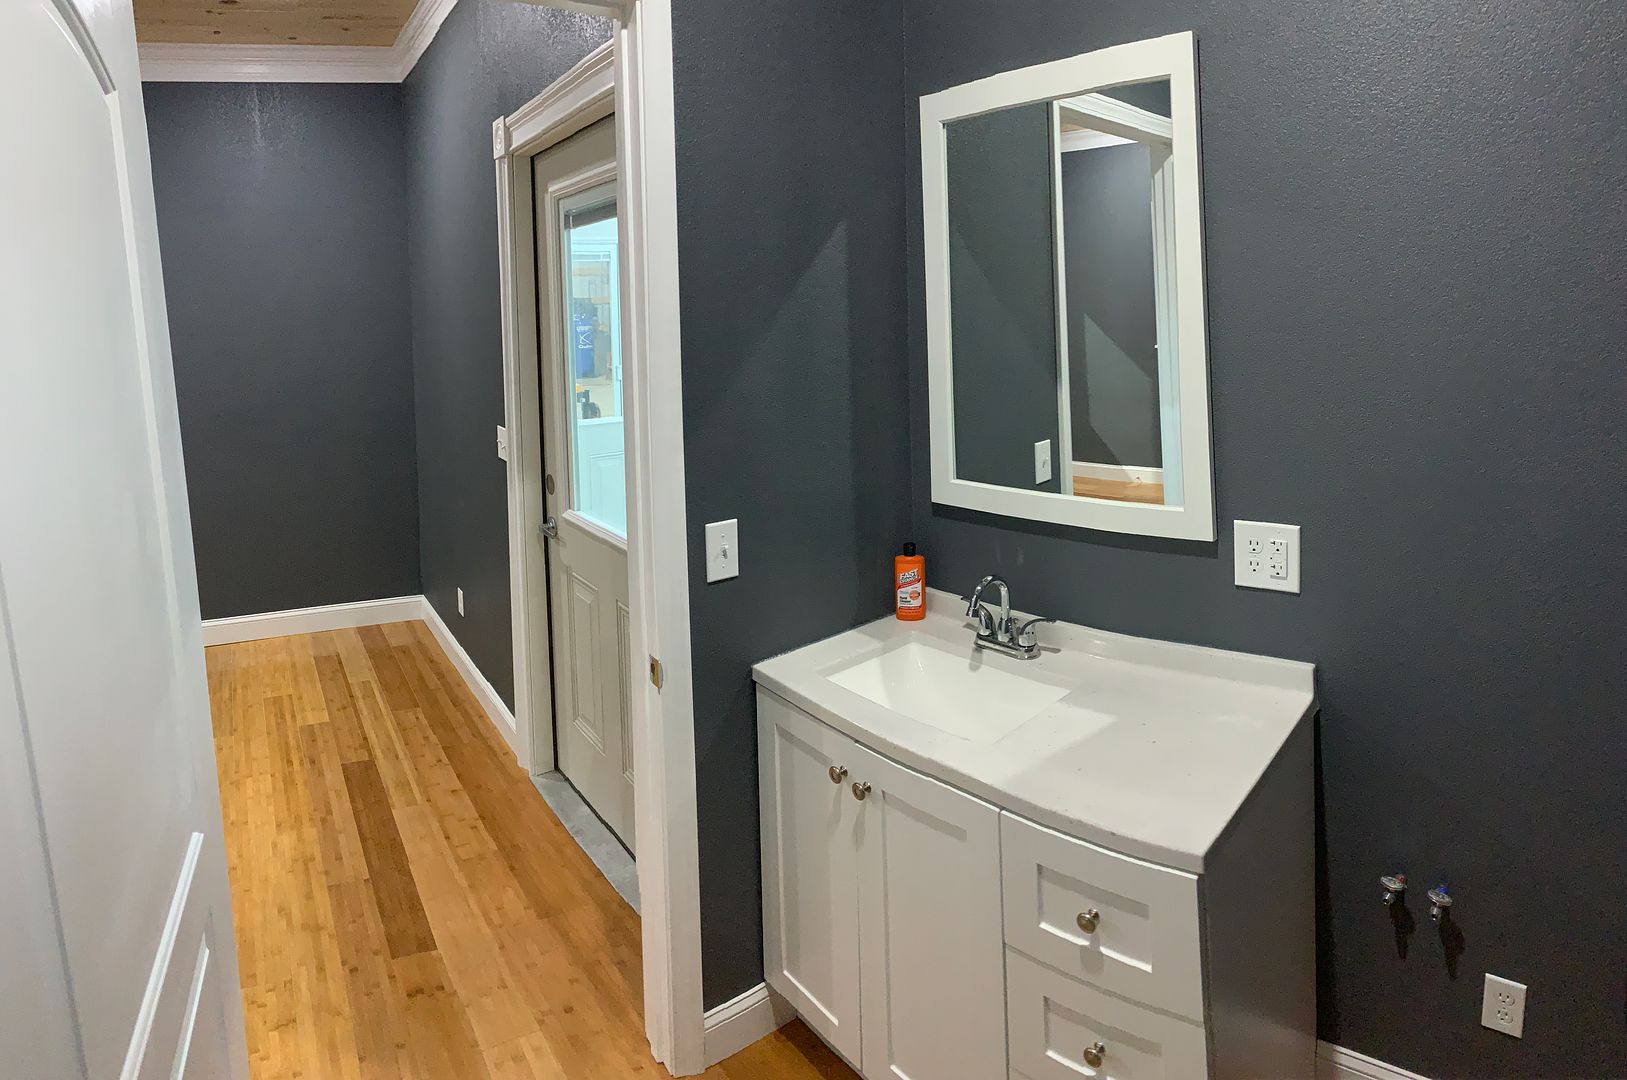 (https://s6.photobucket.com/user/EaglesSJ/media/10A97CC5-F18E-4780-AA3E-F2B1FA0B88F2_zpsnvmowriv.jpeg.html)
Title: Re: 20x32 A frame cabin Central KY
Post by: MountainDon on February 21, 2019, 08:30:56 PM
Post by: MountainDon on February 21, 2019, 08:30:56 PM
Quote from: EaglesSJ on February 21, 2019, 04:26:32 PM
I wondered if you had one in your cabin or not.
I have thought of it. However, the only way to get a phone connection is cellular and it is only 3G at the best of times. I haven't wanted to spend the money. There are also times, like right now, that even if I received a notice that something was awry there is nothing I could easily do about it. The Jemez mountains have had an extraordinary winter. Lots of snow. So I just hope my luck continues to hold on that front.
Most of the images do not appear for me. The 10th and 11th show as does the last one. From what I can see the shop is quite nice. A CNC mill?
EDIT... a Haas
Title: Re: 20x32 A frame cabin Central KY
Post by: EaglesSJ on February 21, 2019, 09:31:42 PM
Post by: EaglesSJ on February 21, 2019, 09:31:42 PM
Quote from: MountainDon on February 21, 2019, 08:30:56 PM
I have thought of it. However, the only way to get a phone connection is cellular and it is only 3G at the best of times. I haven't wanted to spend the money. There are also times, like right now, that even if I received a notice that something was awry there is nothing I could easily do about it. The Jemez mountains have had an extraordinary winter. Lots of snow. So I just hope my luck continues to hold on that front.
Most of the images do not appear for me. The 10th and 11th show as does the last one. From what I can see the shop is quite nice. A CNC mill?
EDIT... a Haas
Ahhh, I never thought about the winter conditions there. Do you run some sort of small heater to keep pipes from freezing or just drain everything when you leave? Also yes that is a Haas mini mill, I use it for my business. I sold my old shop so we could use the funds to build one on our land. Really wanted to be within walking distance of the house so I could spend more time with my wife and kids. Its also very nice having all my tools and such right here close to home. I cant count the times I had to make a trip to the old shop to get a tool I needed here at the house or vice versa.
Title: Re: 20x32 A frame cabin Central KY
Post by: MountainDon on February 22, 2019, 10:04:42 AM
Post by: MountainDon on February 22, 2019, 10:04:42 AM
QuoteDo you run some sort of small heater to keep pipes from freezing or just drain everything when you leave?
Drain pipes and inside water tanks. Clearing the valves and traps is the most important part.
It is very nice to be able to walk to work in a minute or so. It's what we do, too.
Title: Re: 20x32 A frame cabin Central KY
Post by: ben2go on February 22, 2019, 03:00:11 PM
Post by: ben2go on February 22, 2019, 03:00:11 PM
Nice work on the shop. I am looking at building a similar size shop. I think I may wait until I move. A shop that size would nearly take over my lot here close to town.