

Thinking like Water
How to outsmart the wood eaters.
Most houses and small buildings are built from giant plants and other organic products. This is good since doing so means we’re using renewable and potentially sustainable natural materials. The problem is that nature also knows how to break our houses down and recycle the nutrients. In every climate region there are critters large and small who have evolved for the sole purpose of chewing away at your tasty wood house. The long term lifespan of your house will depend to a large extent on how you deal with these critters.
First principles
Each of these many organisms needs two things in order to settle in and get to work digesting your house - moisture and oxygen. Deny them either one and they die.
For the most part, it is pretty hard to deny these guys oxygen. Short of shrink wrapping every piece of wood, the main place oxygen depletion stops wood rot is in wooden posts embedded deeper than 8" to 12" in packed soil (as in a pole or pier foundation). There you can have moisture without rot. The soil closer to the surface will have oxygen however, and there protection is vital.
OK, now let’s focus on the house above the foundation. Since we are building and living in an oxygen rich environment, how do we keep the surface of walls, windows and doors dry and therefore rot free?
The first line of defense is rather obvious - stop the water that falls or splashes against it.
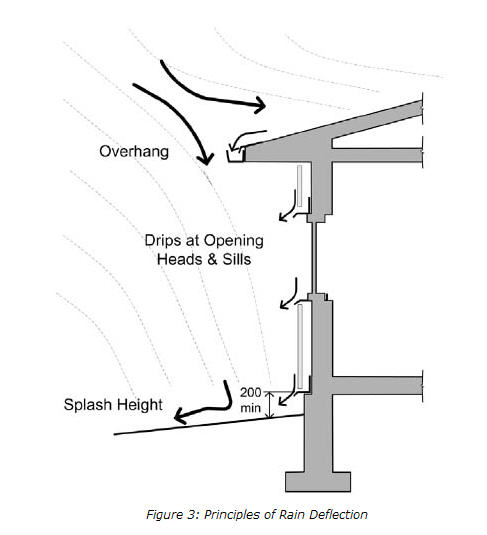
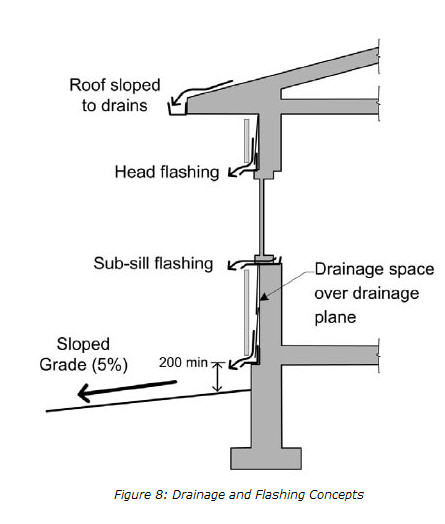
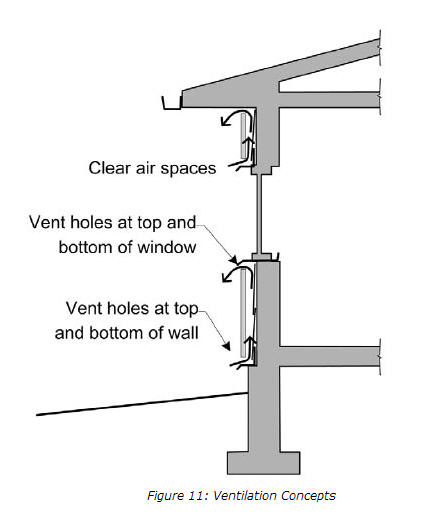
For more detailed information on rain control see this link to the Building Science.com article on “Rain Control in Buildings”. The diagrams above are from this online article and many excellent articles are available at the main site.
https://www.buildingscience.com/documents/digests/bsd-013-rain-control-in-buildings
For additional information on Flashings and water control see the September 2007 issue of the excellent Canadian BCBuilding.info online newsletter.
Where to go from here
- Read how spacers help keep siding dry and ventilated, which is how the vented rain screen above gets built.
- See what soil maps tell you about what you will be digging in.
- Browse the rest of the CountryPlans library.
- Ask about flashing, siding and rain screens in our discussion forum.