|
Roof Section at Wall |
Many people have asked if they can set different roof
sections to different pitches. The answer is YES. And this lesson
should show you how to accomplish this. The pitch you select for each
roof section will over ride the default pitch that is set in the Roof
Build dialog box. Any roof section that you do not set using this
concept will be built using the default pitch.
Since I do not use version 4.0, I am including a quote from another user, Bruce (Delphi Forums), that does. He says: Looks like they changed the roof tool in version 4.0 so that you can no longer click a wall and bring up a roof section at wall dialog box. You now must use the Select items tool (arrow), double click the item (wall), which gives you a wall specification box with different tabs, roof is one of those tabs. Refer to your manual for changing roof pitches if you have version 4. Or substitute Bruce's method of getting to the Roof Dialog box for mine in the lesson that follows. |
|
|
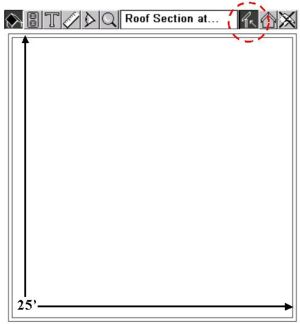
For this tutorial, start out by creating a building that
is about 25 feet x 25 feet square. Click on the Roof Toolbar (roof
picture in the main toolbar), which should automatically select the Roof
Section at Wall tool (red dashed circle). Now, change the pitch on 3 of
the 4 walls of your building. We will leave one of the roof sections
alone so it will use the default value of 6 in 12.
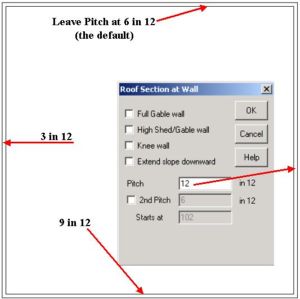
Click the wall on the right side of the screen and the Roof Section at Wall dialog box will open. (or use Bruce's method for version 4.0) |
| Change the value in the Pitch text box to 12.
Completely erase the 6 (D) before replacing it with the value 12.
If you leave the (D), then this value will revert back to the default
value found in the Roof Build dialog box. Do the same to the wall at the
bottom of the screen, but replace the 6 (D) with 9. Lastly, change the
value for the wall on the left from 6 (D) to 3. This should give you
quite a variety of roof pitches.
Next we will build the roof on our building. Since the Roof Toolbar is still active, we can move directly on to the next step. |
|
|
|
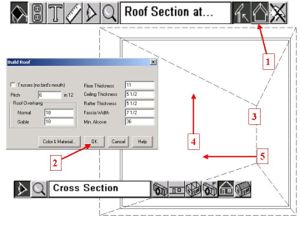
1) Click the Roof Build tool that will open the Build Roof
dialog box. 2) Click the OK button to build the roof. 3) Your Plan
View should show a dashed line representing the roof.
Now let's take a look at the model from the side using a Cross Section View. Select the View Toolbar, and select the Cross Section tool (darkened tool shown in our picture on the View Toolbar). 4) Drag from the center of building toward the top. The view can be see in the next picture. 5) Drag from the vertical roof ridge, toward the left. The view can be see in the next picture.
|
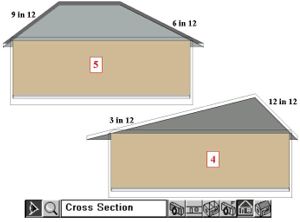
| View #4 at the bottom shows the Cross Section from the #4 action from above and view #5 represents the #5 action from above. You can see each of the different roof slopes/pitches in these views. View #4 shows the left and right walls and view #5 shows the upper and lower walls. View #4 accentuates the offset of the ridge when two different pitches are placed adjacent to one another. |
|
|
|
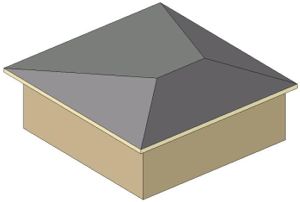
This obscure example makes for one ugly looking house, but it provides a way to show how different roof sections can be set at different pitches. Notice how the size of each section is determined by the size and pitch of the other sections. This is only one small part of building custom roofs. Remember, Roof Sections at Walls can also be changed from Hip (default) to Shed or Gable. |