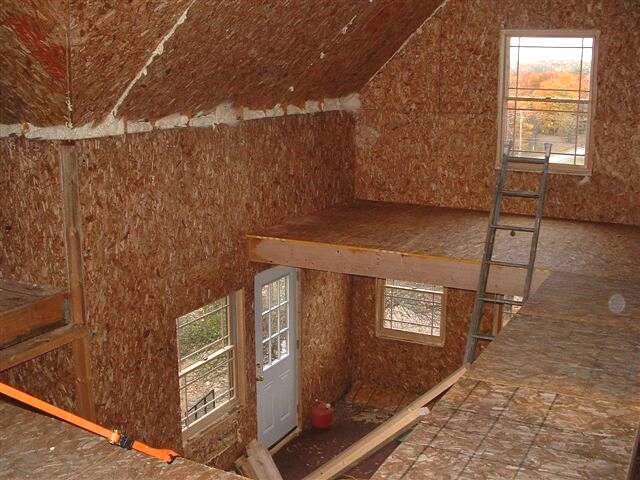
Loft area showing SIP panels and the OSB interior.
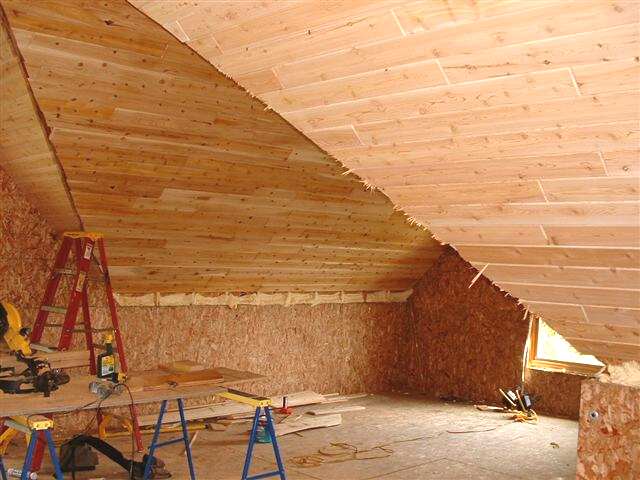
Wood ceiling installed over the SIP panels in the cathedral ceiling.
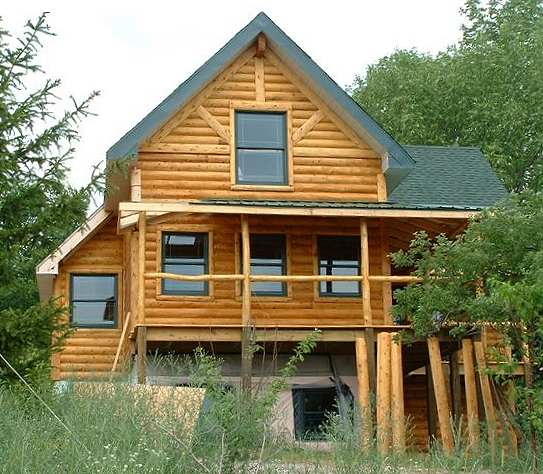
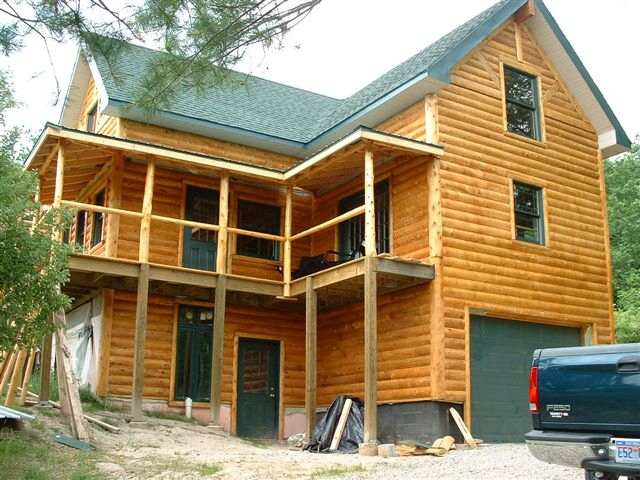
A view of the other end of the house. Rather nice treatment of the log siding.
The Owner's Story
I started this project last spring by making a deal with some excavators
who used my property to help on an adjoining lot. Making a good deal for
us. I worked alone getting in the foundation and cement floor but subbed
out the concrete block walls. Then the real building started as far as I
was concerned.
First I reduced the original
Victoria Cottage plans
to cad drawing on my comp so I could lay out the panels prior to ordering
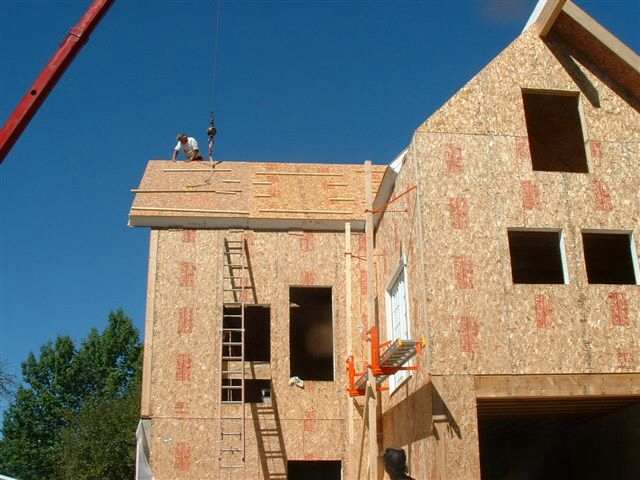
them from the manufacturer. The walls are 6" thick SIP panels and the roof
is 10" thick. The roof was the scary part. It needed to go together from
manufactured parts according to specs I sent to the factory. Some what like
a 3-d puzzle. There is a picture above of these panels going into place.
Up till this point I did all the work alone. 12' long x 6" thick panels are
very heavy so I rigged a pulley system on wheels using a boat winch to move
and lift them into place. Still a lot of work for an old guy like me. This
system is very sturdy but no faster nor easier than stick built. The insulation
factor is really impressive however.
The length of the cottage was increased to 32' (longer than the original
plans) to include the stairs which needed to go down to the basement as well
as up to the loft. This stair meets our local code. The bedroom wing was
increased to the same width as the main home, 16' wide and we extended it
to 14' in length. This allowed for a full upstairs bedroom over the main
floor. I am designing a dormer I put in this room with the left over materials.
I will cut out the roof and get the crane back in to lift it into place after
it is built. I suppose the larger and taller bedroom changed the design somewhat,
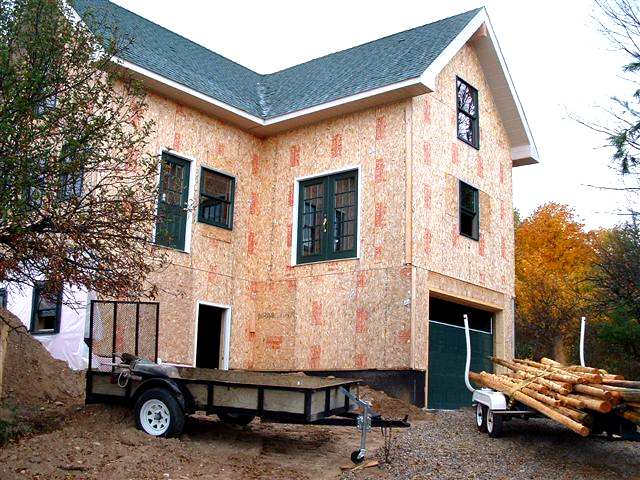
but it is still one of the prettiest homes despite this. The one picture
of the roughed in building with windows and doors was where I left off with
last fall.
Just before leaving for Florida for the winter (03-04), I rented a tractor
and got the septic and drain field in as well as getting some trees transplanted
along the upper drive. I was getting pretty sore by the end of summer as
I already have two artificial joints I walk on and the shoulders are not
so good at this point. One will be replaced at the end of the July as a matter
of fact.
The later pictures are what I have done since getting back this spring. We
decided on the log finish even though it was a little more money. We did
make a nice deal with the mill and got some older stock that had a few water
marks on it at 1/2 price. The total outside materials package in white cedar
with corners, window bucks, and beams, plus the t&g white cedar ceilings
and inside mouldings cost just over $8000. For anyone contemplating this
type of work, power nailers are a life saver. Also if you need to work as
high as part of this home is, renting a man lift is the way to go. I have
rented one several times, including putting the roofing on. A 12/12 roof
is too steep to stand on when you are 30' off the ground!
As can be seen in the porch pictures, we are using white cedar poles where
we can. We will be going out in the swamps to cut more for use inside for
the stair and balcony rails as well as support poles. We may in fact trade
some inside supports for cedar as well. The ceiling will be in cedar but
the walls will be drywall and then creatively painted. All mouldings around
inside windows and doors are to be in hewn white cedar. A lot of this will
need to wait until later as recovery from surgery will take some time. In
the meantime, we will be doing electrical and some inside work up till the
end of the month.
Brad Raby, summer 2004 |